Table of Contents
Advertisement
Quick Links
Advertisement
Table of Contents

Subscribe to Our Youtube Channel
Related Manuals for Cole Parmer MB-800 Series


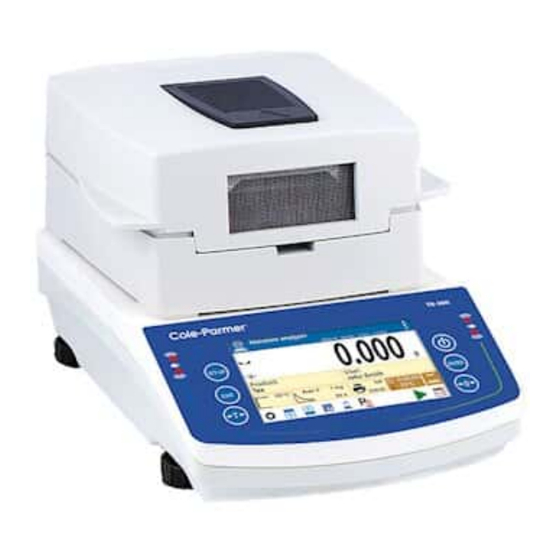
Summary of Contents for Cole Parmer MB-800 Series
- Page 1 User Manual MB-800 SERIES MOISTURE BALANCE...
-
Page 2: Table Of Contents
Contents GENERAL INFORMATION ............................. 1 1.1 INTENDED USE ................................... 1 1.2 WARNING SYMBOLS AND SIGNALS ............................ 1 1.3 SAFETY PRECAUTIONS ............................... 2 1.4 GOOD WEIGHING PRACTICE .............................. 3 1.5 SYSTEM PRECAUTIONS ..............................3 1.6 SUPERVISION OVER METROLOGICAL PARAMETERS ......................4 1.7 STAFF COMPETENCE ................................ - Page 3 7.1 DRYING MODE MAIN SCREEN ............................21 7.2 DRYING MODE RELATED SETTINGS ..........................22 7.3 DRYING PROFILE AND DRYING PROCESS PARAMETERS ....................23 7.4 FINISH MODE ................................... 25 7.5 UNIT DISPLAYED AND PRINTED MEASUREMENT ......................25 7.6 PRINTOUT INTERVAL ................................ 26 7.7 DRYING PROCESS WIZARD ...............................
- Page 4 COMMUNICATION............................. 56 12.1 RS232 PORTS SETTINGS PROCEDURE: ..........................57 12.2 ETHERNET PORT SETTINGS ............................57 12.3 WI-FI PORT SETTINGS ..............................57 12.4 USB PORT ..................................60 PERIPHERAL DEVICES ........................... 60 13.1 COMPUTER ..................................61 13.2 PRINTER ..................................62 13.3 USB FLASH DRIVE ................................64 13.4 BARCODE READER ................................
-
Page 5: General Information
1. GENERAL INFORMATION 1.1 INTENDED USE The moisture analyzer is designed to verify relative moisture content in small samples of various substances, dry mass content in small samples, and determine the mass of weighed objects. Any other use of the moisture analyzer may be dangerous both to the device and the user. The device ensures a fast and precise determination of water content in a tested sample, and the touch screen display considerably simplifies the operation and improves the functionality of the moisture analyzer. -
Page 6: Safety Precautions
1.3 SAFETY PRECAUTIONS WARNING! The use of the moisture analyzer regardless of both, safety information and service manual guidelines may cause health damage and even death. WARNING: Nominal voltage for a moisture analyzer is 110V AC. It means that safety usage precautions for low voltage devices must be abide by while operating the device. -
Page 7: Good Weighing Practice
Under no circumstances should the instrument be used within an area near potential explosions. The moisture analyzer is designed to be operated outside hazardous areas exclusively. Do not open the drying chamber during the drying process. The moisture analyzer features a halogen lamp or IR emitter, which are very powerful heat sources. -
Page 8: Supervision Over Metrological Parameters
Since use of the moisture analyzer conversely to safety precautions and service manual guidelines may be hazardous to operator’s health and life, it is obligatory to read them carefully: Use the moisture analyzer to determine humidity content in samples and to determine mass of a tested sample;... -
Page 9: Protective Clothing
1.9 PROTECTIVE CLOTHING While working with the instrument, use protective clothing to protect yourself from potential hazards, which might be samples and ingredients being tested. Use the following while carrying out tests: • protective apron • protective glasses • protective gloves (while working with hazardous chemical substances) Make sure that any protective clothing has been designed to be used with specific samples and that it is not damaged. -
Page 10: Standard Delivery Components List
2.2 STANDARD DELIVERY COMPONENTS LIST Moisture Analyzer and components shown in Section 2.4 • Warranty Card • Disposable Aluminum Pans • Quick Start Guide • USB w/User Manual 2.3 PLACE OF USE AND ASSEMBLY Operate the device in a workroom free of vibrations and shakes, where there are no air drafts nor dust. - Page 11 Installation- 1) Check grounding spring within unit: 2) Install components following diagram below:...
-
Page 12: Balance Leveling
2.5 BALANCE LEVELING It is necessary to level the balance prior to plugging it in. To level the balance, turn its feet until the air bubble is in the center position. The balance should firmly rest on a surface, each of the feet must be supported. 2.6 TEMPERATURE STABILIZATION TIME Before start of the measuring processes, it is necessary to wait until the moisture analyzer reaches thermal stabilization. -
Page 13: Start-Up
3. START-UP • Plug the power adapter to a socket, next connect the connector to port located at the back of the housing. • Press key located in the top right-hand corner of the panel. • Upon completed start-up, the home screen is displayed automatically. •... -
Page 14: Moisture Analyzer Control
Log Out operation: • Go to home screen, press button, wait for the users database to open. • Select <Log out> option (1st position on the users list). • The home screen is displayed. Permissions There are 3 permissions types: administrator, advanced user, user. Access to operator-related parameters, databases and program functions is conditioned by permissions: Permissions... -
Page 15: Home Screen
Button Overview Press to switch the balance ON/OFF Press to Zero the Moisture Analyzer Press to Tare the Moisture Analyzer ENTER Press to send measurement to a printer or a computer EXIT Function key <Esc>, press to abandon parameter changes or exit to previous menu level SETUP Function key <Home>, press to exit to home screen... -
Page 16: Entering Balance Menu
The top information bar also displays the following information: Symbol informing that wireless communication is on. Symbol informing that communication with a USB flash drive is on. Symbol informing that PC keyboard is connected. Symbol informing that printer is connected via USB. Symbol informing that communication with a PC computer is on. -
Page 17: Soft Keys List
4.5 SOFT KEYS LIST Press to enter home Press to clear edit box content. screen. Press to scroll the menu Press to switch the on-screen up or down. keyboard on/off. Press to confirm the Press to export database (active upon introduced modifications. -
Page 18: Return To Working Mode
• Label Press to enter tare value. • Functions selection pictogram Press to access various moisture analyzer functions 4.7 RETURN TO WORKING MODE Introduced modifications are automatically saved in the menu on return to the working mode main screen. Press soft key repeatedly, keep pressing the key until the balance home... -
Page 19: Samples Preparation
SETUP Press soft key located on the moisture analyzer overlay SETUP for immediate display of the home screen 5. SAMPLES PREPARATION This section of the user manual contains information about obtaining optimum test results during drying process. There are hints for selection of appropriate drying parameters for various materials and substances. -
Page 20: Sampling And Preparation
5.2 SAMPLING AND PREPARATION The sample’s features, its preparation and its size are very important factors influencing the speed and accuracy of the measurement process. The means of sampling and preparation are extremely important for repeatability of measurement results, as a sample should be a representative part of the tested substance. The final measurement result is vastly conditioned by precise and considered sample preparation. - Page 21 Initial filter drying is necessary only for measurements that require very high accuracy. Liquid substances Liquid substances, by creation of drops on their surface caused by surface tension, may render difficulties in drying process. Use a glass fiber filter to shorten the measurement time. The filter causes the tested liquid to separate around the fibers and increase the active evaporating surface.
-
Page 22: Selection Of Drying Process Parameters
6. SELECTION OF DRYING PROCESS PARAMETERS 6.1 SELECTING OPTIMUM MASS FOR A SAMPLE The sample mass influences the accuracy of the measurement result and measurement time. A higher mass of a sample means a higher amount of moisture content that needs to evaporate, and therefore measurement time is longer. -
Page 23: Drying Temperature
6.3 DRYING TEMPERATURE The drying temperature has the largest impact on drying time. The temperature value depends on the type of dried substance. Too low a drying temperature causes too low moisture content evaporation and an under-dried sample and consequently an unnecessary extension of measurement time. -
Page 24: Drying Time
Mild profile Used for drying substances that are sensitive to rapid heat emitted by filaments operating at full power in the initial stage of drying process. This profile prevents substances sensitive to heat from decomposing by mild temperature increase in a set amount of time (the time interval has to be selected by tests). -
Page 25: Drying Profile Analysis
• Automatic 5 (change 1mg/120s) Time-defined finish mode - drying process finish takes place when a set amount of time elapses independent of the measurement result (maximum drying time 99 hours 59 minutes). Manual finish mode - the operator ends the drying process manually by pressing the <START/STOP>... -
Page 26: Drying Mode Related Settings
• The top section displays data on the active working mode (symbol and name), metrologically important data and a button for choosing from the functions available for a particular working mode. • The middle section presents the weighing result. • The bottom section contains supplementary information on the current operation, as well as function buttons. -
Page 27: Drying Profile And Drying Process Parameters
Finish mode Parameter enabling you to select respective finish mode and set its parameters. Printout parameters Parameter enabling you to set the drying process unit for both the display and the printout, and measurement result printout interval during drying. Prognosis Parameter enabling to turn on/off result prognosis function. - Page 28 Specific feature of this drying profile is fast increase of drying temperature in short period of time. When compared to the preset temperature, the drying temperature rises 30% within 180 seconds and it is maintained at this level for a specified amount of time, next it drops to temperature value preset in drying profile parameters.
-
Page 29: Finish Mode
7.4 FINISH MODE Finish mode parameter's values: Automatic 1 - auto switch-off (1mg /10s), Automatic 2 - auto switch-off (1mg /25s), Automatic 3 - auto switch-off (1mg /60s), Automatic 4 - auto switch-off (1mg /90s), Automatic 5 - auto switch-off (1mg /120s), Manual- manual switch-off (upon pressing Start/Stop, maximum drying time is 99 hours 59 minutes). -
Page 30: Printout Interval
%D - part of dry mass obtained during drying process, expressed in percent, measurement result is part of mass that is remaining on a drying pan after humidity content evaporation %R - humid / dry ratio obtained as a result of drying process, expressed in percent, measurement result is part of mass that evaporated from the dried sample during drying process 7.6 PRINTOUT INTERVAL The time interval between printouts in seconds ranging from 0 to 120. -
Page 31: Drying Process
3. Insert data related to product/sample that is to be dried. Set the inserted mode as the drying mode. 4. Select inserted product as a current one prior to drying process. Drying parameters update to parameters saved in the drying mode that is assigned to a selected product. 7.9 DRYING PROCESS Drying process settings are displayed in the information field above the... - Page 32 Place the disposable weighing pan in a pan handle and deposit it on a bracket. The display shows disposable pan weight. It is recommended to close the drying chamber in order to provide stable ambient conditions while taring, to do it press pictogram (to be found at the bottom of the screen).
- Page 33 On sample preparation and result stabilization press key to confirm sample preparation completion. Drying chamber's lid gets closed automatically, the drying process starts. You can close the drying chamber by pressing pictogram (to be found at the bottom of the screen), this also triggers the drying process start.
- Page 34 Press button to preview drying process graph. Press button to return to the home screen. Upon drying process completion, summary of the test is displayed, final moisture content result is held, drying chamber's lid gets opened automatically. Printout footer is sent to a selected interface (accordingly to set printout options –...
-
Page 35: End Result Prognosis
To return to the main screen of the drying process settings, press in the bottom bar of the display. The moisture analyzer returns to its initial state and the completed process summary is blank. The moisture analyzer is ready to perform another test. 7.10 END RESULT PROGNOSIS This option enables estimating end result before drying process is completed. -
Page 36: Weighing Mode
CAUTION: Do not open the weighing chamber during drying process while using prognosis option. It may distract the process and the calculations would be incorrect. Prognosis is finished when the drying chamber is opened, and a suitable message is displayed. 8. -
Page 37: Good Weighing Practice
8.2 GOOD WEIGHING PRACTICE Load an object on the weighing pan. On stabilization of the weight indicated by stability marker on the left side of balance display, read the measurement result. To ensure long lasting use of a balance with correct and reliable measurements of weighed loads, follow the procedures below: •... -
Page 38: Weighing Unit Availability
Units List: Unit Denotation Unit Denotation gram Taele China [tlc] milligram [mg] Momme [mom] kilogram [kg] Grain [gr] carat [ct] Newton pound [lb] Tical [ti] ounce [oz] baht [baht] ounce Troy [ozt] tola [tola] pennyweight [dwt] mesghal [msg] Taele Hongkong [tlh] User unit 1 [u1]... -
Page 39: User-Defined Unit
8.6 USER-DEFINED UNIT Parameter allowing you to declare two custom units. Displayed custom unit value is a result of calculation, where obtained in the course of measurement weight value is multiplied by a multiplier determined for this particular custom unit. The custom units can be freely named with use of 3 characters maximum. - Page 40 Manual tare determination • Press quick access key • An on-screen numeric keyboard is displayed • Enter tare value and press • The balance returns to the weighing mode, and the display indicates entered tare value with minus ‘–‘ sign Deleting tare The tare value indicated on balance display can be deleted by pressing key on balance...
-
Page 41: Weighing Profile
Deleting Tare The entered tare value can be deleted by pressing key, located on the operation panel, or by entering value of 0.000g (read the above description). 8.9 WEIGHING PROFILE In order to make operation with the balance easier, 4 various profiles have been designed. Parameters for these profiles have been set (and saved) in a way ensuring that the weighings are carried out optimally for particular requirements and conditions. -
Page 42: Weighing> - Readout Mode Settings
Profile selection procedure: 8.10 <WEIGHING> - READOUT MODE SETTINGS The software allows setup of operating parameters (filters, value release and autozero function, deleting the last digit and other settings) separately for each working mode. As an operator you can modify all profile settings only for User profile, when it comes to the remaining default profiles (Fast, Fast dosing, Precision) they can only be modified partially, i.e. - Page 43 Setting filter level (option disabled for the following profiles: Fast, Fast dosing, Precision) Filter settings depend on the working environment. For the best possible conditions the filter can work in a very fast mode (V.FAST value for Filter parameter); however, if the conditions are poor (shakes, drafts), the filter should be set to slow or very slow option (SLOW or V.
-
Page 44: Proximity Sensors
Last digit display Function enabling/disabling display of the last digit (placed on the right of the decimal point) of the weighing result. Accessible settings: • Always: all digits are displayed. • Never: last digit disabled. • When stable: last digit displayed only when the result is stable. Moisture analyzer ambient conditions Parameter relating to ambient and environmental conditions of the workstation. -
Page 45: Print Mode
For correct operation of the weighing instrument with AUTOTARE function, it is necessary to adjust the threshold value. <AUTO THRESHOLD> parameter refers to the following functions: autotare, automatic printout. No automatic taring takes place as long as the gross weight value stays within the range set in <AUTO THRESHOLD>... -
Page 46: Minimum Sample Weight
Automatic operation procedure: • Press key to zero the indication (stability marker , and zero pictogram are displayed). • Load the weighing pan, the first stable measurement is sent to the printer port. • Unload the weighing pan. • The next measurement is possible when the indication gets lower than the value set for <AUTO THRESHOLD>... - Page 47 Warn – select to enable display of respective pictograms informing you about the measured mass (whether it is lower than the MSW value or higher than the MSW value). You can accept the measurement that is lower than the MSW value. •...
- Page 48 Weighing with use of MINIMUM SAMPLE WEIGHT function If in the course of weighing you want to find out whether a particular measurement value is higher than the MSW value, specified for a given weighing range, then <Minimum sample weight> function must be on.
-
Page 49: Integration With Titrators
8.15 INTEGRATION WITH TITRATORS In order to provide correct integration with TITRATORS, go to settings of standard printout content and set <Mass value for a titrator> parameter to <Yes> value. With this, other variables for the printout are turned off. The pictogram informs on special format of mass printout, permissible by titrators. -
Page 50: User Adjustment
4. When the start mass determination is complete, <Put weight …> is displayed along with the particular mass standard value. 5. Put the required weight on the pan and press >. 6. When finished, “Remove weight” is displayed. 7. Take the weight off the weighing pan and wait for the Adjustment window to be displayed again. - Page 51 Step 1. Take the following elements out of the drying chamber: • disposable pan, • weighing pan handle, • cross-shaped holder, • weighing pan shield. Step 2. Place the set elements in a drying chamber: • set shield set holder together with the thermometer Step 3.
- Page 52 Caution: Be careful to not cause any damage to the moisture analyzer mechanism Enter <Adjustment> menu and press <Temperature sensor adjustment>. Message <Continue?> is displayed. Upon confirmation, adjustment of drying chamber temperature sensor starts. Follow the displayed prompts. The process is carried out in a way presented below. After 8 minutes a numeric keyboard is displayed.
-
Page 53: Temperature Test
Press button to confirm. Temperature adjustment process is completed and moisture analyzer displays <Adjustment> window. For moisture analyzers with maximum heating temperature of 250°C, the temperature adjustment process is likewise, only the temperature values are higher for each part of the process. 9.5 TEMPERATURE TEST In order to test the drying chamber and the drying process you need to use a special adjustment set (thermometer and thermometer holder). -
Page 54: Working Modes- General Information
The temperature is maintained for 8 minutes (like temperature adjustment procedure). After 8 minutes you shall see a window for entering temperature read from the installed adjustment set. Press button to confirm. The result of the test may be printed on a connected printer to the moisture analyzer. -
Page 55: Working Modes Accessibility
• Wait for the available working modes list to be displayed • Select the working mode you need to operate. 10.2 WORKING MODES ACCESSIBILITY Group of parameters enabling you to declare which functions are to be accessible. You can deactivate functions that are not used in course of moisture analyzer operation, to do it, value <NO> has to be selected for a particular parameter. - Page 56 EXPORT Procedure: • Insert USB flash drive. • Open the database that is to be exported. • Press icon located in the top bar. • The program automatically saves exported data to a USB flash drive file, respective prompts are displayed for confirmation of successfully completed operation. •...
-
Page 57: Products
Database File name and extension Drying Process Reports 123456.dry Weighing Reports 123456.wei Files can be read using ALIBI Reader, for this software please reach out to suppor@schulersci.com The Ambient Conditions database is for information purposes only. Using the records preview option, you can check ambient conditions and observe how they changed over time. -
Page 58: Customers
11.5 CUSTOMERS The Customers database features a list of names of customers for whom the measurements are performed. List of parameters defined for a customer: Name Code [internal code providing customer identification] Address Postal code City 11.6 DRYING PROGRAM The database of drying programs contains saved data on drying parameters that are activated to dry a product. -
Page 59: Ambient Conditions
11.8 AMBIENT CONDITIONS The Ambient Conditions database includes information related to ambient conditions. Depending on the setup, the ambient conditions record may have data such as temperature, humidity and atmospheric pressure. If the given moisture analyzer is connected to a THB module then its indications are recorded to the database also. -
Page 60: Communication
• Variable 1 • Variable 2 • Variable 3 12. COMMUNICATION The Communication menu is found within the Parameters menu. It is accessed by pressing the > key. The balance can communicate with a peripheral device via the following ports: •... -
Page 61: Rs232 Ports Settings Procedure
12.1 RS232 PORTS SETTINGS PROCEDURE: Select communication port <COM1>. Set appropriate values. The RS232 ports enable the following setting of transmission parameters: • Baud rate - 2400, 4800, 9600, 19200, 38400, 57600, 115200 bit/s • Parity - None, Even, Odd 12.2 ETHERNET PORT SETTINGS Procedure: Select the... - Page 62 Pictogram for Wi-Fi network connection status: Pictogram Overview Balance connected, very strong signal Balance connected, strong signal Balance connected, poor signal Balance connected, very poor signal No connection (too poor signal or inaccessible selected network or invalid connection parameters – password, IP, etc.) Example settings for Wi-Fi port: CAUTION! The above presented settings serve informative purposes exclusively...
- Page 63 • With DHCP set to NO value, enter manually IP; MASK; DEFAULT GATE parameters, with DHCP set to YES value, the balance software automatically reads and displays data assigned by Wi-Fi router by means of which the balance is to be connected •...
-
Page 64: Usb Port
To disconnect the network, turn the communication off: COMMUNICATION/WIFI/WIFI – NO 12.4 USB PORT USB 1 port of type A is intended for: • Connecting a USB flash drive storing FAT files system • Connecting the balance to PCL printer •... -
Page 65: Computer
13.1 COMPUTER Carry out configuration using the Computer submenu. Procedure: Press > and then <Peripherals / Computer>. Set the parameters related to cooperation with a computer: • Computer Port available options: none, COM 1, USB, Ethernet, Wi-Fi, USB Free Link CAUTION: To set USB Free Link instead of USB, select any other port (e.g. -
Page 66: Printer
parameter value has to be entered in milliseconds [ms]. • Address parameter for setting address of balance connected with a computer • Weighing Operation Printout Template parameter enabling you to design customized printout, for this use window with printout template. •... - Page 67 computer connected to a balance via a network PENDRIVE – USB port type A for connecting a USB flash drive. Set the format of the saved file. You can save the data in *.txt format (a text file that can be opened on the computer using Notepad) or *.csv format (file that can be opened using Excel).
-
Page 68: Usb Flash Drive
printer is equipped with an autocutter blade) at the end. The Prefix and Suffix parameter settings are available for all the printouts sent from balance, e.g., calibration reports, and for the header, footer and GLP printouts. CAUTION: Inserting the paper crop command to the Suffix results in sending the code after each printout. -
Page 69: Barcode Reader
Return to weighing procedure. Press for a record of measurement data (specified for GLP PRINTOUT). The data is saved as a text file created automatically by the balance software with the file name printout.txt. Remove the USB flash drive from the port after about 10 seconds, counting from the last measurement record. -
Page 70: Printouts
14. PRINTOUTS 14.1 ADJUSTMENT PRINTOUT REPORT Adjustment Report is a group of parameters allowing users to set the data that is to be printed on an adjustment printout. Variable Overview PROJECT Option enables naming the project (name associated with a weighing). The name may consist of maximum 31 characters. -
Page 71: Drying Process Report Printout
For the parameters described above, one of these values must be selected: NO - do not print YES - print An example report: 14.2 DRYING PROCESS REPORT PRINTOUT This group of parameters allows the user to set the data to be printed on a Drying Process Report printout. - Page 72 Set the data to be printed in FOOTER the footer. Printout variables list Variable Overview Active for: Print the date of drying process start Header START DATE Print the time of drying process start Header START TIME Print the balance type Header BALANCE TYPE Print the balance ID number...
-
Page 73: Other Printouts
Measurement Option enables printing out the SET TEMPERATURE temperature set in a particular stage of the drying process with preset interval during drying process. Option enables printing out current Measurement CURRENT temperature read from the sensor with preset TEMPERATURE interval during drying process. Option enables printing out current result Measurement PROGNOSIS... - Page 74 Group of parameters allowing GLP Printout you to declare variables that are to be printed on a measurement printout. Set the data to be printed in FOOTER the footer. Variables List Variable Description Active for Option enables printing out the working mode Header WORKING MODE name printout.
- Page 75 Header Option enables printing out the value of universal VARIABLE 2 variable 2. GLP Printout Footer Option enables printing out the value of universal Header VARIABLE 3 variable 3. GLP Printout Footer GLP Printout Option enables printing out the net weight value in a basic unit (calibration unit).
-
Page 76: Non-Standard Printouts
14.4 NON-STANDARD PRINTOUTS The program allows you to design 100 non-standard printouts. Each of them can consist of approximately 1900 characters. Non-standard printout may include: • variable data conditioned by a particular working mode and operator needs (mass, date etc.), •... - Page 77 {70} Variable 1 {71} Variable 2 {72} Variable 3 {75} User: Name {76} User: Code {77} User: Permissions {80} Packaging: Name {81} Packaging: Code {82} Packaging: Mass {85} Customer: Name {86} Customer: Code {87} Customer: TIN {88} Customer: Address {89} Customer: Postal code {90} Customer: City...
- Page 78 {390} Drying report: Printout interval {395} Moisture analyzer: Set temperature {396} Moisture analyzer: Current temperature {397} Moisture analyzer: Drying time {398} Moisture analyzer: Status {399} Moisture analyzer: Drying time and result {400} Moisture analyzer: Humidity content - %M {401} Moisture analyzer: Dry content - %D {402} Moisture analyzer: Humid/Dry- %R {403}...
-
Page 79: Variables
In order to carry out HEADER or GLP or FOOTER printout using EPSON printer (equipped with an auto-cutter blade) and crop the paper beneath the respective printout, select an option of non- standard printout comprising {150} variable, and set this option in header, GLP printout or footer settings, respectively. -
Page 80: Ambient Conditions
15. AMBIENT CONDITIONS Parameters group which has been designed to enable you to turn on readout of ambient conditions recorded by the ambient conditions’ module. Using this submenu, you can also specify tolerance high and low threshold of both temperature and humidity, and a change rate for these values per hour. The entered values are referred to indicted ones. - Page 81 Ambient conditions module - parameter specifying module’s working mode. Available options: None – readout of ambient condition module's indications turned off; Record – readout and record of indications into module's database turned on; Record and alert – readout and record of indications into module's database turned on, option of display of warnings informing on ambient conditions change turned on (the warnings are displayed on the basis of tolerance high and low thresholds).
-
Page 82: Additional Features
Temperature change rate is to high (blinking pictogram) Humidity change rate is to high (blinking pictogram) 16. ADDITIONAL FEATURES 16.1 BUTTON, LABELS AND TEXT FIELDS CONFIGURATION Area beneath weight indication section can be freely programmed. It is divided into active fields taking the form of a table with 3 rows and 10 columns. - Page 83 Set up rules: Widgets dimensions (width x height) • button – 1x1 • label – 2x1; 3x1; 4x1; 5x1 • text field – 2x1; 3x1; 4x1; 5x1; 6x1; 7x1; 8x1; 9x1; 10x1 To quickly restore the default widgets layout press any widget and hold it until a window with available options is displayed.
- Page 84 2. A new widget can only be applied to an area that holds no other widgets. The software automatically detects which widgets can be applied to an area, this is conditioned by the widget dimensions. 3. It is possible to change functions assigned to an already applied widget. The applied widget, if not needed, can be removed.
-
Page 85: Quick Access Keys
16.3 QUICK ACCESS KEYS You can define quick access buttons, the buttons are displayed underneath the weight indication section. Upon selecting button from the list it is displayed in selected field. These are so called quick access buttons for triggering the most often performed operations. Procedure: Press and hold for a while the spot where a given key is to be placed. - Page 86 The selected key is displayed automatically on the screen. Quick access keys list: Function Modes featuring the key Accept/Print All modes Print header Weighing mode exclusively Print footer Weighing mode exclusively Zero All modes Tare All modes Set tare All modes Change unit Weighing mode exclusively Select unit...
-
Page 87: Labels
Adjustment All modes Variable 1 All modes Variable 2 All modes Variable 3 All modes Hide/show last digit Weighing mode exclusively Working mode parameters All modes Drying mode Drying mode exclusively Drying profile Drying mode exclusively Finish mode Drying mode exclusively Printout interval and unit Drying mode exclusively Open/close cover... - Page 88 Procedure: Press and hold the spot where the label is to be placed. Select a label and its size. Label settings window opens, click INFORMATION field to see a list of information type available for the selected label. Select data to be displayed.
- Page 89 The selected label is displayed automatically on the home screen. Labels list: Label information type Modes featuring the information Date All modes Time All modes Date and time All modes Net weight All modes Tare All modes Gross weight All modes User All modes Product...
-
Page 90: Text Fields
The above presented information type has been designed for particular working modes. Detailed description for a given information type is provided within section overviewing a respective mode. 16.5 TEXT FIELDS You can select text field size and type of information to be displayed in the first and the second line of the field, plus you can decide on a function and assign it to a text field. - Page 91 • Line 1: e.g. text <Time:>, • Line 2: e.g. variable {3}, variable for current time displaying (other variables refer to point for non- standard printouts). function: e.g. adjustment. • When all text field parameters have been defined, the window displays respective values...
-
Page 92: Bargraph
Upon returning to the home screen, determined text field is displayed. 16.6 BARGRAPH Bargraph function is accessible for all working modes. The bargraph presents in a graphic form how much of the balance capacity is in use. <SAMPLE MASS CONTROL> parameter, active in the drying mode, illustrates the location of Min and Max thresholds for a given sample mass. -
Page 93: Miscellaneous Parameters
17. MISCELLANEOUS PARAMETERS A user can set up parameters which influence balance operation. These parameters are to be found in parameters group MISC. Menu language Language parameter enables selecting the language of the moisture analyzer menu descriptions for unlogged operator. Available languages: POLISH, ENGLISH, RUSSIAN, UKRAINIAN, HUNGARIAN, SPANISH, FRENCH, GERMAN, ITALIAN, CZECH, CHINESE, ARABIC, TURKISH, KOREAN. - Page 94 Proximity sensors sensitivity adjustment Proximity sensors sensitivity parameter specifies distance within which the sensors can be operated, its scale is expressed in percent and it ranges from 0% to 100%. For lower percent value the proximity sensors operate at a shorter distance. Usually the sensitivity value is comprised within 50%-70% limits.
-
Page 95: Maitenance
<AUTO OFF> parameter enables automatic display deactivation (the parameter functioning is likewise to button functioning). Upon display deactivation the other subassemblies are powered and the balance turns to stand-by mode. • NONE – auto switch-off not activated. • 0.5; 1; 2; 3; 5 – time given in minutes. If the software registers stable indication for a specified time interval, set in parameter <AUTO OFF>, then the display is turned-off immediately. -
Page 96: Cleaning Temperature Sensor
Upon cleaning let the subassemblies dry. Make sure no liquids or dirt get inside the drying chamber. Install clean components following the diagram. 18.2 CLEANING TEMPERATURE SENSOR To ensure correct temperature measurement make sure that the temperature sensor is clean (1). Take extra precautions while cleaning the device. -
Page 97: General Cleaning Recommendations
18.3 GENERAL CLEANING RECOMMENDATIONS Cleaning ABS components To clean dry surfaces and avoid smudging, use clean non-coloring cloths made of cellulose or cotton. You can use a solution of water and detergent (soap, dishwashing detergent, glass cleaner). Gently rub the cleaned surface and let it dry. Repeat cleaning process if needed. In the case of hard to remove contamination, e.g. -
Page 98: List Of Commands
status and facilitate influencing weighing device operation, e.g.: acquiring measurement results from the weighing device, zeroing, etc. 19.1 LIST OF COMMANDS Command Command overview Zeroing Taring Give tare value Set tare Send stable measurement result in basic measuring unit Immediately send measurement result in basic measuring unit Send stable measurement result in current measuring unit Immediately send measurement result in current measuring unit Switch on continuous transmission in basic measuring unit... -
Page 99: Response Format
Give set ambient conditions state Set filter Give current filter setting Set value release Give current value release setting Set last digit LOGIN Operator logging LOGOUT Operator logout PROFILES Profile selection Give set profile name Caution: Each command must end with CR LF characters. 19.2 RESPONSE FORMAT On receipt of a command, the indicator responds as follows: XX_A CR LF... - Page 100 T_A CR LF - command understood and in progress T_E CR LF - time limit exceeded while waiting for stable measurement result T_I CR LF - command understood but not accessible at this moment Give tare value Format: OT CR LF Response: OT_TARE CR LF - command carried out Response format:...
- Page 101 stability space space character mass space unit CR LF marker An example: S I CR LF – command sent from a computer - command carried out, immediate response: S I _ ? _ _ _ _ _ _ _ 1 8 . 5 _ k g _ CR LF mass value in a basic measuring unit where: _ - space...
- Page 102 stability space space character mass space unit marker Switch off continuous transmission in a basic measuring unit Format: C0 CR LF Response options: C0_I CR LF - command understood but not accessible at this moment C0_A CR LF - command understood and carried out Switch on continuous transmission in a current measuring unit Format: CU1 CR LF Response options:...
- Page 103 Format: K0 CR LF Response options: K0_I CR LF - command understood but not accessible at this moment K0_OK CR LF - command carried out Give available working modes Command overview: Command returns accessible working modes. Format: OMI <CR><LF> Response options: OMI <CR><LF>...
- Page 104 Give accessible units (weighing mode exclusively) Command overview: Command returns units available for a particular device and for a current working mode. Format: UI <CR><LF> Response options: UI_”x , … x ”_OK<CR><LF> – command carried out, returns accessible units UI_I <CR><LF> –...
- Page 105 Response: BP_OK<CR><LF> – BEEP activated CAUTION! BEEP sound activated via BP command is inhibited if in-course of its activation the sound is activated by means of other device: keypad, touch panel, proximity sensors. Send all implemented commands Format: PC CR LF Command: PC CR LF - send all implemented commands...
- Page 106 Command: A_1<CR><LF> – turn autozero function on Response: A_OK<CR><LF> – autozero function is on AUTOZERO function operates until it is turned off by A 0 command. Set ambient conditions state Format: EV_n <CR><LF> Response options: EV_OK <CR><LF> – command carried out EV_E <CR><LF>...
- Page 107 Example: Command: FIG<CR><LF> - give current filter Response: FIG_2_OK<CR><LF> - currently set filter: average Set Value release Format: ARS_n <CR><LF> Response options: ARS_OK <CR><LF> – command carried out – error in-course of command execution, no parameter or incorrect ARS_E <CR><LF> format ARS_I <CR><LF>...
- Page 108 - command understood but not accessible at this ARG_I <CR><LF> moment x - parameter, symbol of current value release setting Example: Command: ARG<CR><LF> - give current value release setting Response: ARG_2_OK<CR><LF> - current value release setting: fast+reliable Operator logging Format: LOGIN_Name, Password CR LF where: _ - space (enter name and password in a form provided by the moisture analyzer –...
-
Page 109: Manual Prinntout / Automatic Printout
Response options: PRG_A_”x” CR LF - command understood, response: profile name PRG_I CR LF - command understood but not accessible at this moment x - profile name (in between inverted commas) Example: Command: PRG CR LF - give profile name Response: PRG _A_”Fast”... -
Page 110: Appendix
_ _ _ _ _ _ 1 8 3 2 . 0 _ g _ _ CR LF - a printout generated, with reference to <GLP printout> settings, from a weighing device upon pressing key: Date Universal variable 3 Time Operator Tare Product... -
Page 111: Dimensions
20.2 DIMENSIONS 20.3 CONNECTORS 1. Power Supply Connector 2. USB 2, Type B connector 3. USB 1, Type A connector 4. Ethernet Connector 5. COM connector 20.4 CONNECTION CABLE Moisture analyzer – computer cable (RS232) -
Page 112: Error Messages
Moisture analyzer –printer cable (Epson) 20.5 ERROR MESSAGES... -
Page 113: Troubleshooting
20.6 TROUBLESHOOTING Problem: no reaction to pressing main switch on/off key (display remains dark). Probable cause: • no voltage in the mains, • damaged power cord, • damaged fuse of the moisture analyzer, • damaged moisture analyzer. Problem: too long pending time for drying process finish. Probable cause: •...
Need help?
Do you have a question about the MB-800 Series and is the answer not in the manual?
Questions and answers