Table of Contents
Advertisement
Advertisement
Table of Contents

Related Manuals for Cole Parmer PBL-602


Summary of Contents for Cole Parmer PBL-602
- Page 1 User Manual Cole-Parmer Symmetry Portable Lab Balances: PBL Series 6-5-18 v5...
-
Page 2: Table Of Contents
INDEX GENERAL INFORMATION ..........................1 INTENDED USE ............................1 PRECAUTIONS .............................1 BATTERY ..............................1 WARRANTY CONDITIONS ........................1 UNPACKING AND INSTALLATION ........................2 PLACE OF USE AND ASSEMBLING....................2 STANDARD DELIVERY COMPONENTS LIST ..................2 UNPACKING ............................2 BALANCE ASSEMBLY ..........................3 BALANCE LEVELING ...........................4 POWERING THE DEVICE ........................4 BATTERY STATUS ..........................5 BATTERY POWER ..........................5 BALANCE CONTROL ............................5... - Page 3 7.9.2 OPERATION MODE ........................... 23 7.9.3 REFERENCE SAMPLE MASS DETERMINED BY WEIGHING ............24 7.9.4 REFERENCE SAMPLE MASS DETERMINED BY ENTERING MASS VALUE ........ 24 7.10 PEAK HOLD ............................24 7.10.1 SETTINGS ............................24 7.10.2 MEANS OF OPERATION......................... 25 7.11 TOTALIZING ............................
-
Page 4: General Information
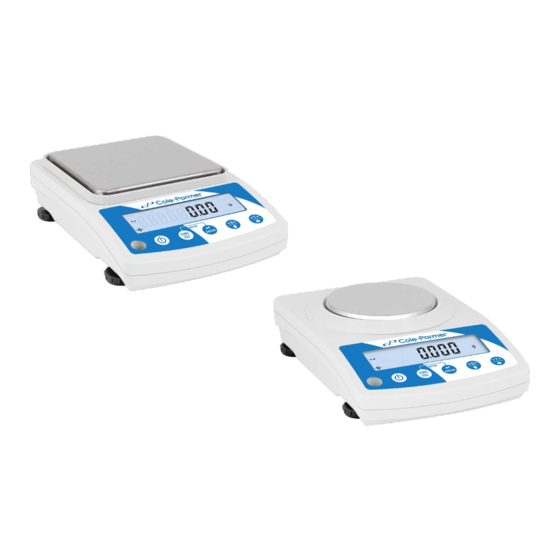
GENERAL INFORMATION INTENDED USE The PBL-Series precision balance enables fast and accurate mass measurements under laboratory conditions. The weighing pan, made of stainless steel and equipped with anti-draft shield, is an integral part of the PBL-series balance. Backlit LCD display ensures clear measurement result. The PBL-Series balance is equipped with an internal battery (comes standard), so it does not have to be connected to the mains. -
Page 5: Unpacking And Installation
Cole-Parmer will exchange, replace or repair the existing balance for any damage that appears to be faulty by production or by construction within the 5-year warranty period. Warranty is voided if: A. Cole Parmer will exchange, replace or repair the existing balance for any damage that appears to be faulty by production or by construction within the 5-year warranty period. -
Page 6: Balance Assembly
1) Check grounding spring to insure it is in the appropriate location. Make sure that the grounding spring juts slightly out of the hole. 2) Install components following diagram below: i. Draft Shield ii. Weighing Pan Model: PBL-602, PBL-2002, PBL-3101, PBL-602.N, PBL-2002.N, PBL-3101.N Components:... -
Page 7: Balance Leveling
Installation: 1) Check grounding spring to insure it is in the appropriate location. Make sure that the grounding spring juts slightly out of the hole. 2) Install components following diagram below: i. Draft Shield ii. Weighing Pan BALANCE LEVELING It is necessary to level the balance prior to plugging it in. To level the balance, turn its feet until the air bubble is in the center position. -
Page 8: Battery Status
(estimated 1-8 hours). On switching on, the balance requires 30 minutes of temperature stabilization time. During temperature stabilization displayed information may change. Adjustment should be carried out after temperature stabilization. For correct operation of the balance the temperature range is +15˚C to +30˚C; Any changes of temperature and humidity during operation can cause indication errors. -
Page 9: Balance Keyboard
BALANCE KEYBOARD Press to switch the balance on/off Function: press to select working mode. ESC: Exit out of menus/submenus Press to send the weighing result to a printer or a computer. Zero: press to zero the balance. Up arrow: move up the menu or submenu Tare: press to tare the balance. -
Page 10: Balance Menu
Simultaneously press to enter 'Main Menu' Press to move upwards within balance menus and submenus Press to enter submenu Press to confirm introduced modifications Press to move one menu level up BALANCE MENU Main menu is divided into function groups. Function group is a group of interrelated parameters. - Page 11 Main Menu Submenus Options Overview Additional Info P1. CAL Adjustment 1.1. CA-E External adjustment Section 6.1 User adjustment with external Section 6.2 1.2. CA-U weight P2. rEAd Balance parameters 2.1. FIL 1, 2, 3 Filter Section 5.1 Section 5.2 2.2. APPr FASt, PrEc, F_P Value release Section 5.3...
-
Page 12: Weighing Mode
2400, 4800, 9600, Section 8.1.1 4.1.1. bAd RS 232 baud rate 19200, 38400, Section 8.1.2 4.1.2. PAr nonE, Odd, EuEn Parity P5. ducE Peripherals 5.1. PC Computer Section 9.1 Section 9.1.1 5.1.1. Prt nonE, rS232, USbB Computer port Section 9.1.2 5.1.2. -
Page 13: Units
• Load the weighing pan steadily avoiding shocks: • Place weighed loads centrally on the weighing pan (eccentricity errors are specified by PN-EN 45501 standard, points 3.5 and 3.6.2.): • Do not load the pan with concentrated force: • Avoid side loading, in particular side shocks: UNITS <P9.Unit>... -
Page 14: Taring
• To enter menu navigation, follow process found in Section 3.2 (page 7). Enter <P9.Unit / 9.2.Unin> submenu. • Press key to view available units: [g,ct,lb] • On selecting start unit, press key to confirm and return to home screen TARING To determine net mass, put the packaging on the weighing pan. -
Page 15: Zeroing
• Tare can be entered at any moment during the weighing process. Caution: Tare cannot be entered manually when tare value is already implemented to balance's memory. In such case message <Err3> is displayed and a short signal is emitted. ZEROING To zero mass indication press . -
Page 16: Balance Ambient Conditions
Procedure: • To enter menu navigation, follow process found in Section 3.2 (page 7). Enter <P2.rEAd / 2.2.APPr> submenu. • Press key to view available options: F_P - Fast and reliable PrEc - Reliable FASt - Fast • Press key to confirm. Return to home screen. BALANCE AMBIENT CONDITIONS Parameter relating to ambient and environmental conditions in which the balance operates. -
Page 17: Last Digit
Procedure: • To enter menu navigation, follow process found in Section 3.2 (page 7). Enter <P2.rEAd / 2.5.tArA> submenu. • Press key to view available options: Basic tare mode. Set (selected) tare value is overwritten on entering new tare value. tArF- Last tare value is stored in balance's memory. - Page 18 Procedure: • To enter menu navigation, follow process found in Section 3.2 (page 7). Enter <P1.CAL / 1.1.CA-E> submenu. • Message <UnLoAd> (unload the weighing pan) is displayed. On unloading the weighing pan, press key. • Balance starts determining mass of an empty weighing pan. The process is signaled by dashes <- >.
-
Page 19: User Adjustment
• On unloading the weighing pan, submenu <1.1.CA-E> is displayed. USER ADJUSTMENT User adjustment is carried out using external weight of class F 1 . Procedure: • To enter menu navigation, follow process found in Section 3.2 (page 7). Enter <P1.CAL / 1.2.CA-u>... -
Page 20: Running Working Mode
• Weighing <UUGG> • Parts counting <PCS> • +/- control <HiLo> • Percent weighing <dEu> • Peak hold <toP> • Totalizing <Add> RUNNING WORKING MODE Procedure: Caution: The balance is restarted with the last working mode activated. WORKING MODE ACCESSIBILITY Within each working mode, accessibility of the working mode can be adjusted. -
Page 21: Save Mode
SAVE MODE You can declare method of sending the information from the balance to a peripheral device (printer, computer). Procedure: Select option for sending of data: Manual printout of stable weighing result and <6.2.GLP> parameter's settings. While StAb pressing key when the result is unstable (no pictogram displayed), the result is to be printed on measurement stabilization. -
Page 22: Automatic Printout Time Interval
AUTOMATIC PRINTOUT TIME INTERVAL Parameter enabling you to set frequency of automatic printout. Printout interval is set in minutes with 1 [min] accuracy within 1 [min] - 1440 [min] range. Utilize to set interval time in minutes within 1 [min] – 1440 [min]. To confirm value press Caution: Option not available for Peak Hold working mode. -
Page 23: Weighing
Utilize to set Lo threshold value for automatic operation. To confirm value press WEIGHING <UUGG> (Weighing) mode is a standard working mode that enables carrying out weighing’s and saving them to the database. 7.6.1 SETTINGS • Accessibility of <UUGG> (Weighing) mode is declared within <P3.1.1Acc>, procedure found within section 7.2 •... -
Page 24: Operation Mode
7.7.2 OPERATION MODE Parameter allowing you to select method of determination of sample piece mass. Procedure: • To enter menu navigation, follow process found in Section 3.2 (page 7). Enter <3.2.PcS / 3.2.2.UUt> submenu. • Press key, parameter values are displayed successively one by one: S_S Select to set sample mass by determining mass of a single part. -
Page 25: Control
• Press key to confirm. Message <LoAd> is displayed for 1 s. Next, the following window is displayed: • If the parts are to be weighed in a container, first put it on a weighing pan and next tare it. •... -
Page 26: Percent Weighing Against Reference Sample Mass
• Enter the value and press key to confirm. Message <SEt Hi> is displayed for 1 s. Next, a message box for declaring high threshold (Max) is displayed. • Enter the value and press key to confirm. Working mode home screen is displayed. -
Page 27: Reference Sample Mass Determined By Weighing
7.9.3 REFERENCE SAMPLE MASS DETERMINED BY WEIGHING Procedure: • To enter menu navigation, follow process found in Section 3.2 (page 7). Enter <3.4.dEu / 3.4.2.UUt> submenu, set <s_s> value. • Enter <dEu> working mode (Percent weighing). • Message <Load> is displayed for 1s. Next, the following window is displayed: •... -
Page 28: Means Of Operation
7.10.2 MEANS OF OPERATION Procedure: • To enter menu navigation, follow process found in Section 3.2 (page 7). Enter <3.5.toP / 3.5.2.Lo> submenu, set <Lo> parameter value (Lo threshold) after exceeding of which maximum force is to be registered. • Enter 'Peak hold' <toP>... -
Page 29: Interfaces
• Load the weighing pan with another ingredient. On indication stabilization press key. • Sum of first and second weighing’s and “▲” pictogram are displayed continuously. • Press key to finish the process (with loaded or unloaded weighing pan). Message “Print?”... -
Page 30: Baud Rate
8.1.1 BAUD RATE Procedure: • To enter menu navigation, follow process found in Section 3.2 (page 7). Enter <P4.Conn / 4.1.rS / 4.1.1.bAd> submenu. • Press key to view available options: 2400 9600 19200 38400 57600 115200 • Press key to confirm. Return to home screen. 8.1.2 PARITY Procedure: •... -
Page 31: Import / Export
8.2.1 IMPORT / EXPORT Function enabling you to archive weighing reports and Alibi reports, and to copy parameters between weighing devices of the same series. Import/export operation can be carried out by means of USB flash drive comprising <FAT files system>. Upon connection of the USB flash drive to the USB A port, the drive gets detected automatically, as a result <IE>... -
Page 32: Usb B Port
USB B PORT USB port of type B is intended for connecting the scale to a computer. In order to make connection of scale and computer possible, it is necessary to install virtual COM port in a computer. To carry out this procedure, you need a respective driver installer which is included on the USB driver included with the balance. -
Page 33: Printout Interval For Continuous Transmission
9.1.3 PRINTOUT INTERVAL FOR CONTINUOUS TRANSMISSION Interval for printouts is set in seconds with 0.1[s] accuracy. You can set any interval value ranging from 0.1 to 3600 seconds. Procedure: • To enter menu navigation, follow process found in Section 3.2 (page 7). Enter <5.1.PC / 5.1.3.Int>... -
Page 34: Glp Printout
For the parameters described above, one of these values must be selected: YES - Print - Do not print Caution: Printouts are printed in English Example report: GLP PRINTOUT <6.2.GLP> menu enables declaring data that is to be printed on a GLP printout. List of data to be declared: Name Overview... -
Page 35: Balance Settings
BALANCE SETTINGS <P7.Othr> menu allows to customize the balance by setting: • Backlight • 'Beep' sound - reaction to pressing a key • Automatic shutdown • Date format • Time format • User menu default settings BACKLIGHT <7.1.bLbt> parameter enables setting display brightness. The backlight can be disabled completely. Procedure: •... -
Page 36: Automatic Shutdown
AUTOMATIC SHUTDOWN <7.3.t1> parameter enables automatic shutdown of the balance, when indication is stable. Procedure: • To enter menu navigation, follow process found in Section 3.2 (page 7). Enter <P7.Misc / 7.3.t1> submenu. • Press key to view available options: nonE - Automatic shut down disabled. -
Page 37: Date Format
DATE FORMAT <7.6.FdAt> parameter enables defining date format for printouts. Procedure: • To enter menu navigation, follow process found in Section 3.2 (page 7). Enter <P7.Misc / 7.6.FdAt> submenu. • Press key to view available options: 1 - Date format DD.MM.YYYY 2 - Date format MM.DD.YYYY 3 - Date format YYYY.MM.DD 4 - Date format YYYY.DD.MM... -
Page 38: Appendix
APPENDIX BALANCE SPECIFICATIONS PBL-203 PBL-602(.N) PBL-2002(.N) PBL-3101(.N) Catalog Number 10402-51 10402-52 10402-53 10402-54 Maximum capacity 200g 600g 2000g 3100g Readability [d] 0.001g 0.01g 0.01g 0.1g Tare range -200g -600g -2000g -3100g Repeatability* 0.002g 0.01g 0.01g 0.1g Linearity ±0.004g ±0.02g ±0.03g ±0.3g... -
Page 39: Cleaning Stainless Steel Componets
13.2.2 CLEANING STAINLESS STEEL COMPONETS Avoid using cleansers containing any corrosive chemicals, e.g. bleach (containing chlorine). Do not use products containing abrasive substances. Always remove the dirt using microfiber cloth to avoid damage of protective coating. In case of a daily maintenance: 1. -
Page 40: Connectors
Fig.2. Dimensions of PBL-602(.N), PBL-2002(.N) and PBL-3101(.N) precision balances. CONNECTORS Interfaces view DC IN - power outlet RS232 - RS 232 connector USB 2 - USB 'device' connector USB 1 - USB 'host' connector Pin2 – RxD RS 232 DB9/M Pin3 –... -
Page 41: Troubleshooting
TROUBLESHOOTING Problem Cause Solution Connect it to the mains, charge Battery (batteries) discharged, the battery (batteries) The balance does not No batteries (batteries not Check if batteries are installed switch on installed or installed incorrectly) correctly (polarization) 't1' parameter set to 'YES' In 'Misc' menu change <7.3.t1>... - Page 42 Five-Year Limited Warranty Cole-Parmer will exchange, replace or repair the existing balance for any damage that appears to be faulty by production or by construction within the 5-year warranty period. Warranty is voided if: A. Cole Parmer will exchange, replace or repair the existing balance for any damage that appears to be faulty by production or by construction within the 5-year warranty period.
- Page 43 For your reference and records: Model Number Serial Number Purchase Date Place Stamp Here Cole-Parmer Warranty Registration 625 East Bunker Ct Vernon Hills, IL 60061...
- Page 44 It is recommended that Cole-Parmer products are calibrated annually to ensure proper function and accurate measurements; however, your quality system or regulatory body may require more frequent calibrations. To schedule your recalibration, please contact InnoCal, an ISO 17025 calibration laboratory accredited by A2LA.
Need help?
Do you have a question about the PBL-602 and is the answer not in the manual?
Questions and answers