Table of Contents
Advertisement
Quick Links
Advertisement
Table of Contents

Subscribe to Our Youtube Channel
Related Manuals for CIAT MAGISTER Series


Summary of Contents for CIAT MAGISTER Series
- Page 1 EN7558843-03 06 - 2021 I n s t r u c t i o n m a n u a l...
-
Page 2: Table Of Contents
CONTENTS 1 - INTRODUCTION ..................................3 2 - RECEIPT OF GOODS ................................4 2.1 - Checking the equipment.................................4 2.2 - Identifying the equipment ...............................4 2.3 - Documents .....................................4 3 - SAFETY INSTRUCTIONS ................................5 4 - WARRANTY ....................................5 5 - STORAGE OF EQUIPMENT ..............................5 6 - HANDLING ....................................5 7 - SUPPLY AIR TYPE ..................................6 8 - LOCATION &... -
Page 3: Introduction
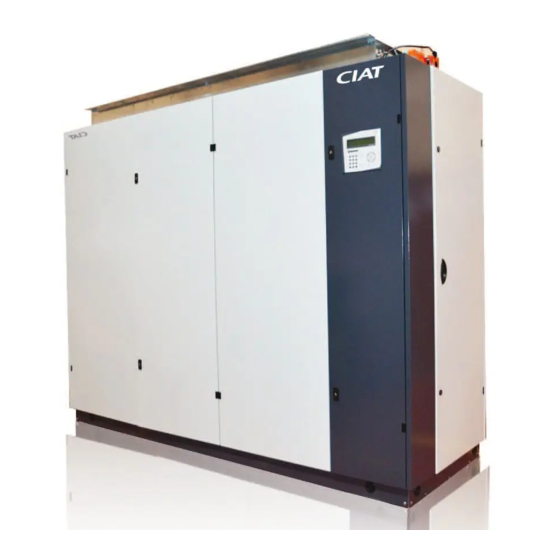
1 - INTRODUCTION Introduction to the range: MAGISTER ® is a range of precision close control units operating with chilled water (temperature and humidity) that is specifically adapted to meet the needs of premises with high heat loads or of sensitive locations (DATA CENTRES, computer rooms, metrology laboratories, etc.). The description of the unit is indicated using the following format: MAGISTER ®... -
Page 4: Receipt Of Goods
2 - RECEIPT OF GOODS 2.1 - Checking the equipment In accordance with Article 133-3 of the French Code of Commerce, the recipient is entirely responsible for checking the condition of the goods received. In the event of missing items, the customer must provide the exact number of parcels delivered. Any damaged or missing items must be specified on the delivery note in the presence of the driver before signing the delivery note. -
Page 5: Safety Instructions
3 - SAFETY INSTRUCTIONS Appropriate PPE (Personal Protective Equipment) when servicing the units must be worn Warning The unit must be installed and maintained by a qualified, experienced technician. Follow the operating precautions to the letter when working on the unit. Labels have been placed on the unit to remind you of the safety instructions. As a general rule, follow all applicable safety regulations and standards. -
Page 6: Supply Air Type
6 - HANDLING Handling with a spreader beam and slings 1100 To be removed while handling, then replaced once the vertical unit is in place If the unit is lifted using a spreader beam and slings: - Protect the panels. - First remove all the caps covering the holes for the tubing on the lower section of the unit. -
Page 7: Location & Installation
8 - LOCATION & INSTALLATION You must leave space for access to the front and to the right of the unit for maintenance and installation operations. For free air intake, there must be at least 500 mm above the unit. 500 mm 1000 mm 1000 mm... -
Page 8: Location And Marking Of Components
9 - LOCATION AND MARKING OF COMPONENTS CW40 to CW100, Under Assembly Filters Electrics Box Cooling coil Cooling coil Control valve (Heating Electric heater coil) (option) Heating coil (option) Additional cabinet Drain pump (option) FMA access Humidifier (option) hatch Condensate drain Control valve (cooling coil) pump (option) CW40 to CW100, Over Assembly... - Page 9 9 - LOCATION AND MARKING OF COMPONENTS CW115, Under Assembly Filters Electrics Box Electric heater (option) Cooling coil Access Control valve hatches (cooling coil) Humidifier (Option) ® EN-9 MAGISTER...
-
Page 10: Connections
10 - CONNECTIONS When following these steps, please consult the dimensional drawing and connection diagram as well as the wiring diagram found inside the vertical unit. 10.1 - Hydraulic connection The hydraulic pipes must be routed through the plates provided for this purpose in the vertical unit frame. This is either done to the right of the unit or directly underneath. -
Page 11: Electrical Connection
10 - CONNECTIONS A condensate drain pump option is available (see technical specifications in paragraph 12), provided that the humidifier option has not been requested. If the humidifier option is selected, the discharge must not drain into the unit's drain pan. To have a single discharge for both, connect the humidifier drain downstream of the unit's drain pan. Warning: the condensates from the humidifier can reach 100 °C. 10.2 - Electrical connection The electrical connections and wiring must be set up as shown on the wiring diagram included with the unit and in accordance with applicable standards and regulations. The unit's power supply cable must be determined according to the power of the unit, the length of the cable, the protection, and the operating mode. - Page 12 10 - CONNECTIONS Recommendations concerning electrical connections of the indoor unit. Connect the indoor unit so that the main power supply comes from underneath the unit. Either on the right side of the unit (1 or 2) or from underneath (3). If using a cased base, pass it through one of the grommets on the right side intended for this purpose (See technical characteristics in paragraph 12.2.5).
- Page 13 10 - CONNECTIONS CW 40 to 100 models CW115 model Inlets Inlet Route for BACNET BUS cable Gateway BACNET Recommended Raceways route for BUS RS 485 cable Raceways All the cable routings in the unit must be sealed tight. The CW115 model is supplied with covers which must be fitted on the side and front section of the casing. ®...
-
Page 14: Technical Characteristics
11.1 - Basic components 11.1.1 - Control The vertical units are equipped with a CIAT µAIR CONNECT2 automatic control unit. CIAT µ Air Connect 2 The heart of the vertical unit, this manages the unit and ensures it functions correctly. It is built into the display. - Page 15 11 - TECHNICAL CHARACTERISTICS Nominal flow rates of cabinets: CHILLED WATER CW 40 CW 53 CW 78 CW 100 CW115 Nominal flow rate (m³/h) 10000 13300 18800 24500 27000 Max. flow rate (m³/h) 13300 13300 20500 27000 27500 Table of operating pressures downstream of the filters CW 40 CW 53 CW 78...
- Page 16 11 - TECHNICAL CHARACTERISTICS Units CW 40 CW 53 CW 78 CW 100 CW115 13 300 13 300 20 500 27 000 27 500 Air flow (m * Maximum operating pressure with G4 / COARSE filtration: 65 % * Maximum operating pressure with F7 / ePM1 filtration: 55 % 46 / 46 51/ 51 78 / 78...
-
Page 17: Optional Components
11 - TECHNICAL CHARACTERISTICS Pressure drops - clean filters: CHILLED WATER CW 40 CW 53 CW 78 CW 100 CW115 10 000 13 300 18 800 24 500 27 500 Flow rate (m³/h) ∆P (Pa) G4/COARSE: 65 % ∆P (Pa) F7/ePM1: 55 % (mm) Filter fouling is measured by a pressure sensor located in the electrics box. - Page 18 The humidifier is supplied with a flexible water supply tube at the back of the cabinet. To drain it, carry out siphoning. Warning: the water temperature can reach 100°C. If the option without the µRC2.1 (CIAT) control has been chosen, there is a display in the cabinet which can be used to control the humidifier. ®...
- Page 19 5 m (l/h) 10 m (l/h) 20 m (l/h) 30 m (l/h) flexible piping Connect a Ø 10 int (3/8") flexible tube (not supplied by CIAT) to the pump discharge. For OVER models (3 and 5), if using a spreader beam and slings, the PVC tube will not be directly connected to the pump, for handling reasons. It must therefore be angled in the right direction and fixed to the clamp, as shown below. ® EN-19...
- Page 20 11 - TECHNICAL CHARACTERISTICS Clamp Elbow PVC tube 11.2.5 - Bases: Support base: Adjustable feet For supply air through a raised floor. The height can be adjusted from 250 mm to a maximum of 610 mm. Adjustment screws are provided with the base for adjustment on site. Do not forget to stick the adhesive seal provided to the aluminium frame of the base to ensure tightness. Cased subbase with grid: Grommet for power supply cable connection...
- Page 21 11 - TECHNICAL CHARACTERISTICS • Cased base with damper: Access hatch for servomotor damper Grommet for power supply cable connection Damper Adjustable feet Plate for hydraulic or refrigerant connection This is mainly used to insulate the cabinet when it is connected to a duct system. The damper prevents air returning to the unit when it is not operating and when other units are operating nearby.
- Page 22 11 - TECHNICAL CHARACTERISTICS Free-cooling plenum (Height = 550 mm): Grommet for control cable routing or for master/slave management, as well as room sensor cables. Access hatch for junction box and damper servomotors Grommet for control cable routing or for master/slave management, as well as room sensor cables.
- Page 23 See electrical diagram for connection. Operation: A filter must be installed upstream on the fresh air side (type F7, not provided by CIAT and at customer's expense) so that the indoor air is not adversely affected. The option allows cooling to be carried out using outdoor air (fresh air), in accordance with the temperature and humidity conditions, to decrease the room temperature.
- Page 24 11 - TECHNICAL CHARACTERISTICS Connectors Inside the front cover Mobile front panel Rear fixed housing Output Autozero Supply terminal Left-hand switch terminal block block LCC-S connection Right-hand switch Packing box Pressure connections Solenoid valve (CP111 only) Electrical connections (as per NFC15-100 standards) See wiring diagram for connection Autozero To perform an Autozero, disconnect the tubes from the 2 pressure connections and press the "Autozero"...
- Page 25 11 - TECHNICAL CHARACTERISTICS Measurement scopes of the CP112 on the scale ± 250 Pa scale depending on the measurement unit. Standard scale and central zero setting - left-hand switch To set the type of measurement scope, position switch 4 as shown opposite: E.g.
-
Page 26: Commissioning
11 - TECHNICAL CHARACTERISTICS 11.2.9 - BACNET IP (OR BACNET MSTP) gateway This is incorporated in the electrics box. The gateway is used to translate the main information available in MODBUS into BACNET IP (OR BACNET MSTP). It is possible to connect 1 to 2 units to the BACNET IP (OR BACNET MSTP) gateway. Please see the recommendations for routing cables in paragraph 11.3 and in the control manual (N09.41). -
Page 27: Maintenance
13 - MAINTENANCE The doors may be removed to facilitate access to all components (see removal diagram below) Open the doors Pull out the pin and remove the hinge (detail B) Lift off the door (detail C) ® EN-27 MAGISTER... -
Page 28: Filters
13 - MAINTENANCE 13.1 - Filters Check the filters frequently when commissioning the unit. The rate at which they will clog will depend on how well the air circuits were cleaned. Maintenance intervals The filter life depends essentially on the amount of dust in the air and the efficiency of the filtration system. The filtration quality cannot be maintained if the filter medium has been damaged during maintenance. We recommend that the filters be replaced once every two years in case of low to moderate use. Replacing the filter elements When performing maintenance, it is important to avoid releasing and spreading the dust that has accumulated in the filter. Turn off the unit. Access the filters by opening the doors on the front. For filter sizes CW 40 to 100 Replace the used filters by new filters. Take care to note the direction of air flow indicated on the new filters. Always make sure that the filter elements are properly positioned before compressing them or turning the unit back on. Runner Thumbwheel - Unscrew the thumbwheel to free the runner. - Remove the runner to take the filters out. -
Page 29: Cooling Coil
13 - MAINTENANCE For CW 115 size filters - Unscrew the clamps on the bottom of the filter (detail A) - Release the filter by pulling up the tab on the top of the filter (detail B) Replace the used filters by new filters. Take care to note the direction of air flow indicated on the new filters. Always make sure that the filter elements are properly positioned before compressing them or switching the unit back on Detail B Detail A 13.2 - Cooling coil Maintenance intervals As the cooling coil is protected by a filter, its air circuits require very little maintenance Always cut the power supply to the cabinet before proceeding with cleaning. Electric heater Maintenance intervals The electric heater requires very little maintenance. -
Page 30: Humidifier
13 - MAINTENANCE Cleaning procedure: Remove the filters as instructed above, To avoid damaging the blower nozzle, make sure that it is not too close to the finned surface. 13.3 - Humidifier Maintenance Clean the humidifier once a year and replace its tank. Cleaning or replacing the steam tank This operation is necessary when the deposits that form on the active surface of the electrodes prevent the correct flow of current (alarms E08, E06). To remove the tank: Completely drain the tank using the manual drain program governed by the controller. (see extract from control manual N09.41 paragraph 6.2 parameter no. 911) Cut the power to the unit by turning it off at the switch or removing the fuses on the line, Remove the tank steam hose, Disconnect the main electrodes and remove the pins from the level electrodes,... -
Page 31: Fans
13 - MAINTENANCE Supply valve CHARGING UNIT Flow regulator In case of a fault with the humidifier (no steam produced), check the water conductivity: it must be between 350 and 1250 µS/cm. If frequent descaling is necessary, check the water hardness. It should be 15°f<TH<30°f. Filling solenoid valve Water top-up Drain pump Water drainage 13.4 - Fans Sizes CW 40 to 100 Fitting UNDER FMA access hatches (A) - Remove the screws on the fan access hatches and remove the hatches. - Page 32 13 - MAINTENANCE Quick connectors (B) - Disconnect the quick connectors (figure B) for each fan motor assembly - Slide shims/supports under the FMAs to support them. Rear screw Rear screw Front screw Front screw - Remove the front screws - Gently unscrew the rear screws so that the FMAs do not fall out and so that they allow the FMAs to be removed by moving them forwards, as shown in figure C.
- Page 33 13 - MAINTENANCE Fitting OVER - Remove the screws on the fan access hatches and remove the hatches (figure A) Screws Quick-release connector - Disconnect the quick-release connectors (figure B) for each FMA. - Then unscrew the 4 screws per FMA that are situated level with the arches. - When refitting the FMA(s), follow the steps in reverse order and ensure the FMA screws are sufficiently tightened. ® EN-33 MAGISTER...
-
Page 34: Electrics Box
13 - MAINTENANCE Size CW115 - Fan access: remove the 6 screws from the fan access hatch (B) - Removing side fans (A): - Remove the 4 screws (A) from the uprights then remove the uprights - Remove the screws from the fan removal panel (C), - Remove the fan attachment screws (D). -
Page 35: Service Intervals
- UK REACH Regulations 2019 UK Importer: - Toshiba Carrier UK Ltd, Porsham Close, Roborough, Plymouth, PL6 7DB This document is not legally binding. As part of its policy for continual product improvement, CIAT reserves the right to make any technical modification it considers necessary without prior notice. ® EN-35... - Page 36 Manufacturer: Carrier S.C.S, Rte de Thil - 01122 Montluel, France. Printed in the European Union. Manufacturer reserves the right to change any product specifications without notice.
Need help?
Do you have a question about the MAGISTER Series and is the answer not in the manual?
Questions and answers