Advertisement
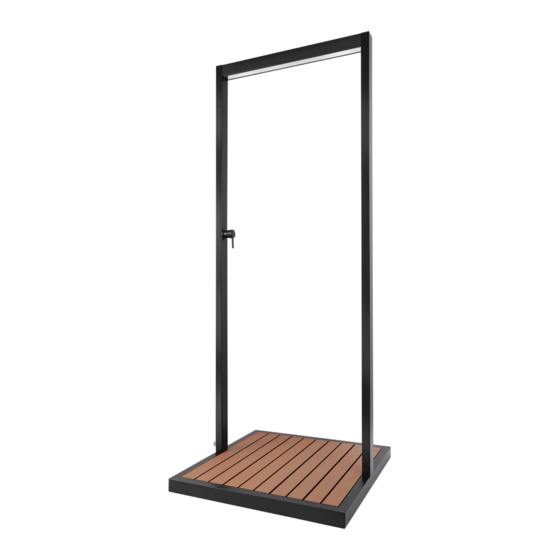
Outdoor Shower Matt Black with Wood Effect Base
BeBa_28529
Please note: Image is for illustrative purposes only and may differ slightly to the
actual product
·Multi person assembly
·Tools required
·We always recommend using professional
·tradespeople to install your product
Congratulations on your purchase
V1_08.04.22
Advertisement
Table of Contents

Related Manuals for Better Bathrooms BeBa 28529


Summary of Contents for Better Bathrooms BeBa 28529
- Page 1 Outdoor Shower Matt Black with Wood Effect Base BeBa_28529 Please note: Image is for illustrative purposes only and may differ slightly to the actual product ·Multi person assembly ·Tools required ·We always recommend using professional ·tradespeople to install your product V1_08.04.22 Congratulations on your purchase...
- Page 2 Congratulations on your purchase And welcome to our growing gang of savvy shoppers We're on a mission to bring you extraordinary bathroom products, for less. From modern to traditional style ceramics, plus the gorgeous fixtures, fittings and furniture to match. So, you can fall in love with your space every single day .
-
Page 3: Table Of Contents
Contents Parts / Diagrams--------------------------------------------------4 · Tools required ----------------------------------------------------5 · Installation --------------------------------------------------------5 · Using---------------------------------------------------------------9 · Troubleshooting -------------------------------------------------9 · Cleaning ----------------------------------------------------------10 ·... -
Page 4: Parts / Diagrams
Parts / Diagrams 1. Left side frame 2. Base 3. Shower head 4. Connector x 2 5. Mechanical cartridge 6. Nut 7. Cover 8. Handle 9. Screw of overhead shower x 10 10. Top cover of overhead shower 11. Connector screw x 8 12. -
Page 5: Tools Required
Tools required Spanner Silicone Drill and drill bit Spirit Level Pencil Tape Measure Hammer Screwdriver Hex wrench 6mm Installation Prepare the water supply pipes to feed the shower with hot on the left and cold on the right. Use the screwdriver to unscrew the screws at the top of overhead shower and take out the top cover. - Page 6 Take out the connectors at both ends. Fix one connector onto the left side frame and tighten with 4pcs screws. Fix another connector onto the right side frame and tighten with 4pcs screws.
- Page 7 Install the overhead shower and tighten with 4pcs screws at each end. Pull out the pipe from left side frame, get 1pc clamp and fix the pipe to the connector on shower head by screwdriver.
- Page 8 Fix the top cover onto overhead shower, put 1pc screw at each end and tighten by screwdriver. Put the frame onto the base, then tighten with 4 screws at each side.
-
Page 9: Using
Connect the water supply pipe to the adapter and tighten with spanner. Installation is then complete. Turn on the water supply and check for leaks. Using To control the temperature, turn the temperature control handle until the desired temperature is reached. To avoid freezing in winter, it's suggested to keep the shower tower in door. -
Page 10: Cleaning
Cleaning To maintain the surface of your product, wipe with a clean damp cloth and wipe dry , do not use any abrasive cleaning agents or materials . It is recommended to wipe and dry on a regular basis.
Need help?
Do you have a question about the BeBa 28529 and is the answer not in the manual?
Questions and answers