Table of Contents
Advertisement
Available languages
Available languages
Quick Links
item # 1001010735
Model # 54677141
Use and Care GUide
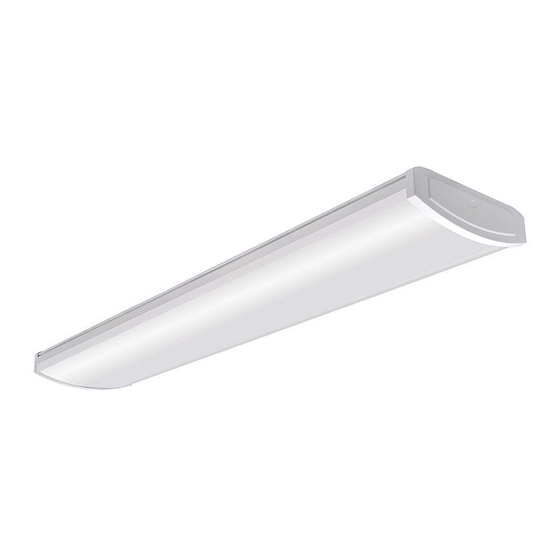
4 FT. Led HiGH OUTPUT WraP LiGHT
Questions, problems, missing parts? Before returning to the store,
call Commercial Electric Customer Service
8 a.m. - 7 p.m., EST, Monday - Friday
9 a.m. - 6 p.m., EST, Saturday
1-877-527-0313
HOMEDEPOT.COM
THANK YOU
We appreciate the trust and confidence you have placed in Commercial Electric through the purchase of this LED light. We strive to
continually create quality products designed to enhance your home. Visit us online to see our full line of products available for your home
improvement needs. Thank you for choosing Commercial Electric!
Advertisement
Chapters
Table of Contents

Related Manuals for Commercial Electric 54677141


Summary of Contents for Commercial Electric 54677141
- Page 1 THANK YOU We appreciate the trust and confidence you have placed in Commercial Electric through the purchase of this LED light. We strive to continually create quality products designed to enhance your home. Visit us online to see our full line of products available for your home...
-
Page 2: Table Of Contents
Table of Contents Table of Contents ........2 Package Contents . -
Page 3: Pre-Installation
Pre-installation PLANNING INSTALLATION Before beginning assembly, installation or operation of product, make sure all parts are present. Compare parts with the package contents list. If any part is missing or damaged, do not attempt to assemble, install or operate the product. Contact customer service for replacement parts. -
Page 4: Package Contents
Pre-installation (continued) PACKAGE CONTENTS Part Description quantity LED Wrap Light Housing LED Wrap Light Diffuser HARDWARE INCLUDED nOTe: Hardware not shown to actual size. Part Description quantity Mounting Bracket Gasket Double Wire Connector Single Wire Connector Electrical Box Screw Drywall Anchor Mounting Screw... -
Page 5: Installation
installation Select a suitable location that can support the weight of the fixture. Determine the method of mounting before drilling. WarninG: RISK oF ELECTRIC SHoCK. Ensure the electricity to the wires you are working on is shut off. Either remove the fuse or turn off the circuit breaker before removing the existing light fixture or installing the new one. - Page 6 installation (continued) Feeding the wires nOTe: Put the gasket (BB) on any knock out hole of the fixture to better protect the wires. □ Feed the electrical connection wires through any knock out hole and then through the mounting bracket (AA). The connection wires can be held in place by the metal tabs, if needed.
- Page 7 installation (continued) Attaching the housing to the ceiling □ Drill a 1/8 in. pilot hole into the screw locations marked on the ceiling. You can also use an awl or nail to dimple the screw holes. □ Install a drywall anchor (FF) and a mounting screw (GG) in each drilled mounting hole, but do not tighten fully. □...
-
Page 8: Care And Cleaning
The fuse blows or the circuit The wires are crossed or the Check the wire connections. breaker trips when the light is power wire is grounding out. Contact a qualified electrician or call Commercial Electric customer turned on. service 1-877-527-0313. - Page 9 notes HoMEDEPoT.CoM Please contact 1-877-527-0313 for further assistance.
- Page 10 Questions, problems, missing parts? Before returning to the store, call Commercial Electric Customer Service 8 a.m. - 7 p.m., EST, Monday - Friday 9 a.m. - 6 p.m., EST, Saturday 1-877-527-0313 HOMEDEPOT.COM Retain this manual for future use.
- Page 11 GRACIAS Apreciamos la confianza que ha puesto en Commercial Electric al comprar este dispositivo de luz LED. Nos esforzamos por crear constantemente productos diseñados para dar realce a su hogar. Visítenos en línea para ver nuestra gama completa de productos...
-
Page 12: Contenido
Contenido Contenido ........12 Contenido del paquete . -
Page 13: Antes De La Instalación
antes de la instalación PLANIFICACIÓN DE LA INSTALACIÓN Antes de comenzar el armado, instalación u operación del producto, asegúrese de que tiene todas las piezas. Compare las piezas con la lista de contenido. Si alguna de las piezas faltara o estuviera dañada, no proceda a armar, instalar u operar el producto. Comuníquese con el servicio al cliente para consultar por las piezas de reemplazo. -
Page 14: Contenido Del Paquete
antes de la instalación (continuación) CONTENIDO DEL PAqUETE Pieza Descripción Cantidad Caja de dispositivo de luz LED envolvente Difusor de dispositivo de luz LED envolvente MATERIALES INCLUIDOS nOTa: Los materiales no se ilustran en tamaño real. Pieza Descripción Cantidad Soporte de montaje Junta Conector de cables doble Conector de cables simple... -
Page 15: Instalación
instalación Seleccione un sitio adecuado que soporte el peso del dispositivo de iluminación. Determine el método de montaje antes de hacer los orificios. adVerTenCia: RIESGo DE DESCARGA ELÉCTRICA. Asegúrese de cortar el suministro eléctrico en los cables con los que trabajará. Extraiga los fusibles o apague el cortacircuitos antes de quitar el aparato de iluminación existente o instalar uno nuevo. - Page 16 instalación (continuación) Cableado nOTa: Coloque la junta (BB) en uno de los orificios ciegos del aparato para proteger mejor los cables. □ Pase los cables por uno de los orificios ciegos y luego a través del soporte de montaje (AA). La conexión de cables puede mantenerse en el lugar con las pestañas de metal, si es necesario.
- Page 17 instalación (continuación) Unir la caja al cielorraso □ Taladre un orificio piloto de 1/8 pulgadas en los sitios de los tornillos marcados en el cielorraso. También puede usar una lezna o clavo para marcar los orificios de los tornillos. □ Instale un anclaje para pirca (FF) y un tornillo de montaje (GG) en cada uno de los orificios, pero no los apriete completamente. □...
-
Page 18: Cuidado Y Limpieza
Los cables están cruzados o el Verique las conexiones de los cables. cortacircuitos cuando se enciende cable de suministro eléctrico no la lámpara. está puesto a tierra. Comuníquese con un electricista calificado o llame al Centro de Atención al Cliente de Commercial Electric 1-877-527-0313. - Page 19 notas HoMEDEPoT.CoM Sírvase comunicarse al 1-877-527-0313 para recibir asistencia.
- Page 20 ¿Preguntas, problemas, piezas faltantes? Antes de devolver el producto a la tienda, llame al Centro de Atención al Cliente de Commercial Electric en el horario de 8 a.m. - 7 p.m., Hora del Este de EE.UU., de lunes a viernes.
Need help?
Do you have a question about the 54677141 and is the answer not in the manual?
Questions and answers
can led wrap light operate with motion sensor switch