Table of Contents
Advertisement
Available languages
Available languages
Quick Links
item # 1001820733
Model # 54568141
Use and Care GUide
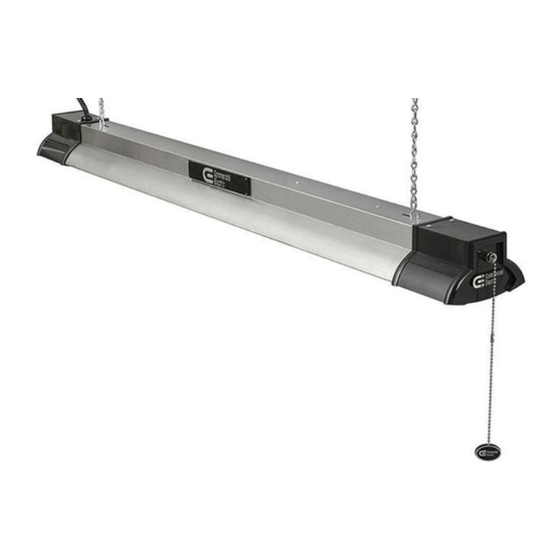
2 FT. Led sHOP LiGHT
Questions, problems, missing parts? Before returning to the store,
call Commercial Electric Customer Service
8 a.m. - 7 p.m., EST, Monday - Friday
9 a.m. - 6 p.m., EST, Saturday
1-877-527-0313
HOMEDEPOT.COM
THANK YOU
We appreciate the trust and confidence you have placed in Commercial Electric through the purchase of this LED
light. We strive to continually create quality products designed to enhance your home. Visit us online to see our full
line of products available for your home improvement needs. Thank you for choosing Commercial Electric!
Advertisement
Chapters
Table of Contents

Subscribe to Our Youtube Channel
Related Manuals for Commercial Electric 54568141


Summary of Contents for Commercial Electric 54568141
- Page 1 THANK YOU We appreciate the trust and confidence you have placed in Commercial Electric through the purchase of this LED light. We strive to continually create quality products designed to enhance your home. Visit us online to see our full...
-
Page 2: Table Of Contents
Table of Contents Table of Contents ........2 Hardware Included .........3 Safety Information ........2 Installation ..........4 Warranty ...........2 Suspension Mounting .......4 Pre-Installation .........3 Linking Feature .........6 Optional Surface Mounting.......6 Planning Installation ......3 Tools Required ........3 Care & Cleaning ........7 Package Contents ........3 Troubleshooting ........7 safety information nOTiCe: This equipment has been tested and found to comply with the... -
Page 3: Pre-Installation
Pre-installation PLANNING INSTALLATION This LED Shop Light can be mounted to the shop or garage ceiling and requires little space. lt is energy-saving, environmentally friendly, and used for emitting soft and even distribution of light. nOTe: Keep your receipt and these instructions for proof of purchase. TOOLS REqUIRED Measuring Power Drill... -
Page 4: Installation
installation Determine the method of mounting the fixture based on the type of ceiling before drilling. Depending on the method chosen for mounting the fixture, mark two spots for the mounting hardware (not included). □ Mark two spots on the ceiling 19 in. apart for suspension mounting. □... - Page 5 suspension Mounting (continued) Attaching the light to the Attaching the chain to the ceiling chain □ □ Hang the fixture (A) by placing one chain (AA) Attach the S hook at the bottom of the over each hook (not included) that has been mounting chain (AA) to the hanger on the installed on the ceiling.
-
Page 6: Linking Feature
Linking Feature WarninG: RISK OF ELECTRIC SHOCK. Disconnect power to the shop light before linking additional shop lights. LINKING MULTIPLE SHOP LIGHTS Multiple light fixtures can be connected, up to a maximum of 18 2 ft. shop lights or 324 total watts. Only the first light fixture needs to be plugged into an electrical outlet. -
Page 7: Care & Cleaning
Optional surface Mounting (continued) Locking the fixture to the mounting surface □ Insert an additional drywall anchor and screw (not included) in the ceiling at the end of the light fixture to prevent it from accidentally sliding off the screw heads. If the original mounting screws are on the left side of the keyholes, then another drywall anchor and screw need to be mounted to the ceiling to the left of the fixture. - Page 8 Questions, problems, missing parts? Before returning to the store, call Commercial Electric Customer Service 8 a.m. - 7 p.m., EST, Monday - Friday 9 a.m. - 6 p.m., EST, Saturday 1-877-527-0313 HOMEDEPOT.COM Retain this manual for future use.
- Page 9 HOMEDEPOT.COM GRACIAS Apreciamos la confianza que ha puesto en Commercial Electric a través de la compra de esta luz LED. Nos esforzamos por crear constantemente productos diseñados para realzar su hogar. Visítenos en línea para ver nuestra gama completa de productos disponibles para sus necesidades al momento de hacer mejoras en su hogar. ¡Muchas...
-
Page 10: Contenido
Contenido Contenido ..........10 Piezas incluidas ........11 Información sobre seguridad ....10 Instalación ..........12 Garantía...........10 Instalación suspedida ......12 Previo a la instalación ......11 Opción de enlace ........14 Instalación opcional en superficie ..14 Planificación de la instalación .....11 Herramientas necesarias .....11 Cuidado y limpieza .........15 Contenido del paquete ......11 Solución de problemas ......15 safety information... -
Page 11: Previo A La Instalación
Previo a la instalación PLANIFICACIóN DE LA INSTALACIóN Esta lámpara de luz LED puede instalarse en el cielorraso de un taller o garaje y ocupa poco espacio. Con su luz suave y de distribución uniforme, ahorra energía y no daña al medioambiente. nOTa: Guarde el recibo de compra y estas instrucciones como prueba de compra. -
Page 12: Instalación
instalación Antes de taladrar determine el método de montaje del dispositivo según el tipo de cielorraso. Según el método elegido para la instalación del dispositivo de luz, marque dos puntos para la instalación de las piezas de ferretería. (no se incluyen). □... - Page 13 instalación suspendida (continuación) Sujetar la lámpara a la Sujetar la cadena al cielorraso cadena □ Cuelgue el cuerpo del dispositivo colocando □ Sujete el gancho S al final de la cadena de una cadena (AA) sobre cada gancho (no se soporte (AA) al colgante del dispositivo de incluye) instalado en el cielorraso.
-
Page 14: Opción De Enlace
Opción de enlace adverTenCia: RIESGO DE DESCARGA ELÉCTRICA. Desconecte la energía eléctrica en el dispositivo de luz antes de enlazar otros dispositivos. ENLACE DE VARIOS DISPOSITIVOS DE LUz Puede enlazar varios dispositivos de luz, hasta un máximo de 18 de 2 pies o un total de 324 vatios. Solo el primer dispositivo debe estar enchufado a un tomacorriente. -
Page 15: Cuidado Y Limpieza
Comuníquese con un electricista calificado cuando se enciende la está puesto a tierra. o llame al Centro de Atención al Cliente de lámpara. Commercial Electric 1-877-527-0313. HOMEDEPOT.COM Comuníquese al 1-855-HD-HAMPTON para solicitar asistencia. - Page 16 ¿Preguntas, problemas, piezas faltantes? Antes de devolver el producto a la tienda, llame al Centro de Atención al Cliente de Commercial Electric en el horario de 8 a.m. – 7 p.m., Hora del Este de EE.UU., de lunes a viernes.
Need help?
Do you have a question about the 54568141 and is the answer not in the manual?
Questions and answers