Twin Eagles TEBQ30R-C Installation Use And Care Manual
Hide thumbs
Also See for TEBQ30R-C:
- Installation use and care manual (36 pages) ,
- Installation use and care manual (36 pages)

Related Manuals for Twin Eagles TEBQ30R-C


Summary of Contents for Twin Eagles TEBQ30R-C
- Page 1 TWIN EAGLES GAS GRILL INSTALLATION, USE AND CARE MANUAL MODELS: TEBQ30G-C TEBQ30R-C TEBQ36G-C TEBQ36R-C TEBQ42G-C TEBQ42R-C P/N: 19198F (07/18) TEBQ54RS-C...
- Page 2 A special message to our customers… Congratulations on the purchase of your Twin Eagles grill! Our products are engineered for precision and designed for style. Each Twin Eagles grill is manufactured in the USA at our own state of the art facility in California.
- Page 3 IMPORTANT SAFETY INSTRUCTIONS WARNING! Read this manual carefully and completely before using your grill to ensure proper operation, proper installation, proper servicing and to reduce the risk of fire, burn hazard and/ or other injury. AVERTISSEMENT! Lire ce manuel avec soin et en entier avant l’utilisation de votre barbecue afin d’en assurer un fonctionnement, une installation et un entretien adéquats et réduire le risque d’incendie, de brûlures et d’autres blessures.
- Page 4 • The pressure regulator and hose assembly supplied with the Twin Eagles Gas Grill must be used. Replacement pressure regulators and hose assemblies must be those specified by Twin Eagles.
-
Page 5: Table Of Contents
TABLE OF CONTENTS GETTING STARTED…………………………………………………………………………………..…….……… GAS REQUIREMENTS GAS SAFETY REQUIREMENT…………………………………………………………….…… LP GAS HOOKUP………….………………………………………………………..…………… PORTABLE LP CONNECTION………….………………………………..…………………..… NATURAL GAS INSTALLATION……………………………………..……………………….. LEAK TEST……………………………………………………………………..………………... ELECTRICAL REQUIREMENTS……………………………………………………………….. LOCATING THE GRILL CLEARANCE TO COMBUSTIBLE CONSTRUCTION……………………………..….……… CLEARANCE TO NONCOMBUSTIBLE CONSTRUCTION…………………….….………… WINDY CONDITIONS…………………………………………………………………………... CUTOUT DIMENSIONS INSULATION JACKET..………………………….………………………………….………….. GRILL………………………………………………………………………………….…………. -
Page 6: Getting Started
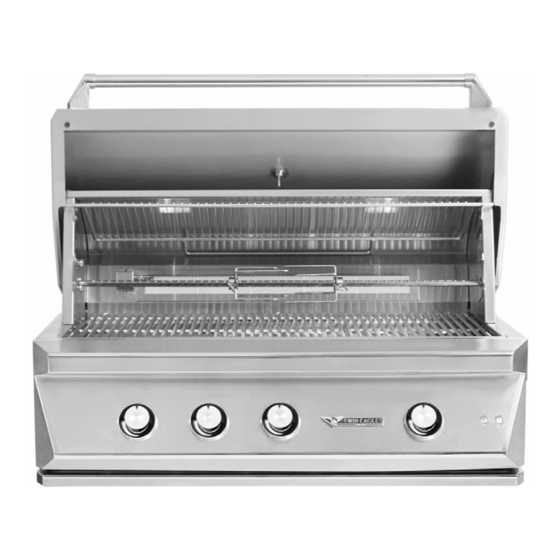
GETTING STARTED 1. Remove all packaging materials, labels and protective plastic film. DO NOT LEAVE UNIT IN THE SUN WITH PROTECTIVE PLASTIC FILM ON FOR A LONG PERIOD OF TIME AS IT WILL BECOME DIFFICULT TO REMOVE THE FILM. 2. Check to ensure that all grill accessories listed below are included. TEBQ TEBQ TEBQ... - Page 7 5. Get familiar with the knobs and burners identification below. TEBQ30 TEBQ36 Grill Grill Burner Rotisserie Grill Burner Rotisserie Grill Burner Sear Zone (Opt) (TEBQ36R) Sear Zone (Opt) (TEBQ30R) Burner TEBQ54RS TEBQ42 Grill Grill Burner Rotisserie Grill Right Sear Left Grill Burner Sear Zone (Opt)
-
Page 8: Gas Requirements
GAS SAFETY REQUIREMENTS Each appliance is set and tested at the factory for the type of gas supply to be used. Identify the type of gas, either natural gas (NG) or Liquid Propane (LP) gas and make sure that the marking on the data plate (rating plate) matches the gas being supplied to the grill. -
Page 9: Lp Gas Hookup
LP GAS HOOK-UP CAUTION: Provide adequate ventilation holes in the enclosure for safety purposes in the event of a gas leak. Install the factory-supplied hose and regulator assembly as shown. Connect the ” flare end of the hose to the grill coupling using a ¾” open wrench. Do not apply pipe sealant to the ”... -
Page 10: Portable Lp Connection
PORTABLE LP CONNECTION One of the many features of the T AGLES grill base is the pullout slide pan for easy access to the LP gas tank. 1) To install the gas cylinder, pull out the slide pan and place the cylinder onto the pan. 2) Tighten the tank holding screw to secure the gas cylinder in place. -
Page 11: Natural Gas Installation
NATURAL GAS INSTALLATION A typical natural gas installation is shown below. Make sure that the factory-supplied regulator is used and installed with the arrow mark on the regulator pointing towards the gas grill. Use only pipe sealants that are approved for use with natural and LP gases. An installer-supplied gas shutoff valve must be installed in an accessible location. -
Page 12: Leak Test
• Check to ensure that flexible hoses do not have any cuts and wear that may affect the safety before each use. Only the factory supplied hose and regulator must be used. Use only replacement regulator and hose assemblies specified by Twin Eagles. LEAK TEST •... -
Page 13: Electrical Requirements
ELECTRICAL REQUIREMENTS The appliance should only be taken apart by a qualified technician, or electrical shock may occur. It is rated at 120V, 60Hz, and 4A. REMINDER: Keep any electrical supply cord and the fuel supply hose away from any heated features. ! WARNING ! Electrical Grounding Instructions: This outdoor gas cooking appliance is equipped with a three prong (grounding) plug for... -
Page 14: Locating The Grill
LOCATING THE GRILL This gas appliance is designed and certified for outdoor use only. Do not locate this grill under overhead unprotected combustible surfaces. When installed under overhead combustible surfaces, a certified ventilating hood wider than the appliance shall be installed with a minimum distance of 36 inches above the cooking surface. -
Page 15: Windy Conditions
Windy Conditions Your TWIN EAGLES grill has been designed and engineered to produce intense heat that sears food quickly, locking in the foods natural moisture and flavor. The grills burners require air for efficient burner combustion. This fresh air is pulled through a vent in the front of your grill and the intense hot air produced by the burners is expelled through a vent in the rear. -
Page 16: Insulation Jacket
Do not build the grill under overhead unprotected combustible construction. If the grill is to be placed into combustible enclosure, an approved insulating jacket is necessary to prevent fire, property damage and bodily injury. Use only Twin Eagles insulating jacket. IMPORTANT: When installing use front right knockout to keep power cord cool. -
Page 17: Grill
GRILL CUT-OUT DIMENSIONS This is for non-combustible construction. For combustible construction refer back to previous page. SEE DETAIL (TYPICAL TO ALL TOP UNITS) -
Page 18: Assembly Instructions
ASSEMBLY INSTRUCTIONS Your Twin Eagles Grill is fully assembled and tested in the factory and requires no major assembly in the field. For the purpose of safe shipping and transit, some parts such as the briquette trays and rotisserie components are wrapped inside the grill and require minor assembly. -
Page 19: Correct Burner Installation
ASSEMBLY INSTRUCTIONS - CONTINUED CORRECT BURNER INSTALLATION: The gas valve orifice is completely inserted inside the venturi. INCORRECT BURNER INSTALLATION: The gas valve orifice is out of position and The orifice is out of position. The orifice is touching the tip of the burner venturi. is not inserted into the burner. -
Page 20: Burner Flame / Air Shutter Adjustment
BURNER FLAME / AIR SHUTTER ADJUSTMENT Each grill burner is tested and adjusted at the factory prior to shipment; however, variations in the local gas supply may make it necessary to adjust the burners. The flames of the U-burners should be visually checked. -
Page 21: Operating Instructions
OPERATING INSTRUCTIONS BEFORE LIGHTING THE GRILL ! WARNING ! DO NOT ATTEMPT TO LIGHT THE GRILL IF YOU SMELL GAS. • WARNING! IT IS CRITICAL THAT THE GAS BURNERS ARE PROPERLY INSTALLED WITH THEIR ORIFICES INSIDE THE BURNERS AIR SHUTTERS. If not properly installed, gas may leak outside of the burner that could lead to fire, potential damage to your grill and bodily injury. -
Page 22: Match Lighting Instructions
5. Allow grill to cool and clean the drip pan after each use. INTERIOR LIGHT OPERATION The Twin Eagles grill is equipped with two interior halogen lights and decorative knob LED lights for late night grilling. The grill is equipped with a hood switch that allows the interior lights to shut-off automatically when closing the hood. -
Page 23: Using The Rotisserie Burner
USING THE ROTISSERIE 1. Insert the food on the middle of the spit rod and then secure For small load it with the meat holders on both ends by tightening the thumb screws on the meat forks. If multiple pieces of food will be cooked at the same time, make sure the load is evenly balanced on the spit rod. -
Page 24: Smoker Box
USING THE SMOKER BOX The Twin Eagles sealed smoker box can hold dry wood chips or liquids for hickory, mesquite or your favorite wood chips to give meat a smoky flavor. 1) Remove a grate. 2) Remove a half size briquette tray where there is no flashtube and replace it with the smoker box. -
Page 25: Cleaning And Maintenance
However, the conditions outlined above, along with neglect, can lead to surface corrosion or rust. It is recommended that your TWIN EAGLES products be kept dry and covered when not in use. This is even more important when long-term storage is intended. -
Page 26: Hex Grates
Specks of grease can gather on the surface of the stainless steel and get baked-on. These can be removed by using a mild abrasive pad with a stainless steel cleaner. Use the mildest cleaner and always scrub in the direction of the grain. Do not use steel wool to clean the grill. Do not use abrasives on the polished highlights. -
Page 27: U-Burner
BURNERS Burners are made of heavy gauge stainless steel and can be soaked in water and cleaned with wire brush. Check every port hole for clogs. Use a wire pin to clean out clogged ports. Make sure the burner is dry before installing it back to the grill. INFRARED SEAR BURNER The infrared burner has stainless housing and a protective screen. -
Page 28: Exploded View
EXPLODED VIEW... -
Page 29: Replacement Parts List
Front Panel Weld Assembly (42”) R Model S26316-54WY Front Panel Weld Assembly (54”) S13270 Light Bezel Housing Assembly S13224 Lens, Light Bezel S13226 Rubber Retention Ring, Light Bezel S19146 Label, Switches, 110V-12V S16365 Switch, 110V, Rotis S16196 Switch, 12V, Lights S13203 Emblem, Twin Eagles... -
Page 30: Replacement Parts List - Continued
REPLACEMENT PARTS LIST - CONTINUED Item TE Part TEBQ TEBQ TEBQ TEBQ TEBQ TEBQ TEBQ Description Number S13235Y Knob Assembly S15303 Regulator, NG S15302 Regulator, LP S13301 U6-Burner S13350 U5-Burner S13345 Sear Burner Assembly (Optional Addition) S13144 Mesh Screen for Sear Burner S16322 Hot Surface Igniter, Rotisserie S26334... -
Page 31: Wiring Diagram
WIRING DIAGRAM... -
Page 32: Troubleshooting Guide
TROUBLESHOOTING GUIDE BEFORE CALLING FOR SERVICE: If your Twin Eagles grill does not function properly, use the following troubleshooting guide before contacting your dealer for service. The troubleshooting guide may save the cost of a service call and the inconvenience of being without your grill. -
Page 33: Limited Product Warranty
789-2206. Be prepared to furnish the following information: Purchaser’s name, model and serial number of the grill, date of purchase and the accurate description of the problem. Twin Eagles will not pay for service calls for correcting an installation problem. Owner shall be responsible for proper installation, providing normal care and maintenance, providing proof of purchase upon request and making the grill accessible for service. -
Page 34: Warranty Registration Card
THIS PAGE IS INTENTIONALLY LEFT BLANK... - Page 35 HOW TO OBTAIN SERVICE For service, please contact your TWIN EAGLES dealer or call TWIN EAGLES direct at (800) 789-2206 or (562) 802-3488 or fax (562) 802-3391 Mailing address: Twin Eagles, Inc. 13259 East 166 Street Cerritos, CA 90703 Visit us at www.twineaglesgrills.com...
- Page 36 Here Place Postage Here Customer Service ATTN: Warranty Department 13259 East 166 Street Cerritos, CA 90703 Fax no. (562) 802-3391...
Need help?
Do you have a question about the TEBQ30R-C and is the answer not in the manual?
Questions and answers