JVC DLA-G150CLU Operating Instructions Manual
Hide thumbs
Also See for DLA-G150CLU:
- Operating instructions manual (80 pages) ,
- Instructions manual (160 pages)
Table of Contents
Advertisement
Quick Links
OPERATING INSTRUCTIONS
PROJECTOR
MANUEL D'INSTRUCTIONS : PROJECTEUR
DLA-G150CLU
DLA-G150CLU
All manuals and user guides at all-guides.com
®
QUICK
ALIGN.
OPERATE
HIDE
W
W
SCREEN
SCREEN
FREEZE
COMP
VIDEO
S
S
PC1
PC2
DVI
Y/C
Y/C
T
T
DIGITAL
ZOOM
FOCUS
KEYSTONE
ZOOM
W
W
PRESET
MENU
EXIT
ENTER
RM-M160 REMOTE CONTROL UNIT
[ DLA-G150CLU / DLA-G150CLE ]
INSTRUCTIONS
(Lenses are optional)
DLA-G150CLU
DLA-G150CLE
LCT1123-001B
Mar. 2002 No. 51931
Advertisement
Chapters
Table of Contents
Troubleshooting

Related Manuals for JVC DLA-G150CLU


Summary of Contents for JVC DLA-G150CLU
- Page 1 DLA-G150CLU All manuals and user guides at all-guides.com DLA-G150CLE OPERATING INSTRUCTIONS [ DLA-G150CLU / DLA-G150CLE ] ® PROJECTOR MANUEL D’INSTRUCTIONS : PROJECTEUR DLA-G150CLU INSTRUCTIONS QUICK ALIGN. OPERATE HIDE SCREEN SCREEN FREEZE COMP VIDEO DLA-G150CLU DIGITAL ZOOM FOCUS KEYSTONE ZOOM PRESET...
-
Page 2: Safety Precautions
– Do not “ceiling-mount” the projector to a place which – Do not use attachments not recommended by the Changes or modification not approved by JVC could void dangerous voltages and other hazards. Refer all service tends to vibrate; otherwise, the attaching fixture of the the user’s authority to operate the equipment. -
Page 3: Table Of Contents
(DIGITAL ZOOM T/W) ..........37 Menu Operations ......38 Basic Menu Operation...........43 Changing the Color System (Video Menu Mode Only) ........45 Changing the Language Display ......46 Changing the Screen aspect ratio/HDTV format (Video Menu Mode Only) ........46 Adjusting Tracking/Phase ........47 DLA-G150CLU... -
Page 4: Controls And Features
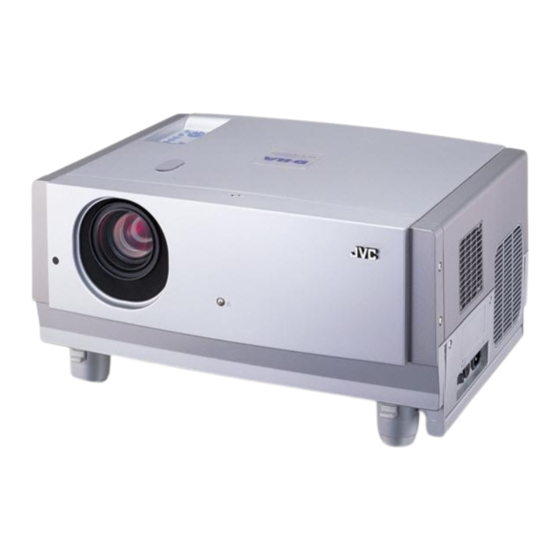
All manuals and user guides at all-guides.com Controls and Features Controls and Features Left-hand Side / Rear Side Front Side / Top Surface / Right Side 5 4 3 2 1 Exhaust vents 6 Adjustable feet (for adjusting the height and angle) Vents for cooling fans through which warm air comes out. -
Page 5: Bottom Surface
Be sure to ask your dealer or These buttons will be used in the menu mode to select an specialist to perform this work. item, or to set or adjust the value. For details, refer to “Basic Menu Operation” on page 43. DLA-G150CLU... -
Page 6: Connector Panel
All manuals and user guides at all-guides.com Controls and Features Controls and Features 9 EXIT button Connector Panel This button will be used in the menu mode to return to the previous menu. When the main menu is displayed, this button will cause the menu to disappear. -
Page 7: Remote Control Unit
All manuals and user guides at all-guides.com Controls and Features Controls and Features r DIGITAL ZOOM T/W buttons Remote Control Unit A part of image can be magnified up to four times on the screen. 5 VIDEO button On the remote control, the same buttons as on the control Each time the T or W button is pressed, the image is panel of the projector are provided except for the following Use this button to select a device such as a video deck... -
Page 8: Installing Batteries
All manuals and user guides at all-guides.com Installing the Projector Controls and Features Installing Batteries Precautions for Installation Install batteries in the remote control. If the remote control has started to work erratically, replace the CAUTIONS batteries. 1. Before installation, do not connect the projector’s power cord. 2. -
Page 9: Adjusting The Inclination Of The Projector
All manuals and user guides at all-guides.com Installing the Projector Installing the Projector Installing the Projector against the Screen Adjusting the Inclination of the Projector The projector should be placed so that the center line of the lens is at a right angle to the screen as shown in the following The vertical angle and the leveling of the projector can be adjusted with the adjustable feet at the bottom of the projector. -
Page 10: Projection Distance And Screen Size
All manuals and user guides at all-guides.com Installing the Projector Installing the Projector Projection Distance and Screen Size Setting the Amount of Lens Shifting • The range of projection distances that can be focused depends on the lens unit (optional) to be used. When the aspect ratio When the lens unit (optional) with the lens shifting function is used, the projected screen can be shifted up and down in of the screen is 4:3, the range is as follows and you need to install the projector within this range. -
Page 11: Remote Control Unit
All manuals and user guides at all-guides.com Installing the Projector Installing the Projector Setting the Position Selecting Screw for Ceiling Mounting Effective Range and Distance of the Remote Control Unit When using the projector in an upside-down, ceiling-mounted position (inverted top-to-bottom and right-to-left), the “position The remote control unit can be used as either a wireless remote control unit or a wired one. -
Page 12: Connecting To Various Devices
All manuals and user guides at all-guides.com Connecting to Various Devices Connecting to Various Devices Before connection, be sure to turn off the projector and connected devices. Allowable input signals Read the manual which comes with each device thoroughly. Horizontal res- Vertical resolu- Horizontal fre- Vertical fre-... -
Page 13: Connecting To Video Devices
All manuals and user guides at all-guides.com Connecting to Various Devices Connecting to Various Devices Connecting to Hi-Vision Devices/DVD Players Connecting to Video Devices Before connecting, be sure to turn off both the projector and Hi-Vision devices/DVD players. Before connection, be sure to turn off both the projector and video device. •... -
Page 14: Connecting To Other Devices
• Note type (Needs to be made) RS-232C reverse connection cable (separately available) * By directly connecting the OUT terminal to the second DLA-G150CLU IN terminal, a number of DLA-G150CLU To RS-232C connector units can be controlled by a single computer. Note... -
Page 15: Connecting To Computer Devices
All manuals and user guides at all-guides.com Connecting to Various Devices Connecting to Various Devices Connecting to DVI Connecting to Computer Devices Before connection, be sure to turn off both the projector and computer devices. Before connection, be sure to turn off both the projector and computer devices. •... -
Page 16: Connecting The Power Cord
All manuals and user guides at all-guides.com Basic Operations Connecting to Various Devices Connecting the Power Cord Lamp control settings After turning the power on, first perform the lamp control settings on the setting menu referring to “Setting and Adjusting Other After all devices have been finished being connected, connect the supplied power cord. -
Page 17: Turning On The Power
All manuals and user guides at all-guides.com Basic Operations Basic Operations Projector’s buttons Projector’s buttons The following describes the basic procedure for normal use 2. Select the Input source to be Projected of the projector. Press the VIDEO button or the PC button to switch the input. STAND BY indicator 1. -
Page 18: Adjust The Screen Size (Zooming)
All manuals and user guides at all-guides.com Basic Operations Basic Operations Projector’s buttons Projector’s buttons 3. Adjust the Screen Size (Zooming) Turning off Image (HIDE) How to adjust the projected screen size differs depending on Video image can be temporarily turned off. STAND BY STAND BY LAMP... -
Page 19: Quick Alignment Function (Quick Align.)
All manuals and user guides at all-guides.com Basic Operations Basic Operations Remote control unit Remote control unit Displaying a Still Picture (FREEZE) Quick Alignment Function (QUICK ALIGN.) While projecting an image, a still picture is obtained at any time by using the FREEZE button on the remote control. The Quick Alignment function automatically adjusts (sets) When you press the FREEZE button: the screen settings of the image input from the PC1, PC2 or... -
Page 20: Menu Operations
All manuals and user guides at all-guides.com Menu Operations Menu Operations You can adjust picture quality, set functions, get information on the input video signal, etc. using the menus. From the Menu Transition Diagram in Video Menu Mode following menu transition diagrams, you can see the overall menus and basic button operation in menu mode. Note that there Main menu in Video Menu Mode Submenus in Video Menu Mode are three menu modes, No signal menu mode, video menu mode and PC menu mode. - Page 21 All manuals and user guides at all-guides.com Menu Operations Menu Operations Menu Transition Diagram in PC Menu Mode Quick Reference Guide for Video Menu Mode Main menu in PC Menu Mode Submenus in PC Menu Mode Main Menu in Video Menu Mode (While receiving video-device-related signals) →...
-
Page 22: Basic Menu Operation
All manuals and user guides at all-guides.com Menu Operations Menu Operations Quick Reference Guide for PC Menu Mode Basic Menu Operation Main Menu in PC Menu Mode (While receiving computer-related signals) Image adj. → (Refer to page 49) When the MENU button is pressed, the projector enters Video or PC menu mode by responding to the input signal being received. -
Page 23: Changing The Color System (Video Menu Mode Only)
All manuals and user guides at all-guides.com Menu Operations Menu Operations Changing the Color System (Video Menu Mode Only) Basic Menu Operation (Cont.) This function is available only in Video menu mode. Basic Button Functions in the Menu Mode The menu is only displayed when there is a signal for the AV IN (Y/C, VIDEO and COMP) terminal. Normally, use the color system in AUTO. -
Page 24: Changing The Language Display
All manuals and user guides at all-guides.com Menu Operations Menu Operations Changing the Language Display Adjusting Tracking/Phase The on-screen language is set to “English” when shipped from the factory. When you want to change to another language, set Normally, tracking and phase adjustments are automatically carried out when a video signal is input to the projector for the it as follows. -
Page 25: (Video Menu Mode Only)
All manuals and user guides at all-guides.com Menu Operations Menu Operations Adjusting Picture Quality Set up for Watching Image Software (Video Menu Mode Only) In the “Image adj.” submenu, adjust brightness, contrast, sharpness, etc. to obtain the desired picture quality. Note that the This unit has a function which allows you to project movies, which were recorded on film, in the best possible conditions. -
Page 26: Adjusting Color Temperature
All manuals and user guides at all-guides.com Menu Operations Menu Operations Adjusting the Video Screen/Menu Position Image adj. The position of the video screen and the menu on the video screen can be adjusted. You can finely adjust the video screen position. -
Page 27: Changing The Image Gamma/Aspect Ratio (Video Menu Mode Only)
All manuals and user guides at all-guides.com Menu Operations Menu Operations Changing the Image Size - Resize Function (PC Menu Mode Only) Changing the Image Gamma/Aspect Ratio (Video Menu Mode Only) The picture image projected can be selectable with the The image Gamma (Down, Cinema or Up) and the aspect ratio (4:3 or 16:9) are selectable in Video menu mode. -
Page 28: Setting And Adjusting Other Functions (Options)
All manuals and user guides at all-guides.com Menu Operations Menu Operations Setting and Adjusting Other Functions (OPTIONS) Adjustment item Button Adjustment content Various functions are provided as shown in the “Options 1” and “Options 2” submenus. You can set or adjust each function, as required. Sets whether to clear the menu display automatically or not. -
Page 29: Getting Information
All manuals and user guides at all-guides.com Replacing the Fuse Menu Operations A fuse is used to protect the power source of the projector. If the fuse is blown, replace it. When the power switch is turned on Getting Information but no power is supplied to the projector, check the fuse. -
Page 30: Replacing The Light-Source Lamp
“Lamp replacement” appears on the screen. 1900 hours * To cancel this message, press the EXIT button or display another Contact the store from where you purchased the projector or the JVC service center for details about purchasing menu. replacement lamps. - Page 31 All manuals and user guides at all-guides.com Replacing the Light-Source Lamp Replacing the Light-Source Lamp Be sure that the power cord is unplugged from the wall outlet. Insert the new light-source lamp fully Light-source lamp inside and fasten the screws. Remove the lamp-replacement opening Fasten the two screws with a flat-end screwdriver.
-
Page 32: Cleaning And Replacing The Filter Cover
All manuals and user guides at all-guides.com Cleaning and Replacing the Filter Cover Replacing the Light-Source Lamp Clean the filter regularly. If the filter is heavily stained and does not clean, or if it is damaged, replace the filter with a new filter. Resetting the Lamp Use Time Otherwise, dirt may get inside and appear on the screen, preventing you from fully enjoying the video image. -
Page 33: Troubleshooting
All manuals and user guides at all-guides.com Troubleshooting Troubleshooting Solutions to common problems related to your projector are described here. If none of the solutions presented here solves the Symptom Probable cause Corrective action Page problem, unplug the projector and consult an authorized dealer or Service Center. A part of image is •... -
Page 34: Warning Indication
All manuals and user guides at all-guides.com Warning Indication Warning Messages If something abnormal has occurred with the projector, the warning status will be indicated by the combination of lighting the The following shows the warning messages that can be displayed on the screen. When a warning message is displayed, take indicators on the control panel as shown in the following table. - Page 35 All manuals and user guides at all-guides.com Warning Messages Warning Messages Message Cause Corrective action Page Message Cause Corrective action Page Displayed when the lamp control • Arrange for a new lamp (lamp 44, 46 • When the DIGITAL ZOOM button •...
-
Page 36: Specifications
DLA-G150CLU All manuals and user guides at all-guides.com DLA-G150CLE Specifications Optical mechanism system ® • Projection method D-ILA (Direct Drive Image Light Amplifier) method (Reflective-type active-matrix method) 0.9" (2.3 cm) measured diagonally (1365 pixels × 1024 pixels) × 3 ®... - Page 37 DLA-G150CLU All manuals and user guides at all-guides.com DLA-G150CLE Specifications General • Power requirements 120 V AC, 50/60 Hz • Power consumption • Allowable operation 41°F to 95°F (+ 5°C to + 35°C) temperature • Allowable relative 20% to 80% (no condensation) humidity •...
-
Page 38: Outside Dimensions
All manuals and user guides at all-guides.com Specifications Specifications Outside dimensions Pin assignment (Specifications for terminals) Y/C terminal Unit: inch (mm) Pin number Signal name 20 (505) *1: Protrusion excluded GND (Y) *2: Lens excluded GND (C) RS-232C terminal Pin number Signal name Pin number Signal name... -
Page 39: Rs-232C External Control
All manuals and user guides at all-guides.com RS-232C external control RS-232C external control 2-3 Parameters used for the data format By connecting a computer to the RS-232C terminal, you can control the projector. Use a reverse connection cable as the RS- 232C connection cable. -
Page 40: Appendix
All manuals and user guides at all-guides.com Appendix Appendix For lens unit GL-M2920ZG (2 to 3:1): Relationship between Projection Distances and Projection Screen Sizes Approximate projection distance unit: ft (m) Notes Projection screen size For 4:3 aspect-ratio screens For 16:9 aspect-ration screens •... - Page 41 DLA-G150CLU All manuals and user guides at all-guides.com DLA-G150CLE PROJECTOR BEDIENUNGSANLEITUNG : PROJEKTOR MANUEL D’INSTRUCTIONS : PROJECTEUR MANUALE D’ISTRUZIONI : PROIETTORE MANUAL DE INSTRUCCIONES : PROYECTOR DLA-G150CLE INSTRUCTIONS QUICK ALIGN. OPERATE HIDE SCREEN SCREEN FREEZE VIDEO DIGITAL KEYSTONE ZOOM FOCUS...
- Page 42 All manuals and user guides at all-guides.com – This product should be operated only with the type of – When connecting other products such as VCR’s, and Thank you for purchasing this projector. Before using it, read and follow all instructions carefully to take full power source indicated on the label.
- Page 43 All manuals and user guides at all-guides.com Contents POWER CONNECTION (United Kingdom only) SAFETY PRECAUTIONS ....1 Setting for Watching Image Software WARNING (Video Menu Mode Only) ........48 The wire which is coloured green-and-yellow must be Do not cut off the main plug from this equipment. Contents ...........
-
Page 44: Accessories
All manuals and user guides at all-guides.com Accessories Controls and Features The following accessories are included with this projector. Check for them; if any item is missing, please Front Side / Top Surface / Right Side contact your dealer. Remote control unit (RM-M160G) Personal computer connection cable [approx. -
Page 45: Left-Hand Side / Rear Side
All manuals and user guides at all-guides.com Controls and Features Controls and Features Bottom Surface Left-hand Side / Rear Side t Air inlet (filter) Air is taken in through the filter to cool the light-source p Connector panel lamp. If the filter is blocked or if something that obstructs For details, refer to “Connector Panel”... -
Page 46: Control Panel On The Projector
All manuals and user guides at all-guides.com Controls and Features Controls and Features Control Panel on the Projector 9 EXIT button This button will be used in the menu mode to return to the previous menu. When the main menu is displayed, this button will cause the menu to disappear. -
Page 47: Connector Panel
All manuals and user guides at all-guides.com Controls and Features Controls and Features Remote Control Unit Connector Panel 5 VIDEO button On the remote control, the same buttons as on the control panel of the projector are provided except for the following Use this button to select a device such as a video deck buttons. -
Page 48: Installing Batteries
All manuals and user guides at all-guides.com Controls and Features Controls and Features r DIGITAL ZOOM T/W buttons Installing Batteries A part of image can be magnified up to four times on the screen. Install batteries in the remote control. If the remote control has started to work erratically, replace the Each time the T or W button is pressed, the image is batteries. -
Page 49: Installing The Projector
All manuals and user guides at all-guides.com Installing the Projector Installing the Projector Adjusting the Inclination of the Projector Precautions for Installation The vertical angle and the leveling of the projector can be adjusted with the adjustable feet at the bottom of the projector. CAUTIONS 1. -
Page 50: Installing The Projector Against The Screen
All manuals and user guides at all-guides.com Installing the Projector Installing the Projector Installing the Projector against the Screen Projection Distance and Screen Size The projector should be placed so that the center line of the lens is at a right angle to the screen as shown in the following •... -
Page 51: Setting The Amount Of Lens Shifting
All manuals and user guides at all-guides.com Installing the Projector Installing the Projector Effective Range and Distance of the Remote Control Unit Setting the Amount of Lens Shifting The remote control unit can be used as either a wireless remote control unit or a wired one. When the lens unit (optional) with the lens shifting function is used, the projected screen can be shifted up and down in position. -
Page 52: Setting The Position Selecting Screw For Ceiling Mounting
All manuals and user guides at all-guides.com Connecting to Various Devices Installing the Projector Setting the Position Selecting Screw for Ceiling Mounting Before connection, be sure to turn off the projector and connected devices. Read the manual which comes with each device thoroughly. When using the projector in an upside-down, ceiling-mounted position (inverted top-to-bottom and right-to-left), the “position selecting screw for ceiling mounting”... -
Page 53: Connecting To Video Devices
All manuals and user guides at all-guides.com Connecting to Various Devices Connecting to Various Devices Connecting to Video Devices Allowable input signals Horizontal res- Vertical resolu- Horizontal fre- Vertical fre- Before connection, be sure to turn off both the projector and video device. Signal olution tion... -
Page 54: Connecting To Hi-Vision Devices/Dvd Players
All manuals and user guides at all-guides.com Connecting to Various Devices Connecting to Various Devices Connecting to Hi-Vision Devices/DVD Players Connecting to Other Devices Before connecting, be sure to turn off both the projector and Hi-Vision devices/DVD players. Before connection, be sure to turn off both the projector and other devices to be connected. •... -
Page 55: Connecting To Devices Which Control The Projector
All manuals and user guides at all-guides.com Connecting to Various Devices Connecting to Various Devices Connecting to Computer Devices Connecting to Devices which Control the Projector Before connection, be sure to turn off both the projector and computer devices. Before connection, be sure to turn off both the projector and devices to be connected. •... -
Page 56: Connecting To Dvi
All manuals and user guides at all-guides.com Connecting to Various Devices Connecting to Various Devices Connecting to DVI Connecting the Power Cord Before connection, be sure to turn off both the projector and computer devices. After all devices have been finished being connected, connect the supplied power cord. At this time, do not yet turn on the •... -
Page 57: Basic Operations
All manuals and user guides at all-guides.com Basic Operations Basic Operations Projector’s buttons The following describes the basic procedure for normal use Lamp control settings of the projector. After turning the power on, first perform the lamp control settings on the setting menu referring to “Setting and Adjusting Other STAND BY indicator 1. -
Page 58: Select The Input Source To Be Projected
All manuals and user guides at all-guides.com Basic Operations Basic Operations Projector’s buttons Projector’s buttons 2. Select the Input source to be Projected 3. Adjust the Screen Size (Zooming) Press the VIDEO button or the PC button to switch the input. How to adjust the projected screen size differs depending on STAND BY •... -
Page 59: Turning Off Image (Hide)
All manuals and user guides at all-guides.com Basic Operations Basic Operations Remote control unit Projector’s buttons Quick Alignment Function Turning off Image (HIDE) (QUICK ALIGN.) Video image can be temporarily turned off. STAND BY LAMP TEMP The Quick Alignment function automatically adjusts (sets) OPERATE Press the HIDE button once: HIDE... -
Page 60: Displaying A Still Picture (Freeze)
All manuals and user guides at all-guides.com Menu Operations Basic Operations You can adjust picture quality, set functions, get information on the input video signal, etc. using the menus. From the Remote control unit Displaying a Still Picture (FREEZE) following menu transition diagrams, you can see the overall menus and basic button operation in menu mode. Note that there are three menu modes, No signal menu mode, video menu mode and PC menu mode. -
Page 61: Menu Operations
All manuals and user guides at all-guides.com Menu Operations Menu Operations Menu Transition Diagram in Video Menu Mode Quick Reference Guide for Video Menu Mode Main menu in Video Menu Mode Submenus in Video Menu Mode Main Menu in Video Menu Mode (While receiving video-device-related signals) →... - Page 62 All manuals and user guides at all-guides.com Menu Operations Menu Operations Menu Transition Diagram in PC Menu Mode Quick Reference Guide for PC Menu Mode Main Menu in PC Menu Mode (While receiving computer-related signals) Main menu in PC Menu Mode Submenus in PC Menu Mode Image adj.
-
Page 63: Basic Menu Operation
All manuals and user guides at all-guides.com Menu Operations Menu Operations Basic Menu Operation (Cont.) Basic Menu Operation Basic Button Functions in the Menu Mode When the MENU button is pressed, the projector enters Video or PC menu mode by responding to the input signal being received. -
Page 64: Changing The Color System (Video Menu Mode Only)
All manuals and user guides at all-guides.com Menu Operations Menu Operations Changing the Color System (Video Menu Mode Only) Changing the Language Display This function is available only in Video menu mode. The on-screen language is set to “English” when shipped from the factory. When you want to change to another language, set The menu is only displayed when there is a signal for the AV IN (Y/C, VIDEO and COMP) terminal. -
Page 65: Adjusting Tracking/Phase
All manuals and user guides at all-guides.com Menu Operations Menu Operations Set up for Watching Image Software (Video Menu Mode Only) Adjusting Tracking/Phase This unit has a function which allows you to project movies, which were recorded on film, in the best possible conditions. Normally, tracking and phase adjustments are automatically carried out when a video signal is input to the projector for the (Function to convert 2-3 pull-down interlace scans to progressive scans) first time, or when the QUICK ALIGN. -
Page 66: (Video Menu Mode Only)
All manuals and user guides at all-guides.com Menu Operations Menu Operations Adjusting Picture Quality Image adj. In the “Image adj.” submenu, adjust brightness, contrast, sharpness, etc. to obtain the desired picture quality. Note that the adjustment items differ in Video menu mode and PC menu mode. All reset? Press the MENU button. -
Page 67: Adjusting The Video Screen/Menu Position
All manuals and user guides at all-guides.com Menu Operations Menu Operations Changing the Image Gamma/Aspect Ratio (Video Menu Mode Only) Adjusting the Video Screen/Menu Position The image Gamma (Down, Cinema or Up) and the aspect ratio (4:3 or 16:9) are selectable in Video menu mode. The position of the video screen and the menu on the video screen can be adjusted. -
Page 68: Changing The Image Size - Resize Function (Pc Menu Mode Only)
All manuals and user guides at all-guides.com Menu Operations Menu Operations Changing the Image Size - Resize Function (PC Menu Mode Only) Setting and Adjusting Other Functions (OPTIONS) The picture image projected can be selectable with the Various functions are provided as shown in the “Options 1” and “Options 2” submenus. Press the MENU button. -
Page 69: Getting Information
All manuals and user guides at all-guides.com Menu Operations Menu Operations Getting Information Adjustment item Button Adjustment content You can get information on the input signal, accumulated used hours of light-source lamp, etc. Sets whether to clear the menu display automatically or not. 2 or 3 Menu display 15sec* : Clears the display automatically in about 15 seconds. -
Page 70: Replacing The Fuse
(Refer to page 40, 42.) place the MAIN POWER switch of OFF [ ] position. Contact the store from where you purchased the projector or the JVC service center for details about purchasing Loosen the fuse holder to remove it. - Page 71 All manuals and user guides at all-guides.com Replacing the Light-Source Lamp Replacing the Light-Source Lamp Be sure that the power cord is unplugged from the wall outlet. Projecting after the lamp has been used for more than 1000 hours (LIGHT OUTPUT CONTROL MODE) (LAMP POWER CONTROL MODE) Remove the lamp-replacement opening Accumulated used hours...
- Page 72 All manuals and user guides at all-guides.com Replacing the Light-Source Lamp Replacing the Light-Source Lamp Resetting the Lamp Use Time Insert the new light-source lamp fully Light-source lamp inside and fasten the screws. After replacing with a new light-source lamp, reset the lamp-time counter inside the projector to clear the accumulated lamp time to zero (0).
-
Page 73: Cleaning And Replacing The Filter Cover
All manuals and user guides at all-guides.com Troubleshooting Cleaning and Replacing the Filter Cover Solutions to common problems related to your projector are described here. If none of the solutions presented here solves the Clean the filter regularly. If the filter is heavily stained and does not clean, or if it is damaged, replace the filter with a new filter. problem, unplug the projector and consult an authorized dealer or Service Center. -
Page 74: Troubleshooting
All manuals and user guides at all-guides.com Warning Indication Troubleshooting If something abnormal has occurred with the projector, the warning status will be indicated by the combination of lighting the Symptom Probable cause Corrective action Page indicators on the control panel as shown in the following table. Then, the projector automatically stops projection and runs the A part of image is •... -
Page 75: Warning Messages
All manuals and user guides at all-guides.com Warning Messages Warning Messages The following shows the warning messages that can be displayed on the screen. When a warning message is displayed, take Message Cause Corrective action Page the corrective action described here. •... -
Page 76: Specifications
All manuals and user guides at all-guides.com Specifications Warning Messages Message Cause Corrective action Page Optical mechanism system Displayed when the lamp control • Arrange for a new lamp (lamp 44, 46 ® • Projection method D-ILA (Direct Drive Image Light Amplifier) method setting is set to LIGHT OUTPUT unit) or replace the lamp early. -
Page 77: Outside Dimensions
All manuals and user guides at all-guides.com Specifications Specifications Outside dimensions General • Power requirements 200 V - 240 V AC, 50/60 Hz • Power consumption • Allowable operation + 5°C to + 35°C Unit: mm temperature *1: Protrusion excluded •... -
Page 78: Pin Assignment (Specifications For Terminals)
All manuals and user guides at all-guides.com RS-232C external control Specifications Pin assignment (Specifications for terminals) By connecting a computer to the RS-232C terminal, you can control the projector. Use a reverse connection cable as the RS- 232C connection cable. The commands to control the projector and the response data against the received commands are explained here. -
Page 79: Appendix
All manuals and user guides at all-guides.com Appendix RS-232C external control 2-3 Parameters used for the data format Relationship between Projection Distances and Projection Screen Sizes The following three kinds of parameters are prepared for the control command and response data. Notes •... - Page 80 All manuals and user guides at all-guides.com Appendix For lens unit GL-M2920ZG (2 to 3:1): Approximate projection distance unit: ft (m) Projection screen size For 4:3 aspect-ratio screens For 16:9 aspect-ration screens (Diagonal length) Wide end Tele end Wide end Tele end 40"...
Need help?
Do you have a question about the DLA-G150CLU and is the answer not in the manual?
Questions and answers