Table of Contents
Advertisement
Advertisement
Table of Contents

Related Manuals for Electrolux COP801X


Summary of Contents for Electrolux COP801X
- Page 1 CKP800X COP801X Oven User Manual...
-
Page 2: Table Of Contents
WE’RE THINKING OF YOU Thank you for purchasing an Electrolux appliance. You’ve chosen a product that brings with it decades of professional experience and innovation. Ingenious and stylish, it has been designed with you in mind. So whenever you use it, you can be safe in the knowledge that you’ll get great results every time. -
Page 3: Safety Information
SAFETY INFORMATION 8. CLOCK FUNCTIONS.........21 12.2 How to remove: Shelf supports ...30 12.3 How to use: Pyrolytic Cleaning..31 8.1 Clock functions......21 12.4 Cleaning Reminder...... 32 8.2 How to set: Clock functions... 21 12.5 How to remove and install: Door..32 9. -
Page 4: General Safety
SAFETY INFORMATION Children should be supervised to ensure that they do not • play with the appliance. Keep all packaging away from children and dispose of it • appropriately. WARNING: Keep children and pets away from the appliance • when it operates or when it cools down. Accessible parts become hot during use. -
Page 5: Safety Instructions
SAFETY INSTRUCTIONS Do not use a steam cleaner to clean the appliance. • Do not use harsh abrasive cleaners or sharp metal scrapers • to clean the glass door since they can scratch the surface, which may result in shattering of the glass. Before pyrolytic cleaning, remove all accessories and •... -
Page 6: Electrical Connection
SAFETY INSTRUCTIONS Depth with open door 1022 mm Ventilation opening minimum size. Opening placed 560x20 mm on the bottom rear side Mains supply cable length. Cable is placed in the 1500 mm right corner of the back side Mounting screws 4x25 mm 2.2 Electrical connection WARNING! -
Page 7: Use
SAFETY INSTRUCTIONS Total power (W) Section of the cable (mm²) maximum 1380 3 x 0.75 maximum 2300 3 x 1 maximum 3680 3 x 1.5 The earth cord (green / yellow cable) must be 2 cm longer than phase and neutral cables (blue and brown cables). -
Page 8: Care And Cleaning
SAFETY INSTRUCTIONS • If the appliance is installed behind a furniture panel (e.g. a door) make sure the door is never closed when the appliance operates. Heat and moisture can build up behind a closed furniture panel and cause subsequent damage to the appliance, the housing unit or the floor. Do not close the furniture panel until the appliance has cooled down completely after use. -
Page 9: Internal Lighting
• Cut off the mains electrical cable close to the appliance and dispose of it. • Remove the door catch to prevent children or pets from becoming trapped in the appliance. 3. INSTALLATION WARNING! Refer to Safety chapters. 3.1 Building in www.youtube.com/electrolux www.youtube.com/aeg How to install your AEG/Electrolux Oven - Column installation 9/40... -
Page 10: Securing The Oven To The Cabinet
INSTALLATION (*mm) min. 550 min. 560 (*mm) min. 550 min. 560 3.2 Securing the oven to the cabinet 10/40... -
Page 11: Product Description
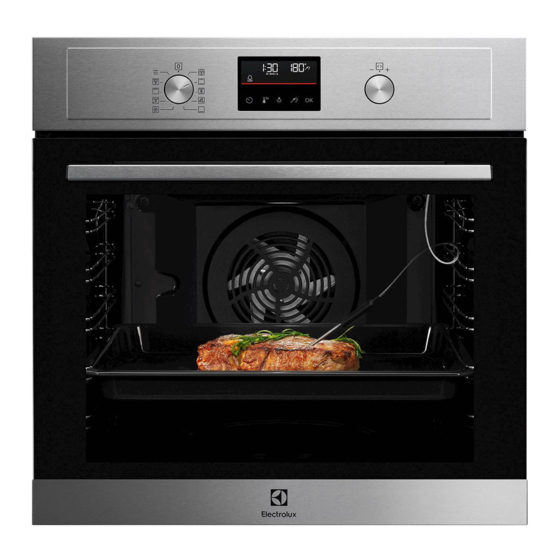
PRODUCT DESCRIPTION 4. PRODUCT DESCRIPTION 4.1 General overview Control panel Knob for the heating functions Display Control knob Heating element Lamp Shelf support, removable Shelf positions 4.2 Accessories • Wire shelf For cookware, cake tins, roasts. • Baking tray For cakes and biscuits. •... -
Page 12: Control Panel
HOW TO TURN OVEN ON AND OFF 5.2 Control panel Control panel sensor fields Press Turn the knob Fast Heat Timer Light Food Sensor Select a heating function to turn on the oven. Turn the knob for the heating functions to the off position to turn the oven off. When the knob for the heating functions is in the off position, the display goes to standby. -
Page 13: Before First Use
BEFORE FIRST USE Food sensor indicator 6. BEFORE FIRST USE WARNING! Refer to Safety chapters. 6.1 Initial cleaning Before the first use clean the empty oven and set the time: 00:00 Set the time. Press 6.2 Initial preheating Preheat the empty oven before the first use. Step 1 Remove all accessories and removable shelf supports from the oven. -
Page 14: How To Set: Heating Functions
DAILY USE 7.1 How to set: Heating functions Start cooking Step 1 Step 2 Set a heating function. Set the temperature. 7.2 Heating functions Standard heating functions Heating function Application To bake on up to three shelf positions at the same time and to dry food. Set the temperature 20 - 40 °C lower than for Conventional Cooking. -
Page 15: Notes On: Moist Fan Baking
DAILY USE Heating function Application To defrost food (vegetables and fruit). The defrosting time depends on the amount and size of the frozen food. Defrost This function is designed to save energy during cooking. When you use this function, the temperature in the cavity may differ from the set temper‐ ature. -
Page 16: Assisted Cooking With Recipes
DAILY USE Assisted Cooking - use it to prepare a dish quickly with default settings: Step 1 Step 2 Step 3 Step 4 1 - 45 Enter the menu. Select Assisted Select the dish. Press Insert the dish to the oven. - Page 17 DAILY USE Dish Weight Shelf level / Accessory Duration time Steak, medi‐ 180 - 220 g ~ 15 min 3; roasting dish on wire shelf per piece; 3 Fry the meat for a few minutes on a hot cm thick sli‐ pan.
- Page 18 DAILY USE Dish Weight Shelf level / Accessory Duration time Pulled pork 1,5 - 2 kg ~ 215 min 2; baking tray Use your favourite spices. Turn the meat after half of the cooking time to get an even browning. Loin, fresh 1 - 1,5 kg;...
- Page 19 DAILY USE Dish Weight Shelf level / Accessory Duration time Duck, whole 2 - 3 kg ~ 100 min 2; roasting dish on wire shelf Use your favourite spices. Put the meat on roasting dish. Turn the duck after half of the cooking time.
- Page 20 DAILY USE Dish Weight Shelf level / Accessory Duration time Loaf cake 50 min 2; loaf pan on wire shelf Vegetable / Side dishes Baked pota‐ 1 kg 50 min 2; baking tray toes Put the whole potatoes with skin on bak‐ ing tray.
-
Page 21: Clock Functions
CLOCK FUNCTIONS Dish Weight Shelf level / Accessory Duration time Baguette / 0,8 kg 30 min 3; baking tray lined with baking Ciabatta / paper White bread More time needed for white bread. All grain / 1 kg 60 min 2;... - Page 22 CLOCK FUNCTIONS How to set: Minute minder Step 1 Step 2 Step 3 The display shows: 0:00 Set the Minute minder Press: Press: Timer starts counting down immediately. How to set: Cooking time Step 1 Step 2 Step 3 Step 4 The display shows: 0:00...
-
Page 23: How To Use: Accessories
HOW TO USE: ACCESSORIES 9. HOW TO USE: ACCESSORIES 9.1 Inserting accessories A small indentation at the top increases safety. The indentations are also anti-tip devices. The high rim around the shelf prevents cookware from slipping of the shelf. Wire shelf: Push the shelf between the guide bars of the shelf support and make sure that the feet point down. - Page 24 HOW TO USE: ACCESSORIES There are two temperatures to be set: The oven temperature. The core temperature. For the best cooking results: Ingredients should be at Do not use it for liquid During cooking it must remain in room temperature. dishes.
-
Page 25: Additional Functions
ADDITIONAL FUNCTIONS Step 5 - press to set the core temperature of the sensor. Step 6 - press to confirm. When food reaches the set temperature, the signal sounds. You can choose to stop or to continue cooking to make sure the food is well done. Step 7 Remove Food Sensor plug from the socket and remove the dish from the oven. -
Page 26: Cooling Fan
HINTS AND TIPS The Automatic switch-off does not work with the functions: Light, Food sensor, Time Delay. 10.3 Cooling fan When the oven operates, the cooling fan turns on automatically to keep the surfaces of the oven cool. If you turn off the oven, the cooling fan can continue to operate until the oven cools down. -
Page 27: Moist Fan Baking - Recommended Accessories
HINTS AND TIPS (°C) (min) Poached meat, baking tray or dripping 35 - 45 0.25 kg Shashlik, 0.5 kg baking tray or dripping 25 - 30 Cookies, 16 baking tray or dripping 20 - 30 pieces Macaroons, 24 baking tray or dripping 25 - 35 pieces Muffins, 12... -
Page 28: Cooking Tables For Test Institutes
HINTS AND TIPS Ramekins Pizza pan Baking dish Flan base tin Ceramic Dark, non-reflective Dark, non-reflective Dark, non-reflective 8 cm diameter, 28 cm diameter 26 cm diameter 28 cm diameter 5 cm height 11.3 Cooking tables for test institutes Information for test institutes Tests according to IEC 60350-1. - Page 29 HINTS AND TIPS (°C) (min) Sponge Conven‐ Wire shelf 40 - 50 Preheat the oven cake, tional for 10 minutes. cake Cooking mould Ø26 cm Sponge True Fan Wire shelf 40 - 50 Preheat the oven cake, Cooking for 10 minutes. cake mould Ø26 cm...
-
Page 30: Care And Cleaning
CARE AND CLEANING 12. CARE AND CLEANING WARNING! Refer to Safety chapters. 12.1 Notes on cleaning Clean the front of the oven with a soft cloth with warm water and a mild deter‐ gent. Use a cleaning solution to clean metal surfaces. Cleaning Clean stains with a mild detergent. -
Page 31: How To Use: Pyrolytic Cleaning
CARE AND CLEANING Step 3 Pull the rear end of the shelf support away from the side wall and remove it. Step 4 Install the shelf supports in the opposite sequence. 12.3 How to use: Pyrolytic Cleaning Clean the oven with Pyrolytic Cleaning. WARNING! There is a risk of burns. -
Page 32: Cleaning Reminder
CARE AND CLEANING Pyrolytic Cleaning During the cleaning the oven lamp is off. When the oven is at the set temperature, the door locks. Until the door unlocks the display shows: When the cleaning ends: Turn off the oven and wait Clean the cavity with a soft Remove the residue from the until it is cold. - Page 33 CARE AND CLEANING Step 3 Close the oven door halfway to the first opening position. Then lift and pull forward and remove the door from its seat. Step 4 Put the door on a soft cloth on a sta‐ ble surface. Step 5 Hold the door trim (B) on the top edge of the door at the two sides and push...
-
Page 34: How To Replace: Lamp
CARE AND CLEANING Make sure that you put the glass panels (A and B) back in the correct sequence. Check for the symbol / printing on the side of the glass panel, each of the glass panels looks different to make the disassembly and as‐ sembly easier. -
Page 35: Troubleshooting
TROUBLESHOOTING 13. TROUBLESHOOTING WARNING! Refer to Safety chapters. 13.1 What to do if... In any cases not included in this table please contact with an Authorised Service Centre. The oven does not turn on or does not heat up Problem Check if... -
Page 36: Service Data
......... 14. ENERGY EFFICIENCY 14.1 Product Information and Product Information Sheet* Supplier's name Electrolux CKP800X 949498459 Model identification COP801X 949498460 Energy Efficiency Index 81.2 Energy efficiency class Energy consumption with a standard load, conventional 0.93 kWh/cycle mode Energy consumption with a standard load, fan-forced 0.69 kWh/cycle... -
Page 37: Energy Saving
Type of oven Built-In Oven CKP800X 32.6 kg Mass COP801X 32.7 kg * For European Union according to EU Regulations 65/2014 and 66/2014. For Republic of Belarus according to STB 2478-2017, Appendix G; STB 2477-2017, Annexes A and B. For Ukraine according to 568/32020. -
Page 38: Menu Structure
MENU STRUCTURE 15. MENU STRUCTURE 15.1 Menu - select to enter the Menu. Step 1 Step 2 Step 3 Step 4 Step 5 O1 - O12 Adjust the value Select the Menu, Select the set‐ Confirm setting. Confirm setting. Settings. ting. - Page 39 39/40...
- Page 40 www.electrolux.com/shop...
Need help?
Do you have a question about the COP801X and is the answer not in the manual?
Questions and answers