Table of Contents
Advertisement
Quick Links
Advertisement
Table of Contents

Related Manuals for LG AS10GDPB0


Summary of Contents for LG AS10GDPB0
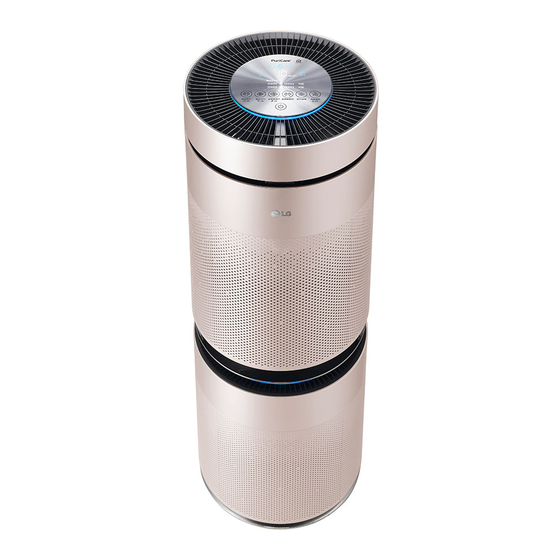
- Page 1 Owner's Manual Air Purifier read this owner’s manual thoroughly before operating the appliance and keep it handy for reference at all times. Model name : as10GD series MFl70445410 www.lg.com rev.02_020520 Copyright © 2019 - 2020 lG electronics Inc. all rights reserved.
-
Page 3: Table Of Contents
Clean Booster Fan speed ..............23 rotating the Clean Booster ....23 Checking the air Quality .......24 using the air Ionizer ......27 setting the sleep Timer ......28 locking the Control Panel Buttons ..28 SMArT fuNCTiONS ....29 lG ThinQ application ......29 smart Diagnosis ........31... -
Page 4: Safety Instructions
SAfeTY iNSTruCTiONS The following safety guidelines are intended to prevent unforeseen risks or damage from unsafe or incorrect operation of the appliance. The guidelines are separated into ‘WArNiNG’ and ‘CAuTiON’ as described below. This symbol is displayed to indicate matters and operations that can cause risk. - Page 5 Operation • If the appliance is immersed in water, stop using it and contact the lG electronics service centre. • If there is a gas leakage (isobutane, propane, lnG, etc.), do not touch the product or power plug and ventilate the area...
- Page 6 • If you detect any abnormal noise, odour or smoke, unplug the product immediately and contact an lG electronics service centre. • Only an authorized repair person from lG electronics service centre should disassemble, repair, or modify the appliance. • Do not use or store fire, combustibles (ether, benzene, alcohol, drugs, propane, butane, combustible spray, insecticide, air freshener, cosmetics etc.) or flammable...
- Page 7 Battery • a button/coin-shaped battery is used in the remote controller of the appliance. If you accidentally swallowed the battery, go to the doctor immediately for emergency treatment. If you fail to receive first aid within 2 hours after you swallowed it, you may experience damage to your internal organs or death in severe cases.
- Page 8 Operation • Do not use the product for removal of toxic gas such as carbon monoxide. • Do not use the product for ventilation purposes. • Do not use the appliance for a long time in a region with unstable voltage. •...
- Page 9 • Do not insert hands or metal objects into the moving part of the Clean Booster. • Do not press multiple buttons at the same time on the remote controller. • Do not kick or step on the remote controller. •...
-
Page 10: Installation
iNSTALLATiON Parts Air Purifier Owner’s Manual remote Controller / Owner’s Manual Battery (Cr2025, 1 unit) • The appearance or components of the appliance may differ depending on the model. • The shape of the power plug differs depending on the country. -
Page 11: Removing Packing Materials
removing Packing Remove the support located at the fi lter inlet. Materials • Upper fi lter inlet: 1 support unpack the appliance and remove any • Lower fi lter inlet: 1 support packing tape or vinyl before using the appliance. Pull out the appliance from the packaging and remove the fi xing tape support... -
Page 12: Remote Controller
remote Controller Insert the fi xing parts at the bottom of the cover into the holes at the bottom inserting Battery of the appliance before you close the cover. with the backside of the remote controller facing up, remove the battery tray from the remote controller. -
Page 13: Transporting Or Moving The Appliance
Transporting or Moving the installing the Appliance Appliance Install the appliance on a strong level surface. Installing the appliance on a weak Transport the appliance in a well-secured or tilted surface may cause noise and and upright position. Impacts may cause vibration or tipping, resulting in injury. -
Page 14: Operation
OPerATiON Appliance Overview front View Clean booster upper part of the air purifier Lower part of the air purifier upper air outlet/Clean booster Lower air inlet (bottom cover) • It discharges purified air through air goes into the lower part of the the upper filter. - Page 15 Back View Smart Diagnosis Part Odour (Gas) Sensor In the event of a malfunction or failure, It detects a odour (gas). you can use the smart Diagnosis option to check the appliance filter condition. It minimizes allergic materials, fine particles, possible sources of sick house syndrome, smog and other PM1.0 (particles with a diameter odour.
- Page 16 filter System NOTe Deodorizing Care filter • Keep the windows or doors closed while It minimizes harmful odour (gas) that using the product. However, if you operate are generated in everyday life such the product for a long time in a closed as bathroom smell, cigarette smoke space, carbon dioxide concentration may (smell) and food smell.
- Page 17 Control Panel Start/Stop Button Booster Speed Button You can start or stop the operation. It allows you to adjust the air flow of the clean booster. Mode Button • Press and hold it for 3 seconds or more to turn on or off the air ionizer. use it to set the operation mode.
- Page 18 Speed: Displays the air purifier's It turns on when the reservation for air flow. turning on/off the appliance is set in the lG ThinQ application. Booster speed: Displays the clean booster's air flow. It turns on when the control panel is locked.
- Page 19 using remote Controller NOTe • To use the remote controller, direct the signal sending area of the remote controller toward the signal reception area of the appliance. • If you are away from the appliance (front) by more than 7 m, the remote controller may not work.
-
Page 20: Getting Started
(ready) on the status display panel. You can specify the sensor stabilization time in the 'air quality sensor start time' option in the lG ThinQ application. – 'always operate': You can check the air quality even when the product is not operated. -
Page 21: Using Booster Mode
using Booster Mode using Dual Mode The clean booster cleans the air and quickly It uses both the upper part and lower part sends it to a long distances to circulate the of the air purifier simultaneously to quickly indoor air. clean the indoor air. -
Page 22: Using Single Mode
using Single Mode Adjusting the Air Purifier fan Speed It cleans the indoor air using the lower part of the air purifier. You can adjust the air flow of the air purifier. Press the Mode button to choose Single Press the Speed button during the operation. mode. -
Page 23: Adjusting The Clean Booster Fan Speed
Adjusting the Clean rotating the Clean Booster Booster fan Speed The clean booster rotates left and right. while in Booster mode, press the Swing You can adjust the air flow of the clean button. booster. while in Booster mode, press the Booster Speed button. -
Page 24: Checking The Air Quality
– Differences in PM concentration values may be the result of different methods of measuring or differences in the actual PM concentration levels. – The PM concentration measurement was tested using lG electronics’ standard test materials. • The overall air quality level is a result of both PM concentration and the odour level. It may... - Page 25 Checking the Air Quality using Turning on/off the Light of air the Light of air quality quality You can press and hold the Mode button for Four different colors are used to indicate the overall air quality based on the particles 3 seconds or more to turn it on/off.
- Page 26 Checking Air Quality on the The above picture displays PM10/PM2.5/ PM1.0, meaning that the concentration of Status display panel particles with a diameter between 1.0 and 2.5 micrometers is higher than those of coarse You may check the overall air quality, particles and fine particles.
-
Page 27: Using The Air Ionizer
using the Air ionizer NOTe • The overall air quality level is a result of To generate ions to minimize various bacteria both PM concentration and the odour from the air. level. It may differ from the PM10, PM2.5 and PM1.0 concentration levels. Press the Booster Speed button for more than 3 seconds while operating. -
Page 28: Setting The Sleep Timer
Setting the Sleep Timer Locking the Control Panel Buttons You can set the appliance to stop automatically after running for the duration You can lock the buttons on the Control you set. Panel to prevent the appliance from Press the Sleep Timer button during the operating due to unforeseen reasons, such operation. -
Page 29: Smart Functions
• Functions may vary by model. • lG ThinQ is not responsible for any network connection problems or any faults, Before using LG ThinQ malfunctions, or errors caused by network connection. - Page 30 20 cm between the product again. device and the body. installing the LG ThinQ Application search for the lG ThinQ application from the Google Play store or apple app store on a smartphone. Follow instructions to download and install the application.
-
Page 31: Smart Diagnosis
Fi equipped appliance, it can transmit troubleshooting data to a smartphone using the LG ThinQ application. • launch the LG ThinQ application and select the Smart Diagnosis feature in the menu. Follow the instructions provided in the LG ThinQ application. - Page 32 Press and hold the indicator button for 5 seconds or more to execute the smart Diagnosis function. Hold the phone on the logo on the back of the appliance. after the data transfer is complete, the diagnosis will be displayed in the application.
-
Page 33: Maintenance
• A filter is a consumable item. Therefore you must buy a new one for replacement when it has reached the end of its lifespan even during the warranty period. Contact the lG electronics service Centre or Consumables shop on the lG electronics site (www.lg.com). -
Page 34: Cleaning The Exterior
Cleaning the exterior CAuTiON • Do not disassemble the clean booster remove dust from the air inlet and arbitrarily. outlet using a vacuum cleaner. • Do not unscrew the 2 screws fixing the clean booster grille on the back while the product is running. -
Page 35: Cleaning The Filter
Cleaning the filter replacing the filter separate the cover from the appliance. remove the cover and replace the filter. Remove dust from the ultra-fine filter • To avoid polluting the surroundings with a vacuum cleaner or soft brush. when replacing the filter, place a newspaper on the floor before you remove the filter. -
Page 36: Cleaning The Particles Sensor
Cleaning the Particles Disabling a Lower filter replacement Alert Sensor Press and hold the indicator and Sleep PM1.0 sensor detects the fi ne particles as Timer buttons simultaneously for 3 seconds well as coarse particles. Therefore, you need or more. to clean its lens regularly. -
Page 37: Storage
Storage Close the sensor cover. If the appliance is not used for a long period of time, store it at a shaded and dry place. Operate the product in Dual mode for one hour or more on a fi ne day. •... -
Page 38: Troubleshooting
TrOuBLeSHOOTiNG If a failure occurs in the appliance, check the following before contacting the service Centre. Symptoms Cause Solution is the power plug The appliance does unplugged from the • Plug it into the outlet properly. not operate. outlet? Did dust accumulate in •... - Page 39 Symptoms Cause Solution • If the amount of the odour is more than the capacity of the product, the display may not Doesn’t the color change change. even if it is moved to a The Light of air • Clean the sensor area. clean room? quality continues to •...
- Page 40 Symptoms Cause Solution • The odour of activated charcoal is not harmful. This is Did you purchase the similar to the odour you may appliance lately? experience in a brand new car. we assure it will go way 1-2 weeks after its first use. •...
- Page 41 • Make sure that the levels of the PM1.0/PM2.5/PM10 are displayed consistently The particles between the lG ThinQ app concentration levels and your appliance. Are you looking at the are different between same particles? •...
-
Page 42: Appliance Specifications
APPLiANCe SPeCifiCATiONS Height Depth width The external appearance and dimensions of the appliance are subject to change without prior notice. Model as10GD series Power 220–240 V~ 50 / 60 Hz when the clean booster is not running: 376 mm x 1 073 mm x 376 mm exterior dimensions (Width X Height X Depth) when the clean booster is running:... - Page 43 MEMO...
- Page 44 MEMO...
- Page 45 MEMO...
- Page 46 MEMO...
Need help?
Do you have a question about the AS10GDPB0 and is the answer not in the manual?
Questions and answers