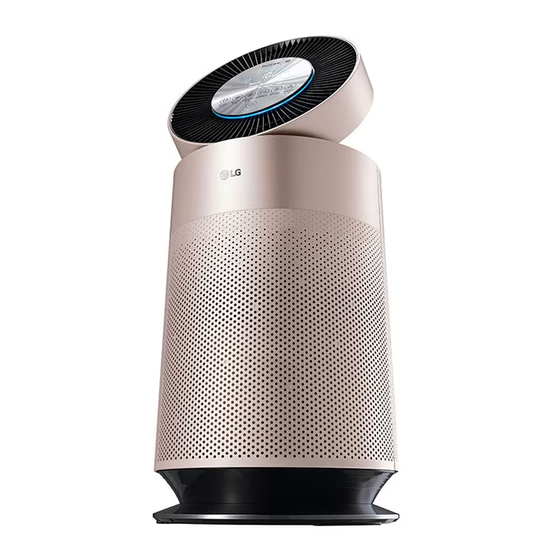
LG AS65GD Series Owner's Manual
Hide thumbs Also See for AS65GD Series:

Advertisement

Quick Links

OWNER'S MANUAL
AIR PURIFIER
For safe and easy use of the product please read the instruction
manual before use.
AS10GD Series
AS65GD Series
EN ENGLISH
MFL70445434
Rev.02_021821
Copyright © 2021 LG Electronics Inc. All rights reserved
www.lg.com

Advertisement

Table of Contents
loading

Summary of Contents for LG AS65GD Series

  • Page 1 OWNER’S MANUAL AIR PURIFIER For safe and easy use of the product please read the instruction manual before use. AS10GD Series AS65GD Series EN ENGLISH www.lg.com MFL70445434 Rev.02_021821 Copyright © 2021 LG Electronics Inc. All rights reserved...
  • Page 2: Table Of Contents

    Adjusting the Fan Speed .................18 Clean Booster Fan Speed ................18 Using the Extra Functions ................19 Checking the Air Quality ..................20 SMART FUNCTIONS ..............23 LG ThinQ Application ..................23 Smart Diagnosis ....................24 MAINTENANCE ................25 Maintaining the Product ..................25 Cleaning the Appliance ...................26 Maintaining the Filter ..................27...
  • Page 3: Safety Instructions

    SAFETY INSTRUCTIONS READ AND SAVE THESE INSTRUCTIONS The following safety guidelines are intended to prevent unforeseen risks or damage from unsafe or incorrect operation of the appliance. The guidelines are separated into ‘WARNING’ and ‘CAUTION’ as described below. This symbol is displayed to indicate matters and operations that can cause risk.
  • Page 4 Installation • Do not install the appliance on an uneven or inclined surface. • Do not install the appliance in an area exposed to direct sunlight or near heat-generating equipment. • Do not install the product in a place where combustible gas may leak or industrial oil or metallic particulates are present.
  • Page 5 Operation • If the appliance is immersed in water, stop using it and contact an LG Electronics Customer Information Center. • If there is a gas leakage (isobutane, propane, LNG, etc.), do not touch the product or power plug and ventilate the area immediately.
  • Page 6 Maintenance • Dispose of the packing materials (vinyl, styrofoam, etc.) to keep them out of reach of children. • Take care not to injure or pinch yourself when you detach and reattach parts of the appliance. • Turn off and unplug the appliance before cleaning it or replacing the filter.
  • Page 7 CAUTION To reduce the risk of minor injury to persons, malfunction, or damage to the product or property when using this product, follow basic precautions, including the following: Installation • Do not tilt the appliance to pull or push it when transporting. •...
  • Page 8 • Do not use the appliance while it is not in an upright position. • Do not use the appliance near objects vulnerable to heat. • Do not use detergents, cosmetics, chemicals, air fresheners, or disinfectants in the appliance. • Do not touch any internal parts while the unit is operating or immediately after operation.
  • Page 9 Battery • Do not modify the battery. • An improperly installed battery may cause an explosion. • Do not recharge or take apart the battery. • Do not dispose of the battery by placing it in a fire, or expose it to high temperatures.
  • Page 10: Installation

    INSTALLATION • The exterior or components of the product may vary depending on the model. Appliance Overview Front View Dual Model Single Model Air outlet (top) / Clean booster Bottom air inlet • Purified air from the filter is emitted. •...
  • Page 11 Rear View Dual Model Single Model Smart Diagnosis Panel Odor (Gas) sensor • When the product malfunctions or • It detects a odor (gas). breaks down, the product status can be checked through Smart Diagnosis. Filter • It eliminates fine particles, smog causing PM1.0 (particles with a diameter between materials, sickening home syndrome 1.0 and 2.5 micrometers) sensor...
  • Page 12: Unpacking The Appliance

    Unpacking the Appliance Filter system Unpack the appliance and remove all packing tape and filter vinyl before using the appliance. Hold the top of the rear cover of the product and pull it slightly to achieve separation. • ‘PM1.0&GAS SENSOR SYSTEM’ is marked on the rear cover of the product.
  • Page 13: Installation Location Requirements

    Installation Location Install the filter in the appliance. • Install it with the side where the handle is Requirements attached facing up. Install the appliance 1m away from a wall. • The air inlet needs sufficient space to function properly. Handle The performance of the appliance may vary depending on the service environment...
  • Page 14: Operation

    Sleep Timer Button hold the button for 3 seconds to control Allows you to use the Off Timer function. the appliance from the LG ThinQ • Pressing and holding it for 3 seconds or smartphone app. more locks or unlocks the control panel −...
  • Page 15: Status Display Panel

    It turns on when the Wi-Fi function booster’s fan speed. is activated. Sleep Timer Display It turns of when the On/Off Timer is set with the LG ThinQ application. It turns on when the control panel is locked. It turns on when the ionizer turns...
  • Page 16: Remote Controller

    Remote controller WARNING • This appliance, including the remote controller, is equipped with a button/coin type battery (CR2025). • Swallowing the battery may cause serious injury or death. If the battery is swallowed, immediately go to a hospital emergency room to see a doctor.
  • Page 17: Operation Starting

    Operation starting Smart Mode Operating mode and fan speed are adjusted Press the Start/Stop button to start the operation. automatically according to overall air quality. NOTE • When the appliance is operated in Smart mode, Speed, Booster Speed, and Swing buttons are not operated.
  • Page 18: Adjusting The Fan Speed

    Dual mode: Only for the relevant NOTE product • When the operation is started for the first time, Auto is set as the Speed. In Auto mode, the The product operates air purifiers at the top and Speed is adjusted automatically according to bottom simultaneously to purify indoor air quickly.
  • Page 19: Using The Extra Functions

    Using the Extra Functions NOTE • Speed is changed to the ‘Low’ level and adjusted automatically at regular intervals Using the Air Ionizer according to air quality. • Fan speed can be adjusted by pressing the To generate ions to minimize various bacteria from Speed button while the sleep timer is activated.
  • Page 20: Checking The Air Quality

    PM concentration values are based on the data Air quality light sheet provided by the sensor manufacturer. • The PM concentration measurement was tested using LG Electronics’ standard test materials. • Differences in PM concentration values may be the result of different methods of measuring...
  • Page 21 Checking the Particles You can turn the air quality light on or off by pressing Mode button for 3 seconds or longer Concestration during operation. You can check the concentration of particles in the air by measuring the size of dust particles. Press the Indicator button during operation.
  • Page 22 − The sensor may not detect particles larger than PM10 generated by activities such as dusting off blankets or cleaning, but they are removed by the filter. • The concentration of odors (gas) may vary due to items emitting odors such as air fresheners, deodorizers, detergents, or cosmetics.
  • Page 23: Smart Functions

    Allows you to set various options on the appliance provider or refer to your wireless router manual. and in the application. • LG ThinQ is not responsible for any network connection problems or any faults, NOTE malfunctions, or errors caused by network •...
  • Page 24: Smart Diagnosis

    Using LG ThinQ to Diagnose Issues Application If you experience a problem with your Wi-Fi Search for the LG ThinQ application from the equipped appliance, it can transmit troubleshooting Google Play Store or Apple App Store on a data to a smartphone using the LG ThinQ smartphone.
  • Page 25: Maintenance

    • The filter must be replaced at the end of its lifespan, and the cost of replacement filters is not covered under the warranty. To purchase new filters, contact an LG Electronics Customer Information Center or visit the website at www. lg.com •...
  • Page 26: Cleaning The Appliance

    Storage NOTE • If dust on the front and rear covers cannot be If the appliance is not used for a long period of removed, disassemble the covers and clean time, store it at a shaded and dry place. them with water. After cleaning, dry the covers thoroughly in the shade.
  • Page 27: Maintaining The Filter

    Maintaining the Filter CAUTION • Do not clean the filter with water. The service Cleaning the Filters life of the filter may be reduced. • Be careful not to damage the ultra-fine filter when using a vacuum cleaner. Separate the cover of the product. •...
  • Page 28 Replacing the filter NOTE • The filter replacement alert will be disabled automatically after 24 hours of the alert being Separate the cover from the product and displayed or the power supply to the appliance replace the filter. is cut off. •...
  • Page 29: Troubleshooting

    TROUBLESHOOTING Before Calling for Service Please check the following before you contact the service center. If the problem persists, contact your local service center. Operation Symptoms Possible Causes & Solution The power plug in unplugged from the outlet. The appliance does not operate.
  • Page 30 • Make sure that the levels of the PM1.0/PM2.5/PM10 are displayed levels are different consistently between the LG ThinQ app and your appliance. between the appliance • The LG ThinQ app may not update the sensor results as quickly as the and the LG ThinQ app. appliance display. Performance Symptoms Possible Causes &...
  • Page 31 The password for the Wi-Fi that you are trying to connect to is incorrect. • Find the Wi-Fi network connected to your smartphone and remove it, then connect your appliance in LG ThinQ. Mobile data for your smartphone is turned on.
  • Page 32: Appliance Specifications

    • Appearance and specifications may vary without notice to improve the quality of the appliance. Dual Model Single Model Name AS10GD Series, AS65GD Series Power AC 220 - 240 V~ 50 Hz Dual Model Exterior When Clean Booster is stopped: 376mm x 1073mm x 376mm...
  • Page 33 Memo...
  • Page 34 Memo...

This manual is also suitable for:

As10gd seriesAs65gdsh0As10gdwh0As10gdsh0As65gdwh0

Table of Contents