Advertisement
Quick Links
Models/Modelos/Modèles
65890LFsLHP
65890LF-ECOsLHP
Series/Series/Seria
RSVP
®
Write purchased model number here.
Escriba aquí el número del modelo comprado.
Inscrivez le numéro de modèle ici.
You may need / Usted puede necesitar / Articles dont vous pouvez avoir besoin:
For easy installation of your
Brizo
®
faucet you will need:
• To READ ALL the instructions completely
before beginning.
• To READ ALL warnings, care, and maintenance
information.
• To purchase the correct water supply hook-up.
Para instalación fácil de su llave
Brizo
®
usted necesitará:
• LEER TODAS las instrucciones completamente
antes de empezar.
• LEER TODOS los avisos, cuidados, e
información de mantenimiento.
• Comprar las conexiones correctas para el
suministro de agua.
Pour installer votre robinet
Brizo
®
facilement, vous devez:
• LIRE TOUTES les instructions avant
de débuter;
• LIRE TOUS les avertissements ainsi que toutes
les instructions de nettoyage et d'entretien;
• Acheter le bon nécessaire de raccordement.
www.brizo.com
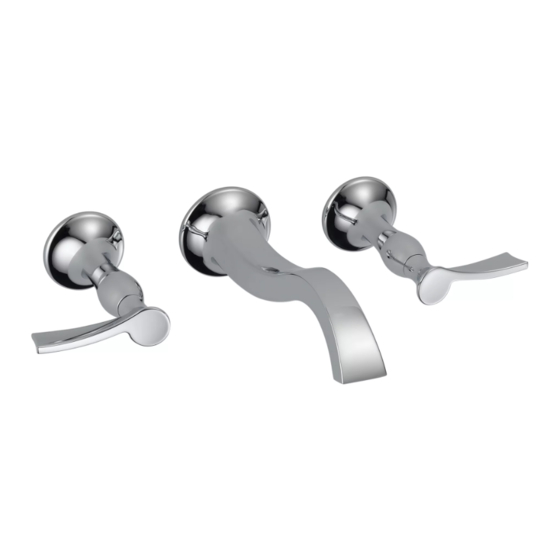
TWO HANDLE WALL MOUNTED LAVATORY FAUCETS -
62893
LESS HANDLES
LLAVES DE AGUA PARA LAVABOS DE DOS MANIJAS
PARA INSTALACIÓN EN LA PARED – SIN MANIJAS
ROBINET MURAL À DEUX MANETTES POUR LAVABO -
SANS LES MANETTES
Note: Drain sold separately. / Nota: El desagüe se vende por separado /
Note : Renvoi vendu séparément.
sSpecify Finish / Especifíque el Acabado / Précisez le Fini
1
Note: Handle kits must be
ordered separately.
Nota: Los juegos de manijas
se venden por separado.
Note : Manettes en kit
vendues séparément.
3 mm
6/23/15
Rev. C
Advertisement

Related Manuals for Brizo RSVP 65890LF-PCLHP-ECO


Summary of Contents for Brizo RSVP 65890LF-PCLHP-ECO
- Page 1 Inscrivez le numéro de modèle ici. Note : Renvoi vendu séparément. You may need / Usted puede necesitar / Articles dont vous pouvez avoir besoin: For easy installation of your Brizo ® faucet you will need: • To READ ALL the instructions completely before beginning.
- Page 2 This warranty excludes all industrial, commercial & business usage, whose purchasers are parts may be obtained by calling 1-877-345-BRIZO (2749) (in the U.S. and Canada) or by hereby extended a five year limited warranty from the date of purchase, with all other terms of writing to: this warranty applying except the duration of the warranty.
- Page 3 RP61825 Valve Cartridge, Hot Side Cartucho de la Válvula , Lado Caliente Cartouche de soupape, eau chaude HL5890s Lever Handle, Body & Gasket, Hot Side RP48434 Palanca, Cuerpo y Empaque, O-Rings Lado Caliente Anillos “O” Manette, corps et Joint, Joints Toriques eau chaude RP61824 RP40119...
- Page 4 MAINTENANCE – VALVES MAINTENANCE – SPOUT SHUT OFF WATER SUPPLIES BEFORE SERVICING VALVE OR SHUT OFF WATER SUPPLIES BEFORE SERVICING VALVE OR SPOUT ASSEMBLIES SPOUT ASSEMBLIES If your faucet leaks out of spout or around handle body, replace valve cartridge (1). If your faucet leaks at the back of the spout, replace two o-rings (1) on spout adapter (2).
-
Page 5: Faucet Installation
Min. 11 1/2" Min. 11 1/2 po 2 1/8" - 3 1/2" Min. 3" 2 1/8 po - 3 1/2 po Min. 3 po MAKE CONNECTIONS TO WATER LINES FAUCET INSTALLATION NOTE: It is very important that the spout tip of this faucet be at least 1" minimum Install 1⁄2"... - Page 6 4" (100 mm) 1 1/2" (38 mm) Diameter COMPLETE WALL FINISH MOUNTING SPOUT ADAPTER Complete finish wall with 1 1⁄2" diameter holes for handle and spout Remove plaster guard (1) and foam spacer (2) from threaded center shanks. Space hole centers 4" (100 mm) apart. NOTE: To ensure proper stud on valve body.
- Page 7 3 mm NOTE: If handles do not align to your satisfaction, unscrew one or both handles and MOUNTING HANDLES AND SPOUT body assemblies until handle disengages from stem. Rotate handle one spline up or NOTE: HANDLE KITS SOLD SEPARATELY. down and screw assembly onto threaded stud until it contacts wall surface. If handle alignment is still not satisfactory, remove one or both handle and body assemblies Remove plaster guard (1) and foam spacers (2) from threaded studs on hot from the valve body.
- Page 8 FLUSH YOUR SYSTEM Remove aerator (1) using plastic wrench (2) provided with your faucet. NOTE: You may need to turn on cold water slightly to help push out aer- ator. Turn both faucet handles (3) to full open position. Turn on hot and cold supplies (if not already open) and flush water lines for one minute.