Table of Contents
Advertisement
Quick Links
Congratulations on your purchase!
Thank you for choosing a Sirius product.
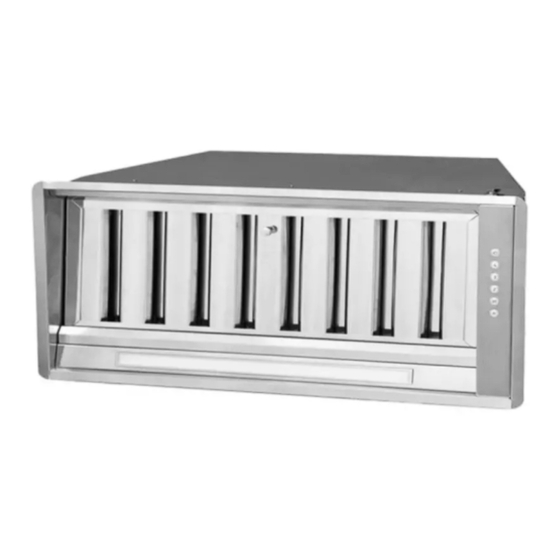
SL906 DL ONBOARD MOTOR series
UNDERMOUNT RANGEHOOD INSTALLATION INSTRUCTIONS
SL906 DL 520
SL906 DL 850
SL906 DLTM 850
SL906 DLTM 1000
SL906 DLTM 1200
SL906 DLTM 1500
EAN #9351116005061
EAN #9351116005078
EAN #9351116005085
EAN #9351116005092
EAN #9351116005108
EAN #9351116005115
www.siriusbrand.com
1
Advertisement
Table of Contents

Related Manuals for Sirius Satellite Radio SL906 DL Series


Summary of Contents for Sirius Satellite Radio SL906 DL Series
- Page 1 Congratulations on your purchase! Thank you for choosing a Sirius product. SL906 DL ONBOARD MOTOR series UNDERMOUNT RANGEHOOD INSTALLATION INSTRUCTIONS SL906 DL 520 EAN #9351116005061 SL906 DL 850 EAN #9351116005078 SL906 DLTM 850 EAN #9351116005085 SL906 DLTM 1000 EAN #9351116005092 SL906 DLTM 1200 EAN #9351116005108 SL906 DLTM 1500...
-
Page 2: Table Of Contents
TABLE OF CONTENTS BEFORE YOU INSTALL INSTALLING THE RANGEHOOD OPERATION MAINTENANCE DIMMABLE LIGHT FUNCTION REPLACING THE LED STRIP WIRING DIAGRAM (SINGLE MOTOR) WIRING DIAGRAM (TWIN MOTOR) WARRANTY... -
Page 3: Before You Install
BEFORE YOU INSTALL - DUCTING INFORMATION Sirius warranty covers only Sirius product. If you choose to install a non-Sirius branded accessory such as flexible ducting, Sirius will only warrant the rangehood and motor. If installation is found to be the cause of failure or issue then charges will apply for service and parts. Flexible ducting is not permitted under any circumstances. - Page 4 flexible cable and plug, or with another device WARNING ensuring omnipolar disconnections from the grid, with an opening distance between the contacts of at Min. 600mm - Max. 700mm for induction cooktops. least 3mm, then such disconnecting devices must be Min.
-
Page 5: Installing The Rangehood
SL906 DL series INSTALLATION - ONBOARD MOTOR To install the appliance please respect the follow instructions: WARNING: Failure to install the screws or fixing • The appliance must be installed by qualified device in accordance with these instructions technicians, or where possible use a Sirius may result in electrical hazards. - Page 6 WARNING The rangehood is quite heavy, so two people will be needed for installation. 1. To install the appliance, adjust the position of the adjustable side-springs using the supplied screws (fig.5), according to the thickness of the board, in which the appliance will be fixed. 4.
-
Page 7: Operation
OPERATION DIMMABLE LIGHT FUNCTION SL906-DL series A: Light switch on/off B: Motor switch on speed 1/off - (low/simmer) This function provides for lights dimmability, ranging C: Motor switch on speed 2 - (general cooking) from 20% to 100%, by holding down light key on the D: Motor switch on speed 3 - (high power) remote control or rangehood buttons. -
Page 8: Replacing The Led Strip
REPLACING THE LED STRIP ON THE SL906 DL 1. Before replacing the LED light, switch off the rangehood, then - by using appropriate tools - remove the LED light from its slot. (Fig 9a - b) 2. Take out the LED light from its connector and replace. -
Page 9: Wiring Diagram (Single Motor)
WIRING DIAGRAM SL906 DL (single motor) -
Page 10: Wiring Diagram (Twin Motor)
WIRING DIAGRAM SL906 DLTM (twin motor) -
Page 11: Warranty
WARRANTY INFORMATION Dear Customer, Thank you for choosing this Sirius Rangehood. We are sure that it will provide you with many years of excellent service. At Arisit Pty Limited we are dedicated to ensuring that our customers receive the best possible after-sales care. The Sirius ‘Protection Plan’... - Page 12 Your Warranty Register now to qualify. Terms & Conditions This warranty will not apply where: Division or travel costs for a technician or The fault is caused by accident, Authorised Service Agent shall be for the misuse, an infestation of insect account of the Purchaser.
Need help?
Do you have a question about the SL906 DL Series and is the answer not in the manual?
Questions and answers