Table of Contents
Advertisement
Quick Links
Advertisement
Table of Contents

Subscribe to Our Youtube Channel
Related Manuals for Cylinda DM 3010


Summary of Contents for Cylinda DM 3010
- Page 1 User manual DM 3010 DM 3110E 15 8848 0100-AA_CYLINDA_B6_EN/ 17-06-21.(15:16)
- Page 2 Dear Customer, Please read this user manual before using the product. Thank you for choosing this product. We hope that you get the best results from your product which has been manufactured with high quality and state-of-the-art technology. Therefore, please read this entire user manual and all other accompanying documents before using the product.
-
Page 3: Table Of Contents
CONTENTS 1 SAFETY INSTRUCTIONS Collapsible upper basket wires ......27 Height setting with empty basket ..... 27 Intended Use ............. 4 Ceiling cutlery basket ........28 Safety for children, vulnerable persons and pets 4 Ceiling cutlery basket ........28 Electrical safety ..........5 Transportation Safety ........ -
Page 4: Safety Instructions
This product must be used to Safety Instructions do the domestic type dishes • This section contains safety only. instructions that will help get This product is not suitable for protected against risks of commercial or collective use. personal injury or property damage. -
Page 5: Electrical Safety
possible, the electrical Keep packaging materials installation where the product away from children. There is connected must contain is the risk of injury and a device which conforms to suffocation. the electrical regulations and Store all detergents and disconnects all poles from the additives used with the grid. -
Page 6: Installation Safety
Installation Safety stove and etc.) or under the cooking area of a hob. • To make the product ready for use, review the information • If the product is going to in the user manual and be used inside a wardrobe/ installation instructions and cabinet/module, keep the make sure that the electricity,... -
Page 7: Operational Safety
Pressure coming from the tap Maximum washing capacity should be 0.03 MPa (0.3 bars) of the product is stated in the minimum and 1MPa (10 bars) section called “Technical maximum. If the water pressure Specifications”. exceeds 1 MPa (10 Bars), a To prevent possible injuries, pressure relief valve should be always place the sharp and... -
Page 8: Maintenance And Cleaning Safety
Environmental Maintenance and cleaning safety Instructions Do not wash the product by Compliance with WEEE spreading or pouring water Directive and Disposing of onto it. the Waste Product Do not use sharp or abrasive This product complies with tools when cleaning the EU WEEE Directive (2012/19/ product. -
Page 9: Package Information
Package information Packaging materials of the product are manufactured from recyclable materials in accordance with our National Environment Regulations. Do not dispose of the packaging materials together with the domestic or other wastes. Take them to the packaging material collection points designated by the local authorities. -
Page 10: Technical Specifications
Technical specifications Note for test institutions: Data required for performance tests shall be provided upon request. Requests can Maximum washing capacity (check the be e-mailed to the following address: energy label and Programme data and dishwasher@standardloading.com average consumption values table given Do not forget to provide the code, stock on Quick Guide. -
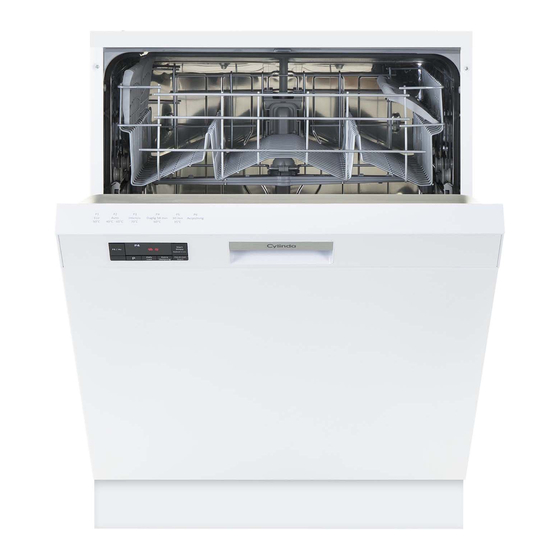
Page 11: Your Dishwasher
Your dishwasher Overview 1. Upper basket 2. Upper impeller 3. Lower impeller 4. Cutlery basket (depends on model) 5. Door 6. Rating Label 7. Control panel 8. Detergent dispenser 9. Lower basket 10. Filters 11. Salt reservoir lid 12. Upper basket rail 13. -
Page 12: Installation
Installation Appropriate installation location In the area where this product is Read “Safety Instructions” section first! installed, there must not be a lockable, Installation procedures must always be sliding or hinged door that will restrict performed by the manufacturer, authorised full opening of the product’s door. -
Page 13: Aquasafe
Aquasafe+ Permitted water temperature: up to 25°C ( 60°C for products equipped (depends on the model) with Aquasafe+; please refer to The Aquasafe+ system protects against Aquasafe+ section ) water leaks that may occur at the hose The dishwasher may not be connected to inlet.Water contact with the valve box of open warm water devices or flow-through the system must be avoided to prevent... -
Page 14: Connection To The Drain
Connection to the drain Electrical connection Water discharge hose can directly be Connect the product to a grounded connected to the drain hole or sink’s outlet protected by a fuse complying drainage. See the installation manual with the values in the "Technical supplied with your machine for detailed specifications"... -
Page 15: Preparation
Preparation Read “Quick Guide - Adjusting Water Softening System” before this section! The regeneration of the water softening Read “Safety Instructions” section first! system can be done in all programmes Tips for energy saving during drying step. When regeneration occurs, duration, energy and water Following information will help you use the consumption of the programme increase. -
Page 16: Adding Salt
Adding salt Water softening system needs to be regenerated in order for the product to operate with the same performance continuously. Dishwasher salt is used for this purpose. Use only special softening salts produced particularly for the dishwashers in your machine. You can put about 2 kg of softening It is recommended to use granule- or salt into the salt reservoir. - Page 17 Adding detergent Pay attention to the warnings on the detergent packaging to get better washing and drying results. Contact the manufacturer of the detergent for further questions. Do not put solvents into the detergent dispenser. There is the risk of explosion! 3.
-
Page 18: Tablet Detergents
Tablet detergents 3. After the empty washing cycle, review the user manual and readjust the water In addition to the conventional tablet hardness level so as to suit the water detergents, there are also commercially supply. available detergent tablets that show water 4. -
Page 19: Items Not Suitable For Washing In The Dishwasher
3. Slightly press the point (B) of the Decorative prints of chinaware as well reservoir lid to close it. as aluminium and silver items may get discoloured or tarnished after washing in the dishwasher just as it happens in handwashing as well. Some delicate glass types and crystals may become dull in time. - Page 20 Suggestions for loading the dishwasher Improper Loading Of Dishware Lower basket Upper basket Improper Loading Of Dishware 20/EN...
-
Page 21: Cutlery Basket
Cutlery basket Cutlery basket (depends on model) (depends on model) Cutlery basket is designed to wash your Cutlery basket is designed to wash your dishes such as knife, fork, spoon, etc. in an dishes such as knife, fork, spoon, etc. in an efficient manner. -
Page 22: Collapsible Lower Basket Tines
Collapsible lower basket tines Collapsible lower basket tines (depends on model) (depends on model) There are foldable tines (A) located at There are foldable tines (A) located at the lower basket of the machine are the lower basket of the machine are designed for an easier placement of large designed for an easier placement of large pieces such as pans, bowls, etc. -
Page 23: Tray Wash Supports
SoftTouch Accessory Tray Wash Supports (depends on model) (depends on model) The SoftTouch Accessory found in the Use the supports to wash trays in the lower basket of your machine enables a bottom basket. safe washing for your fragile glasses. See the Auxiliary functions section for appropriate programme and function selection. -
Page 24: Lower Basket Multipurpose / Height Adjustable Service Rack
Lower basket multipurpose / To close the racks: 1. Fold the rack (A). height adjustable service rack 2. Slide the rack up (B). (depends on model) This accessory located at the lower basket 3. Put the rack in vertical position (C). of your machine allows you to easily wash 4. -
Page 25: Lower Basket Bottle Wire
Lower basket bottle wire Upper basket multipurpose service rack (depends on model) The bottle wire is designed for easier (depends on model) washing of long pieces with wide mouths. This accessory located at the upper basket You may take out the bottle wire from the of your machine allows you to easily wash basket when not in use by pulling it out pieces such as extra long ladles and bread... -
Page 26: Adjusting The Height Of The Upper Basket
Adjusting the height of the upper To lower the basket, while it is in the uppermost position; basket 1. Hold the upper basket wires with both (depends on model) hands, slightly lift up the basket and The upper basket height adjustment simultaneously push and release the mechanism has been designed for you to latches shown in the figure (B). -
Page 27: Collapsible Upper Basket Wires
Collapsible upper basket wires Height setting with empty basket (depends on model) (depends on model) You can use collapsible wires when you In this model, the height setting of the need a larger space for your dishes in the upper basket may be changed using the upper basket of your machine. -
Page 28: Ceiling Cutlery Basket
Ceiling cutlery basket (depends on model) Ceiling cutlery basket is designed to wash your cutlery items such as forks, spoons and etc. by placing them between the bars on the basket. When the central tray is in the lower position, you can load long/high items such as coffee cups, ladles, etc. -
Page 29: Operating The Product
Operating the product to determine a washing programme Read “Safety Instructions” section first! suitable for your dishes. Read “Quick Quide” before this 3. Press Programme Selection key until section. the number of the programme you Keys selected appears on the Programme indicator. - Page 30 Half Load function Super Rinse Function (Depends on model) (Depends on model) It is used to operate the machine without Depending on the type of the detergent loading it completely. used, if a detergent dissolving issue is 1. Load your dishes in the machine as encountered it will remove the resulting you like.
- Page 31 Auto Tablet Feature Interior Lighting (Depends on model) (depends on the model) Auto Tablet is a feature which detects Some models have interior lighting to the use of combined tablet detergents illuminate the interior when the door is automatically. opened. Drying performance of these type of 1.
-
Page 32: Scheduling The Washing Time
EverClean Filter With a second press on the key, (depends on the model) 3-hours time delay icon will disappear With this function, your micro filter will be and 6-hours time delay icon will start to cleaned by a special system at the end of flash. -
Page 33: Starting The Programme
Starting the programme on the step the programme you have cancelled was in. To start your machine after selecting the programme and auxiliary functions, press Salt indicator ( Start/Pause/Cancel key. Your machine performs water softening Please check the salt indicator on the depending on the hardness level of the display to see whether there is adequate supply water. -
Page 34: End Of Programme
End of programme InnerClean End of Programme indicator will light up (depends on model) once the washing programme is over. This programme is recommended to be 1. Press the On/Off key to turn off your operated on each 1-2 months for machine machine. -
Page 35: Maintenance And Cleaning
Maintenance and Cleaning the filters cleaning Clean the filters at least once a week in order for the machine operates efficiently. Read “Safety Instructions” section first! Check if food residues are left on the filters. Unplug the product and turn off the If there are food residues on filters, take tap before attempting any cleaning them out and clean well under running... -
Page 36: Cleaning The Hose Filter
Cleaning the hose filter Damages on the machine that may be caused by impurities coming from the urban supply water or your own water installation (such as sand, dirt, rust, etc.) can be prevented by means of the filter attached to the water inlet hose. Check the filter and the hose regularly and clean them if necessary. -
Page 37: Cleaning The Impellers
Cleaning the impellers Do not try to rotate the impeller by Clean the impellers at least once a week in holding its ends. Trying to rotate the order for the machine operates efficiently. end sections may cause the gear system within the impeller to break. Lower impeller Upper impeller Check if the holes on the lower impeller (1) -
Page 38: Troubleshooting
Troubleshooting Machine does not start. • Power cable is unplugged. >>> Check if the power cable is plugged in. • Fuse is blown. >>> Check the fuses in your house. • Water is cut. >>> Make sure that the water inlet tap is open. •... - Page 39 • Rinse aid is not sufficient. >>> Check the rinse aid indicator and add rinse aid if necessary. Increase the rinse aid setting if there is enough amount of rinse aid in the machine. • Machine is unloaded right after the programme is over. >>> Do not unload your machine right after washing process is completed.
- Page 40 There is a different odour in the machine A new machine has a peculiar odour. It will fade out after a couple of washes. • Filters are clogged. >>> Check if the filter system is clean. Clean the filter system regularly as illustrated in section “Cleaning and Care”.
- Page 41 • Opening of the detergent dispenser lid is prevented during washing. >>> Place the dishes in a way that will not prevent the detergent dispenser lid from opening and the water going into the machine from impellers. • Detergent is stored under unsuitable conditions. >>> If you are using powder detergent, do not store the detergent package in humid places.
- Page 42 Foam forms in the machine. • Dishes are washed with hand-wash detergent by hand but not rinsed before placing them into the machine. >>> Hand-wash detergents do not contain antifoam. There is no need to hand-wash the dishes before placing them into the machine. Removing the coarse soil on the dishes under tap water, with a tissue paper or fork will be sufficient.
- Page 43 Service Nationwide service in Sweden Visit www.cylinda.se Call 0771-25 25 00 Declare Model code Serial number Purchase date Problem description Name and address Phone number Contact us www.cylinda.se 43/EN...
Need help?
Do you have a question about the DM 3010 and is the answer not in the manual?
Questions and answers