Table of Contents
Advertisement
Quick Links
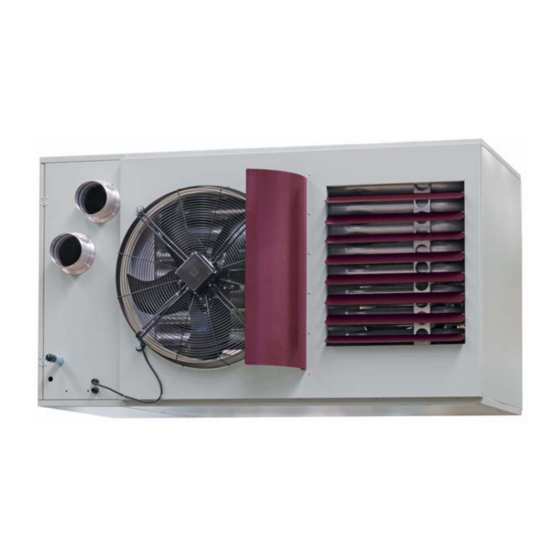
Gas-Fired, Balanced-Flue or Power-Vented Unit Heater
Installation, Commissioning, Servicing
Improper installation, adjustment, alteration, service, or maintenance can cause property damage,
injury or death. All work must be carried out by appropriately qualified persons.
The manufacturer does not take any responsibility in the event of non-observance of the regulations
concerning the connection of the apparatus causing a dangerous operation of the apparatus, possi-
bly resulting in damage to the apparatus and/or environment in which the unit is installed
Please read this document carefully before commencing installation, commissioning and/or servicing.
Leave it with the user or attached to the appliance or gas service meter after installation.
Nortek Global HVAC (UK) Ltd, Park Farm Road, Folkestone, Kent, CT19 5DR
Subject to modification
LCSBD-4
Bi-Directional Axial Fans
& User Instructions
These appliances meet the following EC Directives:
DIR 2009/142/EC:GAD
DIR 2004/108/EC: EMC
DIR 2006/95/EC: LVD
DIR 2006/42/EC: MD
WARNING
1
1611LCSBD-4 GBEN
Advertisement
Table of Contents

Related Manuals for Reznor LCSBD-4


Summary of Contents for Reznor LCSBD-4
- Page 1 1611LCSBD-4 GBEN LCSBD-4 Gas-Fired, Balanced-Flue or Power-Vented Unit Heater Bi-Directional Axial Fans Installation, Commissioning, Servicing & User Instructions These appliances meet the following EC Directives: DIR 2009/142/EC:GAD DIR 2004/108/EC: EMC DIR 2006/95/EC: LVD DIR 2006/42/EC: MD WARNING Improper installation, adjustment, alteration, service, or maintenance can cause property damage, injury or death.
-
Page 2: Table Of Contents
Section Contents Page No Compliance Notices Certificates of Conformity General product Information General Requirements Delivery & Pre-installation Checks Warranty Special risk areas Installation Installation Clearances and Mounting Heights Heater Mounting Warm Air Circulation Air Supply Flue Installation Electrical Installation Gas Installation Commissioning Electrical Pre tests Gas pre tests... - Page 3 IMPORTANT NOTICE TO INSTALLERS Installers should satisfy themselves that the gas pipework installation is carried out in accordance with all current legislation, Codes of Practice and recommendations . Additionally it may be necessary to protect the gas valves which form part of the heater or burner assembly from potential pipe contamination particularly, but not exclusively , where copper gas pipework is used.
-
Page 4: Compliance Notices
1.0 Compliance notices The Reznor range of warm air heaters Where proprietary items are incorporated detailed herewith are manufactured by into Reznor products, detailed information Nortek Global HVAC within a strictly and instructions are also provided as part of controlled... -
Page 5: Certificates Of Conformity
WARNING The Reznor LCSBD range of gas unit (SEE FLUE INSTALLATION 2.5) heaters meet with the government criteria in respect of the Enhanced Capital Allowance Burner Scheme. -
Page 6: General Requirements
1.3 General Requirements supply of fresh air. Caution The position of the heater relative to Before installation, check that the local potential stratification / circulation problems, which generally occur at higher levels and distribution conditions, nature of gas and pressure, and the current state adjustment which may be overcome through the provision of a suitable de-stratification unit. -
Page 7: Warranty
In addition to this there is also a 10 year (3) Order reference/date of order, together time related warranty on the combustion with full installation details (name and chamber. address). (4) Details or symptoms of fault. The warranty commences from the date of (5) Installers name and address. -
Page 8: Installation
guarantee cover. systems, ventilation systems, and various types of process plant. 2.0 Installation Applications should be suspended centrally over the area into which the warm air is to be discharged . The location chosen for the heater must allow for the fitting of an effective flue system. -
Page 9: Warm Air Circulation
Combustion air or heater related ventilation air will not be required if - The heaters are installed in room sealed mode (ie with a positive 2.3 Warm Air Circulation connection to atmosphere of both flue and combustion air). The air heater should be positioned to ... - Page 10 be within 1000 mm of floor level for natural gas and ideally at floor level for lpg gas A plant room means a room housing the installations but in any event no higher than heater plant and probably other items of 250 mm.
- Page 11 15% of the wall height. installations but in any event no higher than 250 mm. The low level natural ventilation opening should be situated on an external wall and be within 1000 mm of floor level for natural 2.4.2.3 Natural Ventilation Openings gas and ideally at floor level for l.p.g gas installations but in any event no higher than Minimum Free Area Of...
- Page 12 should be situated on an external wall and be within 1000 mm of floor level for natural gas and ideally at floor level for l.p.g gas installations but in any event no higher than 250 mm. Minimum Free Area Of Minimum Free Area Of Ventilation Opening Ventilation Opening...
-
Page 13: Flue Installation
Mechanical Ventilation Rate for Plant Room or 2.5 Flue Installation. Enclosure MODEL The LCSBD heater range is suitable for the following flue options C An integral flue spigot is fitted to all LCSBD Air Heaters thereby allowing the flue to connect directly to the heater. - Page 14 1500 from another terminal vertically on the Horizontal flue installations: Distance same wall. from heater connection to terminal must 2000 from ground level. not exceed the following length- The heaters must be connected to the flue system supplied by Nortek Global HVAC LCSBD 95–145 8 Metres in overall length.
- Page 15 Vertical Co axial flue Kit options L1 maximum combined flue length 10 metres Part No Coaxial Terminal 33-55-207 Extra pipes to extend the flue are available as an option Pipe Ø 130 x 1000 mm 33-54-201 Pipe Ø 130 x 500 mm 33-54-202 Pipe Ø...
- Page 16 Option B In this configuration the heater is connected to a single flue pipe to discharge the products of combustion outside the building either through the roof or through a wall. The air for combustion is taken from inside the building. L1 maximum flue length 10 metres Part No Universal Terminal...
-
Page 17: Electrical Installation
2.6 Electrical Installation Electrical panel Warning All electrical wiring and connections must be Ensure that the mains isolator is turned OFF in accordance with the relevant European, before undertaking any electrical work on National, and Local regulations as well as to the heater. -
Page 18: Gas Installation
Fan Control Relay 2.7 Gas installation Warning Please read notice on page 3 of this The fan control switch features normally manual open 230V contacts, and is wired to control the live supply to the fan motor. When the circuit is made the fan will switch on. When As there have been recorded instances of the thermostat or time switch shuts down the deposition of copper sulphide dust within... -
Page 19: Commissioning
3.0 Commissioning Each heater supply must be fitted with a separate isolating cock positioned adjacent Note to and upstream of the union which must be It is a requirement that only suitably sited outside the heater. qualified and competent personnel are allowed to undertake the commissioning The isolating cock should be of the 90 turn... -
Page 20: Ignition Sequence
a) Test for earth continuity. On start the signal will activate the flue b) Test for resistance to earth. venter for a pre purge period and in turn will c) Check live and neutral connections are make the air proving switch, once made, the correct. - Page 21 pressure (measuring point must be as Adjustment of Optional near to burner as possible). Hi-Low regulator Energize High-Low regulator, set gas control in operation and wait until an IMPORTANT outlet pressure is recorded on pressure Adjustments should gauge. be made by qualified Use a 8 mm wrench to turn adjustment persons only.
- Page 22 When High and Low pressure settings are Connect a suitable pressure gauge to correct, replace cap and connect pressure pipe line or to outlet pressure tap of gas feedback connection (if applicable). control concerned, to measure burner pressure (measuring point must be as Checkout near to burner as possible).
- Page 23 maximum adjustment screw and hold it '+' and '-' of the control signal is done correctly, otherwise the PCB will in case of a If maximum pressure setting needs 0-5 V DC control signal not modulate and adjustment turn the maximum rate will even in case of a 0-10 V DC control adjustment screw...
- Page 24 Example: Example: Maximum power (165 mADC at 22V Potentiometer P2 is set at 0 %, and P3 at 5%, the hold-in voltage of the DC) is provided to the modulation coil burner relay is adjustable between 5 with a 10V DC input control signal and % and 100 % of the input control P1 set at 100 % ...
-
Page 25: Hand Over
q) Check that the gas pressure remains satisfactory for all appliances on the same circuit. r) Undertake combustion tests checking CO, and efficiency. CO should not exceed (20PPM). s) Check that the burners are extinguished when the thermostat is set to its lowest setting, and then remove the manometers. -
Page 26: Servicing
4.0 Servicing Servicing procedure major component parts Warnings It is a requirement that only qualified Heat exchanger personnel are allowed to carry out Remove louvres and fan assembly and installation commissioning or servicing. carry out visual inspection of the tubular heat exchanger using an inspection lamp addition only... - Page 27 Fan and Motor Check that they are not kinked or damaged Check electrical connections are intact. Check that the fan is secure and rotates freely without excessive play in the shaft.. Test The fan blades and motor should be cleaned using a soft brush. Test and re-commission as per sections 3.0 to 3.4 inclusive.
-
Page 28: Fault Diagnosis
5.0 Fault finding Electric Supply Turn on Electric Check fuse. Burner fails Supply Replace if required to light Check flue fan Flue fan running Replace flue fan connections Air pressure Check flue is Change air switch made clear pressure switch Thermostat Limit thermostat Reset Limit... - Page 29 Fault finding cont’d Fan will not Bad electrical Check wiring run, heater connection connection goes off on limit Fan control Reset fan Settings control settings incorrect Fan runs in Faulty fan Change fan manual mode control control Faulty fan Change fan motor or motor or capacitor...
-
Page 30: Wiring Diagrams
Wiring Diagram LCSBD 95-120-145 Auto ignition On/Off... - Page 31 Wiring Diagram LCSBD 95-120-145 Auto ignition Hi/Low...
- Page 32 Wiring Diagram LCSBD 95-120-145 Auto ignition Modulation...
-
Page 33: Technical Data
7.0 Technical Data Appliance Type Electrical Supply 230V 50Hz 1ph Fuse Rating 6 AMP IP Rating IP20 Fan Limit Settings Fan On 50ºC Fan Off 30ºC Limit 100ºC 7.1 Technical Data Common Information Country Approved Gas Category AT,BG,CH,CY,CZ,DK,EE,ES,FI,GB,GR,HR, IE,IT,IS,LT,LV,NO,PT,RO,SE,SI,SK,TR BE,CZ,NL,FR,DE,IE,IT,ES,CH,PT,GB,SE, SK,SL,PT,PL,TR PL,LU,DE,RO... -
Page 34: Technical Data Heater Specifications
7.2 Technical Data NAT GAS / LPG MODEL HEAT 88.75 119.33 137.39 OUTPUT HEAT INPUT 98.20 130.40 149.00 (Nett) EFFICIENCY % Nett HEAT 42.96 56.89 65.84 OUTPUT Low Fire HEAT INPUT 49.10 65.20 74.50 (Nett) Low Fire GAS CONNECTION BSP/Rc 3/4”... -
Page 35: Parts Listing
8.0 Parts List Heater size / Description Gas valve G20 03 25136 Gas valve G20 03 25144 Hi/Low Valve 03 25134 Hi/Low Valve 03 25144P Modulating valve G20 03 35145 03 25144M natural gas Modulating valve G31 03 25136 M337 03 35136 M337 propane gas GM44 modulation inter-... - Page 36 Parts list cont’d Heater size / Description Injector Propane gas 07 25801 185 07 25801 195 07 25801 190 Ignition electrode 05 25186 Ionisation probe 03 401US 195292 Burner on neon 60 61996 Reset Relay 230V 30 61742 240V Lockout reset switch 60 61988 Burner 03 400US 1020...
-
Page 37: Dimensions
9.0 Dimensions - LCSBD... - Page 38 Dimensions - Vertical Co/Axial Terminal FLUE Dimensions in mm Heater 95– 145 1630 1860...
- Page 39 Dimensions - Horizontal Co/Axial Terminal FLUE Ensure Terminal is located on the wall in this configuration BOTTOM Dimensions in mm Heater 95-145...
- Page 40 Registered in England N° 1390934. Registered office: 10 Norwich Street, London, EC4A 18D Nortek Global HVAC is a registered trademark of Nortek. Reznor® is a registered trademark of Nortek Global HVAC, LLC. Because of continuous product innovation, Nortek Global HVAC reserves the right to change product specification without due notice.
Need help?
Do you have a question about the LCSBD-4 and is the answer not in the manual?
Questions and answers