
Related Manuals for Westinghouse WSFS1601GD


Summary of Contents for Westinghouse WSFS1601GD
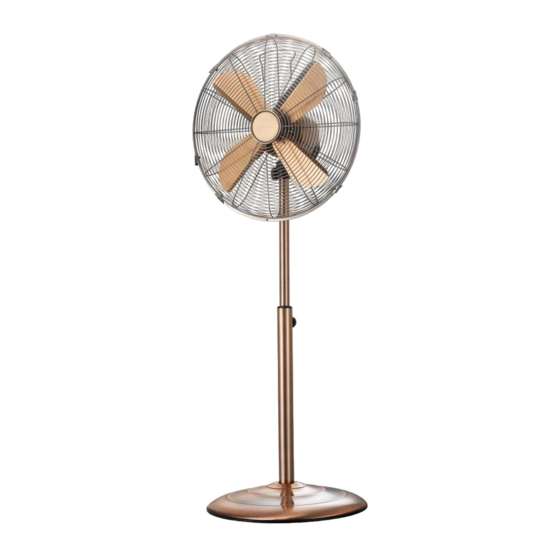
- Page 1 16” Vintage Metal Stand Fan - Antique Copper Ventilateur sur pied style ancien de 16 po en métal — Cuivre antique Instruction Manual / Manuel d’instructions WSFS1601GD...
-
Page 3: Table Of Contents
CONTENT SAFETY INFORMATION IMPORTANT SAFEGUARDS ............... 4 HOW TO USE DESCRIPTION OF PARTS ................7 BASE ASSEMBLY ................... 9 MOTOR UNIT AND BASE ASSEMBLY ............ 9 FAN HEAD ASSEMBLY ................9 OPERATING INSTRUCTIONS ............. CLEANING AND MAINTENANCE ............DISPOSAL ....................INFORMATION AND SERVICE ............ -
Page 4: Safety Information
SAFETY INFORMATION DANGER WARNING CAUTION DANGER – Immediate hazards WARNING – Hazards or unsafe CAUTION – Hazards or unsafe which WILL result in severe practices which COULD result in practices which COULD result in personal injury or death severe personal injury or death minor personal injury WARNING When using electrical appliances, basic safety precautions... - Page 5 SAFETY INFORMATION WARNING! The metal fan blades have sharp edges. Handle with care. DANGER! Avoid contact with moving parts. Never insert fingers, pencils or other objects into the rotating fan blades or any openings on the appliance, as this may cause an injury, electric shock, fire, or damage to the appliance.
- Page 6 SAFETY INFORMATION DANGER OF ELECTROCUTION! Never use the appliance in the bathroom, near any source of water or heavy moisture (e.g. near a swimming pool, bathtub, basin, or in a damp basement, etc.). Do not place any objects filled with liquids, such as vases, near or on the appliance.
-
Page 7: How To Use
HOW TO USE DESCRIPTION OF PARTS Carry handle 9. Oscillation knob 2. Locking clips 10. Control knob (O-Off/I/II/III) 3. Fan head 11. Front guard 4. Tilt adjustment knob 12. Fan blades 5. Extension pole 13. Rear guard 6. Height adjustment knob 14. - Page 8 HOW TO USE Fig. 1 Fig. 2 Fig. 3 Fig. 4 Fig. 5 Fig. 6 Fig. 7 Fig. 8...
-
Page 9: Base Assembly
HOW TO USE Fig. 9 Fig. 10 BASE ASSEMBLY Remove the L-shaped screw and metal washer from the outer pole (7) by turning the L-shaped screw anti-clockwise. 2. Insert the outer pole (7) into the top of the base (8) (Fig. 1). 3. - Page 10 HOW TO USE 3. Loosen the screw on the back of the fan blades (12) and align it with the flat indentation on the motor shaft (14) (Fig. 9). Insert the fan blades into the motor shaft until the screw is right on top of the flat indentation (Fig.
-
Page 11: Operating Instructions
OPERATING INSTRUCTIONS Place the fan upright on a dry, level and stable surface. 2. To adjust the vertical tilt, hold the fan head (3) with one hand and, with the other hand, slowly turn the tilt-adjustment knob (4) anti-clockwise to loosen it. Push the fan head (3) up/down to adjust the tilt to your desired angle (70⁰... -
Page 12: Cleaning And Maintenance
CLEANING AND MAINTENANCE DANGER OF ELECTROCUTION! Before cleaning, always unplug the appliance from the wall socket. WARNING! To avoid electrical hazards, never immerse the appliance, power cord or plug in water or any other liquids. Never rinse them under the tap. Keep all electrical parts dry. NOTE: Never use solvents, chemical or abrasive cleaning agents, wire brushes, sharp objects or scouring pads to clean the appliance. -
Page 13: Disposal
In line with our policy of continuous product development, we reserve the right to change the product, packaging and documentation specifications without prior notice. Model: WSFS1601GD Voltage: 120 V/AC, 60 Hz Power: 50 W... - Page 14 TABLE DES MATIÈRES CONSIGNES DE SÉCURITÉ PRÉCAUTIONS DE SÉCURITÉ IMPORTANTES ........15 UTILISATION DESCRIPTION DES PIÈCES ............... 19 ASSEMBLAGE DE LA BASE ..............21 ASSEMBLAGE DU BLOC MOTEUR ET DE LA BASE ......21 ASSEMBLAGE DE LA TÊTE DU VENTILATEUR ......... 22 INSTRUCTIONS DE FONCTIONNEMENT ........
-
Page 15: Consignes De Sécurité
CONSIGNES DE SÉCURITÉ DANGER AVERTISSEMENT MISE EN GARDE DANGER – Danger immédiat AVERTISSEMENT – Dangers ou pratiques MISE EN GARDE – Dangers ou quiCAUSERA des blessures dangereuses POUVANT provoquer des pratiques peu sécuritaires POUVANT graves ou la mort. blessures graves, voire mortelles. causer des blessures légères. - Page 16 CONSIGNES DE SÉCURITÉ 5. Cet appareil peut être utilisé par des enfants âgés de 8 ans et plus et par des personnes ayant des capacités physiques, sensorielles ou mentales réduites ou un manque d'expérience et de connaissances si elles ont reçu une surveillance ou des instructions concernant l'utilisation de l'appareil en toute sécurité...
- Page 17 CONSIGNES DE SÉCURITÉ AVERTISSEMENT ! Débranchez toujours l'appareil de la prise murale avant : - d’assembler ou de démonter des pièces, - de régler l'inclinaison verticale, - de déplacer l'appareil d'un endroit à un autre, - de nettoyer l’appareil et de le ranger. 14.
- Page 18 CONSIGNES DE SÉCURITÉ DANGER D’ÉLECTROCUTION ! Cet appareil ne contient aucune pièce réparable par l'utilisateur. N'essayez jamais de démonter ou de réparer l'appareil vous-même. La garantie ne couvrira aucune réclamation pour des dommages dus à une mauvaise manipulation. AVERTISSEMENT ! N'utilisez jamais un appareil endommagé.
-
Page 19: Utilisation
UTILISATION DESCRIPTION DES PIÈCES Poignée de transport 8. Base et poids de la base 2. Clips de verrouillage 9. Bouton d’oscillation 3. Tête de ventilateur 10. Bouton de contrôle 4. Bouton de réglage de (O-Arrêt / I / II / III) l’inclinaison 11. - Page 20 UTILISATION Schéma 1 Schéma 2 Schéma 3 Schéma 4 Schéma 5 Schéma 6 Schéma 7 Schéma 8...
-
Page 21: Assemblage De La Base
UTILISATION Schéma 9 Schéma 10 ASSEMBLAGE DE LA BASE Retirez la vis en forme de L et la rondelle métallique du montant externe (7) en tournant la vis en forme de L dans le sens inverse des aiguilles d’une montre. 2. -
Page 22: Assemblage De La Tête Du Ventilateur
UTILISATION ASSEMBLAGE DE LA TÊTE DU VENTILATEUR Insérez l'arrière de la grille arrière (13) dans l'arbre du moteur (14). 2. Alignez les 4 trous de vis sur la grille arrière (13) avec les 4 trous de vis du bloc moteur (15) (schéma 7), en vous assurant que la poignée de transport (1) est en haut. -
Page 23: Instructions De Fonctionnement
INSTRUCTIONS DE FONCTIONNEMENT Placez le ventilateur en position verticale sur une surface sèche, plane et stable. 2. Pour régler l'inclinaison verticale, tenez la tête du ventilateur (3) d'une main et, de l'autre main, tournez lentement le bouton de réglage de l'inclinaison (4) dans le sens inverse des aiguilles d’une montre pour le desserrer. -
Page 24: Nettoyage Et Entretien
NETTOYAGE ET ENTRETIEN DANGER D’ÉLECTROCUTION ! Débranchez toujours l'appareil de la prise murale avant de le nettoyer. AVERTISSEMENT ! Pour éviter les risques électriques, n’immergez jamais l'appareil, le câble d'alimentation ou la fiche dans l'eau ou dans tout autre liquide. Ne les rincez jamais sous l’eau du robinet. -
Page 25: Mise Au Rebut
Conformément à notre politique de développement continu des produits, nous nous réservons le droit de modifier les spécifications du produit, de l’emballage et de la documentation sans préavis. Modèle : WSFS1601GD Tension : 120 V / CA, 60 Hz Puissance : 50 W... - Page 28 ¼ and Westinghouse are trademarks of Westinghouse Electric Corporation, a USA company. Used under license by Westinghouse Homeware (HK) Co. All Rights Reserved. WSFS1601GD • 12/20...
Need help?
Do you have a question about the WSFS1601GD and is the answer not in the manual?
Questions and answers