Table of Contents
Advertisement
Quick Links
Minka-Aire
TM
and brass finish, solid designer colors, and unique glass and crystal
designs. A large selection of light fixtures and light kits are also
available. Ask your dealer about accessories that will allow your to
customize your fan.
We're certain that your Minka-Aire
will many years of comfort, energy savings and satisfaction. To
ensure your personal safety and to maximize the performance of your
fan, please read this manual thoroughly.
L
IMITED
Minka-Aire
and workmanship for one year from the date of purchase, expect for
the motor, Minka-Aire
motor in this fan shall be free from defects in material and
workmanship as long as the original purchase owns the fan. Minka-
only obligation under this limited warranty is to replace repair
Aire
TM
or refund the purchase price any fan confirmed by Minka-Aire
be defective in material or workmanship after such fan is returned to
Minka-Aire
TM
purchase and with shipping charges prepaid. This warranty shall not
apply to fans which have been damaged as a result of improper
installation, removed from the original installation or subjected to
use for which the fan was not designed. The customer shall be
responsible for any cost of removing the old fan, installing a new fan
or any other costs. This limited lifetime warranty is in lieu of all
other expressed warranties. Minka-Aire
circumstances be liable for any incidental or consequential damages.
Date Purchase
Store Purchase
Model Number
Serial Number
Congratulations on your purchase of a
Minka-Aire
be a beautiful addition to you home, and will
keep you comfortable throughout the year.
offers a variety of ceiling fans: combinations of wood
L
IFETIME
warrants this fan to be free from defects in material
TM
warrants to the original owner that the
TM
by the original purchase along with a proof of
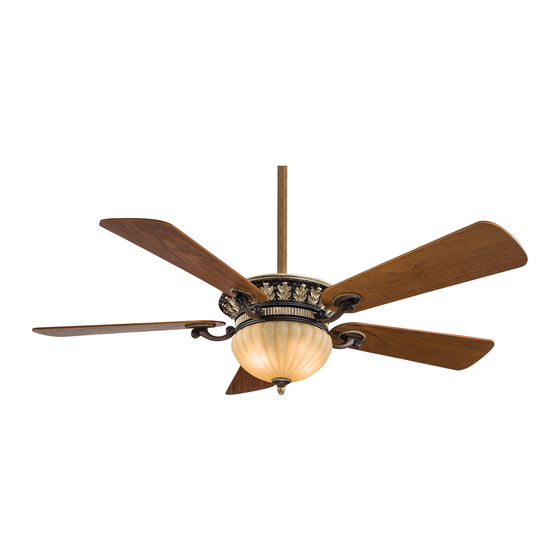
F702
ceiling fan! Your new fan will
TM
fan will provide you
TM
W
ARRANTY
TM
TM
shall under no
to
Advertisement
Table of Contents

Related Manuals for Minka-Aire Volterra F702L


Summary of Contents for Minka-Aire Volterra F702L
- Page 1 Aire or refund the purchase price any fan confirmed by Minka-Aire be defective in material or workmanship after such fan is returned to by the original purchase along with a proof of Minka-Aire purchase and with shipping charges prepaid.
-
Page 2: Table Of Contents
ONTENTS AFETY ULES................... ACKAGE ONTENTS..............NSTALLING THE AN..............SSEMBLING THE AN..............ANGING THE AN................ LECTRICAL ONNECTIONS............NSTALLING THE RANSMITTER........INISHING THE NSTALLATION..........LADE NSTALLATION..............NSTALLING THE IGHT ULB & LASS HADE....PERATING YOUR RANSMITTER......ARE OF YOUR AN..............ROUBLESHOOTING..............PECIFICATIONS................1151 W. -
Page 3: Safety Rules
1. S AFETY ULES 1. Before you begin installing the fan, 6. Caution: To reduce the risk of shut the power off at the circuit personal injury use only the screws breaker or the fuse box. provided with the outlet box. 2.Be cautions! Read all instructions 7. -
Page 4: Ackage Ontents
ACKAGE ONTENTS Unpack your fan and check the contents. You should have the following items: 9. Fan motor/housing assembly 1. Fan blades (5 ) 10. Blade holders (5) 2. Hanger bracket 11. 50W Halogen bulb (2) 3. Canopy 12. Glass shade 4. -
Page 5: Installing The Fan
Secure the outlet box directly to the ceiling. Longer downrods are available building structure. Use appropriate from your Minka-Aire dealer. fasteners and building materials. The outlet box and its support must be able To hang your fan where there is an... -
Page 6: Ssembling The An................................................................... Hanging The Fan
SSEMBLING THE Your fan is packed with the motor and Upper Housing unassembled, Screw Upper housing proceed the following steps for fan Rubber washers assembly: Step1. Remove the two screws and rubber washers from the top of the motor center band. Place the upper Top motor housing over the motor center band and secure it with the two screws and... - Page 7 ANGING THE REMEMBER to turn off the power. Outlet box Follow the steps below to hang your screws fan properly: Hitch Lock Step 1. Secure the hanger bracket to the ceiling outlet box using screws included with your outlet box, lock washers included with the fan.
-
Page 8: Electrical Connections
LECTRICAL ONNECTIONS WARNING: To avoid possible electrical Step 4. (Fig. 16 & 17) If your outlet box has shock, be sure electricity is turned off at a ground wire (green or bare copper) connect the main fuse box before wiring. the fan ground wire from hanger ball and hanger bracket to it;... -
Page 9: Installing The Wall Transmitter
Outlet box White (neutral) Black (hot) Green or bare copper (ground) Black ("AC IN L") White ("AC IN N") Receiver Black ("to motor L") White ("to motor N") Blue (for bottom light) Orange Ground (Connect to (for upper light) ground wire on (green) hanger bracket if no house... -
Page 10: Finishing The Installation
NSTALLING THE RANSMITTER WARNING: HOOK UP IN "SERIES ONLY" DO NOT CONNECT THE HOT AND NEUTRAL WIRES OF THE ELECTRIC CIRCUIT TO THE TRANSMITTER WALL SWITCH DAMAGE TO THE SWITCH AND POSSIBLE FIRE COULD OCCUR. Step 1. Remove the existing wall plate and switch from the wall junction box.. Step 2. -
Page 11: Blade I
9. B LADE NSTALLATION Step1. Attach the fan blade to the blade holder using the screws and fiber washers provided. Tighten screws securely. Repeat process for remaining blades.(Fig. 20A) Step2. Rotate motor until holes become visible through the light plate access window. -
Page 12: Installing The Light B G S
NSTALLING THE IGHT & G LASS HADE WARNING: Shut of the power supply before removing or replacing lamp. In handling of halogen bulb, care should be taken not to touch it with your bare hands. Oil residue will shorten the life of the halogen bulb. -
Page 13: Operating Your Wall Transmitter
11.O PERATING THE RANSMITTER Restore power to ceiling fan and test for proper operation. A. HI, MED, and LOW buttons: These three buttons are used to set the fan speed as follows: HI= high speed Med= medium speed SUMMER OPERATION Low= low speed B. -
Page 14: Are Of Your An..................................................................... Troubleshooting
Refer to the minimize discoloration or tarnishing. section, "Making Electrical Connections". For any additional information about your Minka-Aire Ceiling fan, please write to: 1151 W. Bradford Court Corona, CA 92882... - Page 15 13. T ROUBLESHOOTING Problem Solution Fan will not start 1. Check fuses or circuit breakers. 2. Check line wire connections to fan. CAUTION: Make sure main power is off. 3. Check to make sure the dip switches from the transmitter and receiver are set to the same frequency. Fan sounds noisy.
Need help?
Do you have a question about the Volterra F702L and is the answer not in the manual?
Questions and answers