
Related Manuals for Velleman HQ POWER VDPC174


Summary of Contents for Velleman HQ POWER VDPC174
-
Page 1: Table Of Contents
VDPC174 USER MANUAL GEBRUIKERSHANDLEIDING NOTICE D’EMPLOI MANUAL DEL USUARIO BEDIENUNGSANLEITUNG INSTRUKCJA OBSŁUGI MANUAL DE FUNCIONAMENTO... - Page 2 VDPC174 V. 02 – 14/06/2018 ©Velleman nv...
-
Page 3: User Manual
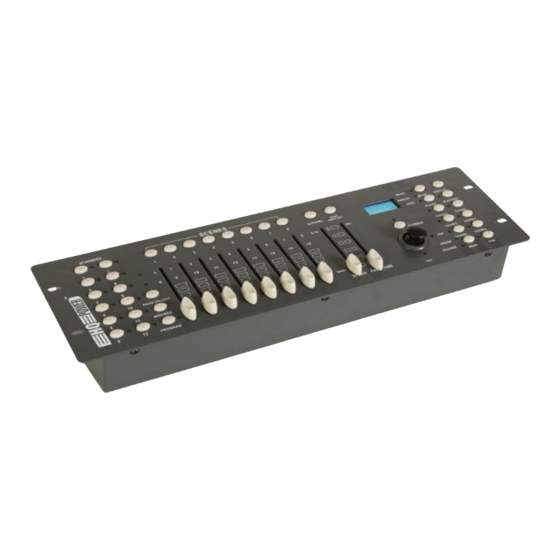
If in doubt, contact your local waste disposal authorities. Thank you for choosing Velleman! Please read the manual thoroughly before bringing this device into service. If the device was damaged in transit, do not install or use it and contact your dealer. - Page 4 4. DMX In This connector accepts your DMX input signals. 5. DC Input 9-12VDC / 500mA. 6. Power Switch Switch the power on or off. 7. AUDIO In Accepts the audio signals between 0.1V ~ 1Vpp. V. 02 – 14/06/2018 ©Velleman nv...
- Page 5 Setting Up the Joystick 1. Press and hold the PROGRAM button until the LED is lit. 2. Press and hold the MODE and FINE buttons simultaneously. The assign LED should light. If the V. 02 – 14/06/2018 ©Velleman nv...
- Page 6 6. Tap the scene button that corresponds to the scene you’re editing. This will override the existing scene. Be sure to select the same scene in steps 3 and 6, otherwise you may accidentally record over an existing scene. V. 02 – 14/06/2018 ©Velleman nv...
- Page 7 1. Enable the PROGRAM mode. 2. Press the corresponding button to the chase you wish to add a step to. 3. Press the TAP / DISPLAY button, the LCD will show the current step. V. 02 – 14/06/2018 ©Velleman nv...
- Page 8 Hold the MODE button and press the SCENE button that is same as the slider number for tilt (slider 5 / scene 5)). 7. Continue steps 3 to 7 as needed. You may reverse a maximum of 48 channels for 12 scanners. V. 02 – 14/06/2018 ©Velleman nv...
- Page 9 Music Mode 1. Press the MUSIC / BANK COPY button to activate MUSIC mode. 2. Use the bank UP / DOWN button to select a bank of scenes you wish to run. The scenes V. 02 – 14/06/2018 ©Velleman nv...
- Page 10 4. Disconnect the device from the mains prior to maintenance activities. 5. Wipe the device regularly with a moist, lint-free cloth. Do not use alcohol or solvents. 6. There are no user-serviceable parts. 7. Contact your dealer for spare parts if necessary. V. 02 – 14/06/2018 ©Velleman nv...
- Page 11 45 °C Use this device with original accessories only. Velleman nv cannot be held responsible in the event of damage or injury resulted from (incorrect) use of this device. For more info concerning this product and the latest version of this manual, please visit our website www.velleman.eu.
-
Page 12: Gebruikershandleiding
Houd dit toestel uit de buurt van kinderen en onbevoegden. 3. Algemene richtlijnen ® Raadpleeg de Velleman service- en kwaliteitsgarantie achteraan deze handleiding. Dit toestel is ontworpen voor professioneel gebruik op podia, in disco's, enz. U mag dit toestel enkel binnenshuis gebruiken en aansluiten op een spanning van maximum 9-12VDC / 500mA. - Page 13 Deze aansluiting zendt uw DMX-waarde naar de DMX scanner of DMX pack. 4. DMX In Deze aansluiting aanvaardt uw DMX ingangssignalen. 5. DC-ingang 9-12VDC / 500mA. 6. Voedingsschakelaar In- of uitschakelen van het toestel. V. 02 – 14/06/2018 ©Velleman nv...
- Page 14 1, 6 and 8 are ON 1, 5, 6 and 8 are ON De PROGRAM-modus inschakelen Om de mode in te schakelen, houd de PROGRAM-knop gedurende enkele seconden ingedrukt tot de LED oplicht. V. 02 – 14/06/2018 ©Velleman nv...
- Page 15 6. Druk op de scèneknop die met de bewerkte scène overeenkomt. De bestaande scène wordt overschreven. Zorg dat u dezelfde scène kiest als in stap 3 en 6 om niet over een bestaande scène te schrijven. V. 02 – 14/06/2018 ©Velleman nv...
- Page 16 5. Druk op MIDI / REC COPY. Alle LEDs knipperen drie maal om aan te geven dat de opdracht is volbracht. Een stap toevoegen 1. Schakel de PROGRAM-modus in. 2. Druk op de knop van de toe te voegen chase. V. 02 – 14/06/2018 ©Velleman nv...
- Page 17 2. Druk op de scannerknop en selecteer de te wissen scanner. 3. Druk gelijktijdig op MODE en AUTO / DEL. Alle LEDs knipperen drie maal om aan te geven dat de opdracht is uitgebracht. V. 02 – 14/06/2018 ©Velleman nv...
- Page 18 2. Gebruik UP / DOWN om de bank met scènes te selecteren die u wenst weer te geven. De geselecteerde scènes worden sequentieel weergegeven op het muziekritme door de ingebouwde microfoon opgevangen. 3. Druk opnieuw op MUSIC / BANK COPY om de modus te verlaten. V. 02 – 14/06/2018 ©Velleman nv...
- Page 19 4. Ontkoppel het toestel van het lichtnet voor u aan onderhoudswerkzaamheden begint. 5. Maak het toestel geregeld schoon met een vochtige, niet pluizende doek. Gebruik geen alcohol of solvent. 6. De gebruiker mag geen onderdelen vervangen. 7. Bestel eventuele reserveonderdelen bij uw dealer. V. 02 – 14/06/2018 ©Velleman nv...
- Page 20 45 °C Gebruik dit toestel enkel met originele accessoires. Velleman nv is niet aansprakelijk voor schade of kwetsuren bij (verkeerd) gebruik van dit toestel. Voor meer informatie over dit product en de laatste versie van deze handleiding, zie www.velleman.eu. De informatie in deze handleiding kan te allen tijde worden gewijzigd zonder voorafgaande kennisgeving.
-
Page 21: Notice D'emploi
Les dommages occasionnés par des modifications à l'appareil par le client, ne tombent pas sous la garantie. Gardez votre VDPC174 hors de la portée de personnes non qualifiées et de jeunes enfants. 3. Directives générales Se référer à la garantie de service et de qualité Velleman ® en fin de notice. ... - Page 22 Entrée des données MIDI. 2. DMX Polarity Select Sélection de la polarité DMX. 3. DMX Out Envoi de la valeur DMX vers le scanner DMX ou le pack DMX. 4. DMX In Entrée des signaux DMX. V. 02 – 14/06/2018 ©Velleman nv...
- Page 23 1, 6 et 7 sur ON 1, 5, 6 et 7 sur ON 1 et 8 sur ON 1, 5 et 8 sur ON 1, 6 et 8 sur ON 1, 5, 6 et 8 sur ON V. 02 – 14/06/2018 ©Velleman nv...
- Page 24 1. Activez le mode « PROGRAM ». 2. Pour sélectionner un banc contenant la scène à éditer, enfoncez « UP / DOWN ». 3. Sélectionnez la scène à éditer en enfonçant le bouton correspondant. V. 02 – 14/06/2018 ©Velleman nv...
- Page 25 4. Enfoncez le bouton « MIDI / REC ». 5. Répétez les étapes 3 et 4 jusqu’à ce que toutes les scènes soient instaurées. Insertion d’un banc de scènes dans une poursuite 1. Activez le mode « PROGRAM ». V. 02 – 14/06/2018 ©Velleman nv...
- Page 26 4. Enfoncez TAP / DISPLAY pour choisir entre le mode à 8 canaux et à 16 canaux. 5. Enfoncez le bouton « SCANNER » pour sélectionner le scanner. 6. Maintenez enfoncé le bouton « MODE » et enfoncez le bouton « SCENE » correspondant au V. 02 – 14/06/2018 ©Velleman nv...
- Page 27 3. Après la sélection, utilisez les glissières « SPEED » et « FADE TIME » pour ajuster la vitesse de la progression de la scène. 4. Il est également possible d’instaurer la vitesse à l’aide du bouton TAP SYNC / DISPLAY. Le V. 02 – 14/06/2018 ©Velleman nv...
- Page 28 2. Utilisez le bouton « UP / DOWN » pour sélectionner le canal DMX (01 ~ 16) à attribuer au canal MIDI. 3. Maintenez enfoncé « MIDI / REC » pour sauvegarder la configuration. Toutes les LEDs flashent trois fois pour indiquer le complètement de l’opération. V. 02 – 14/06/2018 ©Velleman nv...
- Page 29 © DROITS D’AUTEUR SA Velleman est l’ayant droit des droits d’auteur pour cette notice. Tous droits mondiaux réservés. Toute reproduction, traduction, copie ou diffusion, intégrale ou partielle, du contenu de cette notice par quelque procédé ou sur tout support électronique que ce soit est interdite sans l’accord préalable écrit de l’ayant droit.
-
Page 30: Manual Del Usuario
Mantenga el VDPC174 lejos del alcance de personas no capacitadas y niños. 3. Normas generales ® Véase la Garantía de servicio y calidad Velleman al final de este manual del usuario. Este aparato ha sido diseñado para uso profesional en una discoteca, un teatro, etc. El VDPC174 sólo está... - Page 31 4. DMX In Entrada de las señales DMX. 5. DC Input 9-12VDC / 500mA. 6. Interruptor ON/OFF Para activar y desactivar el aparato. 7. AUDIO In Entrada de las señales audio entre 0.1V ~ 1Vpp. V. 02 – 14/06/2018 ©Velleman nv...
- Page 32 1, 5, 6 y 8 en la posición ON Activar el modo de programación Para activar el modo de programación, mantenga pulsado el botón « PROGRAM » durante algunos segundos hasta que el LED se ilumine. V. 02 – 14/06/2018 ©Velleman nv...
- Page 33 6. Pulse el botón de escena que coincide con la escena editada. Esto borrará la escena existente. En los pasos 3 y 6, asegúrese de que seleccione la misma escena para no borrar escenas existentes. V. 02 – 14/06/2018 ©Velleman nv...
- Page 34 3. Utilice los botones UP / DOWN para seleccionar el banco de escenas que quiere copiar. 4. Pulse el botón MUSIC / BANK COPY. 5. Pulse el botón MIDI / REC COPY. Todos los LEDs parpadean tres veces para indicar que la operación está terminada. V. 02 – 14/06/2018 ©Velleman nv...
- Page 35 Mantenga pulsado el botón « HOLD » y pulse el botón « SCENE » que coincide con el deslizador (deslizador 5 / escena 5)). 7. Repita los pasos de 3 a 7 si fuera necesario. Es posible invertir máx. 48 canales y 12 escáneres. V. 02 – 14/06/2018 ©Velleman nv...
- Page 36 Este ajuste queda válido hasta que se desplace el deslizador. 5. Pulse el botón « AUTO / DISPLAY » para salirse del modo « AUTO ». V. 02 – 14/06/2018 ©Velleman nv...
- Page 37 2. Utilice el botón « UP / DOWN » para seleccionar el canal DMX (01 ~ 16) que quiere atribuir al canal MIDI. 3. Mantenga pulsado « MIDI / REC » para guardar la configuración. Todos los LEDs parpadean tres veces para indicar que la operación está terminada. V. 02 – 14/06/2018 ©Velleman nv...
- Page 38 45 °C Utilice este aparato sólo con los accesorios originales. Velleman nv no será responsable de daños ni lesiones causados por un uso (indebido) de este aparato. Para más información sobre este producto y la versión más reciente de este manual del usuario, visite nuestra página web www.velleman.eu.
-
Page 39: Bedienungsanleitung
Halten Sie Kinder und Unbefugte vom Gerät fern. 3. Allgemeine Richtlinien Siehe Velleman® Service- und Qualitätsgarantie am Ende dieser Bedienungsanleitung. Dieses Gerät ist entworfen für den professionellen Einsatz auf Bühnen, in Discotheken, usw. Sie dürfen dieses Gerät nur im Innenbereich bei einer maximalen Spannung von max. 9-12VDC / 500mA verwenden. - Page 40 Rückplatte (siehe Abb. 2) 1. MIDI In Empfängt MIDI-Daten. 2. DMX Polarity Select Wahl der DMX-Polarität. 3. DMX Out Dieser Anschluss sendet Ihren DMX-Wert an den DMX-Scanner oder DMX-Pack. 4. DMX In Dieser Anschluss akzeptiert Ihre DMX-Eingangssignale. V. 02 – 14/06/2018 ©Velleman nv...
- Page 41 1, 6 und 7 sind ON 1, 5, 6 und 7 sind ON 1 und 8 sind ON 1, 5 und 8 sind ON 1, 6 und 8 sind ON 1, 5, 6 und 8 sind ON V. 02 – 14/06/2018 ©Velleman nv...
- Page 42 2. Drücken Sie UP / DOWN um die Bank, die Sie bearbeiten möchten, zu selektieren. 3. Wählen Sie die zu bearbeitende Szene, indem Sie die entsprechende Taste drücken. 4. Verwenden Sie die Blendregler und/oder Joystick um die Szene anzupassen. V. 02 – 14/06/2018 ©Velleman nv...
- Page 43 Eine Bank mit Szenen in eine Chase bringen 1. Schalten Sie den Programmmodus ein. 2. Wählen Sie die Chase, die Sie programmieren wollen. 3. Wählen Sie mit UP / DOWN die Bank, die Sie kopieren wollen. V. 02 – 14/06/2018 ©Velleman nv...
- Page 44 Sie sich im REVERSE-Modus befinden und den Neige-LED aufleuchtet, überprüfen Sie, an welchen Schiebeschalter die Steuerung der Neigebewegung angeschlossen ist. Halten Sie MODE gedrückt und drücken Sie die Szenentaste, die dem Neige-Schiebschalter entspricht V. 02 – 14/06/2018 ©Velleman nv...
- Page 45 4. Stellen Sie die Geschwindigkeit mit TAP SYNC / DISPLAY ein. Das Intervall zwischen zwei Tastendrücken ist gleich dem Intervall zwischen zwei Schritten. Die Einstellung bleibt aktiv bis Sie den SPEED-Schiebeschalter verstellen. 5. Drücken Sie AUTO / DISPLAY um den Modus zu verlassen. V. 02 – 14/06/2018 ©Velleman nv...
- Page 46 Sie keine zusätzlichen Löcher in Montagebügel, verändern Sie die Anschlüsse nicht, usw. 3. Sorgen Sie dafür, dass die Netzkabel nicht beschädigt sind. Lassen Sie das Gerät von einer Fachkraft warten. V. 02 – 14/06/2018 ©Velleman nv...
- Page 47 2.7 kg max. Umgebungstemperatur 45 °C Verwenden Sie dieses Gerät nur mit originellen Zubehörteilen. Velleman nv übernimmt keine Haftung für Schaden oder Verletzungen bei (falscher) Anwendung dieses Gerätes. Für mehr Informationen zu diesem Produkt und die neueste Version dieser Bedienungsanleitung, siehe www.velleman.eu.
-
Page 48: Instrukcja Obsługi
W razie wątpliwości należy skontaktować się z lokalnym organem odpowiedzialnym za utylizację odpadów. Dziękujemy za zakup produktu Velleman! Prosimy o dokładne zapoznanie się z instrukcją obsługi przed użyciem urządzenia. Nie montować ani nie używać urządzenia, jeśli zostało uszkodzone podczas transportu - należy skontaktować... - Page 49 1. MIDI IN Wejście danych MIDI. 2. DMX POLARITY SELECT Wybór biegunowości DMX. 3. DMX OUT To złącze przesyła wartość DMX do skanera lub pakietu DMX. 4. DMX IN To złącze przyjmuje sygnały wejściowe DMX. V. 02 – 14/06/2018 ©Velleman nv...
- Page 50 1, 5, 6 i 7 w pozycji ON 1 i 8 w pozycji ON 1, 5 i 8 w pozycji ON 1, 6 i 8 w pozycji ON 1, 5, 6 i 8 w pozycji ON V. 02 – 14/06/2018 ©Velleman nv...
- Page 51 8. Powtarzać kroki od 4 do 7 do momentu zaprogramowania wszystkich scen w banku 1. 9. Nacisnąć przycisk skanera 1, aby wyłączyć sterowanie suwakiem. 10. Po zakończeniu wyjść z trybu programowania. Można teraz ręcznie przeglądać program. V. 02 – 14/06/2018 ©Velleman nv...
- Page 52 Aby możliwe było zaprogramowanie sekwencji, konieczne jest zaprogramowanie kilku scen. Ta funkcja umożliwia odtwarzanie do 240 scen w ustalonej wcześniej kolejności. Zaleca się usunięcie wszystkich sekwencji sterownika przed rozpoczęciem programowania sekwencji po raz pierwszy. Patrz “Usuwanie wszystkich sekwencji”. V. 02 – 14/06/2018 ©Velleman nv...
- Page 53 3. Użyć przycisków wyboru banków pamięci (GÓRA/DÓŁ), aby wybrać oś, która ma zostać przyporządkowana (ruch panoramiczny lub pionowy). 4. Przyciskiem TAP/DISPLAY wybrać tryb 16- lub 8-kanałowy. 5. Nacisnąć przycisk odpowiadający skanerowi, który ma zostać przyporządkowany. 6. Przytrzymując przycisk MODE, nacisnąć przycisk sceny odpowiadający suwakowi V. 02 – 14/06/2018 ©Velleman nv...
- Page 54 3. Nacisnąć jednocześnie przyciski MODE i TAP/DISPLAY, aby zapisać ustawienia w pamięci. Aby anulować zapisywanie ustawień, nacisnąć przycisk BLACKOUT, aby zakończyć operację. Odtwarzanie Uruchamianie scen Istnieją trzy tryby, w których można uruchamiać sceny i sekwencje: Tryb ręczny, tryb automatyczny i tryb muzyczny. V. 02 – 14/06/2018 ©Velleman nv...
- Page 55 4. Jeżeli podczas transferu wystąpi błąd, na wyświetlaczu LCD pojawi się napis ERROR. Odbiór pliku zrzutu 1. Gdy urządzenie jest wyłączone, nacisnąć jednocześnie przyciski skanera 8 i 9 oraz sceny 2. 2. Ponownie włączyć zasilanie, przytrzymując te trzy przyciski. Na ekranie LCD pojawi się napis V. 02 – 14/06/2018 ©Velleman nv...
- Page 56 © INFORMACJA O PRAWACH AUTORSKICH Właścicielem praw autorskich do niniejszej instrukcji jest firma Velleman nv. Wszelkie prawa są zastrzeżone na całym świecie. Żadna część niniejszej instrukcji nie może być kopiowana, powielana, tłumaczona ani przenoszona na jakikolwiek nośnik elektroniczny (lub w inny sposób) bez wcześniejszej pisemnej zgody właściciela praw...
-
Page 57: Manual De Funcionamento
3. Normas gerais ® Consulte a Garantia de Serviço e Qualidade Velleman nas últimas páginas deste manual. Este aparelho destina-se a ser usado por profissionais em palcos, discotecas, teatros, etc. O VDPC174 só deve ser usado em espaços interiores e estar a ligado a uma corrente de no máx. 9-12VDC / 500mA. - Page 58 Este conector envia o seu valor DMX para o scanner DMX ou pacote DMX. 4. Entrada DMX Este conector aceita os seus sinais de entrada DMX. 5. entrada DC 9-12VDC / 500mA. 6. Interruptor Para ligar ou desligar. V. 02 – 14/06/2018 ©Velleman nv...
- Page 59 1, 6 e 7 estão ON 1, 5, 6 e 7 estão ON 1 e 8 estão ON 1, 5 e 8 estão ON 1, 6 e 8 estão ON 1, 5, 6 e 8 estão ON V. 02 – 14/06/2018 ©Velleman nv...
- Page 60 8. Repita os passos 4 a 7 até todas as cenas terem sido programadas no banco 1. 9. Prima o botão SCANNER 1 para desativar o controlador. 10. Quando terminar, desative o modo PROGRAM. Poderá agora controlar manualmente o que acabou de programar. V. 02 – 14/06/2018 ©Velleman nv...
- Page 61 240 cenas numa ordem pré-selecionada. Recomenda-se que apague todas as sequências existentes no controlador antes de programar sequências pela primeira vez. Ver “Apagar Todas as Sequências”. 1. Ative o modo PROGRAM. V. 02 – 14/06/2018 ©Velleman nv...
- Page 62 (exemplo: Se a panorâmica é controlada pelo controlador número 4, pressione o botão MODE enquanto prime o botão de cena 4) 7. Quando terminar pressione os botões MODE e FINE em simultâneo mais uma vez para sair do modo ASSIGN. V. 02 – 14/06/2018 ©Velleman nv...
- Page 63 2. Verifique e certifique-se de que tanto os Led AUTO como o Led MUSIC estão desligados 3. Use o botão de banco UP / DOWN para selecionar o banco que tem as cenas que pretende executar. 4. Pressione o botão SCENE correspondente à cena que pretende exibir. V. 02 – 14/06/2018 ©Velleman nv...
- Page 64 2. Ligue unidade novamente enquanto pressiona estes três botões. No LCD aparece RECEIVE para indicar que a unidade está a receber o arquivo de despejo. 3. Assim que a recepção terminar, a unidade voltará automaticamente ao modo NORMAL. V. 02 – 14/06/2018 ©Velleman nv...
- Page 65 © SOBRE OS DIREITOS DE AUTOR A Velleman NV detém os direitos de autor deste manual do utilizador. Todos os direitos mundiais reservados. É estrictamente proíbido reproduzir, traduzir, copiar, editar e gravar este manual do utilizador ou partes deste sem prévia autorização escrita por parte da detentora dos direitos.
- Page 66 Velleman®; worden. - se calcula gastos de transporte de y a Velleman® si el aparato ya no está • Bij reparaties buiten de waarborgperiode zullen transportkosten aangerekend cubierto por la garantía.
- Page 67 Velleman® Service- und Qualitätsgarantie wymienione wyżej warunki są bez uszczerbku dla wszystkich komercyjnych gwarancji. Seit der Gründung in 1972 hat Velleman® sehr viel Erfahrung als Verteiler in der Powyższe postanowienia mogą podlegać modyfikacji w zależności od Elektronikwelt in über 85 Ländern aufgebaut.
Need help?
Do you have a question about the HQ POWER VDPC174 and is the answer not in the manual?
Questions and answers