
Related Manuals for Primera LX610


Summary of Contents for Primera LX610
- Page 1 User’s Manual © 2020 All rights reserved. For the most recent version of this manual please visit http://www.primera.com/LX610downloads...
- Page 2 Trademark Acknowledgments: Primera and Primera LX610 are registered trademarks of Primera Technology, Inc. Windows is a registered trademark of Microsoft Corporation. All other trademarks are the property of their respective owners.
-
Page 4: Table Of Contents
2F Replacing Ink Cartridges ..........................28 2G Adjusting the Gap Sensor Position (Pre Die-Cut Labels Only) ..............30 Section 3 Primera PrintHub ..........................32 3A Adjusting Knife Pressure and Stretch Factor ..................... 33 3B Using the Cost Estimator ........................... 35 3C Set the Gap Sensor Mode (Pre Die-Cut Labels Only) ................. - Page 5 4E.1 Choosing a Label Size (Page Layout) ....................58 4E.2 Import a flat Image (JPG, BMP, PNG, TIF, GIF) ..................59 4E.3 Working with Layers in an Imported Vector File ................62 4F Tutorial: How to Setup a Print and Cut using PTCreate Pro – Contour Cut ..........64 4F.1 Choosing a Label Size (Page Layout) ....................
-
Page 6: Section 1: Getting Started
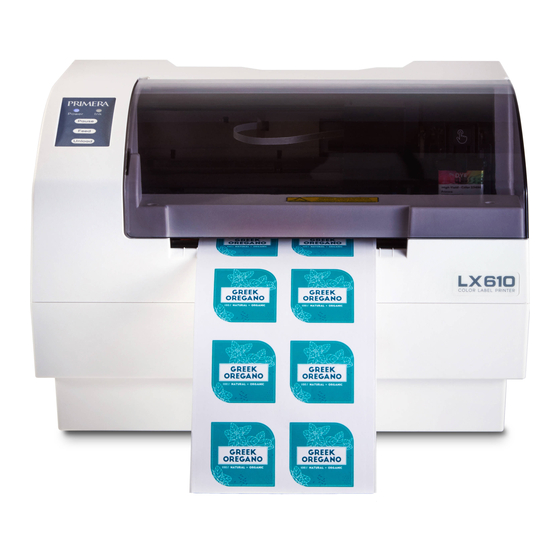
Section 1: Getting Started THANK YOU… ...for choosing an LX610 Color Label Printer. The LX610 Printer will print razor-sharp text and barcodes, vibrant colors, and even stunning photo-realistic photographs directly onto rolls of labels, card stock and a variety of other approved media. AND with the built in digital die cutter you can cut and create your labels in any size or shape you choose. -
Page 7: Unpacking And Inspection
1B Unpacking and Inspection While unpacking your printer, inspect the carton to ensure that no damage has occurred during shipping. Make sure that all supplied accessories are included with your unit. The following items are included in the supply box: 1. -
Page 8: Installing The Roll Holders
1C Installing the Roll Holders Some light assembly is required before operating the printer. Follow these instructions to install the roll holders. 1. Set the printer on its front so the bottom is facing you. Notch 2. Install the movable label roll holder by attaching the hooked end on the rail. The bottom of the holder will fit in the notch on the printer. - Page 9 3. Slide the Roll Holder to the far right. Notch 4. Install the roll guide by attaching Roll Guide the hooked end on the rail. The bottom of the holder will fit in the notch on the printer. Roll Guide...
- Page 10 Stop 5. Slide the Guide to the stop. 6. Locate the remaining roll holder with the protruding wire. Connect the wire to the port on the printer. Tuck the wire inside the cavity. Push the wire into the cavity as you move the holder closer to the notch Wire...
- Page 11 7. Snap the holder in place so the two screw holes line up with the holes on the printer. 8. Install the T8 screws using the INCLUDED Allen key or a Torx T8 screwdriver. 9. Rotate the printer back on its feet.
-
Page 12: Identifying The Parts
1D Identifying the Parts These illustration shows the printer from various angles so all important parts can be identified. Control Panel Front Cover The Power LED indicates that the printer is on and ready to receive print jobs. The Ink LED will illuminate when a cartridge has 10% or less of its ink remaining. The Pause Button is pressed to pause a job to allow for loading of label stock and ink cartridges. - Page 13 Interior Die Cutting Upper Guide Die Cutter Print Carrier Carriage Ribbon Cable Shaft Ribbon Cable Print Carrier Die Cutting Knife Collar Die Cutting Pre die-cut Lower Guide Wear Strip Pinch Rollers Handle Knife rollers Shaft Cutter Wheel Mechanism...
-
Page 14: Section 2: Media, Cartridges And Knives
Back Movable Gap Sensor Infeed Area Power Switch Throat Guide Adjustment Fixed Guide Power Movable Roll Fixed Roller Holder Holder w/ Chip Reader Section 2: Media, Cartridges and Knives... -
Page 15: Label And Roll Specifications
2A Label and Roll Specifications Pre Die-Cut Labels. A wide variety of pre die-cut label stock can be used in the printer. Refer to the specifications and settings in the following sections before ordering custom stock from Primera or any stock from another company. - Page 16 For these reasons the weight or thickness of the liner is a variable that cannot easily be defined. Primera recommends and uses 40# liner with all Pre Die-Cut label stock.
- Page 17 Note on Label Orientation: If you are using an applicator to apply your labels, be sure to order label stock with the correct orientation for your applicator. For example, most applicators will apply the side of the label first, so you will want to print the labels sideways.
-
Page 18: Installing Digital Die-Cutting Label Stock
2B Installing Digital Die-Cutting Label Stock 1. Move the roll holder to the preset position for on demand digital die-cutting (3 mark from the left – 1.25”) Move to third mark from Left 2. Install the Blue Hub on the open side of the digital die-cutting media. Note: The green hub is not needed for digital die-cutting and can be stored in the notch on the movable holder. - Page 19 3. Set the roll in place so that the blue pin sits in the notch on the roll holder. Blue Pin Notch 4. Make sure the green chip holder fits in the corresponding green slot on the roll holder. Green Chip Holder Notch...
- Page 20 5. Before feeding the stock you must plug in power and switch on the printer. Power Switch Power Cable 6. Guide the leading edge of the roll into the feed area. Move the blue guide to the far side. Blue Guide 7.
-
Page 21: Installing Pre Die-Cut Label Stock
2C Installing Pre Die-Cut Label Stock 1. Move the roll holder to the approximate position which matches the width of the stock you are installing. You can always fine tune this later. 2. Install the Green Hub on the right side of the pre die-cut media. Black Hub Blank Chip Holder Smart Chip... - Page 22 (Hub/Chip comes preinstalled) 3. Install the Blue Hub on the left side of the digital die cutting media. Pre Die-Cut Media Blue Hub 4. Set the roll in place so that the blue pin sits in the notch on the roll holder. Blue Pin Notch...
- Page 23 5. Make sure the green blank chip holder fits in the corresponding green slot on the roll holder. Blank Chip Holder Notch Before feeding the stock you must plug in power and switch on the printer. Power Switch Power Cable...
- Page 24 6. Guide the leading edge of the roll into the feed area. Move the blue guide so that it touches the label stock. Gap sensor should intersect the gap between labels Blue Guide Gap Sensor Position Note the positon of the label sensor. Slide Indicator from right the sensor position indicator so that it edge of media...
-
Page 25: Replacing The Digital Die Cutting Knife Holder
2D Replacing the Digital Die Cutting Knife holder Install the included die cutting knife shown here. 1. Open the Cover 2. Pull out on the blue handle to loosen the knife collar. - Page 26 3. Install the knife holder. 4. Push on the knife so it goes all the way down before pushing the collar in. 5. Push the collar to tighten the knife holder and allow it to cut. Correct Incorrect...
-
Page 27: Replacing The Cutting Knife
2E Replacing the Cutting Knife When a knife is dull it will no longer cut through the label at maximum pressure. You will start to see ragged cuts or cuts that do not cut all the way through the label material. You can attempt to increase the pressure but you’ll probably need to replace the knife. -
Page 28: Replacing Ink Cartridges
2F Replacing Ink Cartridges You can replace cartridges at any time or wait for the Low Ink Warning to prompt you to replace cartridges. You will receive low ink warnings at 10% and 0%. Press the Load/Feed button to continue printing after you receive this warning. - Page 29 4. Locate a new cartridge and remove it from its packaging. Remove the foil outer package and the tape covering the nozzles. 5. Place the new cartridge into the empty carriage. Note: When installing the cartridge, tilt the cartridge at a slight backward angle of approximately 30 degrees. 6.
-
Page 30: Adjusting The Gap Sensor Position (Pre Die-Cut Labels Only)
2G Adjusting the Gap Sensor Position (Pre Die-Cut Labels Only) If you are using label stock other than standard square / rectangular die-cut labels such as circular die-cut labels or through-hole stock use the instructions below to adjust the position of the label stock gap sensor. - Page 31 The sensor can only be moved a maximum of 2 inches from the left side of the printable area. This means that the maximum diameter circular label that can be printed is 4 inches. For circular labels larger than 4 inches in diameter, you must have a black mark printed on the back of the label stock. This means that you must change the Stock Sensor Mode to Reflective.
-
Page 32: Section 3 Primera Printhub
Section 3 Primera PrintHub Primera PrintHub is used to interact with the printer for gathering ink levels, maintenance, alignment, cost calculation and several other functions. You can use it to manage these functions on multiple LX610 printers and other Primera label printer models. PrintHub automatically installs with your printer driver and can be accessed through the printer driver preferences or as a program on your Windows start menu. -
Page 33: Adjusting Knife Pressure And Stretch Factor
3A Adjusting Knife Pressure and Stretch Factor Knife Pressure and Stretch Factor settings can be found in Primera Print Hub on the Printer Settings Tab for the LX610. Click the Advanced Settings button to view these settings. Pressure affects how deep into the media the knife will cut. - Page 34 stretch factor will need to be adjusted to compensate for the thicker material and different feed speed. Adjusting Knife Pressure over time. Eventually, the knife blade will begin to wear and require more cut pressure to cut at the same depth as when it was brand new and sharper.
-
Page 35: Using The Cost Estimator
3B Using the Cost Estimator The cost estimator is found under the queue section on the first tab of the PrintHub. The last five job costs are stored in the list. Each job will show the cost per label based on the cost per cartridge entered below the list. -
Page 36: Set The Gap Sensor Mode (Pre Die-Cut Labels Only)
2. Go to Start - Programs - Primera Technology - Primera PrintHub. 3. Click on the Label Feed (3rd tab from left). - Page 37 for irregular shaped labels, circles larger than 4 inches or on any stock where the print starting position cannot be sensed using the label itself. Continuous. (Sensor off) If you have continuous stock with no die-cut, reflective mark or holes, set the sensor type to Continuous.
-
Page 38: Set The Present/Cut Mode
2. Go to Start - Programs - Primera Technology - Primera PrintHub. 3. Click on the Label Feed Tab. - Page 39 Present Options Do not present. In this mode the label stock does not move after the last label is printed. This means that part of the last label printed is still in the printer. This should be used only if you have a label rewinder attached.
-
Page 40: Adjusting Print Alignment
This is to avoid any need for alignment. The LX610 senses the beginning of the label with an optical sensor and is capable of printing to top, bottom, left and right edge. Because of this it is necessary to align the printer to work with specific types of label stock. - Page 41 Click on Test Alignment to print the alignment shown to the right. Look at the print to determine how much white space is visible on the edges. The black lines should print right on the leading edge and left edge. In this example the Top of Form needs approximately - 10.
-
Page 42: Printhub Settings
3F PrintHub Settings General application settings that apply to the software and all printers can be found by clicking the blue “Settings” button in the lower left. Printer specific settings can be found on the “Printer Settings” Tab. See next section. Language. - Page 43 Advanced. Check the “Generate Printer Status XML” box to create an XML at "C:\ProgramData\PTI\PrintHub\PrinterStatus.xml". Software developers can use this file to display status information such as error messages and ink levels in 3rd party applications.
-
Page 44: Printhub Printer Settings
3G PrintHub Printer Settings Printer settings can be found in Primera Print Hub on the Printer Settings Tab for the LX610. Information. This section displays all current driver, software and firmware versions. Advanced Setting Button. Click the Advanced Settings button to view the following settings. -
Page 45: 3G1. Multiple Printer Support
General Settings 3G1. Multiple Printer Support You can install multiple printers to the same computer and use them simultaneously. To do so you will need to change the USB serial number identifier of one of the two printers, two of three printers, three of four printers etc. -
Page 46: Section 4 Printing And Cutting With Ptcreate
Section 4 Printing and Cutting with PTCreate PTCreate is everything you will need to layout your prints and cuts for your LX610. Every object that you place in your layout, can be set to print only, cut only or Print and Cut. There are two different versions. - Page 47 2. Import. Standard Version import allows you to insert flat files like JPG, BMP or PNG which can be a graphic you would like to print. Pro Version Import allows you to import flat files and Vector files like AI, EPS and SVG which can be a graphic you would like to print, a cut file or both in the same file.
- Page 48 c. Fill and Stroke. Use this to change the line style of the cut. For the most part you should leave these settings at their defaults. If you are having trouble seeing your cut line, you can change the color of it here. d.
-
Page 49: Ptcreate Software Activation
4B PTCreate Software Activation You will need to activate the Professional version of your PTCreate software. If you purchase the Pro Version, you will be sent an activation code in your purchase confirmation. To Activate follow the activation prompt that appears when you open the software or go to the Help Menu - Activate An activation windows will appear. -
Page 50: Software Deactivation
4C Software Deactivation To move the activation to another computer you will need first remove the activation from this computer. To remove activation, go the Help Menu – Deactivate… A confirmation prompt will appear. Important Note: Deactivation requires internet access! If you are unable to deactivate because of a computer crash, please contact tech support to receive another activation code. -
Page 51: Tutorial How To Setup A Print And Cut In Ptcreate Standard
4D Tutorial How to setup a Print and Cut in PTCreate Standard This tutorial will walk you through the basic steps to print and cut a label. 4D.1 Choosing a Label Size (Page Layout) After you activate your software you will be prompted to open or create a new project. 1. -
Page 52: Import A Flat Image (Jpg, Bmp, Png, Tif, Gif)
PTCreate Standard allows you to import flat files for printing only. You can import the following image formats: JPG, BMP, PNG, TIF, GIF. Important Note: Primera recommends imported images are at least 300 DPI. The software is optimized for this size. Larger DPI images can be manually resized. Smaller DPI images will not utilize the maximum quality of the printer and may appear pixelated. - Page 53 2. Browse to the file you would like to use and choose Open. 3. The file will appear on your page layout. 4. You can manually move it on your page or increase the size. However, a better option is to use the Position and Size window.
-
Page 54: Add A Cut File
5. Center the image horizontally and vertically to the Page. 4D.3 Add a Cut file In PTCreate Standard you can either draw a box in the approximate location of the cut file or use one of the preset size from the library. If you have a rectangular label or you would like to add a corner radius to your cut it is preferable to draw the cut line. - Page 55 Before you start to draw the cut line, adjust the corner radius. You will not be able to change this after you draw your cut line. The corner radius is the amount of curve around the corners. .125 in (1/8 Inch) is the standard corner radius. Draw the cut line by hovering your mouse over the top left corner of your design.
- Page 56 Once the cut line is in place you can adjust its size and positon. Whatever size you choose will be the exact size of final cut label. A typical overbleed is 1/16”. This will ensure that the cut is completely within the printed label every time so you have no white space around the edges.
-
Page 57: Print
4D.4 Print. To print go to the File Menu and choose Print or click the Print Icon on the shortcut bar. The print dialog will appear. Make sure Print+Cut is selected. Click the Properties button to access the printer settings such as Print Quality, Saturation and Color Matching. For a full explanation of printer driver settings see section 5E Note: Before printing we recommend clicking the print Preview Button... -
Page 58: Tutorial: How To Setup A Print And Cut Using Ptcreate Pro - Vector File Cut
4E: Tutorial: How to Setup a Print and Cut using PTCreate Pro – Vector File Cut If you have a designer that is able to use an advanced program like Adobe Illustrator or Corel Draw, you can save your print file and cut file together as a multi-layer vector file in AI, EPS, or SVG format. You can then import them into PTCreate and designate which layer will be the cut and which will be the print. -
Page 59: Import A Flat Image (Jpg, Bmp, Png, Tif, Gif)
Tip! Set your page larger than the label size to be cut. This will allow you to create a bleed around the label so that you always cut inside your print and get perfect cut every time. 3. To set the page height or width to a custom size type the size in the W: and H: boxes or toggle the size up or down with the arrows. - Page 60 7. Browse to the file you would like to use and choose Open.
- Page 61 8. The file will appear on your page layout. You can manually move it on your page or increase the size. However, a better option is to use the Position and Size window. Set the size to match the size of the page layout. In this case center the image to the page.
-
Page 62: Working With Layers In An Imported Vector File
4E.3 Working with Layers in an Imported Vector File Once you have imported the vector file you view the layers in the layers window. The cut file must separated from the design at the top level. It cannot be buried under other layers that will be printed. - Page 63 10. Once you find the cut line, select that layer and click the style tab above. A. Choose Cut Only! B. Set Style to Blackout. 11. Now select the Print layer, click on the stye tab above and choose Print Only! Layer to be Cut Layer to be Printed 12.
-
Page 64: Tutorial: How To Setup A Print And Cut Using Ptcreate Pro - Contour Cut
4F Tutorial: How to Setup a Print and Cut using PTCreate Pro – Contour Cut This tutorial will walk you through the basic steps to print and cut a label using the trace image / contour cut feature found in the Professional version of PTCreate. 4F.1 Choosing a Label Size (Page Layout) After you activate your software you will be prompted to open or create a new project. -
Page 65: Import An Image
AI, EPS, PDF, SVG, JPG, BMP, PNG, TIF, GIF. Important Note: Primera recommends imported images are at least 300 DPI. The software is optimized for this size. Larger DPI images can be manually resized. Smaller DPI images will not utilize the maximum quality of the printer and may appear pixelated. - Page 66 5. Browse to the file you would like to use and choose Open. 6. The file will appear on your page layout. You can manually move it on your page or increase the size. However, a better option is to use the Position and Size window.
-
Page 67: Trace Image And Create Cut Line
Center the image horizontally and vertically to the Page. 4F.3 Trace Image and create Cut Line Tracing the images requires a flat file such as BMP, GIF, JPG or PNG. 9. Select the image object that you just imported. This is very important. - Page 68 10. There are many options available in the Trace Image window. However, the most important option is the Contrast. You should adjust the contrast until the preview shows a single green highlighted image in the shape you would like to cut. 11.
- Page 69 12. Note the difference in the preview when you increase and decrease the contrast. Contrast to High: If contrast is too high you will lose the shape detection and end up with a rectangle cut. Contrast to Low: If contrast is too low you will end up with extra cut lines outside of the main cut and potentially the wrong shape.
- Page 70 13. Click OK when you are happy with the shape of your cut line. The cut line will appear on top of your image as a red outline. You’ll see a trace layer appear in the layer window.
-
Page 71: Offset A Cut Path
4F.4 Offset a Cut Path 14. Now you’ll need to offset the cut line inside your image so that you’ll have a bleed. With the cut line selected go to the Path Menu and select Offset. On the Path Offset Window, check the Inset Offset box and adjust the amount of offset. For this image we chose 0.040 inches. - Page 72 16. Click OK to change the Offset. The new cut line will appear. Note: Before printing we recommend clicking the print Preview Button described in section 4H 17. To print go to the File Menu and choose Print or click the Print Icon on the shortcut bar. The print dialog will appear.
-
Page 73: Setup Multiple Identical Cuts (Duplicate And Array)
4G Setup multiple identical cuts (Duplicate and Array) If you intend to print and cut a smaller label such a 2” circle you may want to duplicate that image and cut line across the page so that you don’t waste material. No matter what your label size is your page size for die cutting is always 4.25”. - Page 74 Set the Size and Position. In this example we are setting the size to 2.125 x 2.125. Center the image horizontally and vertically. 4. Create your cut line using the shape tool on the left size tool bar. Right click on the rectangle icon and choose the circle tool.
- Page 75 7. Center the cut line horizontally to the page 8. Using the arrow tool select both image and the cut line by drawing a box around them.
- Page 76 Group them together by going to the Object Menu – Group. This will ensure that cut says with the image and in the correct relative location while we move and duplicate the image in the next steps. Align the group image and cut line to the upper left corner.
- Page 77 11. Now go to the Object Menu and click Duplicate. Make sure the image and cut line are still selected otherwise the Duplicate item will not be available. 12. Set the number of rows and columns. Set the gap between the rows and columns. In this case we are setting the gaps to zero.
-
Page 78: Print Preview
4H Print Preview Before you print you can click the Preview button to verify what objects will cut and what objects will print. Check either Show Cut Lines or Show Printable to see what will print or cut. -
Page 79: Vector File Specifications For Designer
4I Vector File Specifications for Designer When importing files using the methods described in section 4E please make sure the imported file follows the specifications below: 1. Place the design on a top layer. Place the cut line on another top layer at the same level as the design. -
Page 80: Section 5: Printing Only To Pre Die-Cut Labels
Section 5: Printing only to Pre Die-Cut labels If you don’t need to cut custom shapes, the LX610 is an extremely capable Pre Die-Cut Label printer. While PTCreate can print only to the LX610 other dedicated printing programs offer some advantages. - Page 81 2. Select "Blank Template". Click "Next". 3. Select "Color Label 610". Click "Next".
- Page 82 4. Select "Specify Custom Settings". Click "Next". 5. Set the page size, width and height to match labels installed in the printer. Click "Next". Important: Measure the label stock if you are unsure about the size.
- Page 83 6. Select your label shape. This is typically "Rounded Rectangle" for standard labels from Primera. Click Next. 7. Set all of the margins to zero. (You can adjusted the left margin and Top of Form in the Label Alignment Section). Click Next.
- Page 84 8. Set Rows and Columns to 1 for a standard label. Click Next. 9. Set Template Size to be the same as the label size. Click Next.
- Page 85 10. Check the "Picture" box to add a background photo or graphic to your label. Click "Next". If you click "Finish", the remaining default wizard options will be set and no picture will be added. 11. Select "Embedded Picture". Click the "File" Button to browse to the location of your photo/graphic file.
- Page 86 12. Review the label setup summary. If it is correct, click "Finish". Your blank label or label with background will be displayed. You can edit any of these initial settings by going to the File Menu and selecting "Page Setup". Basic and advanced settings are available on the various tabs.
-
Page 87: Add Text, Barcodes And Graphics To A Bartender Label
5B Add Text, Barcodes and Graphics to a BarTender Label Once you have created your label size you will be able to add text, a barcode and/or graphics. This can be done using one of the buttons on the button bar at the top of the screen. Add Text. -
Page 88: Printing From Other Programs
3. Choose the right printing program. There are many different applications that are capable of printing to the LX610. However, there are only a few that are ideal printing applications. For example, Adobe Illustrator is an excellent design program but is not always the best printing program. -
Page 89: Creating A Full Bleed Print
5D Creating a Full Bleed Print To create a label that completely fills the space with no white margins, adjust these settings in the status monitor and printing application (BarTender). This is only necessary if you are printing to Pre- Die Cut Label stock. - Page 90 TOF. Increase the Top of Form by 0.4mm. This will cause the printer to start printing before the label and ensure a fully printed label. Some additional adjustment may be necessary if the label was not perfectly aligned to begin with. See Section 4E. Note: It is best to over bleed as little as possible to avoid excess ink on the label backing.
-
Page 91: Printer Driver Settings
5E Printer Driver Settings Once the printer driver has been successfully installed, you will need to setup the driver with the appropriate print options. Refer to the following steps to change or verify your default printer driver preferences. These settings will apply to all new designs created in BarTender or other programs after the preferences were changed. - Page 92 ICC Gloss Paper, ICC Gloss Polyester and ICC Matte Bopp are all ICC calibrated color matching options. Select the setting that corresponds to your installed Primera media of the same type to produce ICC color matched prints. Note: ICC monitor calibration and additional setup is required for this option to work.
- Page 93 Set to "Yes" for fastest print speed. Requires an alignment print after every cartridge change. Set to "No" for better quality print (in some cases). Launch PrintHub This setting will open the Primera PrintHub application. Details Select this setting to see current firmware and driver version information and other printer settings.
-
Page 94: Section 6: Troubleshooting
6A Solving Pre Die-Cut Print Alignment Problems Image is Vertically Offset (White space can be seen on the top or bottom of the label) The LX610 decides where to start printing by detecting the start of a die-cut label, detecting a black mark on the back or detecting a thru-hole that corresponds to the start of the label. - Page 95 calibrated for a 2mm margin. A larger margin around the label will cause a right side space. Page Size. Often the page size is not large enough for the label. If this is the case you may see white space on the right side of the label and no image overlap on the opposite side.
-
Page 96: Maintenance
6B Maintenance Replacing the Cutter Wear Strip The wear strip is the surface directly underneath the cutting blade in the cutter mechanism. Over time this strip will wear down due to cutter knife pressure. It can also be damaged if the knife cuts through the liner and contacts the wear strip. -
Page 97: Poor Print Quality - Cleaning The Cartridge
6C Poor Print Quality – Cleaning the Cartridge It may be necessary to clean the ink cartridge nozzles if you notice reduced print quality, or if you suspect a cartridge nozzle has become slightly dried out or clogged. If the cartridge has been left out of the printer more than 30 minutes, the ink in the print head nozzles may have dried. - Page 98 Soak the paper towels in water for 5 seconds. 6. Place one paper towel on cartridge nozzles. Gently press the paper towel with your finger. Leave the paper towel on the nozzles for 30-40 seconds.
- Page 99 7. Wipe nozzles. a. Place second paper towel on flat/hard surface. b. Press the nozzles into the paper towel. c. Firmly tap the top of the cartridge three times to force the ink out. d. Wipe/Drag the cartridge in the direction indicated. e.
-
Page 100: Technical Support
6D Technical Support. If you have difficulties operating your Printer, contact technical support using one of the methods listed below. Source Location Primera Knowledge Base www.primera.com/kb Email Support www.primera.com/customer-support 763-475-6669 (Mon - Fri 7 a.m. - 10 p.m CST Phone Support and Saturday 11 a.m. -
Page 101: Section 7: Technical Specifications
Storage Temperature -4 to 140º F (-20 to 60º C) 10 to 60% RH (non-condensing) Operating Humidity Storage Humidity 10 to 80% RH (non-condensing) Certifications UL, UL-C, CE, FCC Class A REPLACEMENT INK Primera Pigment 53491 CARTRIDGES Primera Dye 53494...
Need help?
Do you have a question about the LX610 and is the answer not in the manual?
Questions and answers