Table of Contents
Advertisement
Quick Links
Advertisement
Table of Contents

Related Manuals for Asus 90IG02W1-BU9G10


Summary of Contents for Asus 90IG02W1-BU9G10
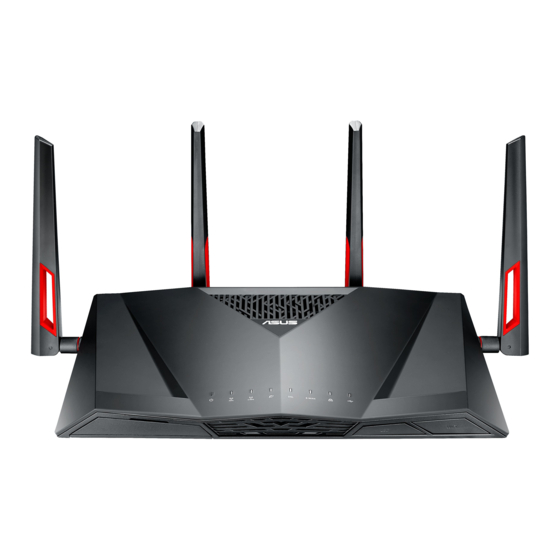
- Page 1 User Guide DSL-AC88U Dual-band Wi-Fi ADSL/VDSL Modem Router...
- Page 2 Product warranty or service will not be extended if: (1) the product is repaired, modified or altered, unless such repair, modification of alteration is authorized in writing by ASUS; or (2) the serial number of the product is defaced or missing. ASUS PROVIDES THIS MANUAL “AS IS” WITHOUT WARRANTY OF ANY KIND,...
-
Page 3: Table Of Contents
Table of contents Getting to know your wireless router Package contents ..................5 Hardware features ..................6 Creating your network Positioning your router ................9 What you need ...................10 Connecting your devices ................11 Before you proceed...................14 Network configuration using the web GUI Logging in to the web GUI ..............21 Setting up the wireless security settings ..........23 Managing your network clients ............25... - Page 4 Firmware Upgrade Troubleshooting Troubleshooting ..................43 Restoring the firmware via the Rescue mode........46 ASUS DDNS Service ..................48 Appendices Notices ......................50 Networks Global Hotline Information ..........64 ASUS Contact information ..............67...
-
Page 5: Getting To Know Your Wireless Router
Warranty card Support CD (User Manual/utilities) Splitter (varies with regions) • If any of the items is damaged or missing, contact ASUS for technical inquiries and support. Refer to the ASUS Support Hotline list at the back of this user manual. • Keep the original packaging material in case you would need future warranty services such as repair or replacement. -
Page 6: Hardware Features
Hardware features 10 11 Power LED Off: No power. On: Device is ready. Flashing slowly: Rescue mode Flashing quickly: WPS in progress. 5GHz LED Off: No 5GHz signal. On: Wireless system is ready. Flashing: Transmitting or receiving data via wireless connection. 2.4GHz LED Off: No 2.4GHz signal. - Page 7 E-WAN LED Off: No Ethernet connection. ON: Connection to Ethernet. LAN LED Off: No power or no physical connection. On: Has physical connection to a local area network (LAN). USB LED Off: No power or no physical connection with a USB device. On: Has physical connection with a USB device.
- Page 8 17 18 19 Reset button This button resets or restores the system to its factory default settings. WPS button This button launches the WPS Wizard. DSL port Connect to a splitter or to a telephone outlet via an RJ-11 cable. LAN 1 ~ 4 ports Connect network cables into these ports to establish LAN connection.
-
Page 9: Creating Your Network
Creating your network Positioning your router To get the best wireless network performance from your wireless router, follow the recommendations below: • Place the wireless router at the center of your network for maximum wireless coverage. • Keep the device away from metal obstructions and away from direct sunlight. • Keep the device away from 802.11g or 20MHz only Wi-Fi devices, 2.4GHz computer peripherals, Bluetooth devices, cordless phones, transformers, heavy-duty motors, fluorescent lights, microwave ovens, refrigerators, and other industrial equipment to prevent signal interference or loss. -
Page 10: What You Need
What you need To set up your network, you need one or two computers that meet the following system requirements: • Ethernet RJ-45 (LAN) port (10Base-T/100Base-TX/1000Base-T) • IEEE 802.11a/b/g/n/ac wireless capability • An installed TCP/IP service • Web browser such as Microsoft Internet Explorer, Mozilla Firefox, Apple Safari, or Google Chrome • If your computer does not have built-in wireless capabilities, install an IEEE 802.11a/b/g/n/ac WLAN adapter to your computer to connect to the network. -
Page 11: Connecting Your Devices
Connecting your devices • Use a wired connection when setting up your wireless router to avoid possible wireless setup issues. • Before setting up your ASUS wireless router, do the following: • If you are replacing an existing router, disconnect it from your network. • Disconnect the cables/wires from your existing modem. If your modem has a backup battery, remove it as well. • Reboot your computer (recommended). - Page 12 Wired connection Wall Power Outlet Power Wall telephone outlet Computer To set up your ADSL/VDSL router using a wired connection: 1. Insert the splitter’s line connector to the phone outlet and connect your phone into the phone port. 2. Using the bundled phone cable, connect your DSL-AC88U’s DSL port to the splitter’s DSL port.
- Page 13 Wireless connection Wall Power Outlet Power Wall telephone outlet Computer To set up your ADSL/VDSL router using a wireless connection: 1. Insert your wireless modem router’s AC adapter into the DC-IN port and plug it to a power outlet. 2. Using the bundled phone cable, connect your DSL-AC88U’s DSL port to the splitter’s DSL port.
-
Page 14: Before You Proceed
Before you proceed Before configuring your wireless router, apply the steps described in this section to each computer on the network to avoid problems connecting to the wireless network. A. Disable any configured proxy servers. Windows 7 / 8* ® The screenshots provided are for Windows®... - Page 15 3. From the Local Area Network (LAN) Settings window, uncheck Use a proxy server for your LAN. 4. Click OK then Apply. MAC OSX 1. From your Apple Safari browser, click Safari > Preferences > Advanced. On the Proxies item, click Change Settings...
- Page 16 Configure TCP/IP settings to automatically obtain an IP address. Windows 7 / 8 ® The screenshots provided are for Windows® 7 only. The steps and options may be different for Windows® 8 and Windows® 8.1. 1. Click Start > Control Panel >...
- Page 17 4. Select Internet Protocol Version 4 (TCP/IPv4) or Internet Protocol Version 6 (TCP/IPv6), then click Properties. 6. Tick Obtain an IP address automatically. 7. Click OK.
- Page 18 MAC OSX 1. Click Apple Menu >System Preferences > Network 2. Click Ethernet on the left panel. 3. On the Configure IPv4, item select Using DHCP. 4. Click Apply.
- Page 19 Setting up your ADSL/VDSL router 1. Ensure that the DSL LED on the DSL-AC88U front panel is on and not flashing.
- Page 20 2. Launch your web browser. The QIS web page appears automatically and starts detecting your connection type, VPI/VCI value and encapsulation mode. If the QIS web page does not appear after you launched your web browser, disable the proxy settings on your web browser.
-
Page 21: Network Configuration Using The Web Gui
GUI Logging in to the web GUI Your ASUS Wireless Router uses a web-based user interface that allows you to configure the router using any web browser such as Internet Explorer, Mozilla Firefox, Apple Safari, or Google Chrome. - Page 22 3. The wireless router GUI provides access to various configuration settings.
-
Page 23: Setting Up The Wireless Security Settings
To set up the wireless security settings: 1. Key in http://router.asus.com on your web browser. 2. On the login screen, key in the default user name (admin) and password (admin), then click OK. The wireless router’s web GUI launches. - Page 24 4. On the Wireless name (SSID) field, key in a unique name for your wireless network. 5. From the Authentication Method dropdown list, select the encryption method for your wireless network. 6. Key in your security passkey. 7. Click Apply.
-
Page 25: Managing Your Network Clients
Managing your network clients To manage your network clients: 1. Launch the wireless router’s web GUI. 2. On the Network Map screen, click the Clients icon to display information about your network clients. -
Page 26: Monitoring Your Usb Device
Monitoring your USB device The ASUS Wireless Router provides one USB 3.0 port for connecting USB devices such as a USB storage device and USB printer. • To use this feature, you need to plug a USB storage device, such as a USB hard disk or USB flash drive, to the USB 3.0 port on the rear panel of your wireless router. - Page 27 FTP Share service in this user manual. • This router works with most USB HDDs/Flash disks (up to 2TB size) and supports read-write access for FAT16, FAT32, EXT2, EXT3, and NTFS. • To safely remove the USB disk, launch the web GUI (http:// router.asus.com), then in the Network Map page, click the USB icon > Eject USB disk. • Incorrect removal of the USB disk may cause data corruption.
-
Page 28: Creating Your Guest Network
Creating your Guest Network Setting up a Guest Network provides wireless Internet connectivity for temporary visitors while restricting access to your private network. To create your guest network: 1. Click Guest Network on the left navigation panel. 2. Click Enable. 3. -
Page 29: Using The Traffic Manager
Using the Traffic Manager Managing QoS (Quality of Service) Bandwidth The Quality of Service feature allows you to set the bandwidth priority and manage network traffic. To set up QoS: 1. Click Traffic Manager on the left navigation panel and click the QoS tab. -
Page 30: Monitoring Traffic
Monitoring Traffic Click the Traffic Monitor tab to view the network activity of your Internet, Wired, and Wireless connections for the last 24 hours, daily or in real-time. -
Page 31: Using Usb Application
Refer to the Plug-n-Share Disk Support List for disk format, file and partition size at http://event.asus.com/networks/disksupport To avoid data loss or damage to the USB storage device, always follow the steps to safely remove your USB device. - Page 32 To use AiDisk: 1. Click USB application on the left navigation panel and click the AiDisk icon. 2. From the Welcome to AiDisk wizard screen, click Go. 3. Assign access rights to the USB storage device. Select limitless access rights, limited access rights, and admin rights to define read-right privileges to files stored in the USB storage device.
- Page 33 4. To set up your domain name via the ASUS DDNS service, select I will use the service and accept Terms of service and key in your preferred domain name. Your domain name will follow the format xxx.asuscomm.com, where xxx is your host name.
-
Page 34: Using The Servers Center
Using the Servers Center Servers Center provides settings for Samba and FTP Shares. Using the Network Place (Samba) Share service The Network Place (Samba) Share feature allows Mac OSX, Windows, and Linux clients to access files on the USB storage device. - Page 35 5. Assign a name for the user account and key in a password. Click Add. 6. Use the Modify and Delete buttons to change the password or remove the user account. 7. Select a user and assign the type of access rights for files or folders located in the storage device: • R/W: Select this option to assign read/write access for a specific file/folder.
-
Page 36: Using The Ftp Share Service
Using the FTP Share service Your ASUS wireless router can set up the connected USB storage device as an FTP server. To set up the FTP Share service: 1. Configure file sharing using the steps in Using AiDisk for File Sharing. - Page 37 8. Select the type of access rights for the storage device: • R/W: Select this option to assign read/write access for a specific file/folder. • W: Select this option to assign write only access for a specific file/folder. • R: Select this option to assign read only access for a specific file/folder.
-
Page 38: Using The Miscellaneous Setting
Using the Miscellaneous setting The Miscellaneous settings page allows you to configure additional properties for the USB disk. You can change the maximum number of users who can access the USB storage device, assign a device name and work group, or specify the language settings for the FTP server. -
Page 39: Configuring Advanced Settings
6. In the Lease Time field, specify in seconds when an assigned IP address will expire. Once it reaches this time limit, the DHCP server will then assign a new IP address. • ASUS recommeds that you use an IP address format of 192.168.1.xxx (where xxx can be any number between 2 and 254) when specifying an IP address range. -
Page 40: Upgrading The Firmware
Upgrading the firmware Download the latest firmware from the ASUS website at https://www.asus.com/support To upgrade the firmware: 1. Click Administration from the left navigation panel. 2. Click the Firmware Upgrade tab. 3. In the New Firmware File item, click Choose File. Navigate to the downloaded firmware file. -
Page 41: Restoring/Saving/Uploading Settings
Restoring/Saving/Uploading settings To restore/save/upload wireless router settings: 1. Click Administration on the left navigation panel. 2. Click the Restore/Save/Upload Setting tab. 3. Select a task from the configuration options: • To restore to default factory settings, click Restore, and click OK once prompted. • To save the current system settings, click Save, navigate to the folder where you intend to save the file and click Save. -
Page 42: Firmware Upgrade
Firmware Upgrade Download the latest firmware from the ASUS website at http://www.asus.com To upgrade the firmware: 1. From the navigation panel, go to Advanced Settings > Administration > Firmware Upgrade tab. 2. In the New Firmware File field, click Choose File to locate the downloaded file. -
Page 43: Troubleshooting
Troubleshooting If you encounter problems that are not mentioned in this chapter, contact ASUS Technical Support. Troubleshooting I cannot access the router GUI for configuring the router. • Delete the cookies and temporary files in your web browser. To do this in Internet Explorer 8: 1. Launch your web browser, then click Tools > Internet Options. - Page 44 Authentication: • Use a wired connection to connect to the router. • Check the wireless security settings. • Press the Reset button at the rear panel for more than five seconds. Cannot find the router: • Press the Reset button at the rear panel for more than five seconds. • Check the settings in the wireless adapter such as SSID and encryption method. Cannot access the Internet using a wireless LAN adapter. • Place the router closer to the wireless client. • Check whether the wireless adapter is connected to the correct wireless router. • Check whether the wireless channel in use conforms to the channels available in your country/area. • Check the encryption settings.
- Page 45 The DSL light is ON (steady and not blinking) and means Internet access is possible, but I still cannot browse the Internet. • Restart your computer. • Check if the WAN LED on the wireless router is on. • Check the wireless encryption settings. • Check if the computer can get an IP address (using both a wired or wireless connection). • Check that your web browser is configured to use the local LAN and is not configured to use a proxy server. If the DSL light blinks continuously or stays off, Internet access is not possible - the Router is unable to establish a connection with the ADSL network.
-
Page 46: Restoring The Firmware Via The Rescue Mode
The following are the factory default settings: User name: admin Password: admin IP address: router.asus.com SSID (2.4GHz): Refer to the label at the bottom of the router SSID (5GHz): Refer to the label at the bottom of the router Restoring the firmware via the Rescue mode. - Page 47 4. From the interface, click Choose File, and browse for your firmware file. You can download the latest firmware file from the ASUS Support site at https://www.asus.com/support 5. Click Update Software. The process takes about two minutes to complete. 6. After the process is completed, the login page appears. If it does not appear, enter http://192.168.1.1 on your web...
-
Page 48: Asus Ddns Service
2. I did not register the ASUS DDNS for the router I bought six months ago. Can I still register it? Yes, you can still register the ASUS DDNS service for your router. - Page 49 Different ISPs may have different interval times for updating IP addresses. 6. Is the ASUS DDNS service free, or is it just a trial version? The ASUS DDNS service is a free and embedded service in some ASUS routers.
-
Page 50: Appendices
We believe in providing solutions for you to be able to responsibly recycle our products, batteries, other components, as well as the packaging materials. Please go to http://csr.asus. com/english/Takeback.htm for the detailed recycling information in different regions. - Page 51 This equipment generates, uses and can radiate radio frequency energy and, if not installed and used in accordance with the instructions, may cause harmful interference to radio communications. However, there is no guarantee that interference will not occur in a particular installation. If this equipment does cause harmful interference to radio or television reception, which can be determined by turning the equipment off and on, the user is encouraged to try to correct the interference by one or more of...
- Page 52 Safety Information To maintain compliance with FCC’s RF exposure guidelines, this equipment should be installed and operated with minimum distance 20cm between the radiator and your body. Use on the supplied antenna. Declaration of Conformity for R&TTE directive 1999/5/EC Essential requirements – Article 3 Protection requirements for health and safety –...
- Page 53 Operation is subject to the following two conditions: (1) this device may not cause interference, and (2) this device must accept any interference, including interference that may cause undesired operation of the device. Radio Frequency (RF) Exposure Information The radiated output power of the Wireless Device is below the Industry Canada (IC) radio frequency exposure limits.
- Page 54 警語 經型式認證合格之低功率射頻電機,非經許可,公司、商號或 使用者均不得擅自變更頻率、加大功率或變更原設計之特性及 功能。低功率射頻電機之使用不得影響飛航安全及干擾合法通 信;經發現有干擾現象時,應立即停用,並改善至無干擾時方 得繼續使用。前項合法通信,指依電信法規定作業之無線電通 信。低功率射頻電機須忍受合法通信或工業、科學及醫療用電 波輻射性電機設備之干擾。 Authorised distributors in Turkey BOGAZICI BIL GISAYAR SAN. VE TIC. A.S. Tel: +90 212 3311000 Addrress: AYAZAGA MAH. KEMERBURGAZ CAD. NO.10 AYAZAGA/ISTANBUL CIZGI Elektronik San. Tic. Ltd. Sti. Tel: +90 212 3567070 Address: CEMAL SURURI CD.
- Page 55 GNU General Public License Licensing information This product includes copyrighted third-party software licensed under the terms of the GNU General Public License. Please see The GNU General Public License for the exact terms and conditions of this license. All future firmware updates will also be accompanied with their respective source code.
- Page 56 pieces of it in new free programs; and that you know you can do these things. To protect your rights, we need to make restrictions that forbid anyone to deny you these rights or to ask you to surrender the rights.
- Page 57 Terms & conditions for copying, distribution, & modification 0. This License applies to any program or other work which contains a notice placed by the copyright holder saying it may be distributed under the terms of this General Public License. The “Program”...
- Page 58 a) You must cause the modified files to carry prominent notices stating that you changed the files and the date of any change. b) You must cause any work that you distribute or publish, that in whole or in part contains or is derived from the Program or any part thereof, to be licensed as a whole at no charge to all third parties under the terms of this License.
- Page 59 In addition, mere aggregation of another work not based on the Program with the Program (or with a work based on the Program) on a volume of a storage or distribution medium does not bring the other work under the scope of this License. 3.
- Page 60 If distribution of executable or object code is made by offering access to copy from a designated place, then offering equivalent access to copy the source code from the same place counts as distribution of the source code, even though third parties are not compelled to copy the source along with the object code.
- Page 61 your obligations under this License and any other pertinent obligations, then as a consequence you may not distribute the Program at all. For example, if a patent license would not permit royalty-free redistribution of the Program by all those who receive copies directly or indirectly through you, then the only way you could satisfy both it and this License would be to refrain entirely from distribution of the Program.
- Page 62 Each version is given a distinguishing version number. If the Program specifies a version number of this License which applies to it and “any later version” , you have the option of following the terms and conditions either of that version or of any later version published by the Free Software Foundation.
- Page 63 12 IN NO EVENT UNLESS REQUIRED BY APPLICABLE LAW OR AGREED TO IN WRITING WILL ANY COPYRIGHT HOLDER, OR ANY OTHER PARTY WHO MAY MODIFY AND/OR REDISTRIBUTE THE PROGRAM AS PERMITTED ABOVE, BE LIABLE TO YOU FOR DAMAGES, INCLUDING ANY GENERAL, SPECIAL, INCIDENTAL OR CONSEQUENTIAL DAMAGES ARISING OUT OF THE USE OR INABILITY TO USE THE PROGRAM (INCLUDING BUT NOT LIMITED TO LOSS OF DATA OR DATA BEING RENDERED...
-
Page 64: Networks Global Hotline Information
Slovak Republic 00421-232162621 08:00-17:00 Mon-Fri Czech Republic 00420-596766888 08:00-17:00 Mon-Fri Switzerland-German 0041-848111010 09:00-18:00 Mon-Fri Switzerland-French 0041-848111014 09:00-18:00 Mon-Fri Switzerland-Italian 0041-848111012 09:00-18:00 Mon-Fri United Kingdom 0044-1442265548 09:00-17:00 Mon-Fri Ireland 0035-31890719918 09:00-17:00 Mon-Fri Russia and CIS 008-800-100-ASUS 09:00-18:00 Mon-Fri Ukraine 0038-0445457727 09:00-18:00 Mon-Fri... - Page 65 Region Country Hotline Numbers Service Hours Australia 1300-278788 09:00-18:00 Mon-Fri New Zealand 0800-278788 09:00-18:00 Mon-Fri Japan 09:00-18:00 Mon-Fri 0800-1232787 09:00-17:00 Sat-Sun 09:00-18:00 Mon-Fri 0081-570783886 (Non-Toll Free ) 09:00-17:00 Sat-Sun Korea 0082-215666868 09:30-17:00 Mon-Fri Thailand 0066-24011717 09:00-18:00 Mon-Fri 1800-8525201 Singapore 0065-64157917 11:00-19:00 Mon-Fri Asia-Pacific 0065-67203835...
- Page 66 00382-20608251 09:00-17:00 Mon-Fri Serbia 00381-112070677 09:00-17:00 Mon-Fri Slovenia 00368-59045400 08:00-16:00 Mon-Fri 00368-59045401 Estonia 00372-6671796 09:00-18:00 Mon-Fri Latvia 00371-67408838 09:00-18:00 Mon-Fri Baltic Countries Lithuania-Kaunas 00370-37329000 09:00-18:00 Mon-Fri Lithuania-Vilnius 00370-522101160 09:00-18:00 Mon-Fri For more information, visit the ASUS support site at: https://www.asus.com/support...
-
Page 67: Asus Contact Information
ASUS COMPUTER INTERNATIONAL (America) Address 800 Corporate Way, Fremont, CA 94539, USA Telephone +15107393777 +15106084555 Website usa.asus.com Online support https://www.asus.com/support ASUS COMPUTER GmbH (Germany and Austria) Address H arkort Str. 21-23, D-40880 Ratingen, Germany Support Fax +49-2102-959931 Website asus.com/de Online contact eu-rma.asus.com/sales Technical Support...
Need help?
Do you have a question about the 90IG02W1-BU9G10 and is the answer not in the manual?
Questions and answers