Table of Contents
Advertisement
Available languages
Available languages
Quick Links
Advertisement
Table of Contents

Subscribe to Our Youtube Channel
Related Manuals for Gaggenau AR 400 742


Summary of Contents for Gaggenau AR 400 742
- Page 1 Gaggenau Installation instructions ......2 Instructions d’installation.....11 Instrucciones de instalación ....20 AR 400 742 Remote fan unit Moteur Módulo del ventilador...
-
Page 2: Safety Definitions
Table of ContentsIn s t a l la t i o n in s t r u c t i o n s Safety Definitions WARNING This indicates that death or serious injuries may occur as a result of non-observance of this warning. -
Page 3: Important Safety Instructions
IMPORTANT SAFETY INSTRUCTIONS READ AND SAVE THESE INSTRUCTIONS INSTALLER: LEAVE THESE INSTRUCTIONS WITH I O N WARNING THE APPLIANCE AFTER INSTALLATION IS COMPLETE. Risk of fire Operating several gas burners at the same time gives IMPORTANT: SAVE THESE INSTRUCTIONS FOR THE rise to a great deal of heat. -
Page 4: Appliance Handling Safety
IMPORTANT SAFETY INSTRUCTIONS READ AND SAVE THESE INSTRUCTIONS WARNING WARNING Risk of electrical shock or fire TO REDUCE THE RISK OF FIRE, ELECTRIC SHOCK, Frame grounded to neutral through a ground strap. OR INJURY TO PERSONS, OBSERVE THE Grounding through the neutral conductor is prohibited FOLLOWING: for new branch-circuit installations (1996 NEC), mobile ‒... -
Page 5: Related Equipment Safety
IMPORTANT SAFETY INSTRUCTIONS READ AND SAVE THESE INSTRUCTIONS Related Equipment Safety Remove all tape and packaging before using the appliance. Destroy the packaging after unpacking the appliance. Never allow children to play with packaging material. The appliance is only guaranteed safe to use if installed by a specialist in accordance with these installation instructions. -
Page 6: General Notes
General notes Before You Begin Ventilation line Tools and Parts Needed Note: The appliance manufacturer does not assume any ▯ Screwdriver Torx T20 warranty for complaints attributable to the pipe section. ▯ Pencil ▯ The appliance achieves its optimum performance by ▯... -
Page 7: Appliance Dimensions
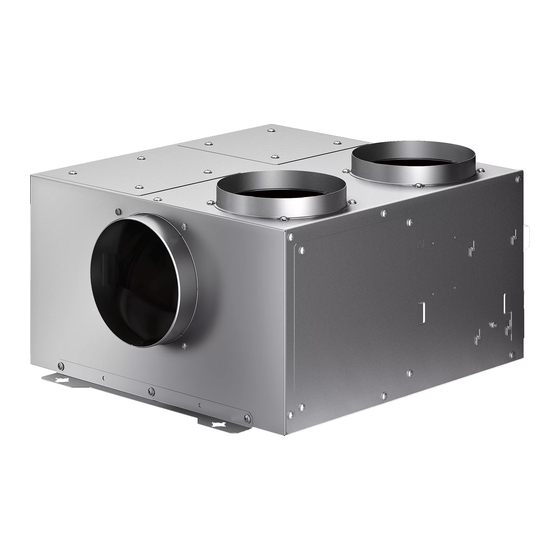
Appliance dimensions Installing the appliance The remote fan unit has 5 connection openings, 4 on the top side of the appliance and one on the side across from the exhaust opening. 2 connecting pieces Ø 6" (150 mm) are included in the delivery. You can get additional connecting pieces using the order number 653556. -
Page 8: Connect Appliance
Fasten the appliance to the wall using Connect appliance Alternative: four screws. Connecting the power cable Note: Align the appliance horizontally. The appliance has to be connected to the power supply by means of a 3-wire conduit installation with a 1 inch conduit. -
Page 9: Connect Electrical Supply
If one of the networked appliances fails (power Connecting the network cable interruption, network cable disconnected), this leads to Use the control cable to connect the remote fan unit and the fan function being blocked for the entire system. All the fan. -
Page 10: Removing The Appliance
Removing the appliance Customer service Disconnect the appliance from the power supply. Remove the control cable. Undo the exhaust If your appliance needs repairs, our customer service is connections. Pull out the appliance. there for you. We work hard to help solve problems quickly and without unnecessary service calls, getting your appliance back up and running correctly in the least amount of time possible. -
Page 11: Définitions De Sécurité
Table de MatièresIn s t r u c t i o n s d ’ in s t a l la t i o n Définitions de Sécurité AVERTISSEMENT Le non-respect de cet avertissement peut entraîner la mort ou des blessures graves. ATTENTION Le non-respect de cet avertissement peut entraîner des blessures mineures ou modérées. -
Page 12: Consignes De Sécurité Importantes
CONSIGNES DE SÉCURITÉ IMPORTANTES LIRE ET CONSERVER CES INSTRUCTIONS INSTALLATEUR : LAISSEZ CES INSTRUCTIONS AVEC T É S É C O N I O N AVERTISSEMENT L'APPAREIL APRÈS UNE FOIS L'INSTALLATION TERMINÉE. Pour l'installation de la hotte, vous devez respecter tous les règlements des entreprises de distribution IMPORTANT : CONSERVER CES INSTRUCTIONS d'électricité... -
Page 13: Sécurité De Manipulation De L'appareil
CONSIGNES DE SÉCURITÉ IMPORTANTES LIRE ET CONSERVER CES INSTRUCTIONS Avant l'installation, mettre l'appareil hors service au AVERTISSEMENT panneau de service. Verrouiller le panneau d'entrée RISQUE D'ÉLECTROCUTION d'électricité pour éviter que le courant ne soit Une mise à la terre inadéquate peut entraîner un risque accidentellement rétabli. -
Page 14: Codes Et Normes De Sécurité
CONSIGNES DE SÉCURITÉ IMPORTANTES LIRE ET CONSERVER CES INSTRUCTIONS Codes et normes de sécurité Cet appareil est conforme à la version la plus récente de l'une ou plusieurs des normes suivantes : ▯ UL 507 - Ventilateurs électrique (Electric Fans) ▯... - Page 15 Instructions générales Avant de commencer Conduit d'évacuation Outils et pièces nécessaires Remarque : Le fabricant de l’appareil décline toute ▯ Tournevis à empreinte Torx T20 garantie en cas de réclamation imputable à des ▯ Crayon problèmes liés au parcours des conduits. ▯...
-
Page 16: Cotes De L'appareil
Cotes de l'appareil Encastrement de l'appareil Le moteur séparé possède 5 orifices de raccordement, 4 sur le dessus de l'appareil et un sur le côté en face de l'orifice de soufflage. La fourniture comprend 2 pièces de connexion Ø 6" (150 mm). Vous pouvez vous procurer d'autres pièces de connexion sous la référence 653556. -
Page 17: Brancher L'appareil
Fixer l'appareil au mur au moyen de Brancher l’appareil Alternative : 4 vis. Branchement du câble d'alimentation Remarque : Aligner l'appareil à l'horizontale. L'appareil doit être branché à l'alimentation électrique par une installation de conduit à 3 fils avec un conduit de 1 po. -
Page 18: Brancher L'alimentation Électrique
La panne d'un participant (coupure de tension, Branchement du câble réseau séparation du câble réseau) conduit au blocage de la Utilisez le câble de contrôle pour brancher l'unité de fonction de ventilation de l'ensemble du système. ventilation à distance et le ventilateur. La fiche doit Toutes les touches sur l'appareil clignotent. -
Page 19: Dépose De L'appareil
Vérification de l'installation Service après-vente Mettre le disjoncteur en circuit. Vérifier que les éléments fonctionnent correctement. Si votre appareil nécessite une réparation, notre service après-vente est là pour vous. Nous travaillons sans relâche pour vous aider à résoudre les problèmes en Dépose de l'appareil peu de temps tout en évitant les visites d'entretien inutiles afin d'assurer le bon fonctionnement de votre... -
Page 20: Definiciones De Seguridad
ContenidoIn s t r u c c i o n e s in s t a l a c i ó n Definiciones de Seguridad ADVERTENCIA Esto indica que se pueden producir lesiones graves o la muerte si no se cumple con esta advertencia. -
Page 21: Instrucciones De Seguridad Importantes
INSTRUCCIONES DE SEGURIDAD IMPORTANTES LEA Y CONSERVE ESTAS INSTRUCCIONES INSTALADOR: DEJE ESTAS INSTRUCCIONES CON C O N I O N ADVERTENCIA EL ELECTRODOMÉSTICO CUANDO HAYA FINALIZADO LA INSTALACIÓN. ADVERTENCIA – PARA REDUCIR EL RIESGO DE INCENDIO, CHOQUE ELÉCTRICO O LESIONES A IMPORTANTE: CONSERVE ESTAS INSTRUCCIONES LAS PERSONAS, OBSERVE LAS SIGUIENTES PARA USO DEL INSPECTOR DE ELECTRICIDAD... -
Page 22: Seguridad Con La Electricidad
INSTRUCCIONES DE SEGURIDAD IMPORTANTES LEA Y CONSERVE ESTAS INSTRUCCIONES ADVERTENCIA ADVERTENCIA Para reducir el riesgo de incendio y para hacer que el Riesgo de descarga eléctrica o incendio aire salga al exterior correctamente, asegúrese de que La conexión a tierra del marco con el cable neutro debe haya un conducto que lo dirija hacia afuera. -
Page 23: Seguridad Relacionada Con Los Equipos
INSTRUCCIONES DE SEGURIDAD IMPORTANTES LEA Y CONSERVE ESTAS INSTRUCCIONES Seguridad relacionada con los ADVERTENCIA equipos PARA REDUCIR EL RIESGO DE INCENDIO, CHOQUE ELÉCTRICO O LESIONES A LAS PERSONAS, Retire toda la cinta y el embalaje antes de usar el OBSERVE LAS SIGUIENTES RECOMENDACIONES: electrodoméstico. - Page 24 Información general Antes de empezar Conducto de escape Herramientas y piezas necesarias Nota: La garantía del fabricante del aparato no cubre ▯ Destornillador con cabeza Torx T20 las reclamaciones que se atribuyan al segmento de ▯ Lápiz conductos. ▯ Taladro con broca de ¼" (6 mm) ▯...
-
Page 25: Dimensiones Del Equipo
Dimensiones del equipo Instalación del aparato El módulo del ventilador tiene cinco aberturas de conexión, cuatro en la parte superior del aparato y una lateralmente frente a la abertura de soplado. En el volumen de entrega están incluidos 2 racores de empalme de Ø... -
Page 26: Conectar El Aparato A La Red Eléctrica
fijar el aparato a la pared con Levantar y retirar la cubierta del bloque de Alternativa: 4 tornillos. terminales desatornillando los 3 tornillos de fijación. Nota: Nivelar el aparato en sentido horizontal. Guiar el conducto a través de la abertura para la conexión eléctrica que hay en el elemento de sujeción Fijar el conducto con el anillo roscado... -
Page 27: Conexión De La Alimentación Eléctrica
Si uno de los aparatos conectados falla (interrupción de Conectar el cable de red la tensión, separación del cable de red), se bloqueará el Utilizar el cable de control para conectar la unidad de funcionamiento del ventilador de todo el sistema. Todas ventilador remota y el ventilador. -
Page 28: Desmontar El Aparato
Pruebe la instalación Servicio de Atención al Cliente Encienda el disyuntor. Verifique que los elementos funcionen correctamente. Si su aparato requiere reparación, nuestro Servicio de Atención al Cliente está a su disposición. Trabajamos duro para ayudar a resolver los problemas de forma Desmontar el aparato rápida y sin llamadas de servicio innecesarias, consiguiendo que su aparato vuelva a funcionar... - Page 32 Gaggenau BSH Home Appliance Corporation 1901 Main Street, Suite 600 Irvine, CA 92614 +1.877.442.4436 www.gaggenau-usa.com © 2015 BSH Home Appliances Gaggenau Hausgeräte GmbH Carl-Wery-Straße 34 81739 München GERMANY...
Need help?
Do you have a question about the AR 400 742 and is the answer not in the manual?
Questions and answers