Transcell Technology TI-500 Manual
Hide thumbs
Also See for TI-500:
- Manual (25 pages) ,
- Setup & operation manual (18 pages) ,
- Setup & operation manual (50 pages)
Table of Contents
Advertisement
Quick Links
The non-automatic weighing instrument
Manufacturer:
Type:
Model:
No of the EC type-approval certificate:
S.no
Max # of verification scale
intervals
Fraction p
i
Corresponds to the production model described in the EC type-approval certificate and to the requirements
of the Council Directive 90/384/EEC.
*
This declaration is only valid with a certificate of conformity by a notified body.
Note 1:
The sentence marked with a * does not apply if the non-automatic weighing instrument
was verified by the manufacturer.
Note 2:
In case of verification in two stages the validity of the declaration of conformity may
depend on the documentation of the carrying out of the second stage of the
verification.
Date:
_______________________
Declaration of Conformity
III
Transcell Technology, Inc.
35 Waltz Drive
Wheeling, IL 60090
USA
Digital Indicator
Type TI-500, test certificate FIT 01.I.03
FI 01.1.05
65501
3000
0.5
Signed: ____________________________
Tel. (847) 419-9180
Fax (847) 419-1515
Advertisement
Table of Contents

Related Manuals for Transcell Technology TI-500


Summary of Contents for Transcell Technology TI-500
- Page 1 Transcell Technology, Inc. Tel. (847) 419-9180 35 Waltz Drive Fax (847) 419-1515 Wheeling, IL 60090 Type: Digital Indicator Model: Type TI-500, test certificate FIT 01.I.03 No of the EC type-approval certificate: FI 01.1.05 S.no 65501 Max # of verification scale 3000 intervals...
-
Page 2: Table Of Contents
TABLE OF CONTENTS Page Chapter 1: Introduction To The TI-500-EU Indicator ..............1-1 Chapter 2: Installation ........................2-1 Stainless Steel Enclosure ..................... 2-1 2.1.1 Connecting the weigh platform................. 2-1 2.1.2 Connecting the serial printer, remote display or computer ......2-1 2.1.3... - Page 3 Chapter 6: Calibration ........................6-1 Calibration Overview ..................... 6-1 Zero Calibration (F16) ....................6-1 Span Calibration (F17) ....................6-1 View Calibration Values (F18)..................6-2 Key-in Zero Calibration Value (F19) ................6-2 Key-in Span Calibration Value (F20) ................6-3 C hapter 7: Operation........................
- Page 4 LIST OF FIGURES TI-500-EU Front Panel......................1-1 TI-500-EU Main Circuit Board Overview................. 2-1 Connection Assignments for the Load Cell Terminal (J1) ............2-1 Connection Assignments for the serial communication Terminal........... 2-2 Setup Menu Key Assignments....................3-1 Setup Menu Chart ........................3-2 User Menu Key Assignments....................
-
Page 5: Chapter 1: Introduction To The Ti-500-Eu Indicator
The power supply may also be used as the main power supply. If your Model TI-500-EU Digital Indicator is part of a complete floor scale or has been installed for you, you may skip to Chapter 7 for operating instructions. Prior to using the indicator, please read this chapter carefully and completely. -
Page 6: Chapter 2: Installation
2.1.2 CONNECTING THE SERIAL PRINTER, REMOTE DISPLAY OR COMPUTER The TI-500-EU indicator comes standard with one full duplex RS-232 serial port, designed for connection to either a PC or a serial printer. The same port may be also used as a simplex, RS-232 port designed for connection to a remote display. -
Page 7: Connecting The Power Supply
Figure 2-3: Connection assignments for the serial communication terminal 2.1.3 CONNECTING THE POWER SUPPLY 1. The indicator ships standard with an external AC to DC adapter. Simply plug the AC adapter into the indicator’s DC Power Jack first, and then plug into a standard wall outlet. -
Page 8: Chapter 3: Configuration
CHAPTER 3: CONFIGURATION CONFIGURATION OVERVIEW The indicator contains two main setup menus: The Setup (“F”) menu, which configures the indicator to your weigh platform and the User (“A”) menu, which configures the serial communication port and enables some user options. The Setup and User menus consist of several menu selections, each with its own sub-menu of choices. -
Page 9: Notes On The Setup Menu
Grads Span Gn. Zero Band Zero Range Mot. Band Dig. Filter Ovld. Limit Calib. Unit 0.5d 0.25d 3d 5d 10d 2% 1d 9d 1 2 4 8 100% 1.9% 25 50 75 100 150 200 500 1000 1500 2000 2500 3000 4000 5000 6000 8000 10000... -
Page 10: Navigating In The User Menu
3.3.2 NAVIGATING IN THE USER MENU Use the directional keys shown in Figure 3-3 to move around in the User Menu Chart shown in Figure 3-4 on the following page. To move to a new “A” heading, use the TARE (left) or PRINT (right) key to move right or left in the User Menu Chart. -
Page 11: Exiting The User Menu
3.3.4 EXITING THE USER MENU 1. Exit the User (“A”) menu by following the directions in Section 3.2.5 or 3.2.6. The display will go through a digit check, then settle into Normal Operating mode. All front panel keys will now return to their normal mode of operation. -
Page 12: Chapter 4: Setup Menu Descriptions And Procedures
CHAPTER 4: SETUP MENU DESCRIPTIONS AND PROCEDURES SETUP MENU DESCRIPTIONS This section provides more detailed descriptions of the selections found in the Setup Menu Chart. Factory-set defaults are shown in bold with a checkmark (√). NAME/CODE DESCRIPTION CODE/VALUE Specifies number of full-scale graduations. Value should be consis- 1,000 tent with legal requirements and environmental limits on the useful 1,500... - Page 13 NAME/CODE DESCRIPTION CODE/VALUE Determines the desired weight increments. Value should be consis- 1√ Display tent with legal requirements. Divisions Determines location of the decimal point. 0√ Decimal Pt. 0.00 0.000 0.0000 Places indicator into the zero calibration routine. Scrolling down with Press ZERO key Zero Calibra- the ZERO key one level begins the procedure.
-
Page 14: Chapter 5: User Menu Descriptions And Procedures
CHAPTER 5: USER MENU DESCRIPTIONS AND PROCEDURES USER MENU DESCRIPTIONS This section provides more detailed descriptions of the selections found in the User Menu Chart. Factory-set defaults are shown in bold with a checkmark (√). NAME/CODE DESCRIPTION CODE/VALUE Selects the baud rate for data transmission through the serial port. 1200 2400 Baud Rate... -
Page 15: User Menu Procedures
USER MENU PROCEDURES This section provides instructions for all of the User Menu procedures. 5.2.1 ID Number Entry (A8) While in the User Menu mode, scroll to "A 8", then scroll down once using the ZERO key to enter the ID Number menu. The display will momentarily show "ID NO", followed by a value with one flashing digit. -
Page 16: Chapter 6: Calibration
CHAPTER 6: CALIBRATION CALIBRATION OVERVIEW The indicator is calibrated by following the procedures embedded in F16 (Zero) and F17 (Span) of the Setup Menu. Each procedure enters a value into the indicator's non-volatile memory - F16 the zero value (deadweight) and F17 the span value (test weight). The minimum test weight that can be used is 1% of full-scale capacity. -
Page 17: View Calibration Values (F18)
4. After setting the exact value, press the NET/GROSS key to save the value. 5. If the calibration was successful, the display will show "EndC1" momentarily, then revert back up to F17. At this time it is suggested that the calibration values be recorded for future use (see Section 6.4). -
Page 18: Key-In Span Calibration Value (F20)
KEY-IN SPAN CALIBRATION VALUE (F20) Note: This procedure is intended for emergency use only in the case of non-volatile memory loss. A valid span calibration value, obtained from a successful F17 calibration procedure, must be used. 1. While in the Setup mode, scroll to "F 20", then scroll down once using the ZERO key. 2. -
Page 19: Chapter 7: Operation
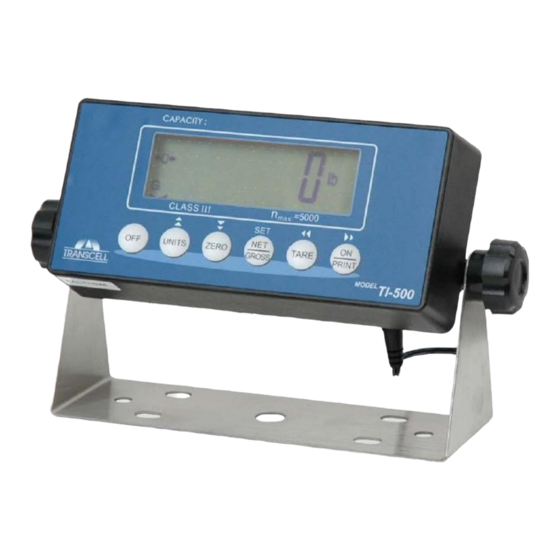
CHAPTER 7: OPERATION 7 .1 DISPLAY The Model TI-500-EU indicator utilizes a 6-digit LCD (Liquid Crystal Display) to display the weight and system information. Table 7-1 summarizes the display annunciators. 7.1.1 LIQUID CRYSTAL DISPLAY (LCD) Figure 7-1 shows the display detail of the TI-500-EU LCD. -
Page 20: Keyboard
7 .2 KEYBOARD The keyboard is composed of five function keys. Refer to Figure 7-2 for the overall layout and key locations. FIGURE 7-2: Function Keys Layout 7.2.1 FUNCTION KEYS lb/kg – This key toggles the indicator between lb and kg units if enabled in the User (“A”) enu. -
Page 21: Taring An Item
7.3.2 TARING AN ITEM To weigh an item in a container, the weight of that container must first be subtracted from the overall weight to obtain an accurate weight reading. This is known as taring. 1. Select the desired weighing unit by pressing the lb/kg key until that unit is indicated on the display. -
Page 22: Appendix A: Specifications
APPENDIX A: SPECIFICATIONS ANALOG SPECIFICATIONS Full Scale Input Signal 30mV, including dead load 1.0 μV / grad Minimum Sensitivity Input Impedance 30MΩ, typical Internal Resolution Approximately 150,000 counts Display Resolution 50,000 display division max Measurement Rate 10 Meas/sec, nominal System Linearity Within 0.02% of FS Calibration Method Software Calibration, with long term storage in EEPROM... -
Page 23: Appendix B: Serial Port Information
APPENDIX B: SERIAL PORT INFORMATION SERIAL PORT MODES B.1.1 FULL DUPLEX MODE The Full Duplex Mode provides a Demand serial transmission mode and is selected by setting A3 to “d” and A6 to “0”. The Demand mode allows control from a host device, usually a PC, and can be activated by pressing the PRINT key on the indicator’s front panel. -
Page 24: Recognized Host Commands
B.1.1.1 RECOGNIZED HOST COMMANDS “P” - This command is sent to the indicator to print the indicated display. The indicator will not respond if the scale is in motion, positive overload or negative overload. “Z” - This command is sent to the indicator to zero the scale. The indicator will not respond if the scale is in motion, positive overload or negative overload. -
Page 25: Simplex Mode
B.1.3 SIMPLEX MODE The Simplex Mode provides a continuous serial transmission mode and is selected by setting A3 to “C” and A6 to “0”. The Continuous mode is used to interface to computers, scoreboards, and other remote devices requiring constant data updating. The transmission occurs at the end of each display update. -
Page 26: Appendix C: Determining Proper Span Gain (F2
APPENDIX C: DETERMINING PROPER SPAN GAIN (F2) SPAN GAIN OVERVIEW The Span Gain parameter found in F2 of the Setup Menu is directly related to the ADC (Analog to Digital Converter) integration time. This means that the lower the setting, the higher the number of measurements per second. - Page 27 # of External Full Scale Input Range (mV/V) Grads 1,000 1,500 2,000 – 2,500 – 3,000 – 4,000 – – 5,000 – – 6,000 – – – 8,000 – – – – 10,000 – – – – – 12,000 – –...
-
Page 28: Appendix D: Displayed Error Codes
APPENDIX D: DISPLAYED ERROR CODES CODE MODE MEANING / POSSIBLE SOLUTION Normal Operating Gross Overload. A weight greater than the rated capacity has been Mode applied to the scale. Remove the weight from the platter or try re- calibrating the scale. Otherwise, check for a bad load cell connection or possible load cell damage due to overloading.
Need help?
Do you have a question about the TI-500 and is the answer not in the manual?
Questions and answers