
Subscribe to Our Youtube Channel
Related Manuals for Transcell Technology TI-500 FDI Series


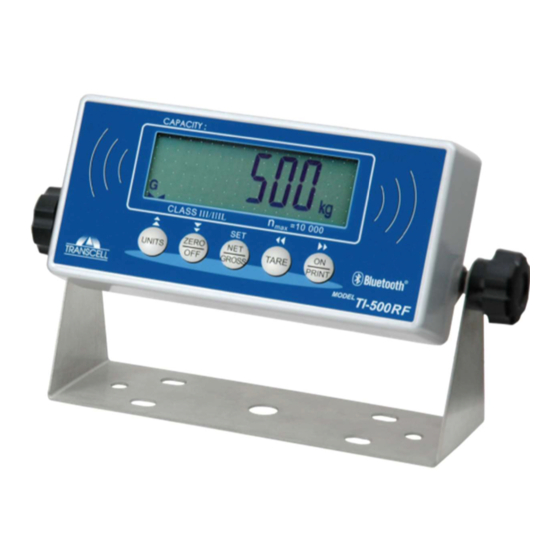
Summary of Contents for Transcell Technology TI-500 FDI Series
- Page 1 MODEL TI-500 FDI Installer’s Manual Force Data Instrument Revision 1.1 October 14, 2016...
-
Page 2: Table Of Contents
© Transcell Technology, Inc. 2012-2016. All rights reserved. The information contained herein is the property of Transcell Technology and is supplied without liability for errors or omissions. No part may be reproduced or used except as authorized by contract or other written permission. The copy- right and the foregoing restriction on reproduction and use extend to all media in which the information may be embod- ied. -
Page 3: Installation & Overview
INSTALLATION & OVERVIEW Remember that the installer is ultimately responsible to assure that a particular installation will be and remain safe and operable under the specific conditions encountered. This manual covers the following products: Model Display Enclosure Type Max. Sampling Rate TI-500 FDI-01 Aluminum/ABS 80 Hz... -
Page 4: Getting Started
The TI-500 force data instrument features one full duplex RS-232 serial port, designed for con- nection to a computer or a serial printer. The same port may be also used as a simplex, RS-232 port designed for connection to a remote display. DSUB9 Connector Pin No. -
Page 5: System Configuration
SYSTEM CONFIGURATION Configuration Menus The TI-500 force data instrument contains three menus to configure the instrument system: Setup (“F”) Menu – Configures all metrologically-related parameters including calibration procedures. User (“A”) Menu – Configures COM2 communication parameters and other misc parameters, e.g. automatic turn off. COM1 (“C”) Menu –... -
Page 6: Entering The Setup ("F") Configuration Menu
Entering the Setup (“F”) Configuration Menu To access this menu, please follow these directions: 1. Switch off the instrument by pressing and holding down the ZERO/OFF key for about 5 sec- onds. 2. Press and hold down the ON/PRINT key (about 20 seconds) until the screen shows “-F-”. - Page 7 CODE/NAME DESCRIPTION SELECTION LIST Averages weight readings to produce higher stability. Lower number 0 to 12 8 Digital Filter provides a faster response. Choose the speed that works best for your application. Selects the primary base unit to be used in the calibration process. 1...
- Page 8 CODE/NAME DESCRIPTION SELECTION LIST This sub-menu will reset all parameters in the “F” and “A” menu to the Press the ZE- Factory Reset default settings. It will not overwrite any previously saved calibration RO/OFF key twice (EU) data. USE WITH CAUTION! to execute This sub-menu will reset all system parameters to the default set- Press the ZE-...
-
Page 9: Entering The User ("A") Or Com ("C") Menu
Entering the User (“A”) or COM (“C”) Menu NOTE: Follow the same steps to enter the COM (“C”) Menu– just substitute “C” for “A” be- 1. Switch off the RF force data instrument by pressing and holding down the ZERO/OFF key for about 5 seconds. -
Page 10: User ("A") And Com ("C") Menu Descriptions
User (“A”) and COM (“C”) Menu Descriptions This section provides more detailed descriptions of the selections found in the User Menu Chart. Factory-set defaults are shown in bold with a checkmark; (√). CODE/NAME DESCRIPTION SELECTION LIST A1/C1 Selects the baud rate for data transmission through the serial port. 600, 1200, 2400, 4800, 9600 , Baud Rate... - Page 11 CODE/NAME DESCRIPTION SELECTION LIST A9/C9 Allows you to key-in the number of line feeds. Pressing the ZE- Key-in Line Feeds RO/OFF key to scroll down one level begins the sequence. 0 to 99 8 Allows you to configure the automatic power off time for the RF force Key-in Auto Power Off data instrument.
-
Page 12: Setting System Time And Date (A20)
Setting system time and date (A20) 1. Switch off the instrument by pressing and holding down the ZERO/OFF key for about 5 sec- onds. 2. Press and hold down the ON/PRINT key (about 20 seconds) until the screen shows “-F-”. 3. -
Page 13: Diagnostics (A24)
17. In order to save all parameter settings, it is imperative to exit all menus in the following manner: At the parameter level, press the UNITS (up) key twice (two times) to exit the User Menu. The instrument displays ‘SAvE’ and then automatically powers off. Diagnostics (A24) Here is a brief description of each test mode: A24-U1 Display Test –... -
Page 14: Bluetooth ("B") Menu Descriptions
7. To scroll thru the available parameter settings, use the TARE (left) or ON/PRINT (right) keys. 8. Once the setting you want is displayed on the screen, press the NET/GROSS (set) key to save this value and revert back up to the parameter level, e.g. ”B 1”. -
Page 15: System Calibration
SYSTEM CALIBRATION Calibration Overview Digital system calibration is accomplished in two steps: zero calibration (F16) and positive span calibration (F17). A third calibration for negative span calibration is also available via F15. You can calibrate up to 7 points per side. Here is the recommended sequence for multiple fixtures and multiple calibration points: 1. -
Page 16: Digital Span Calibration (F15 And F17)
Digital Span Calibration (F15 and F17) You must perform each span calibration point from lowest to highest absolute value. 1. Switch off the instrument by pressing and holding the ON/PRINT key for about 5 seconds. 2. Enter the Setup mode by pressing and holding the ON/PRINT key for about 20 seconds or until the screen shows “F”. -
Page 17: Digital Zero Calibration (F16)
Digital Zero Calibration (F16) 1. Switch off the instrument by pressing and holding the ON/PRINT key for about 5 sec- onds. 2. Enter the Setup mode by pressing and holding the ON/PRINT key for about 20 seconds or until the screen shows “F”. 3. - Page 18 4. Scroll down once using the ZERO/OFF key to enter the “Bluetooth” menu. Instrument shows “B 1”. 5. While in the Bluetooth mode, scroll to "B 6”. 6. Press the ZERO/OFF key once; the display says “F-CAL”. 7. To view all of the factory corner calibration values, press the ZERO/OFF key once; the in- strument automatically displays the calibration values for each corner (1-4) in sequence and then returns to the “F-CAL”...
-
Page 19: Serial Port Info
SERIAL PORT INFO SERIAL PORT MODES DEMAND DUPLEX MODE The Demand Duplex Mode provides a two way serial transmission mode. In this mode, the output information is transmitted on demand; either by pressing the ON/PRINT key on the instrument’s front panel or upon receiving a recognized command from a host device (i.e. -
Page 20: Output Strings
OUTPUT STRINGS TEXT PRINT TICKET The Text Print Ticket is designed specifically for a serial printer. ID. NO. 123456 GROSS 25.00 lb DATE 03/01/2011 NOTES: 1. The ID number field is not printed if it is disabled in A7 of the User Menu. 2. - Page 21 O = Over/under range NOTE: Additional unit is available: N = Newtons O = oz G= grams L= pounds K = grams Contents subject to change without notice. Transcell Technology, Inc. 975 Deerfield Parkway Buffalo Grove, IL 60089 847.419.9180 .419.1515 Fax 847 Web:...
Need help?
Do you have a question about the TI-500 FDI Series and is the answer not in the manual?
Questions and answers