Advertisement
Quick Links
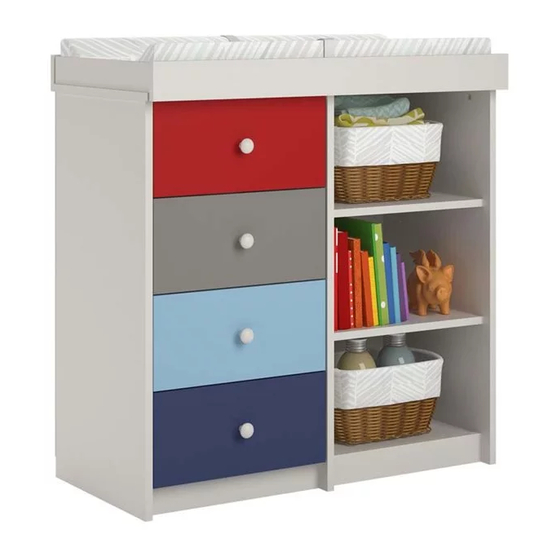
COSCO
-KEEP FOR REFERENCE-
WARNING
Unit can tip over causing severe injury
or death.
Anchor unit to stud or wall.
DO NOT allow children to climb on unit.
Put heavy items on lower shelves or drawers.
Read and follow all assembly instructions.
Please Recycle
Recicle Por Favor
Réutilisez SVP
5891500PCOM
®
-GUARDAR PARA REFERENCIA-
ADVERTENCIA
Este mueble puede caerse por encima
causando daño serio o la muerte
Anolar el mueble a un espárrago muro.
NO dejar que los niños suben por encima del mueble.
Poner los articulos mas pesados en los tableros o cajones inferiores.
Leer y sequir todos de los instucciones para el montaje.
DO NOT RETURN PRODUCT TO THE STORE
ALTO
Individual stores do not stock parts.
STOP
NO REGRESAS ESTA PRODUCTO A LA TIENDA
Las tiendas no tiene partes.
ARRÊT
NE RETOURNEZ PAS LE PRODUIT AU MAGASIN
Les magasins individuels ne gardent pas de pièces.
If a part is missing or damaged, please visit our website or call our toll-free customer
service line. We will gladly ship your replacement parts FREE of charge.
Si las partes están perdidas o dañadas Por favor visite nuestra página de Internet o
llame a nuestra línea de teléfono gratis de Servicio al Cliente. Nosotros le enviaremos
sus repuestos sin cargo adicional, serán totalmente gratis.
Si une pièce est manquante ou endommagée, veuillez visiter notre site web ou appelez
sans frais notre Service à la clientèle. Nous expédierons avec plaisir vos pièces de
rechange GRATUITEMENT.
Need Parts or
Nesacitas partes o
Assistance?
Asistancia?
WWW.COSCOKIDSFURNITURE.COM/PARTS
or call toll free:
o llame a nuestra línea gratis:
1-800-489-3351
ou appelez sans frais:
For prompt, reliable service; please have your assembly manual ready.
Para servicio mas rapido y reliable por favor tenga esta manual listo.
Pour un service rapide et fiable, s'il vous plaît ayez votre livret d'assembage en
main.
-GARDEZ POUR RÉFÉRENCE-
AVERTISSEMENT
L'unité peut basculer et causer des
blessures graves ou la mort.
Fixez l'unité au mur ou à un montant.
Ne laissez PAS les enfants grimper sur le meuble
Déposez les pièces lourdes sur les tablettes ou tiroirs
du bas.
Lire et suivre toutes les instructions d'assemblage.
Besoin de Pièces ou
d'assistance?
B345891500PCOM 0
Advertisement

Related Manuals for Cosco 5891500PCOM


Summary of Contents for Cosco 5891500PCOM
- Page 1 5891500PCOM ® COSCO DO NOT RETURN PRODUCT TO THE STORE ALTO Individual stores do not stock parts. STOP NO REGRESAS ESTA PRODUCTO A LA TIENDA Las tiendas no tiene partes. ARRÊT NE RETOURNEZ PAS LE PRODUIT AU MAGASIN Les magasins individuels ne gardent pas de pièces.
- Page 4 PARTS - PIEZAS - PIECES Parts shown are the base cabinet of your model. Drawers shown on next page. Please note, some parts are labeled with a sticker and some parts have a letter stamped on a raw edge. Piezas mostradas son la base del gabinete de su modelo. Cajones que se muestra en la siguiente página. Tenga en cuenta las mismas partes se etiquetan con una etiqueta engomada y algunas partes tienen una carta impresa en un borde crudo.
- Page 5 PARTS - PIEZAS - PIECES Parts shown are for the drawers. Please note, some parts are labeled with a sticker and some parts have a letter stamped on a raw edge. Piezas que se muestran son para los cajones. Tenga en cuenta que algunas partes están etiquetados con una pegatina y algunas partes tienen una carta sellada en un borde crudo.
- Page 6 PARTS - PIEZAS - PIECES Parts List ITEM PART NUMBER DESCRIPTION 35891015010 panel izquierdo / panneaul gauche 35891015020 panel derecho / panneau droit 35891015030 partición / cloison 35891015040 cima / dessus 35891000050 abajo a la izquierda / en bas à gauche 35891015060 abajo a la derecha / en bas à...
- Page 7 PARTS - PIEZAS - PIECES #A56540 #A52010 #A84050 #A22570 #A54215 #A22510 slide knob safety bracket kit cam lock drawer bracket cam bolt perilla corredera juego del soporte de seguridad soporte de caón cerradura de leva perno de leva glissiere coulissante bouton ensemble de courroie sécurite support de tiroir...
- Page 8 This illustration shows how the CAM fastening system works. Esta ilustración muestra el sistema de fijación de leva y como funciona. Cette illustration montre le système de fixation CAME et son fonctionnement. Tighten to fully seat. Do not over tighten. Proper orientation of cam.
- Page 9 Important: When using a power drill or power screwdriver for screwing, please be aware to slow down and stop when screw is tight. Failure to do so may result in stripping the screw. Importante: Cuando se utiliza un taladro eléctrico o corriente desarmador para atornillar, tenga en cuenta a despacio y se detendrá...
- Page 10 Note: You will have small wood dowels (7) and large wood dowels (17). You will use the smaller wood dowels (7) in this step. Nota: Usted tendrá clavijas pequeñas de madera (7) y tacos de madera de gran tamaño (17). Que va a utilizar las clavijas de madera más pequeños (7) en este paso.
- Page 11 Extend each slide as shown. Press the black plastic lever upward and seperate the two parts of the slide. Ampliar la diapositiva como se muestra. Presione hacia arriba la palanca negra de plástico y separar las dos partes de la diapositiva. Étendre la lame comme illustré.
- Page 12 Use these three holes when attaching slide. Utilice estos tres agujeros al colocar la diapositiva. Utilisez ces trois trous pour la fixation de glissière. front frente avant Refer to step 3 if needed for holes to use. Consulte el paso 3 si es necesario para los agujeros para su uso.
- Page 13 Use these three holes when attaching slide. Utilice estos tres agujeros al colocar la diapositiva. Utilisez ces trois trous pour la fixation de glissière. front frente avant Refer to step 3 if needed for holes to use. Consulte el paso 3 si es necesario para los agujeros para su uso.
- Page 14 right surface left surface derecho superficie superficie izquierda surface droite surface gauche Proper orientation of CAM LOCK Posición correcta de la cerradura de leva. Bonne orientation de la SERRURE DE CAME Note: You will have small wood dowels (7) and large wood dowels (17). You will use the smaller wood dowels (7) in this step.
- Page 15 Finished Edge Borde Acabado Bord Fini B345891500PCOM 0 15 /34 ?? www.coscokidsfurniture.com ??
- Page 16 Note: You will have small wood dowels (7) and large wood dowels (17). You will use the smaller wood dowels (7) in this step. Nota: Usted tendrá clavijas pequeñas de madera (7) y tacos de madera de gran tamaño (17). Que va a utilizar las clavijas de madera más pequeños (7) en este paso.
- Page 17 Do not fully tighten this screw yet. No apretar este tornillo todavía. Ne serrez pas encore complètement cette vis. Finished Edge Borde Acabado Bord Fini Note: You will have small wood dowels (7) and large wood dowels (17). You will use the smaller wood dowels (7) in this step.
- Page 18 Finished Edge Borde Acabado Bord Fini Bottom edge of partition (C) and kicks (H) wil be flush with each other. Borde inferior de la partición (C) y patadas (H) Wil ser al ras con los demás. LOCK Le bord inférieur de la partition (C) et de coups de pied (H) wil être de niveau UNLOCK APRETAR DESAPRETAR...
- Page 19 Notice: After shelves (E&F) and kicks (H) are attached, tighten screws (9) that were not fully tightened in step 9. Aviso: Después de estantes (E y F) y patadas (H) están unidos, apriete los Finished Edge tornillos (9) que no fueron apretados plenamente en el paso 9. Borde Acabado Avis: Après étagères (E &...
- Page 20 Finished Edge Borde Acabado Bord Fini LOCK UNLOCK APRETAR DESAPRETAR SERRER OUVRIR B345891500PCOM 0 20 /34 ?? www.coscokidsfurniture.com ??
- Page 21 Carefully turn the unit over onto its front side as shown. WARNING Cuidadosamente vire la unidad sobre la parte delantera como se muestra. Please make sure that the Backs are attached securely. Tournez soigneusement l'unité sur le devant comme montré. All nails must be driven into the parts straight and tightened firmly.
- Page 22 Note: You will use the large wood dowels (17) in this step. Nota: Usted usará los grandes espigas de madera (17) en este paso. Remarque: Vous allez utiliser les grandes chevilles de bois (17) dans cette étape. Proper orientation of CAM LOCK Posición correcta de la cerradura de leva.
- Page 23 Be sure to use the holes shown. Asegúrese de utilizar los orificios mostrados. Veillez à utiliser les trous indiqués. End View Vista Final Vau Finale The top surface of the small angle bracket (15) must be flush with the bottom edge of the front rail (I). La superficie superior del soporte de ángulo pequeño (15) debe estar al ras con el borde inferior del riel frontal (I).
- Page 24 finished surface lado terminado surface finie B345891500PCOM 0 24 /34 ?? www.coscokidsfurniture.com ??
- Page 25 glue cola colle Finished Edge Borde Acabado Bord Fini glue cola colle Apply 3-4 drops of glue into the wood dowels holes in the back rail (J) before attaching the Finished Edge left and right rails (S&T). Borde Acabado Bord Fini Aplicar 3-4 gotas de pegamento en los orificios de las clavijas de madera en el riel posterior (J) antes de conectar el rieles...
- Page 26 Apply 3-4 drops of glue into the wood dowels holes in the front rail (I) before attaching the left and right rails (S&T). Aplicar 3-4 gotas de pegamento en los agujeros de las clavijas de madera en el riel frontal (I) antes de conectar los carriles izquierdo y derecho (S&T). Appliquer 3-4 gouttes de colle dans les chevilles de bois trous dans le rail avant (I) avant de fixer les rails gauche et droite (S&T).
- Page 27 Lay the drawer sides down on a flat hard surface. Carefully line up the drawer bracket with the holes in the drawer side as shown. Using a hammer, tap each drawer bracket stem part way into each hole. Repeat this process until the drawer bracket is fully seated on the drawer side.
- Page 28 Finished Edge Borde Acabado Bord Fini finished surface lado terminado surface finie Finished Edge Borde Acabado Bord Fini Please Note: You will assemble 4 drawers. All 4 drawers assemble in the same manner. The assembly illustration will show 1 drawer. You will repeat each step 4 times for each drawer.
- Page 29 Removed in step 3. Se quitó en el paso 3. Retiré à l'étape 3. B345891500PCOM 0 29 /34 ?? www.coscokidsfurniture.com ??
- Page 30 Please Notice: The top of the unit is not shown for visibility of the safety bracket attachment. DO NOT remove the top of the unit. Observe por favor: hole La unidad de encima no demuestra la visibilidad del accesorio del soporte de seguridad.
- Page 31 Notice, the drawer bracket holes are slotted. Drawer fronts can be adjusted by loosening screws, making needed adjustments and retightening screws. Tenga en cuenta los agujeros de los soportes de cajón están ranurados. Frentes de los cajones pueden ajustarse aflojando los tornillos, hacen los Be sure the carrier of the slide is positioned all the ajustes necesarios y vuelva a apretar los tornillos.
- Page 32 Note: To remove the drawers, you'll need to reach between the drawer sides and end panels with a flat screwdriver to release the plastic lever of the drawer slides. On the left side you'll press the plastic lever up and on the right side you'll press the plastic lever down to release the drawer from the unit.
- Page 33 MAXIMUM LOADS – CARGA MAXIMA - CHARGES MAXIMALES This unit has been designed to support the maximum loads shown. Exceeding these load limits could cause sagging, instability, product collapse, and/or serious injury. Esta unidad ha sido diseñada para soportar la carga máxima anotada. El exceder estos límites puede causar inestabilidad, colapsarse y/o causar serias lesiones.
- Page 34 To covert your unit from a changing table to a dresser, remove parts (I, J, S & T). Unscrew the seven screws (14) in the back rail (J) and the screw (16) attaching the small angle bracket (15) to the top (D). Para convertir la unidad de una mesa para cambiar pañales a un aparador, eliminar partes (I, J, S &...
Need help?
Do you have a question about the 5891500PCOM and is the answer not in the manual?
Questions and answers