Table of Contents
Advertisement
Quick Links
M1
Portable Cinema
User Guide
IMPORTANT: Please read this User Guide to obtain important information on installing
and using your product in a safe manner, as well as registering your product for future
service. Warranty information contained in this User Guide will describe your limited
coverage from ViewSonic Corporation, which is also found on our web site at http://
www.viewsonic.com in English, or in specific languages using the Regional selection
box in the upper right corner of our website. "Antes de operar su equipo lea cu
idadosamente las instrucciones en este manual"
Model No. VS17337
Advertisement
Table of Contents

Related Manuals for ViewSonic VS17337


Summary of Contents for ViewSonic VS17337
- Page 1 Warranty information contained in this User Guide will describe your limited coverage from ViewSonic Corporation, which is also found on our web site at http:// www.viewsonic.com in English, or in specific languages using the Regional selection box in the upper right corner of our website.
- Page 2 Compliance Information FCC Statement This device complies with part 15 of FCC Rules. Operation is subject to the follow- ing two conditions: (1) this device may not cause harmful interference, and (2) this device must accept any interference received, including interference that may cause undesired operation.
- Page 3 Important Safety Instructions Read these instructions. Keep these instructions. Heed all warnings. Follow all instructions. Do not use this unit near water. Clean with a soft, dry cloth. Do not block any ventilation openings. Install the unit in accordance with the manufacturer’s instructions.
- Page 4 Declaration of RoHS2 Compliance This product has been designed and manufactured in compliance with Directive 2011/65/EU of the European Parliament and the Council on restriction of the use of certain hazardous substances in electrical and electronic equipment (RoHS2 Directive) and is deemed to comply with the maximum concentration values issued by the European Technical Adaptation Committee (TAC) as shown below: Proposed Maximum Substance...
- Page 5 Product Registration To fulfill possible future product needs, and to receive additional product information as it becomes available, please visit your region section on ViewSonic’s website to register your product online. The ViewSonic CD also provides an opportunity for you to print the product registration form.
-
Page 6: Table Of Contents
Table of Contents Introduction ................ 1 Projector features .........................1 Shipping contents ............. 2 Package Overview........................2 Product Overview .........................3 Controls and functions ............ 4 Setting up ................7 Power On/Off ........................8 Mount the Projector ......................10 Open the smart stand and adjust the focus ring ..............11 Adjust Projected Image ..................... - Page 7 Adjusting the Audio Mode ....................25 Adjusting the Light source settings ..................25 Reset All Settings ......................26 Eye Protection ........................26 Viewing different file ......................26 Using the 3D function ......................30 OSD Menu System ......................32 Specification sheet ......................34 HDMI Support Video Timing ....................
-
Page 8: Introduction
Introduction Projector features The Portable Cinema providing users with high-performance LED projection and a user- friendly design to deliver high reliability and ease of use. Some of the features may not be available on your projector. Actual performance may vary and subject to model specifications. •... -
Page 9: Shipping Contents
Shipping contents Package Overview Carefully unpack and verify that you have all of the items shown below. If any of these items are missing, please contact your place of purchase. Projector AC Power Cord AC Power Adapter Quick Start Guide Quick Start Guide Quick Start Guide Quick Start Guide... -
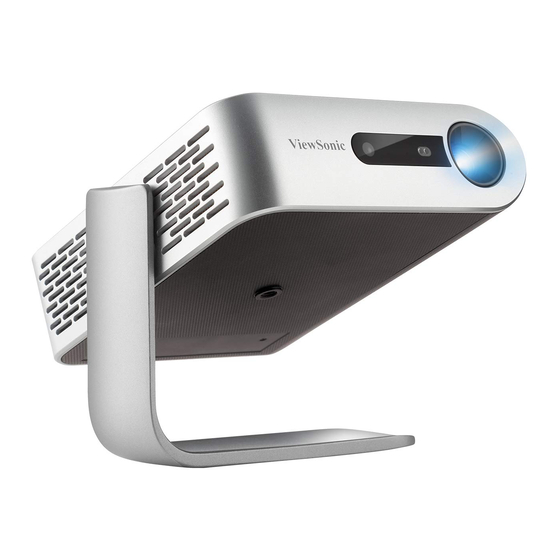
Page 10: Product Overview
Product Overview ENTER ENTER ENTER ENTER ENTER ENTER ENTER ENTER 17 18 17 18 17 18 17 18 17 18 17 18 17 18 17 18 Speaker Volume - / Down 15. USB-C Ventilation Volume + / Up 16. HDMI port Focus Ring 10. -
Page 11: Controls And Functions
Controls and functions Projector ENTER Power / Enter - Press 3 seconds to power on/off the projector ENTER - Enacts the selected On-Screen Display(OSD) menu item. Volume down - Decrease the volume level. ENTER - Down Volume up - Increase the volume level. ENTER - Up Return... - Page 12 Remote Control Power button LEFT / BACKWARD Settings 10. RIGHT / FORWARD Home 11. MUTE Harman Kardon Settings 12. PLAY / PAUSE Bluetooth Mode 13. RETURN UP / KEYSTONE 14. Volume Up 15. Volume Down DOWN / KEYSTONE Remote control effectiverange Refer to the illustration about the location of the Infra-Red (IR) remote control sensor(s).
- Page 13 Replacing the remote control battery To open the battery cover, turn the remote control over to view its back, open the cover in the direction of the arrow as illustrated. Remove any existing batteries (if necessary) and install two AAA batteries observing the battery polarities as indicated in the base of the battery compartment.
-
Page 14: Setting Up
Setting up Operating your projector This portable projector allows you to plug and play your devices so you can easily open multimedia files and hear audio straight from it’s built-in Harman Kardon speakers. For your safety and to maintain the quailty of this unit, refer to the following steps when operating your Projector. -
Page 15: Power On/Off
Power On/Off Using power cord Connect the power cord to the power adapter. Connect the AC power cord to a power source Connect the DC power connector to your projector. Charge the projector for 4.5 hours before using it in battery mode for the first time. IMPORTANT! •... - Page 16 Using The Battery Warning message is displayed when the battery is running out. As your battery is low, the projector will be turned off in a minute. If the screen shows a low battery message, be sure to charge the battery. Battery using time information Status Time and Display...
-
Page 17: Mount The Projector
Mount the Projector Screw a standard tripod into the screw hole on the projector. The tripod is not included. Bottom side of the Bolt used to projector attach the projector The projector is Tripod connected to this part... -
Page 18: Open The Smart Stand And Adjust The Focus Ring
Open the smart stand and adjust the focus ring • Open the smart stand by moving its lens cover down • Adjust the image focus of the projection onscreen by moving the focus ring up and down. -
Page 19: Adjust Projected Image
Adjust Projected Image The projector is equipped with a smart stand for adjusting the projected image Using Auto Keystone to adjust image (refer to details in Page 29) -
Page 20: Positioning Your Projector
Positioning your projector Screen size and projection distance table Adjust the LED projector’s distance from the screen using the below table: 16:9 image on a 16:9 Screen (a) Screen Size (b) Image Width (c) Image height (d) Projection Distance inch inch inch inch... -
Page 21: Using The Menus
Using the menus The projector is equipped with On-Screen Display (OSD) menus for making various adjustments and settings. The OSD screenshots below are for reference only, and may differ from the actual design. Below is the overview of the OSD menu. Battery indicator Input... - Page 22 Launch the onscreen display by opening the smart stand of your projector OSD menus will be shown after ViewSonic start up screen. To use the OSD menus, please select your language first. Press Settings button on remote to turn the OSD setting page on Use <...
-
Page 23: Adjusting Your Projector's Settings
Adjusting your projector’s settings Refer to the following steps when accessing the onscreen display menu options to adjust your projector settings: Launch the onscreen display menu Press< / >to select the menu option you would like to access Press < / > to adjust the settings according to your preference. Press OK to save the new settings. -
Page 24: Connect The Projector To Your Device
Connect the projector to your device Please use the supplied USB-C cable to make sure the compatibility. Please make sure your USB-C device can support video transmission Micro SD - SDHC (up to 32GB) - FAT32 / NTFS USB-C HDMI - iPhone/iPad need to buy additional adapter, to avoid compatible issue, please use Apple authorized accessories... -
Page 25: Different Menu Options
Different menu options Switching input signal Different input signals can be used to connect with the projector. Different source is shown on the OSD homepage. Press < / > until your desire signal is selected and press OK. Once detected, the selected source information will be displayed on the screen for seconds. - Page 26 USB Reader • Flash Drive support up to 128GB • Format: FAT32 / NTFS • Hard disk support up to 1TB • FW update...
-
Page 27: M1+ Fw Upgrade
Click “Confirm” Page with the loading bar will be appeared After reached 100%, will return to ViewSonic start up screen for loading again The whole upgrading process will take around 5~10 mins After finishing the process, will return to the Home page... -
Page 28: Wallpaper
Wallpaper Select this menu option to change the OSD wallpaper. You may select your preferred picture from the pre-installed wallpaper collection. GO to Wallpaper > choose selected wallpaper and press OK Wallpaper example: Image Settings Aspect Ratio Go to Settings > Image Settings > Aspect Ratio Press <... -
Page 29: About The Aspect Ratio
About the aspect ratio In the picture below, the black portions are inactive areas and the white portions are active areas. OSD menus can be displayed on those unused black areas. Auto: Proportional scaling of an image to fit the projector’s natural resolution in its horizontal width. -
Page 30: Auto Keystone
Auto Keystone Auto Keystone provides a rectangular screen image by automatically adjusting the Keystone number when there is a trapezoidal screen image caused by tilting of the projector. Go to Settings > Image Settings > Auto Keystone Press < / > to select: •... -
Page 31: Harman Kardon - Adjusting The Audio Settings
Optimizing the image Select the Display Mode The projector is preset with several predefined picture modes so that you can choose one to suit your operating environment and input signal picture type. To select an operation mode that suits your need, you can follow one of the following steps. -
Page 32: Adjusting The Audio Mode
Adjusting the Audio Mode Go to Settings > Harman Kardon > Audio Mode Press up / down to select a desired mode. Press OK when finished. Mode Movie Sound Mode Bass Booster Sets audio optimized for a specific genre. Instrumental If available, you can press Harman Kardon on the remote control to adjust the projector’s sound mode. -
Page 33: Reset All Settings
Reset All Settings Returns all settings to the factory preset values. The following settings will still remain: Language, Keystone, Go to Settings > Reset Settings > All Settings Press < / > to select Reset / Cancel. Press OK when finished. Eye Protection To protect children’s eye on direct light damage, when an object get closer to the lens, and will automatically turn to a blank image... - Page 34 For single file: Press OK when finished. For multiple files: Click “Select”, boxes will be appeared in front of each file, press OK and up/down to select multiple files. Then select Copy / Paste / Cut/ Delete under “Select” button. Go to Homepage and select your sources again, Paste your selected files on your desired location.
- Page 35 Press OK on remote control or Enter on keypad to show the control bar when playing video / music / photo. Control playback by using the following buttons. Picture Video Backward Backward Play Fast backward Next Play Zoom in Pause Zoom out Fast Forward Rotate (left)
- Page 36 Multimedia support format Extension Codec .xvid Video Xvid, H.264 .avi Audio .mp4 Video H.264/MPEG 4 .m4v Audio .mov .mkv Video H.264 Video H.264, MPEG2 .trp Audio MP3/AAC .mts .m2ts Video MPEG1, MPEG2 .vob Audio DVD-LPCM .mpg Video MPEG1...
-
Page 37: Using The 3D Function
Using the 3D function This portable cinema features 3D function which enables you to enjoy 3D movies, videos, and sporting events in a more realistic way by presenting the depth of the images. You need to wear a pair of 3D glasses to view 3D images. If the 3D signal is input from an HDMI 1.4a compatible device, the portable cinema detects the signal for 3D Sync information and once detected, it projects images in 3D format automatically. - Page 38 Video Control Menu 3D OSD menu •...
-
Page 39: Osd Menu System
OSD Menu System Menu system Please note that the on-screen display (OSD) menus vary according to the signal type selected. The menu items are available when the projector detects at least one valid signal. If there is no equipment connected to the projector or no signal detected, limited menu items are accessible. - Page 40 Source Main Menu Sub-menu Options Backwards / Forward / Fast Video Control Bar backwards / Fast Forward / Play / (appear with icon) Pause / Volume / settings Backwards / Play / Forward / Play Photos Control Bar Micro SD Zoom in / Zoom out / Rotate / (appear with icon) settings...
-
Page 41: Specification Sheet
Specification sheet Specification Projection system 0.2” WVGA Native Resolution 854x480 Brightness 250lm Contrast Ratio 120000:1 Display Color 1.07 Billion Colors Light Source Light source life 30000 hours (Nor/SuperEco) Lamp Watt 10W RGB LED Lens F=1.7, f=5.5mm Projection Offset 100%+/-5% Throw Ratio Image size 24"-100"... - Page 42 English, French, Spanish, Thai, Korean, German, Italian, Russian, Swedish, Language Dutch, Polish, Czech, T-Chinese, S-Chinese, Japanese, Turkish, Portuguese, Finnish, Indonesian, India, Arabic, Vietnamese Standard Accessory Power Cord Remote Control USB-C Cable 1 (1m) Optional Accessory Warranty Card Yes (for specific regions only) Carry Bag Feature Map SuperColor...
-
Page 43: Hdmi Support Video Timing
HDMI Support Video Timing Horizontal Vertical Dot Clock Timing Resolution frequency (KHz) frequency (Hz) Frequency (MHz) 480i 720(1440) x 480 15.73 59.94 480p 720 x 480 31.47 59.94 576i 720(1440) x 576 15.63 576p 720 x 576 31.25 720/50p 1280 x 720 37.5 74.25 720/60p... -
Page 44: Hdmi Support Pc Timing
HDMI Support PC Timing Resolution Mode Refresh rate (Hz) H-frequency (kHz) Clock (MHz) VGA_60 59.940 31.469 25.175 VGA_72 72.809 37.861 31.500 640 x 480 VGA_75 75.000 37.500 31.500 VGA_85 85.008 43.269 36.000 VGA_120 119.518 61.910 52.500 720 x 400 720x400_70 70.087 31.469 28.3221... -
Page 45: 3D Support Timing
Resolution Mode Refresh rate (Hz) H-frequency (kHz) Clock (MHz) 59.883 64.674 119.000 1680 x 1050 1680x1050_60 59.954 65.290 146.250 1920 x 1200 1920x1200_60 59.950 74.038 154.000 640x480@67Hz MAC13 66.667 35.000 30.240 832x624@75Hz MAC16 74.546 49.722 57.280 1024x768@75Hz MAC19 75.020 60.241 80.000 1152x870@75Hz MAC21... -
Page 46: Usb-C Support Timing
USB-C Support Timing Horizontal Vertical Dot Clock Timing Resolution frequency (KHz) frequency (Hz) Frequency (MHz) 480i 720 (1440) x 480 15.73 59.94 480p 720 x 480 31.47 59.94 576i 720 (1440) x 576 15.63 576p 720 x 576 31.25 720/50p 1280 x 720 37.5 74.25... - Page 47 Latin America www.viewsonic.com/la/ soporte@viewsonic.com la/soporte/servicio-tecnico Nexus Hightech Solutions, Cincinnati #40 Desp. 1 Col. De los Deportes Mexico D.F. Tel: 55) 6547-6454 55)6547-6484 Other places please refer to http://www.viewsonic.com/la/soporte/servicio-tecnico#mexico Macau www.hk.viewsonic.com T= (853) 2833-8407 service@hk.viewsonic.com Middle East ap.viewsonic.com/me/ Contact your reseller service@ap.viewsonic.com...
- Page 48 ViewSonic . Please refer to the ViewSonic website in your country to check the local terms and model variants, and see if the product model in your country is eligible for a longer warranty period.
- Page 49 Exclusion of damages: ViewSonic’s liability is limited to the cost of repair or replacement of the product. ViewSonic shall not be liable for: 1. Damage to other property caused by any defects in the product, damages based...
- Page 50 If a product proves to be defective in material or workmanship during the warranty period, ViewSonic will, at its sole option, repair or replace the product with a like product. Replacement product or parts may include remanufactured or refurbished parts or components &...
- Page 51 Tel: (52) 999-925-1916 Tel: 01(52)95-15-15-22-22 E-Mail: rrrb@sureste.com Fax: 01(52)95-15-13-67-00 E-Mail. gpotai2001@hotmail.com Tijuana: FOR USA SUPPORT: ViewSonic Corporation Av Ferrocarril Sonora #3780 L-C 14035 Pipeline Ave. Chino, CA 91710, USA Col 20 de Noviembre Tel: 800-688-6688 Tijuana, Mexico E-Mail: http://www.viewsonic.com Projector Mexico Warranty Term Template In UG...
Need help?
Do you have a question about the VS17337 and is the answer not in the manual?
Questions and answers