Table of Contents
Advertisement
Quick Links
PX701HD
PX701HDH
Projector
User Guide
IMPORTANT: Please read this User Guide to obtain important information on installing and using your product
in a safe manner, as well as registering your product for future service. Warranty information contained in this
User Guide will describe your limited coverage from ViewSonic Corporation, which is also found on our web site at
http://www.viewsonic.com in English, or in specific languages using the Regional selection box in the upper right
corner of our website.
Model
No. VS17689
Model Name: PX701HD | PX701HDH
Advertisement
Table of Contents

Related Manuals for ViewSonic PX701HDH


Summary of Contents for ViewSonic PX701HDH
- Page 1 Warranty information contained in this User Guide will describe your limited coverage from ViewSonic Corporation, which is also found on our web site at http://www.viewsonic.com in English, or in specific languages using the Regional selection box in the upper right corner of our website.
- Page 2 At ViewSonic®, we believe that our products have the potential to make a positive impact in the world, and we are confident that the ViewSonic® product you have chosen will serve you well. Once again, thank you for choosing ViewSonic®!
-
Page 3: Safety Precautions - General
Safety Precautions - General Please read the following Safety Precautions before you start using the projector. • Keep this user guide in a safe place for later reference. • Read all warnings and follow all instructions. • Allow at least 20“ (50 cm) clearance around the projector to ensure proper ventilation. - Page 4 (UPS). • If smoke, an abnormal noise, or a strange odor is present, immediately switch the projector off and call your dealer or ViewSonic®. It is dangerous to continue using the projector. • Use only attachments/accessories specified by the manufacturer.
-
Page 5: Safety Precautions - Ceiling Mounting
Safety Precautions - Ceiling Mounting Please read the following Safety Precautions before you start using the projector. If you intend to mount the projector on the ceiling, we strongly recommend that you use a proper fitting projector ceiling mount kit and that you ensure it is securely and safely installed. -
Page 6: Table Of Contents
Contents Safety Precautions - General ........3 Safety Precautions - Ceiling Mounting ......5 Introduction .............. 10 Features ........................10 Package Contents ....................10 Product Overview ....................11 Projector ........................ 11 Controls and Functions ....................11 Connection Ports ......................12 Remote Control ..................... 13 Controls and Functions .................... - Page 7 Making Connections ..........24 Connecting to Power ....................24 Connecting to Video Sources ................25 HDMI Connection ....................25 Connecting to Computer Sources .................26 VGA Connection ....................26 VGA Out Connection ..................... 26 Connecting to Audio .....................27 Operation ..............28 Turning the Projector On/Off ................28 Starting Up the Projector ..................
- Page 8 Appendix ..............58 Specifications ......................58 Projector Dimensions .................... 59 Timing Chart ......................59 Analog RGB ......................59 HDMI (PC) ......................60 HDMI (Video) ......................62 IR Control Table ....................62 Address Code ......................63 RS-232 Command Table ..................64 Pin Assignment ...................... 64 Interface ........................ 64 Command Table ....................
- Page 9 Regulatory and Service Information ......78 Compliance Information ..................78 FCC Compliance Statement ................... 78 Industry Canada Statement ................... 78 CE Conformity for European Countries ..............78 Declaration of RoHS2 Compliance................. 79 Indian Restriction of Hazardous Substances ............80 Product Disposal at End of Product Life ..............80 Copyright Information ..................81 Customer Service ....................
-
Page 10: Introduction
Introduction The ViewSonic PX701HD/HDH is a high brightness 3,500 ANSI Lumens projector featuring a Full HD 1080p resolution that offers impressive visual performance in a brightly lit living room or meeting room. The projector adopts the latest lamp design to extend lamp life of up to 20,000 hours under SuperEco+ mode, effectively reducing lamp replacement and maintenance costs. -
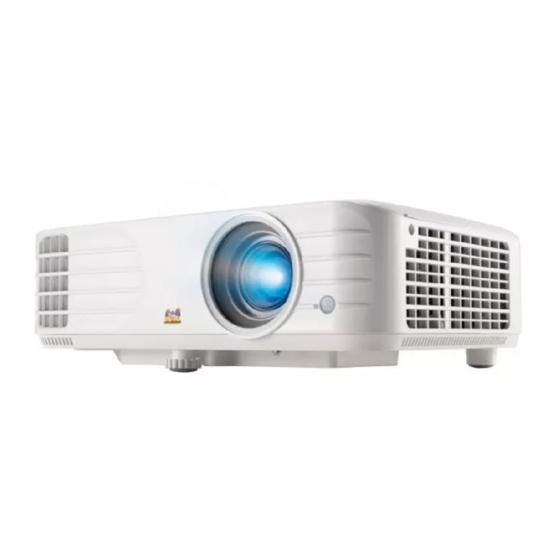
Page 11: Product Overview
Product Overview Projector Controls and Functions Temperature Indicator Light Power Indicator Lamp Indicator Light Light MENU BLANK EXIT ENTER COLOR SOURCE MODE Vent (heated air Focus Ring exhaust) Zoom Ring Projection Lens Remote IR sensor Description Toggles the projector between standby mode and Power On. Power Manually corrects distorted images resulting from an angled ] Keystone Keys... -
Page 12: Connection Ports
Connection Ports Security Slot AC Power Cord Inlet Security Bar Ceiling Mount Holes Adjuster Foot Port Description 1 AUDIO OUT Audio signal output socket. 2 AUDIO IN Audio signal input socket. HDMI 1 HDMI port. 4 HDMI 2 HDMI port. USB 5V/1.5A Out USB Type A port for power supply. -
Page 13: Remote Control
Remote Control Button Description Manually corrects distorted Controls and Functions images resulting from an Keystone Keys angled projection. Enacts the selected OSD Enter Menu item. Selects the desired Left/ Right menu items and makes Down adjustments. Turns on/off the On-Screen Menu Display (OSD) Menu or goes back to previous OSD Menu. -
Page 14: Remote Control Effective Range
Remote Control Effective Range To ensure proper function of the remote control follow the steps below: The remote control must be held at an angle within 30° perpendicular to the projector’s IR remote control sensor(s). The distance between the remote control and the sensor(s) should not exceed 8 m (26 ft.) NOTE: Refer to the illustration for the location of... -
Page 15: Initial Setup
Initial Setup This section provides detailed instructions for setting up your projector. Choosing a Location Personal preference and room layout will decide the installation location. Consider the following: • Size and Position of your screen. • Location of a suitable power outlet. •... -
Page 16: Projection Dimensions
Projection Dimensions NOTE: See “Specifications” on page 58 for the native display resolution of this projector. 16:9 Image on a 16:9 Screen • 16:9 Image on a 4:3 Screen • NOTE: (e) = Screen / (f) = Center of Lens 16:9 Image on a 16:9 Screen (a) Screen (b) Projection Distance... -
Page 17: 16:9 Image On A 4:3 Screen
16:9 Image on a 4:3 Screen (a) Screen (b) Projection Distance (c) Image (d) Vertical Offset Size minimum maximum Height minimum maximum 1524 1832 2015 1778 2137 2351 2032 2443 2687 2286 2748 3023 1029 2540 3053 3358 1143 2794 3358 3694 1257... -
Page 18: Mounting The Projector
If you buy a third-party mount, please use the correct screw size. Screw size can vary depending on the thickness of the mounting plate. To ensure the most secure installation, please use a ViewSonic® wall or ceiling mount. 2. Ensure the screws used to attach a mount to the projector meet the following specifications: •... -
Page 19: Preventing Unauthorized Use
Preventing Unauthorized Use The projector has several built-in security features to prevent theft, access, or accidental setting changes. Using the Security Slot To help prevent the projector from being stolen, use a security slot locking device to secure the projector to a fixed object. Below is an example of setting up a security slot locking device: NOTE: The security slot can also be used as a safety anchor if the projector is... -
Page 20: Using The Password Function
Using the Password Function To help prevent unauthorized access or use, the projector offers a password security option. The password can be set through the On-Screen Display (OSD) Menu. NOTE: Make note of your password, and keep it in a safe place. Setting a Password Press Menu to open the OSD Menu and go to: SYSTEM... -
Page 21: Changing The Password
Changing the Password Press Menu to open the OSD Menu and go to: SYSTEM > Security Settings > Change Password. 2. Press Enter, the message, ‘INPUT CURRENT PASSWORD’ will appear. 3. Enter the old password. ͫ If the password is correct, the message, ‘INPUT NEW PASSWORD’ will appear. -
Page 22: Forgetting The Password
Forgetting the Password If the password function is activated, you will be asked to enter the six-digit password every time you turn on the projector. If you enter the wrong password, the password error message, as pictured to the right, will appear for 5 seconds, and the message ‘INPUT PASSWORD’... -
Page 23: Locking The Control Keys
Locking the Control Keys With the control keys on the projector locked, you can prevent your settings from being changed accidentally (by children, for example). NOTE: When the Panel Key Lock is On, no control keys on the projector will operate except Power. -
Page 24: Making Connections
Making Connections This section guides you on how to connect the projector with other equipment. Connecting to Power 1. Connect the power cord to the AC IN jack at the rear of the projector. 2. Plug the power cord into a power outlet. NOTE: When installing the projector, incorporate a readily accessible disconnect device in the fixed wiring, or connect the power plug to an easily accessible... -
Page 25: Connecting To Video Sources
Connecting to Video Sources HDMI Connection Connect one end of an HDMI cable to the HDMI port of your video device. Then connect the other end of the cable to the HDMI 1 or HDMI 2 port of your projector. -
Page 26: Connecting To Computer Sources
Connecting to Computer Sources VGA Connection Connect one end of a VGA cable to the VGA port of your computer. Then connect the other end of the cable to the COMPUTER IN port of your projector. NOTE: Some notebooks do not turn on their external displays automatically when connected to a projector. -
Page 27: Connecting To Audio
Connecting to Audio The projector is equipped with speakers, however, you can also connect external speakers to the AUDIO OUT port of the projector. NOTE: • The audio output is controlled by the projector’s Volume and Mute settings. • AUDIO IN may not work due to the non-standardized DVI format. -
Page 28: Operation
Operation Turning the Projector On/Off Starting Up the Projector 1. Press the Power button to turn on the projector. 2. The lamp will light up, and a “Power On/Off Ring Tone” will play. 3. The Power Indicator Light stays green when the projector is On. -
Page 29: Shutting Down The Projector
Shutting Down the Projector 1. Press the Power or Off button and a confirmation message will appear to prompt you to press the Power or Off button a second time. Additionally you can press any other button to cancel. NOTE: If you do not respond in a few seconds after the first press, the message will disappear. -
Page 30: Selecting An Input Source
Selecting an Input Source The projector can be connected to multiple devices at the same time. However, it can only display one full screen at a time. If you want the projector to automatically search for the input source, ensure the Quick Auto Search function in the SYSTEM menu is On. -
Page 31: Adjusting The Projected Image
Adjusting the Projected Image Adjusting the Projector's Height and Projection Angle The projector is equipped with one (1) adjuster foot. Adjusting the foot will change the projector’s height and the vertical projection angle. Carefully adjust the feet to fine tune the projected image’s position. Auto-Adjusting the Image Sometimes, you may need to improve the picture quality. -
Page 32: Correcting Keystone
Correcting Keystone Keystoning refers to the situation where the projected image becomes a trapezoid due to angled projection. To correct this, besides adjusting the height of the projector, you may also: 1. Use the keystone keys on the projector or remote control to display the keystone page. -
Page 33: Hiding The Image
Hiding the Image In order to draw the audience’s full attention to the presenter, you can press Blank on the projector or remote control to hide the screen image. Press any key on the projector or remote control to restore the image. CAUTION: Do not block the projection lens as this could cause the blocking object to become heated and deformed or even cause a fire. -
Page 34: Menu Functions
Menu Functions This section will introduce the On-Screen Display (OSD) Menu and its options. General On-Screen Display (OSD) Menu Operation The projector is equipped with an On-Screen Display (OSD) Menu for making various adjustments. It can be accessed by pressing on the projector or Menu remote control. -
Page 35: On-Screen Display (Osd) Menu Tree
On-Screen Display (OSD) Menu Tree Main Menu Sub-menu Menu Option Auto Aspect Ratio 16:9 16:10 Native Keystone -40~40 Lens Shift -20~20 DISPLAY Position X: -5 ~ 5, Y: - 5 ~ 5 Phase 0~31 H. Size -15~15 Zoom 0.8X ~2.0X OverScan Off/1/2/3/4/5 Inactive... - Page 36 Main Menu Sub-menu Menu Option Color -50~50 Sharpness 0~31 1.8/2.0/2.2/2.35/ Gamma 2.5/Cubic/sRGB Off/1/2/3/4/ Brilliantcolor 5/6/7/8/9/10 Advanced Noise Reduction 0~31 IMAGE Primary Color Color Management Saturation Gain Reset Reset Color Settings Cancel Disable/VGA /HDMI/ Signal Auto Power On Disable/Enable Direct Power On Disable/Enable Disable/10 min/20 Auto Power Off...
- Page 37 BASIC Start Counting/Off Pattern Test Card Disable/5 min/10 min/15 min/20 min/25 Blank Timer min/30 min Message Black Splash Screen Blue ViewSonic Auto Frame Sequential 3D Sync Frame Packing 3D Settings Top-Bottom ADVANCED Side-by-Side 3D Sync Invert Disable/Invert Save 3D Settings...
- Page 38 Main Menu Sub-menu Menu Option Normal/Eco/ Lamp Mode Dynamic Eco/ SuperEco+ Reset Lamp Hours Reset/Cancel Lamp Usage Time Lamp Settings Normal ADVANCED Lamp Hours Information Dynamic Eco SuperEco+ Equivalent Lamp Hour Reset Reset Settings Cancel Language Multi-Language OSD Selection Front Table Rear Table Projector Position Rear Ceiling...
- Page 39 Main Menu Sub-menu Menu Option Panel Key Lock Remote Control Code 1/2/3/4/5/6/7/8 SYSTEM RS-232 Control Method 2400/4800/9600/14400/19200/38400/57600/ Baud Rate 115200 Source Color Mode Resolution INFORMATION Color System Firmware Version 3X Fast Input...
-
Page 40: Display Menu
DISPLAY Menu 1. Press the Menu button to display the On-Screen Display (OSD) Menu. 2. Press to select the DISPLAY menu. Then press Enter or use to access the DISPLAY menu. 3. Press Enter to select the menu option. Then press to display its sub-menu, or press to adjust/select the setting. - Page 41 Menu Option Description Auto Scales an image proportionally to fit the projector’s native resolution in its horizontal width. This is suitable for the incoming image which is neither in 4:3 nor 16:9 and you want to make most use of the screen without altering the image’s aspect ratio.
- Page 42 Menu Option Description Adjusts the clock phase to reduce image distortion. Phase NOTE: This function is only available when a PC input signal is selected. Adjusts the horizontal width of the image. H. Size NOTE: This function is only available when a PC input signal is selected.
-
Page 43: Image Menu
IMAGE Menu 1. Press the Menu button to display the On-Screen Display (OSD) Menu. 2. Press to select the IMAGE menu. Then press Enter or use to access the IMAGE menu. 3. Press to select the menu option. Then press to display its sub-menu, Enter or press... - Page 44 Menu Option Description Brightest Maximizes the brightness of the projected image. This mode is suitable for environments where extra-high brightness is required, such as using the projector in well lit rooms. Sports Designed for viewing sports in well-lit environments. Standard Designed for normal circumstances in a daylight environment.
- Page 45 Menu Option Description 8000K Images appear bluish white. 6500K Images maintain a normal white appearance. 5500K Images appear reddish white. Color Temp. To set a custom color temperature, you can further adjust the following items: Red Gain/Green Gain/Blue Gain Adjusts the Contrast levels of Red, Green, and Blue. Red Offset/Green Offset/Blue Offset Adjusts the Brightness levels of Red, Green, and Blue.
- Page 46 Menu Option Description Noise Reduction This function reduces electrical image noise caused by different media players. The higher the setting, the less the noise. (Not available when input signal is HDMI.) Color Management Advanced Only in permanent installations with controlled lighting levels such as boardrooms, lecture theaters, or home theaters, should color management be considered.
-
Page 47: Power Management Menu
POWER MANAGEMENT Menu 1. Press the Menu button to display the On-Screen Display (OSD) Menu. 2. Press to select the POWER MANAGEMENT menu. Then press Enter or use to access the POWER MANAGEMENT menu. 3. Press to select the menu option. Then press Enter to display its sub-menu, or press... - Page 48 Menu Option Description Signal Selecting VGA/HDMI allows the projector to turn on automatically once the VGA/HDMI signal is fed through the VGA/HDMI cable. You can also select All and the projector will turn on automatically upon receiving either a VGA or HDMI signal.
- Page 49 Menu Option Description The functions below are available in standby mode (plugged in, but not turned on). VGA Loop Through When selecting On, the projector outputs the signal received Standby Settings only from COMPUTER IN. Audio Pass Through When selecting On, the projector outputs an audio signal when the Audio In and Audio Out sockets are correctly connected to a proper device.
-
Page 50: Basic Menu
BASIC Menu 1. Press the Menu button to display the On-Screen Display (OSD) Menu. 2. Press to select the BASIC menu. Then press Enter or use to access the BASIC menu. 3. Press to select the menu option. Then press Enter to display its sub-menu, or press... - Page 51 Menu Option Description Presentation timer can indicate the presentation time on the screen to help you achieve better time management when giving presentations. Timer Period Sets the time period. If the timer is already on, the timer will restart whenever the Timer Period is reset. Timer Display Allows you to decide if you want the timer to show up on the screen for one of the following time periods:...
-
Page 52: Advanced Menu
ADVANCED Menu 1. Press the Menu button to display the On-Screen Display (OSD) Menu. 2. Press to select the ADVANCED menu. Then press Enter or use access the ADVANCED menu. 3. Press to select the menu option. Then press to display its sub-menu, Enter or press to adjust/select the setting. - Page 53 Menu Option Description This projector features a 3D function which enables you to enjoy 3D movies, videos, and sporting events in a more realistic way by presenting the depth of the images. You need to wear a pair of 3D glasses to view 3D images. 3D Sync The default setting is Auto and the projector automatically chooses an appropriate 3D format when detecting 3D...
- Page 54 Menu Option Description Lamp Mode ͫ Normal: Provides full lamp brightness. ͫ Eco: Reduces lamp power consumption by 16% and lowers brightness to extend the lamp life and decreases the fan noise. ͫ Dynamic Eco: Reduces lamp power consumption by up to 30% depending on the content brightness level.
-
Page 55: System Menu
SYSTEM Menu 1. Press the Menu button to display the On-Screen Display (OSD) Menu. 2. Press to select the SYSTEM menu. Then press Enter or use to access the SYSTEM menu. 3. Press to select the menu option. Then press to display its sub-menu, Enter or press... - Page 56 Menu Option Description We recommend you use the High Altitude Mode when your environment is between 1,500 m to 3,000 m above sea level, and ambient temperature is between 5°C–25°C. NOTE: • Do not use High Altitude Mode if your environment is High Altitude Mode between 0 to 1,499 m, and the temperature is between 5°C to 35°C.
-
Page 57: Information Menu
INFORMATION Menu 1. Press the Menu button to display the On-Screen Display (OSD) Menu. 2. Press to select the INFORMATION menu and display its contents. Menu Option Description Source Shows the current input source. Color Mode Shows the selected mode in the IMAGE menu. Resolution Shows the native resolution of the input source. -
Page 58: Appendix
(W x H x D) (12.3” x 4.3” x 8.7”) Weight Physical 3.7 kg (8.16 lbs) 300W (Typical) Power Saving Modes < 0.5W (Standby) Please use the power adapter from ViewSonic® or an authorized source only. The test condition follows EEI standards. -
Page 59: Projector Dimensions
Projector Dimensions 312 mm (W) x 108.37 mm (H) x 221.8 mm (D) 312 mm 108.37 221.8 MENU BLANK EXIT 62.72 mm 91.81 mm ENTER COLOR SOURCE MODE Timing Chart Analog RGB 3D Sync Refresh Clock Resolution Mode frequency rate (Hz) (MHz) Frame Sequential Top-Bottom Side-by-Side (kHz) -
Page 60: Hdmi (Pc)
3D Sync Refresh Clock Resolution Mode frequency rate (Hz) (MHz) Frame Sequential Top-Bottom Side-by-Side (kHz) WXGA_60 59.81 49.702 83.5 Supported Supported Supported WXGA_75 74.934 62.795 106.5 1280 x 800 WXGA_85 84.88 71.554 122.5 WXGA_120 (Reduce 119.909 101.563 146.25 Supported Blanking) SXGA_60 60.02 63.981... - Page 61 3D Sync Refresh Clock Resolution Mode frequency rate (Hz) (MHz) Frame Sequential Top-Bottom Side-by-Side (kHz) XGA_60 60.004 48.363 Supported Supported Supported XGA_70 70.069 56.476 XGA_75 75.029 60.023 78.75 1024 x 768 XGA_85 84.997 68.667 94.5 XGA_120 (Reduce 119.989 97.551 115.5 Supported Blanking) 1152 x 864...
-
Page 62: Hdmi (Video)
HDMI (Video) Horizontal Vertical Dot Clock 3D Sync Video Resolution frequency frequency frequency mode Frame Sequential Frame Packing Top-Bottom Side-by-Side (KHz) (Hz) (MHz) 480i 720(1440) x 480 15.73 59.94 Supported 480p 720 x 480 31.47 59.94 Supported Supported Supported 576i 720(1440) x 576 15.63 Supported... -
Page 63: Address Code
Format Byte 1 Byte 2 Byte 3 Byte 4 Pattern NEC-F2 Blank NEC-F2 PgUp NEC-F2 PgDn NEC-F2 NEC-F2 (Mute) NEC-F2 (Volume Down) NEC-F2 (Volume Up) NEC-F2 (Zoom in) NEC-F2 (Zoom out) Eco Mode NEC-F2 Color Mode NEC-F2 Address Code Code 1 83F4 Code 2 93F4... -
Page 64: Rs-232 Command Table
Write Blue 0x06 0x14 0x00 0x04 0x00 0x34 0x11 0x0A 0x01 0x68 Splash Screen Write ViewSonic 0x06 0x14 0x00 0x04 0x00 0x34 0x11 0x0A 0x02 0x69 Splash Screen Write 0x06 0x14 0x00 0x04 0x00 0x34 0x11 0x0A 0x04 0x6B Splash Screen... - Page 65 Function Type Action Command High Altitude Read Status 0x07 0x14 0x00 0x05 0x00 0x34 0x00 0x00 0x11 0x0C 0x6A Mode Light source Mode Write Normal 0x06 0x14 0x00 0x04 0x00 0x34 0x11 0x10 0x00 0x6D Lamp Mode Write 0x06 0x14 0x00 0x04 0x00 0x34 0x11 0x10 0x01 0x6E Light source Mode Write Dynamic Eco 0x06 0x14 0x00 0x04 0x00 0x34 0x11 0x10 0x02 0x6F...
- Page 66 Function Type Action Command Horizontal position Write Shift Left 0x06 0x14 0x00 0x04 0x00 0x34 0x12 0x06 0x00 0x64 Horizontal position Read Get Value 0x07 0x14 0x00 0x05 0x00 0x34 0x00 0x00 0x12 0x06 0x65 Vertical position Write Shift Up 0x06 0x14 0x00 0x04 0x00 0x34 0x12 0x07 0x00 0x65 Vertical position Write...
- Page 67 Function Type Action Command Gain Write Decrease 0x06 0x14 0x00 0x04 0x00 0x34 0x12 0x13 0x00 0x71 Gain Write Increase 0x06 0x14 0x00 0x04 0x00 0x34 0x12 0x13 0x01 0x72 Gain Read Get value 0x07 0x14 0x00 0x05 0x00 0x34 0x00 0x00 0x12 0x13 0x72 Sharpness Write Decrease...
- Page 68 Function Type Action Command Language Write Czech 0x06 0x14 0x00 0x04 0x00 0x34 0x15 0x00 0x0d 0x6E Language Write Portugese 0x06 0x14 0x00 0x04 0x00 0x34 0x15 0x00 0x0e 0x6F Language Write Thai 0x06 0x14 0x00 0x04 0x00 0x34 0x15 0x00 0x0f 0x70 Language Write Polish...
- Page 69 Function Type Action Command Remote Control Write code 2 0x06 0x14 0x00 0x04 0x00 0x34 0x0C 0x48 0x01 0xA1 Code Remote Control Write code 3 0x06 0x14 0x00 0x04 0x00 0x34 0x0C 0x48 0x02 0xA2 Code Remote Control Write code 4 0x06 0x14 0x00 0x04 0x00 0x34 0x0C 0x48 0x03 0xA3 Code Remote Control...
-
Page 70: Glossary
Glossary This section describes the standard glossary of terms used in projector models. All terms are listed in alphabetical order. NOTE: Some terms may not be applicable to your projector. Aspect Ratio Refers to the ratio of the image width to the image height. Auto Sync Built-in intelligent auto adjustment function that will re-adjust the frequency and clock values to provide the best picture quality. - Page 71 Activating it will improve projector cooling and performance. INFORMATION Displays the timing mode (video signal input), the projector model number, the serial number, and the ViewSonic® website URL. Input Select Toggles between the various input options that are available for the projector.
- Page 72 Lamp Settings The projector’s lamp information and settings can be viewed and adjusted by viewing the “Lamp Hours Information” or adjusting the “Lamp Mode”. Lens shift The projector’s lens can be shifted vertically by adjusting the “ ” Lens Shift menu.
-
Page 73: Troubleshooting
Troubleshooting Common Problems This section describes some common problems that you may experience when using the projector. Problem Possible Solutions • Ensure the power cord is properly attached to the projector and to the power outlet. • If the cooling process has not completed, please wait until it has finished then try to turn on the The projector does not turn on projector again. -
Page 74: Led Indicators
LED Indicators Light Status and Description Power Green Stand-by mode Flashing Green Powering up Green Normal operation Green Normal power-down cooling Flashing Downloading Green Green Green Burn in off Lamp Green First light source-lit error cooling Flashing Light source error in normal operation Green Color wheel start has failed Heating/Cooling... -
Page 75: Maintenance
• ViewSonic® does not recommend the use of any ammonia or alcohol-based cleaners on the lens or case. Some chemical cleaners have been reported to damage the lens and/or case of the projector. • ViewSonic® will not be liable for damage resulting from use of any ammonia or alcohol-based cleaners. -
Page 76: Lamp Information
Lamp Information This section will provided a better understanding of your projector’s lamp. Lamp Hour When the projector is being used, the duration (in hours) of lamp usage is automatically calculated by the built-in timer. To obtain the lamp hour information: 1. -
Page 77: Lamp Replacement Timing
Lamp Replacement Timing When the Lamp Indicator Light lights up, please install a new lamp or consult your dealer. CAUTION: An old lamp may cause a malfunction in the projector and in some instances the lamp may explode. Replacing the Lamp NOTE: It is recommended to turn the power off and disconnect the projector from the power outlet, and contact a qualified service personnel for lamp... -
Page 78: Regulatory And Service Information
Regulatory and Service Information Compliance Information This section addresses all connected requirements and statements regarding regulations. Confirmed corresponding applications shall refer to nameplate labels and relevant markings on the unit. FCC Compliance Statement This device complies with part 15 of FCC Rules. Operation is subject to the following two conditions: (1) this device may not cause harmful interference, and (2) this device must accept any interference received, including interference that may cause undesired operation. -
Page 79: Declaration Of Rohs2 Compliance
The following information is only for EU-member states: The mark shown to the right is in compliance with the Waste Electrical and Electronic Equipment Directive 2012/19/EU (WEEE). The mark indicates the requirement NOT to dispose of the equipment as unsorted municipal waste, but use the return and collection systems according to local law. -
Page 80: Indian Restriction Of Hazardous Substances
Schedule 2 of the Rule. Product Disposal at End of Product Life ViewSonic® respects the environment and is committed to working and living green. Thank you for being part of Smarter, Greener Computing. Please visit the ViewSonic®... -
Page 81: Copyright Information
Microsoft, Windows, and the Windows logo are registered trademarks of Microsoft Corporation in the United States and other countries. ViewSonic® and the three birds logo are registered trademarks of ViewSonic® Corporation. VESA is a registered trademark of the Video Electronics Standards Association. -
Page 82: Customer Service
For technical support or product service, see the table below or contact your reseller. NOTE: You will need the product’s serial number. Country/ Region Website Country/ Region Website Asia Pacific & Africa Australia Bangladesh www.viewsonic.com/au/ www.viewsonic.com/bd/ 中国 (China) www.viewsonic.com.cn 香港 (繁體中文) www.viewsonic.com/hk/ Hong Kong (English) India www.viewsonic.com/hk-en/ www.viewsonic.com/in/... -
Page 83: Limited Warranty
If a product proves to be defective in material or workmanship during the warranty period, ViewSonic will, at its sole option, repair or replace the product with a like product. Replacement product or parts may include remanufactured or refurbished parts or components. - Page 84 (e) the serial number of the product. 3. Take or ship the product freight prepaid in the original container to an authorized ViewSonic service center or ViewSonic. 4. For additional information or the name of the nearest ViewSonic service center, contact ViewSonic. Limitation of implied warranties:...
- Page 85 Exclusion of damages: ViewSonic’s liability is limited to the cost of repair or replacement of the product. ViewSonic shall not be liable for: 1. Damage to other property caused by any defects in the product, damages based upon inconvenience, loss of use of the product, loss of time, loss of profits, loss of business opportunity, loss of goodwill, interference with business relationships, or other commercial loss, even if advised of the possibility of such damages.
-
Page 86: Mexico Limited Warranty
If a product proves to be defective in material or workmanship during the warranty period, ViewSonic will, at its sole option, repair or replace the product with a like product. Replacement product or parts may include remanufactured or refurbished parts or components &... - Page 87 Exclusion of damages: ViewSonic’s liability is limited to the cost of repair or replacement of the product. ViewSonic shall not be liable for: 1. Damage to other property caused by any defects in the product, damages based...
- Page 88 Tel: (52) 999-925-1916 Tel: 01(52)95-15-15-22-22 E-Mail: rrrb@sureste.com Fax: 01(52)95-15-13-67-00 E-Mail. gpotai2001@hotmail.com FOR USA SUPPORT: Tijuana: ViewSonic Corporation Av Ferrocarril Sonora #3780 L-C 14035 Pipeline Ave. Chino, CA 91710, USA Col 20 de Noviembre Tel: 800-688-6688 Tijuana, Mexico E-Mail: http://www.viewsonic.com Projector Mexico Warranty Term Template In UG...
- Page 89 C0 M91 Y72 K24 Process Color Process Color C0 M0 Y0 K100 C0 M91 Y72 K24 Process Color Spot Color Pantone Black C Pantone 187 C Spot Color...
Need help?
Do you have a question about the PX701HDH and is the answer not in the manual?
Questions and answers