
Related Manuals for Modern Forms Slim Flush FH-W2003-52L-27-BA


Summary of Contents for Modern Forms Slim Flush FH-W2003-52L-27-BA
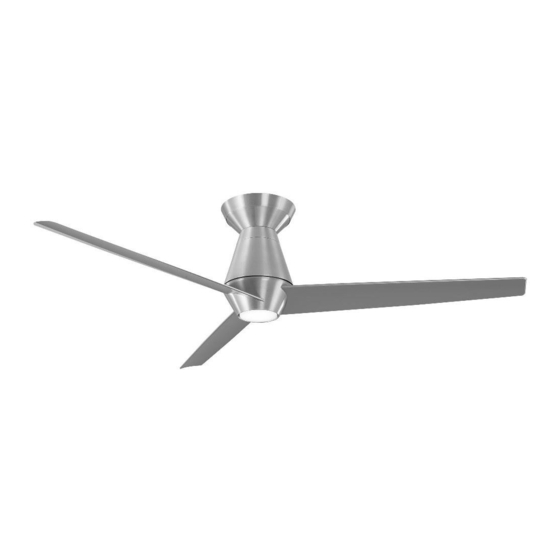
- Page 1 Slim Flush Installation Instructions works with the Google Assistant Compatible with...
- Page 2 Please read and review instructions before installation...
- Page 3 General Inquiries Fan Support For all questions about your ceiling fan please read For fast service have the following information below all included instructions, installation procedures, when you call: troubleshooting guidelines and warranty information before starting installation • Mo de l Na me a nd Nu m be r For missing parts or general inquiries •...
- Page 4 Safety Rules For operation, maintenance, and troubleshooting information, visit http://modernforms.com/fan-support/ To reduce the risk of electric shock, ensure electricity has been To avoid personal injury or damage to the fan and turned off at the circuit breaker before beginning. other items, please be cautious when working around or cleaning the fan.
- Page 5 Modern Forms. Substitution of parts or accessories not Noise and fan damage can occur designated for use with this product by Modern Forms could result in personal injury or property damage and will void the warranty. WARNING: This appliance is not intended for use by young Contact an authorized dealer or the manufacturer if any parts are children without supervision.
- Page 6 Compatible with our free more efficient than AC fans for flexible control Modern Forms app MOTOR The Modern Forms app integrates seamlessly with smart home devices you already own. works with the Google Assistant FREE APP DOWNLOAD WI-FI TOUCH PANEL...
-
Page 7: Table Of Contents
Table of Contents Package Contents Mounting Options Installing the Mounting Bracket Attaching the Fan Blades Hanging the Fan Making the Electrical Connections Installing the Wall Control Finishing the Installation Installing the Trim Ring Installing the Adapter Plate Installing the Luminaire Module Controlling the Fan Factory Reset App Instructions... - Page 8 Tools & Materials Required Wire cutters Electrical tape Phillips screwdriver Step ladder NOTE: Before discarding packaging materials, be certain all parts have been removed. NOTE: Place the parts from the hardware bag into a small container to keep them from being lost. MAC ID IMPORTANT: Please make note of the MAC ID on the receiver and keep it in a safe place.
-
Page 9: Package Contents
Package Contents Fan Blade Adapter Plate RPL-F2003-***-BD-** Mounting Bracket Remote Control RPL-F2003-HGR Motor Housing F-RCBT-WT Receiver PC Shade F-R3-2003-052 RPL-F2003-GLA Decorative Trim Ring RPL-F2003-TRIM-** Hardware Bag RPL-FH2003-PARTS Safety Cable Blade Screws 6.5” x 19 x 2mm 3/16” x 12mm Flat washer (1pcs) Phillips washer head Luminaire Module screws (10pcs) -
Page 10: Mounting Options
Mounting Options Installing The Mounting Bracket Standard Ceiling Caution: To prevent electrical shock, ensure electricity has been turned off at the circuit breaker before beginning. CAUTION: To prevent electrical shock, ensure electricity has been 1. Remove 1 set screw from mounting bracket and set turned off at the circuit breaker before beginning. - Page 11 Attaching the Fan Blades 1. Place blade on motor and secure with the blade attachment, screws and washers. 2. Insert blades in slots, aligning with motor assembly holes. 3. Secure blades with blade attachment screws & washers. 4. Remove set screws from motor housing, install blade collector ring (when applicable), and re-install screws.
-
Page 12: Hanging The Fan
Hanging the Fan 1. Remove 2 opposing screws and loosen the others. 2. Pass supply wires through mounting plate. 3. Lift motor assemby and hang it on the hook on the mounting plate using one of the screw holes. F H- W2 003... -
Page 13: Making The Electrical Connections
Making the Electrical Connections 1. Connect the wires from fan to the corresponding wires on the receiver. OUTLET BOX 2. Connect the wires from the outlet box to the corresponding WHITE (NEUTRAL) wires on the receiver. BLACK (HOT) GREEN (GROUND) NOTE: Follow wiring diagram found on the receiver hardware. - Page 14 Installing the Wall Control White White Black (to fan) Black (from breaker) Black Copper Green (Ground) Ground White (Neutral) Wall outlet box Wall control NOTE: Wall Control not included. A bluetooth wall control accessory can be purchased separately. NOTE: For multi-location wiring, skip to the next step. 1.
-
Page 15: Installing The Wall Control
Installing the Wall Control if Applicable Wall Controller 1 Wall Controller 2 Wall Controller 3 White to Fan Black to Fan Green to Fan HOT IN Green 1. Install the wall control using the wiring diagram in below. 2. Individually pair each of the wall controls with the fan receiver using the pairing instructions in section 14. F H- W 2 0 0 3... -
Page 16: Finishing The Installation
Finishing the Installation Installing the Trim Ring 1. Secure wire connectors with supplied wire ties. 1. Install the trim ring as shown. 2. Install motor housing to mounting plate with the screw removed as in Step 2. F H- W2 003... -
Page 17: Installing The Adapter Plate
Installing the Adapter Plate Installing the Luminaire Module 1. Remove 1 of 3 screws and loosen the others (do not remove). 1. Attach LED wires from motor assembly to luminaire module. 2. Using the screw from the previous step, install the adapter plate. Secure the luminaire module with the 3 screws to the adapter plate. - Page 18 Installing the Luminaire Module ≈ r ¿ » y 3. Install glass shade or luminaire cover without over-tightening.
-
Page 19: Controlling The Fan
Controlling the Fan Summer Mode (Counter-Clockwise) Air-Gap Switch* Wall Control Remote Pairing Unpairing Winter Mode * Air-Gap Switch only included Control Press and hold buttons To purge, press and hold buttons for 4 seconds. (Clockwise) with wall control for 10-15 seconds. Your fan is pre-paired. -
Page 20: Factory Reset
You can re-establish connectivity by performing a Wi-Fi Reset and NOTE: You may need to factory reset your receiver if you using the Modern Forms app to reconfigure the fan to connect to experience issues with network connectivity. the network with the new settings. - Page 21 (sold seperately) or through the Modern Forms app. To use the Modern Forms app, download it for free from the App Store or Google Play. Open the app to create your account. You can also log in using your Facebook or Google account.
- Page 22 Application The Modern Forms app will walk you through the main screen and show you how to create schedules, change fan speeds, dim the light, switch between Summer and Winter Modes, invite users, create groups and much more. Please refer to the Modern Forms app instructions for more details.
-
Page 23: Accessories
Wi--Fi Touch Panel F-TS BK, WT Sold separately Wall Control 6 fan speeds, dims light to 1% Bluetooth Works in conjunction with Modern Forms F-WCBT-WT Wall Control Smart Fan receiver (not included) Compatible with Modern Forms Smart Fans Bluetooth F-RCBT-WT... - Page 24 La notificación de un defecto por escrito debe ser recibida por Modern Forms dentro de los cinco (5) años a partir de la a defect in writing must be received by Modern Forms within five (5) years from the date of purchase (or according period of time as outlined by material).
- Page 25 Le problème sur le terrain. Si le problème ne peut pas être résolu, un numéro RGA sera attribué. L’obligation de Modern Forms est expressément limitée à la réparation ou au remplacement, sans frais, dans l’usine de Modern Forms après autorisation écrite préalable du retour.
- Page 26 Notes F H- W2 003...
- Page 27 Notes F H- W 2 0 0 3...
- Page 28 F H - W2003 modernforms.com...
Need help?
Do you have a question about the Slim Flush FH-W2003-52L-27-BA and is the answer not in the manual?
Questions and answers