Table of Contents
Advertisement
Quick Links
Advertisement
Table of Contents

Related Manuals for TEFAL Pro Style IT34 Series


Summary of Contents for TEFAL Pro Style IT34 Series
- Page 1 IT34XX www.tefal.com...
- Page 2 Depending on model /...
-
Page 3: Safety Instructions
SAFETY INSTRUCTIONS Please read these instructions carefully before first use and keep them in a safe place. • Never leave the appliance unattended whilst connected to the power supply, even if for a few moments, especially where children are present. •... - Page 4 • Do not attempt to hang up the unit using the hose. • The use of accessory attachments other than those provided by Tefal is not recommended and may result in fire, electric shock or personal injury.
- Page 5 hot water from condensation. Ensure that the attachments have cooled down to avoid contact with hot water. • Burns could occur from touching hot parts, hot water or steam. Use care when you empty a steam appliance. There may be hot water in the tank or from the inside the appliance.
-
Page 6: Troubleshooting
TROUBLESHOOTING Problems Possible causes Solutions There is no steam. The appliance has not Check that the appliance has been been switched on. plugged in correctly. Press the On/Off button. The appliance will begin producing steam after approximately 45 seconds. The hose has been Check that the hose is not bent or twisted. - Page 7 The hose makes a You are using the steam Raise the hose frequently during use gurgling noise. head in a position close and adjust the pole to its maximum to the ground and some height in order to avoid the formation of condensation occurs in condensation.
-
Page 12: Product Description
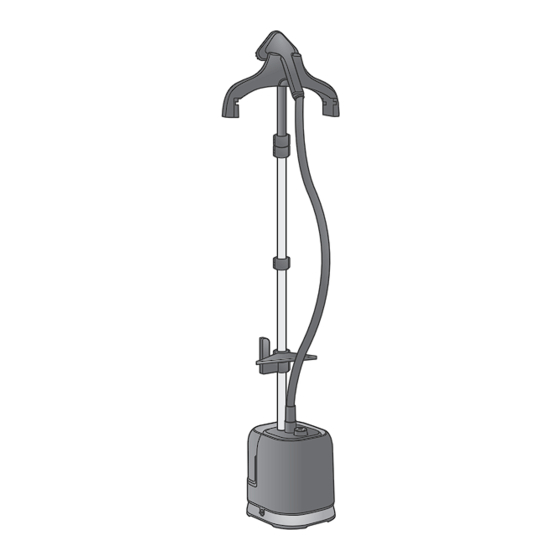
PRODUCT DESCRIPTION / Hanger* 2. EN Steam Head Steam Hose 4. EN Adjustable poles ON / OFF Button 6. EN Removable Water tank Draining Cap 8. EN Vertical Support* Fabric Brush 10. EN Hanger & clips* Depending on model /... - Page 13 1. ASSEMBLY / Insert the pole in the housing untill you hear a "click" Open the three pole locks. Extend the pole fully. Close the three locks.
- Page 14 Fully insert the hanger vertically on top of the pole and lock it. Position the steam head on its craddle. Insert the steam hose , and lock it, by screwing until hearing a "click". CLICK Add the vertical support and the hanger. Depending on model /...
-
Page 15: Before Use
Unwind the support and x it, by adjusting the tension with the dedicated hook and lock it. 2. BEFORE USE / Remove the water tank. Remove the cap then ll in the water tank. 1,5L 51OZ Fully screw the water tank cap and insert tank back in appliance. - Page 16 Add the clothe of your choice on the hanger. 3. ACCESSORIES / Accessories must be settled when appliance is cold and not running. The fabric brush opens the weaves of the fabrics for better steam penetration.
- Page 17 4. USE / The appliance must remain in a horizontal position on the oor. Plug in the appliance. Turn the On/O Button, in order to switch on the appliance. Then, adjust steam output by turning the button. After 45 seconds approximately, steam will come out.
-
Page 18: During Use
For optimal use, pass the steam jets on your garment from top to bottom. Never steam directly on people. 5. DURING USE / If steam is not coming out anymore, this can be due to low water level in tank. - Page 19 Turn the on/o button to the "OFF" positioning, in order to switch o the appliance. Unplug, then remove the water tank. Remove the cap then ll in the water tank. 1,5L 51OZ Fully screw the water tank cap and insert tank back in appliance.
- Page 20 Turn the On/O Button, in order to switch on the appliance. Then, adjust steam output by turning the button. 6. AFTER USE / Turn the on/o button to the "OFF" positioning, in order to switch o the appliance. Unplug the appliance. Remove the water tank.
- Page 21 Unscrew the cap and then empty the water tank completely in a sink. Screw back the cap and place the water tank back to its appliance. Roll up the power cord and place it on its hook. Wait for an hour for your appliance to cool before storing.
-
Page 22: Descaling Procedure
7. DESCALING PROCEDURE / To apply every 6 months or in case of performance decrease. WARNING! Wait for an hour that appliance completely cools down. Remove the steam head from the cradle, unlock & collapse the pole. Remove the water tank. - Page 23 Fill in 0.5L(litre) of water in the appliance tank inlet. 0.5 L 17OZ Water Shake Gently the appliance to remove the main particles. Place the appliance over a sink & unscrew the «Anti calc» cap by turning it anti clockwise. Be careful , water might be hot.
- Page 24 Vertically tilt the appliance to empty mix in a sink. Unlock the pole , uncollapse, lock. Position the steam head on its craddle. Remove the cap then ll in the water tank. 1,5L 51OZ...
- Page 25 Fully screw the water tank cap and insert tank back in appliance. Plug in the appliance. Let the appliance run until water tank is emptied completely.
- Page 26 8. CLEANING / Wait an hour for complete cool down. Only use a sponge with water to clean the base. Only use a sponge with water to clean the steam head. Never use detergents when cleaning your appliance.
- Page 27 Never wash or rinse appliance directly over a sink. Never wash or rince the steam head directly over a sink.
- Page 28 9100027420...
Need help?
Do you have a question about the Pro Style IT34 Series and is the answer not in the manual?
Questions and answers