Toa F-2352C Instruction Manual
Ceiling speaker system
Hide thumbs
Also See for F-2352C:
- Brochure (46 pages) ,
- Specifications (12 pages) ,
- Instruction manual (12 pages)
Table of Contents
Advertisement
Quick Links
CEILING SPEAKER SYSTEM
TABLE OF CONTENTS
1. SAFETY PRECAUTIONS .......................... 2
2. GENERAL DESCRIPTION ........................ 3
3. FEATURES ................................................ 3
5. INSTALLATION ......................................... 5
FOR MAINTENANCE ............................... 10
Please follow the instructions in this manual to obtain the optimum results from this unit.
We also recommend that you keep this manual handy for future reference.
F-2322C
INSTRUCTION MANUAL
F-2352C
7. REPAINTING THE SPEAKER .................. 11
PROTECTION CIRCUITRY ...................... 11
9. SPECIFICATIONS .................................... 12
Accessories ............................................... 12
Optional Components ................................ 12
F-2322C
F-2352C
Advertisement
Table of Contents

Related Manuals for Toa F-2352C


Summary of Contents for Toa F-2352C
-
Page 1: Table Of Contents
INSTRUCTION MANUAL CEILING SPEAKER SYSTEM F-2322C F-2352C F-2322C F-2352C TABLE OF CONTENTS 7. REPAINTING THE SPEAKER ....11 1. SAFETY PRECAUTIONS ......2 8. ABOUT THE INPUT OVERLOAD 2. GENERAL DESCRIPTION ......3 PROTECTION CIRCUITRY ...... 11 3. FEATURES ..........3 9. -
Page 2: Safety Precautions
WARNING combination. Doing otherwise may cause the unit or component to fall off, resulting in personal injury. • Leave the installation to your TOA dealer because • Should the following irregularity be found during the installation requires expert knowledge. use, immediately stop operating the unit and Improper installation may cause the unit to fall, contact your nearest TOA dealer. -
Page 3: General Description
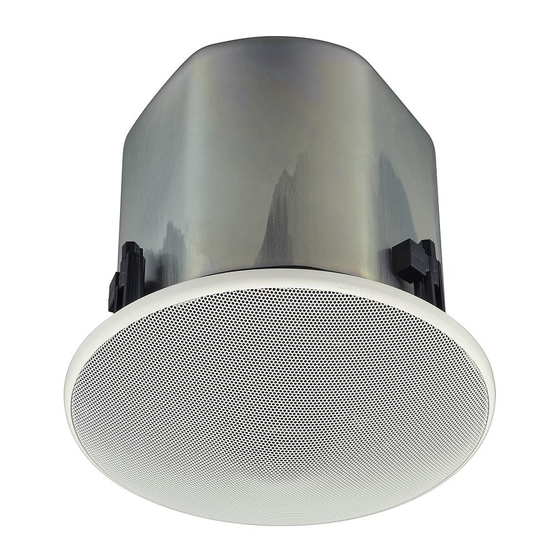
2. GENERAL DESCRIPTION The F-2322C and F-2352C are flush-mounted ceiling speakers that offer wide frequency range and high- quality sound output. The F-2322C employs a full-range speaker element, while the F-2352C features a 2-way speaker configuration. Use of their supplied and optional mounting hardware permits versatile mounting to match a wide range of applications and installation locations. -
Page 4: Nomenclature And Dimensions
Safety wire (accessory) Length: Approx. 600 (23 ") Mounting hole: ø200 (7 [Ceiling mounting] Ceiling reinforcement ring (accessory) Ceiling panel • F-2352C [Front] [Side] [Rear] Cord clamp 41 (1 229 (9 Front grille (accessory) Safety wire hook Detachable input... -
Page 5: Installation
5. INSTALLATION The F-2322C and F-2352C ceiling speakers can be mounted in 5 different configurations: • Direct mounting to a ceiling panel Use the supplied ceiling reinforcement ring. • Mounting to a ceiling frame Use the supplied ceiling reinforcement ring in conjunction with the optional HY-TB1 Tile Bar Bridge. - Page 6 Step 3. Mount fittings to a ceiling or hanging pipe. 3-1. Direct mounting to a ceiling panel Mounting hole Fold the supplied ceiling reinforcement ring in half* and insert it through the mounting hole in the ceiling panel, then open it with its tabs facing up. Place the ring on the ceiling panel aligning it with the mounting hole.
- Page 7 3-4. Mounting to an anchor bolt [Installed HY-AH1] Use the supplied ceiling reinforcement ring in conjunction with the optional HY-AH1 Anchor Hanging Bracket. Anchor bolt Note Refer to the instruction manual included with the HY-AH1 HY-AH1 for the correct mounting procedure. (optional) Ceiling reinforcement ring (accessory)
- Page 8 (in the cases of Steps 3-1, 3-2, 3-3 and 3-4) Mounting hole Insert the speaker through the mounting hole till it contacts the ceiling panel. While doing so, avoid directly touching the speaker element and diffuser section (F-2352C only). Speaker unit WARNING Never grab the F-2352C's diffuser section as a hand hold.
- Page 9 6-2. Exposed mounting (in the case of Step 3-5) Follow Step 6-1 to mount. HY-BC1 Back Can attached to suspension pipe Note (optional) The ceiling reinforcement ring supplied with the speaker is not used. Caution Take care not to pinch the speaker cable and safety wire Speaker unit (supplied with the speaker).
-
Page 10: Removing The Speaker For Maintenance
6. REMOVING THE SPEAKER FOR MAINTENANCE 6.1. Detaching the Front Grille Turn the front grille counterclockwise to full stop, then lightly Unlock pull it downward. The front grille employs a double-locking system. If the grille cannot be detached when lightly pulled downward, it likely has not yet been fully rotated back to the detachment Front grille position. -
Page 11: Repainting The Speaker
8. ABOUT THE INPUT OVERLOAD PROTECTION CIRCUITRY Both the F-2322C and the F-2352C feature internal input overload protection circuitry. If an extremely high input level is fed to the unit, the protection circuitry automatically cuts off the signal to the speaker element. -
Page 12: Specifications
Use this Back Can when mounting the speaker unit in exposed hanging applications. Traceability Information for Europe (EMC directive 2004/108/EC) Manufacturer: Authorized representative: TOA Corporation TOA Electronics Europe GmbH 7-2-1, Minatojima Nakamachi, Chuo-ku, Kobe, Hyogo, Suederstrasse 282, 20537 Hamburg, Japan Germany URL: http://www.toa.jp/...
Need help?
Do you have a question about the F-2352C and is the answer not in the manual?
Questions and answers