Table of Contents
Advertisement
Available languages
Available languages
Quick Links
ISTRUZIONI PER L'USO
INSTRUCTIONS FOR USE
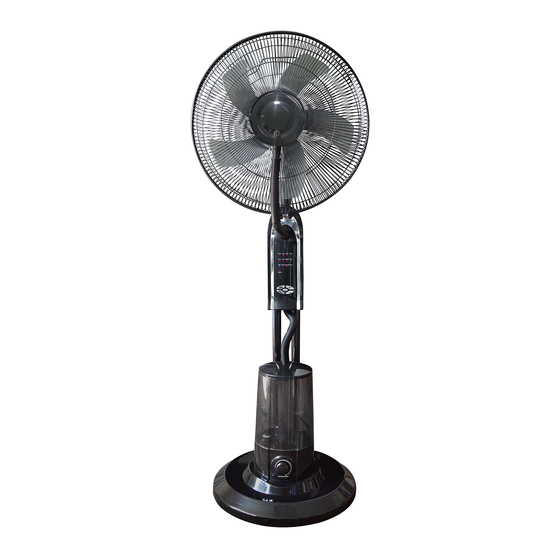
VENTILATORE A PIANTANA CON UMIDIFICATORE
STAND FAN WITH HUMIDIFIER
AR5M40
Il presente apparecchio può essere
utilizzato dai bambini a partire da 8 anni
in su e da persone dalle ridotte capacità
fisiche, sensoriali o mentali, oppure con
mancanza di esperienza e di conoscenza
se a loro è stata assicurata un'adeguata
sorveglianza, oppure se hanno ricevuto
istruzioni
circa
l'uso
in
sicurezza
dell'apparecchio e hanno compreso i
pericoli correlati.
I bambini non devono giocare con
l'apparecchio. Le operazioni di pulizia
e di manutenzione non devono essere
effettuate dai bambini senza sorveglianza.
Se il cavo di alimentazione dovesse essere
danneggiato, deve essere sostituito
solamente presso i centri di assistenza
autorizzati dal costruttore.
Advertisement
Table of Contents

Related Manuals for ARDES AR5M40


Summary of Contents for ARDES AR5M40
- Page 1 ISTRUZIONI PER L’USO INSTRUCTIONS FOR USE VENTILATORE A PIANTANA CON UMIDIFICATORE STAND FAN WITH HUMIDIFIER AR5M40 Il presente apparecchio può essere utilizzato dai bambini a partire da 8 anni in su e da persone dalle ridotte capacità fisiche, sensoriali o mentali, oppure con mancanza di esperienza e di conoscenza se a loro è...
- Page 2 Spegnere l’apparecchio e scollegarlo durante le operazioni di riempimento e pulizia. Assicurarsi che il ventilatore sia scollegato dalla rete di alimentazione prima di togliere le griglie di protezione. Avvertenze ATTENZIONE: leggere attentamente il presente libretto in quanto contiene importanti istruzioni per la sicurezza di installazione, uso e manutenzione.
- Page 3 può essere ritenuto responsabile. Posizionare ed utilizzare l’apparecchio su un piano d’appoggio orizzontale e stabile. Prima di utilizzare l’apparecchio verificare visivamente l’integrità del medesimo e del suo cavo di alimentazione. In caso di dubbi rivolgersi a personale qualificato. Prima di alimentare l’apparecchio accertarsi che i suoi dati di targa (tensione e frequenza) siano rispondenti a quelli della rete di distribuzione elettrica e che la presa sia idonea al terminale del cavo di cui l’apparecchio è...
- Page 4 qualsiasi oggetto e/o sostanza infiammabile o potenzialmente esplosiva. In caso di funzionamento anomalo o di anomalie durante il funzionamento spegnere subito l’apparecchio, scollegarlo dall’alimentazione, verificare le cause delle anomalie riscontrate eventualmente con l’aiuto di personale qualificato. Evitare in ogni caso di effettuare operazioni non previste dal presente manuale d’uso (come smontarlo e/o modificarlo).
-
Page 5: Informazioni Tecniche
Informazioni tecniche 1 - Vite di sicurezza 14 - Viti di fissaggio corpo principale 2 - Anello di chiusura 15 - Cavo di alimentazione 3 - Borchia nebulizzante 16 - Tubi di sostegno 4 - Griglia frontale 17 - Base 5 - Ghiera di fissaggio ventola 18 - Peso per base 6 - Ventola... - Page 6 Assemblaggio Posizionare il peso della base (18) sotto alla base (17) e posizionare la pia-stra di fissaggio (24) sulla base (17) in modo che i fori coincidano. Inserire i tubi di sostegno (16) nei fori della piastra di fissaggio e bloccare il tutto con le apposite viti e rondelle (25).
- Page 7 Spegnere l’umidificatore portando l’interruttore posto laterlamente su corpo principale dell’umidificatore in posizione “O” e scollegarlo dalla rete di alimentazione elettrica.” Sollevare il serbatoio dell’umidificatore e capovolgerlo sottosopra. Svitare il tappo presente sul serbatoio ruotandolo in senso antiorario. Inserire dell’acqua fredda pulita (precedentemente bollita) all’interno del serbatoio.
- Page 8 Premere i seguenti pulsanti per selezionare la funzione desiderata: ON/SPEED (pulsante presente sia sul pannello comandi sia sul telecomando): premere a ventilatore spento per accendere il prodotto. Premere a ventilatore acceso per selezionare la velocità desiderata a scelta tra Low (bassa velocità), Middle (media velocità) e High (massima velocità).
- Page 9 TIMER (pulsante presente sia sul pannello comandi sia sul telecomando): premere a ventilatore acceso per impostare lo spegnimento differito del ventilatore, in un intervallo tra 0,5 ore e 7,5 ore dal momento della programmazione. Ad ogni pressione il tempo aumenta di 0,5 ore. Le indicazioni luminose relative al timer si accendono sul display: 1/2Hrs.
-
Page 10: Manutenzione
Quando la funzione è attiva il relativo indicatore luminoso è acceso sul display, quando la funzione non è attiva l’indicatore luminoso è spento sul display. La funzione nebulizzazione può essere attivata in modo indipendente dalla ventilazione: è sufficiente spegnere il ventilatore con il pulsante Off e successivamente premere il tasto Mist. - Page 11 This appliance may be used by children 8 years of age and older and people with reduced physical, sensory or mental capacities or with a lack of experience and knowledge if they are adequately supervised or have been instructed on the safe use of the appliance and are aware of the related dangers.
- Page 12 the air). The packing materials (plastic bags, expanded polystyrene, etc.) must be kept out of the reach of children or disabled persons since they represent potential sources of danger. The installation/assembly of the device will be made/ or according to the indications of the manufacturer.
- Page 13 immediately, turn off the power and check the cause of the anomalies, if possible, with the support of a qualified person. Avoid carrying out operations which are not specified in this manual (such as disassembling and/or altering). Always remember to unplug the power cable of the device if it is not used for a long period, before storing, cleaning or performing any maintenance operation.
-
Page 14: Technical Informations
Technical informations 1 - Safety screw 14 - Main body screw 2 - Lock ring 15 - Power cord 3 - Misting adjustment knob 16 - Supporting tubes 4 - Front grille 17 - Base 5 - Fan lock ring 18 - Base weight 6 - Fan 19 - Humidifier power cord... - Page 15 Assembling Place the weight of the base (18) under the base (17) then place the fixing plate (24) on the base (17) so that the holes match. Insert the supporting tubes (16) in the holes of the fixing plate and secure them with screws and washers (25).
- Page 16 Turn off the humidifier and set the switch placed on the side of the humidifier’s main body in position “O” and disconnect the power cable from the socket. Lift the tank of the humidifier and turn it upside down. Unscrew the cap of the tank by rotating it counterclockwise. Fill the tank with cold and clean water (previously boiled).
- Page 17 Press the following buttons to select the function you need: ON/SPEED (button present both on the control panel and on the remote control): press it to turn on the fan. While the fan is on, press it to select the speed you need and select between Low (low speed), Middle (average speed) and High (maximum speed).
- Page 18 The total operating time set before the automatic switching off is given by the light indicators (for example if all the timer light indicators are on during the operating time set before the automatic switching off, the total operating time is given by: 1/2Hrs.(0,5 hours)+1Hrs.(1 hour)+2Hrs.(2 hours)+4Hrs.
-
Page 19: Maintenance
Maintenance Before carrying out the regular cleaning operations turn off the fan and unplug it. DO NOT disassemble the fan: this fan cannot be disassembled. For external cleaning use a soft and dry cloth. DO NOT dip the device in water, or splash it with any other liquids. DO NOT use solvents or any other chemical products for cleaning it. -
Page 20: Garanzia
GARANZIA Condizioni La garanzia ha validità 24 mesi dalla data d’acquisto. La presente garanzia è valida solo se viene correttamente compilata ed accompagnata dallo scontrino fiscale che ne prova la data di acquisto. L’apparecchio deve essere consegnato esclusivamente presso un nostro Centro Assistenza autorizzato. -
Page 21: User Information
GUARANTEE Terms and Conditions The guarantee is valid for 24 months. This guarantee applies only if it has been duly filled in and is submitted with the receipt showing the date of purchase. The guarantee covers the replacement or repair of parts making up the appliance which were faulty at source due to manufacturing faults. - Page 22 Prodotto importato da: Poly Pool S.p.A. Via Sottocorna, 21/B 24020 Parre (Bergamo) - Italy Tel. 035703244 r.a. - Fax 035702716 http://www.ardes.it - e-mail:info@ardes.it MADE IN CHINA...
Need help?
Do you have a question about the AR5M40 and is the answer not in the manual?
Questions and answers