Table of Contents
Advertisement
Quick Links
Advertisement
Table of Contents

Related Manuals for Goodmans GDVD90W2


Summary of Contents for Goodmans GDVD90W2
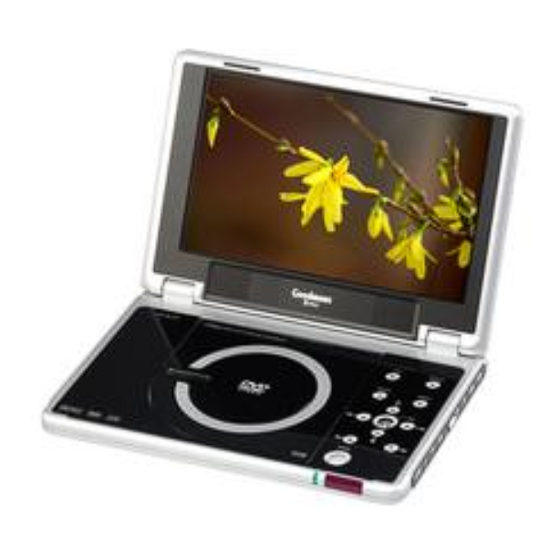
- Page 1 GDVD90W2 Portable DVD Player with Remote Control User Guide...
-
Page 2: Table Of Contents
Table of Contents Remote Control Location of buttons................4 Front View Locations of controls.................5 Side View Locations of controls ................. 6 Chapter 1. DVD Chapter 1. DVD Chapter 1. DVD Chapter 1. DVD Chapter 1. DVD 1-1 DVD Playback....................7 Basic Playback.......................... 7 Stopping Playback and Returning to The Menu (If a Menu Is Available on The DVD)......... - Page 3 Table of Contents -continued Chapter 4. Setup Chapter 4. Setup Chapter 4. Setup Chapter 4. Setup Chapter 4. Setup 4-1 Language Setup.....................22 On Screen Display (OSD) Language Setting..................22 DVD MENU Language Setting....................... 23 AUDIO Soundtrack Language Selection [DVD]................... 24 SUBTITLE Language Selection [DVD]....................
-
Page 4: Remote Control Location Of Buttons
Remote Control Location of buttons SETUP button LCD button INFO. button ANGLE button PAUSE/UP button TITLE button MENU button AUDIO button F.BWD/LEFT button F.FWD/RIGHT button PLAY/SEL. button NEXT button PREVIOUS button A-B REPEAT button STOP/DOWN button REPEAT(1-ALL) button NUMERICAL buttons MUTE button SUBTITLE button... -
Page 5: Front View Locations Of Controls
Front View Location of controls LCD screen SPEAKERS LCD button SETUP button INFO button MENU button PAUSE/UP button F.FWD/RIGHT button PLAY/SEL. button NEXT button STOP/DOWN button PREVIOUS button Remote Sensor OPEN button POWER indicator/Battery charge indicator F.BWD/LEFT button... -
Page 6: Side View Locations Of Controls
Side View Location of controls LEFT SIDE DIAGRAM DC IN jack POWER button RIGHT SIDE DIAGRAM Volume control Headphone socket Headphone socket Coaxial output socket (Digtial Audio) AV out/AV in switch button Audio output/input socket Video output/input socket... -
Page 7: Chapter 1. Dvd
1-1 DVD Playback Preparation Please connect the portable DVD player to Power (using the supplied battery or the main adapter) and connect the earphones/headphone or connect it to external equipment. If connecting the player to external equipment: Turn on the TV set, and select “Video” or “Aux” as the TV’s source. Turn on the stereo system if the player has been connected to a stereo system. -
Page 8: Stopping Playback
1-1 DVD Playback -continued Stopping Playback Press <STOP> once to stop the disc at its present position (PRESTOP). When the play button is pressed, the disc will start from the playback position. Press <STOP> twice to stop the disc when the play button is pressed, playback will resume from the beginning. Rapid Advance (Rapid Reverse) Press <F.BWD>... -
Page 9: Repeat Viewing
1-1 DVD Playback -continued Repeat Viewing Press <1/ALL REPEAT> during playback. Press once: Chapter (The current chapter will be repeated.) Press twice: Title (The current title will be repeated.) Press three times: Disc (The whole disc will be repeated.) Press four times: off (Repeat cancelled) *To return to normal playback <1/ALL REPEAT>... -
Page 10: Convenient Functions
1-2 Convenient functions Scene Information Press <INFO.> during playback. <INFO.> button repeatedly and the title number, chapter number, and other information will be shown on Press the screen. *To stop displaying scene information <INFO.> repeatedly until the information disappears. ---Press Changing Audio Soundtrack Language You can change the audio language from the one selected at the initial settings to a different language. -
Page 11: Viewing From Another Angle
1-2 Convenient functions -continued Viewing From Another Angle Some DVD discs contain scenes which have been filmed simultaneously from a number of different angles. These scenes <ANGLE> button. (The recorded angles vary can be viewed from each of these different angles using the depending on the disc.) Press <ANGLE>... -
Page 12: Dvd Menu
1-2 Convenient functions -continued DVD Menu Some DVD discs have unique menu structures called DVD menus. For example, DVDs programmed with complex content provide guide menus, and those recorded with various languages provide menus for audio and subtitle language selection. Although the DVD menu’s contents and operation vary from disc to disc, the following explains basic operation for these menus. -
Page 13: Chapter 2. Audio Cd
2-1 Audio CD Playback Audio DVD Audio DVD Audio DVD Audio DVD Audio DVD Preparation Please connect the portable DVD player to Power (using the supplied battery or the mains adapter) and connect the earphones/headphones or connect it to external equipment. If connecting the player to external equipment: Turn on the TV set, and select “Video”... -
Page 14: Skipping To Previous Or Subsequent Tracks
2-1 Audio CD Playback Audio DVD Audio DVD Audio DVD Audio DVD Audio DVD -continued Skip to Previous or Subsequent Tracks Skip Ahead Press <NEXT> during playback. The next track will be played. Press the button repeatedly to select subsequent tracks. Skip Back Press <PREVIOUS>... -
Page 15: Playing Kodak Picture Cds
3-1 Playing Kodak Picture CDs Special F Special F Special F Special F Special Functions unctions unctions unctions unctions Basic Playback You can play Kodak picture CDs for viewing on the screen. Insert a picture CD into the player. After few seconds, the portable DVD player will start to playback the pictures in slide show automatically. Enter the number of the picture to be shown using the numerical keys, then press <PLAY/SEL.>... -
Page 16: During Slide Show
3-1 Playing Kodak Picture CDs Special F Special F unctions unctions Special F Special F Special Functions unctions unctions -continued During a Slide Show Press <NEXT> to view the next picture or <PREVIOUS> to view the previous picture. Press <RIGHT> button or <LEFT>... -
Page 17: Playing Jpeg Picture Cds
3-2 Playing JPEG picture CDs Special F Special F Special F Special F Special Functions unctions unctions unctions unctions Basic Playback JPEG pictures on a CD can be played back as a slide show. Load a JPEG picture CD. After few seconds, the portable DVD player will start to playback the pictures as a slide show automatically. Enter the number of the picture to be shown using the numerical keys, then press <PLAY/SEL.>. -
Page 18: Playing Mode
3-2 Playing JPEG Picture CDs Special F Special F unctions unctions Special F Special F Special Functions unctions unctions -continued Playing Mode Press <NEXT> to view next picture or <PREVIOUS> to view previous picture. Press <RIGHT> button or <LEFT> button to rotate the picture. <RIGHT>... -
Page 19: Playing Music Discs
3-3 Playing Music Discs Special F Special F Special F Special F Special Functions unctions unctions unctions unctions Basic Playback Turn the DVD player on using the power ON/OFF switch. Press <OPEN> to open the DVD door. Hold the edge of the disc and push the disc gently until it clicks into place with the printed side up. -
Page 20: Playing A Cd Containing Jpeg Pictures And Mp3 Music
Special F Special F unctions unctions Special F Special F Special Functions unctions unctions 3-4 Playing a CD containing JPEG pictures and music Basic Playback Load a disc containing JPEG pictures and music. After few seconds, the File Manager will be displayed and the portable DVD player starts to play back the files in order automatically. -
Page 21: Thumbnail Mode
Special F Special F unctions unctions 3-4 Playing a CD containing JPEG pictures and music Special F Special F Special Functions unctions unctions Thumbnail Mode Press <TITLE> to enter Thumbnail mode. While in Thumbnail mode, there are 20 pictures per page. Press <... -
Page 22: Chapter 4. Setup
4-1 Language Setup Setup Setup Setup Setup Setup On Screen Display (OSD) Language Setting Allows the default languages for the on screen display (OSD) to be set. (Default: English) Press <SETUP> in the stop mode. Press <UP> button / <DOWN> button to select “Language Setup”, and then press <PLAY/SEL.>. -
Page 23: Dvd Menu Language Setting
4-1 Language Setup Setup Setup Setup Setup Setup -continued DVD Menu Language Setting Set the default language for the menu on the DVD. (Default: English) Press <SETUP> in the stop mode. Press <UP> button / <DOWN> button to select “Language Setup”, and then press <PLAY/SEL.>. -
Page 24: Audio Soundtrack Language Selection [Dvd]
4-1 Language Setup Setup Setup Setup Setup Setup -continued AUDIO Soundtrack Language Selection [DVD] Set the preferred audio language for playback. (Default: English) Press <SETUP> in the stop mode. Press <UP> button / <DOWN> button to select “Language Setup”, and then press <PLAY/SEL.>. -
Page 25: Subtitle Language Selection [Dvd]
4-1 Language Setup Setup Setup -continued Setup Setup Setup SUBTITLE Language Selection [DVD] Set the preferred language for the subtitles. (Default: Off) Press <SETUP> in the stop mode. Press <UP> button / <DOWN> button to select “Language Setup”, and then press <PLAY/SEL.>. -
Page 26: Screen Setup
4-2 Screen Setup Setup Setup Setup Setup Setup TV Type Setting Set the TV picture type that should be displayed on the LCD screen or the connected TV. (Default: 16:9) Press <SETUP> in the stop mode. Press <UP> button / <DOWN>... -
Page 27: Screen Saver Setting
4-2 Screen Setup Setup Setup -continued Setup Setup Setup Screen Saver Setting Set the screen saver to come on when a disc is stopped and no button is pressed after 10 minutes. (Default : On) Press <SETUP> in the stop mode. Press <UP>... -
Page 28: Audio Setup
4-3 Audio Setup Setup Setup Setup Setup Setup Digital Out Setting Set the digital output depending on the amplifier connected. (Default: SPDIF/RAW) Press <SETUP> in the stop mode. Press <UP> button / <DOWN> button to select “Audio Setup”, and then press <PLAY/SEL.>. -
Page 29: Custom Setup
4-4 Custom Setup Setup Setup Setup Setup Setup Parental Control Setting [DVD] A built-in viewer rating setting enables you to lock the videos that you do not want children to view. For example, if you set it to PG-13, then the portable DVD player will not play the videos rated R, NC-17 or X unless the correct password is entered. -
Page 30: Password Setting [Dvd]
Setup Setup Setup Setup Setup 4-4 Custom Setup -continued Password Setting [DVD] You can change the password that protects the parental settings. (Default: 0000) Press <SETUP> in the stop mode. Press <UP> button / <DOWN> button to select “Custom Setup”, and then press <PLAY/SEL.>. -
Page 31: Angle Mark Setting [Dvd]
Setup Setup Setup Setup Setup 4-4 Custom Setup -continued Angle Mark Setting [DVD] You can choose to display or hide the angle mark “ ” on the screen which will appear if there are multiple angle shot for the current scene. Press <SETUP>... -
Page 32: Default Setting
4-4 Custom Setup Setup Setup Setup Setup Setup -continued Default Setting Returns settings to factory set defaults. Press <SETUP> in the stop mode. Press <UP> button / <DOWN> button to select “Custom Setup”, and then press <PLAY/SEL.>. Press <UP> button / <DOWN>... -
Page 33: Lcd Setup
Setup Setup Setup Setup Setup 4-5 LCD Setup Panel Setting The portable DVD player provides two options about the panel adjustment: “Normal” or “4:3”. Press <LCD> repeatedly until “PANEL” is shown. Press <LEFT> button or <RIGHT> button to choose the preferred panel setting. -
Page 34: Brightness Setting
Setup Setup Setup Setup Setup 4-5 LCD Setup -continued Bright Setting Increase or decrease the brightness. Press <LCD> repeatedly until “BRIGHTNESS” is shown. Press <LEFT> button or <RIGHT> button to choose the preferred brightness setting. << NOTE>> The brightness range is from +9 to -9. -1 -1 -1 -1 -1 BRIGHTNESS BRIGHTNESS... -
Page 35: Contrast Setting
Setup Setup Setup Setup Setup 4-5 LCD Setup -continued Contrast Setting You can adjust the contrast of video with this setting to a soothing view for your eyes. Press <LCD> repeatedly until “CONTRAST” is shown. Press <LEFT> button or <RIGHT> button to choose the preferred contrast setting. -
Page 36: Sharpness Setting
Setup Setup Setup Setup Setup 4-5 LCD Setup -continued Sharpness Setting You can adjust the sharpness of video with this setting to a soothing view for your eyes. Press <LCD> repeatedly until “SHARPNESS” is shown. Press <LEFT> button or <RIGHT> button to choose the preferred sharpness setting.. -
Page 37: Important Safety Information
F F F F F or Y or Y or Y or Your R or Y our R our R our R our Reference eference eference eference eference 5-1 Important Safety Information This manual contains important information about how to safely and properly install, opeprate and care for this product. - Page 38 5-1 Important Safety Information F F F F F or Y or Y or Y or Y or Your R our R our R our R our Reference eference eference eference eference -continued Avoid damaging the AC adaptor cord. Protect the AC adaptor cord from being walked on or pinched particularly at plugs, and the point where they exit from the apparatus.
-
Page 39: Disc Use And Care
F F F F F or Y or Y or Y or Your R or Y our R our R our R our Reference eference eference eference eference 5-2 Disc Use and Care DO NOT use non-circular DVD discs, otherwise it may lead to damage to this DVD player. In order to keep the disc surface clean, please hold the DVD disc by its edge. -
Page 40: Precautions
5-3 Precautions F F F F F or Y or Y or Y or Y or Your R our R our R our Reference our R eference eference eference eference Please read these precautions before operating this player. Power cord protection To avoid any malfunctioning of the player, and to protect against electric shock, fire or personal injury, please observe the following. -
Page 41: Troubleshooting
5-4 Troubleshooting F F F F F or Y or Y or Y or Your R or Y our R our R our Reference our R eference eference eference eference Before requesting service for the portable DVD player, check the chart below for a possible cause of the problem you are experiencing. -
Page 42: Disc Handling And Maintenance
F F F F F or Y or Y or Y or Your R or Y our R our R our R our Reference eference eference eference eference 5-5 Disc Handling and Maintenance Handling Precautions Hold the disc by the edges so the surface will not be soiled with fingerprints. (A) Fingerprints, dirt and scratches can cause skipping and distortion. -
Page 43: Specifications
5-6 Specifications F F F F F or Y or Y or Y or Your R or Y our R our R our R our Reference eference eference eference eference DVD VIDEO PLAYER/OUTPUTS/SUPPLIED ACCESSORIES DVD VIDEO PLAYER Power supply ~230V 50Hz Power consumption Weight 1200 g...
Need help?
Do you have a question about the GDVD90W2 and is the answer not in the manual?
Questions and answers