Table of Contents
Advertisement
Quick Links
Advertisement
Table of Contents

Subscribe to Our Youtube Channel
Related Manuals for Apelson ISLA90SS


Summary of Contents for Apelson ISLA90SS
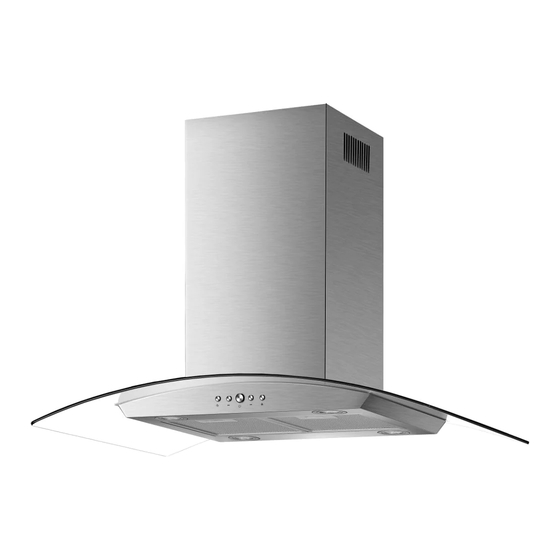
- Page 1 USER MANUAL Curved Glass Island Hood...
- Page 2 [01] x 1 [02] x 1 [03] x 2 [04] x 8 [06] x 1 [05] [07] x 06 [08] x 16 [09] x 16 [10] x 40 [11] x 4 (6 x 50mm) (5 x 10mm) (4 x 6mm) Cooker hood...
-
Page 3: Table Of Contents
Let's get started... These instructions are for your safety. Please read through them thoroughly before use and retain them for future reference. Getting started... Safety Before you start more detail... Product functions Switching on/off Care and maintenance Troubleshooting Recycling and disposal Technical and legal information Appendix Installation... -
Page 4: Safety
Safety These instructions are for your safety. Please read through them thoroughly prior to installation and retain them for future reference. • All installation work must be carried out by a competent person or qualified electrician. • This appliance must be installed correctly by a suitably qualified person, strictly following the manufacturer’s instructions. - Page 5 Safety 8 and supervised. Keep the appliance and its cord out of reach of children less than 8 years. Means for disconnection must be incorporated in the fixed wiring in accordance with the wiring rules. An all-pole disconnection switch having a contact separation of at least 3mm in all poles should be connected in fixed wiring.
- Page 6 Safety Please dispose of the packing material carefully. Do not use flammable sprays in close vicinity to the appliance. We also recommend that great care be taken during use and cleaning. Read the cleaning and maintenance sections for this appliance carefully. A steam cleaner is not to be used.
- Page 7 Safety involves no risk of damage. Switch off the electricity supply to the hood and reconnect after one minute. To avoid the risk of fire, clean the metal filter regularly and closely watch and regulate pans containing hot oil. Do not use the hood if it shows signs of damage or imperfection.
-
Page 8: Before You Start
Before you start Things to check before you start To avoid the risks that are always present when you use an electrical appliance it is important that this cooker hood is installed correctly and that you read the safety instructions carefully to avoid misuse and hazards. We recommend that you keep this instruction booklet for future reference and pass it on to any future owners. - Page 9 Before you start Accessories not supplied Recirculation Extraction TMFILT4 (UK & IE) Ø150mm VENT PACK 2 (UK & IE) CARBON FILTER ORDERING HOTLINE 0344 800 1128 (UK) SELF ADHESIVE 014475261 (IE) ALUMINIUM TAPE...
-
Page 10: In More Detail
Operation Product functions • This appliance extracts the air of the kitchen to remove the odours and keep an optimum level of air quality inside the room, it also allows you to illuminate the cooking area. Switching on/off • Switch on the appliance at the switched fused connection unit. The appliance is ready for use. -
Page 11: Care And Maintenance
Care and maintenance Active charcoal filter replacement Warning Always switch off the electricity supply before carrying out maintenance work on the hood. In the event of a FUSE fault, contact customer services. CLOSE NOTE: Make sure the filter is securely locked. Otherwise, it would loosen and cause dangerous. - Page 12 Care and maintenance Aluminium and active charcoal filters replacement 1 MONTH MAX.65˚C Aluminium filters: To avoid fires, clean thoroughly once a month or whenever the display pilot light lights up (if fitted). To do so, remove the filters and soak in hot water and detergent for an hour.
-
Page 13: Troubleshooting
Troubleshooting Troubleshooting Fault Cause Solution Excessive The appliance is not Take down the appliance and vibration. installed properly on the check it is properly fixed. brackets. The fan blade is Switch off the appliance. Repair damaged. to be carried out by qualified service personnel only. -
Page 14: Recycling And Disposal
Recycling and disposal Technical and legal information Recycling and disposal Environmental protection Waste electrical products should not be disposed of with household waste. Please recycle where facilities exist. Check with your Local Authority or retailer for recycling advice. The symbol on the product or its packaging indicates that this product cannot be treated as normal household waste. -
Page 15: Technical And Legal Information
Technical and legal information Wiring All installation work must be carried out by a competent person or qualified electrician. Before connecting the mains supply ensure that the mains voltage corresponds to the voltage on the rating plate. WARNING: THIS APPLIANCE MUST BE EARTHED. Mains Supply could be connected to the Mains Voltage by Direct Connection DOUBLE POLE SWITCHED FUSED SPUR OUTLET... - Page 16 Technical and legal information Technical and legal information The Manufacturer declines all liability for damage caused to persons and objects due to incorrect or improper installation of the appliance. Electrical Requirements Any permanent electrical installation must comply with the latest I.E.E. regulations and local electricity company regulations.
- Page 17 Installation VENT PACK Ø150mm DUCTED OPTION RECIRCULATION OPTION Choose a type of installation: Ducted option (extraction to the outside) or recirculation option (no extraction to the outside). If fitted to a concrete ceiling this product can be used in recirculation mode only. Both options are suitable for a wooden ceiling. Warning: Failure to install the screws or fixing device in accordance with these instructions may result in electrical hazards...
- Page 18 H (min. 70cm, max. 120cm) DIM.A DIM.A MIN.750mm (GAS) MIN 650mm (Electric) Caution! Before drilling it is extremely important to check the ceiling for hidden pipes, electrical cables etc. using an appropriate detection device. Ensure the ceiling and fixings used can support the weight of this appliance! If in doubt, consult a structural engineer for advice.
- Page 19 Optional I [07] x 6 WARNING: Use only the same size of fittings and mounting screws as recommended in this instruction manual. Failure to follow these instructions may result in electrical hazards. Mark and drill six holes 8mm in diameter according to the dimensions shown above. Secure the top mounting plate to the ceiling using the rawl bolts, nuts and washers supplied.
- Page 20 Optional II WARNING: Use only the same size of fittings and mounting screws as recommended in this instruction manual. Failure to follow these instructions may result in electrical hazards. Caution! This appliance is heavy. Before mounting the cooker hood ensure that the ceiling is capable of supporting the weight of the appliance.
- Page 21 [05] x 1 Once the ceiling plate is secured as above, install the mains supply cable inside the plate. Drill a hole for installation of the vent hose (ducted option on a timber ceiling only). [05] [06] x 1 Fix the one-way-valve to the air outlet of the cooker hood.
- Page 22 Ø150mm Vent Pack 2 Fix the vent pack using similar tape on the outlet (ducted option on a timber ceiling only). Max. 120cm [08] x 16 [09] x 16 [10] x 32 Min. 70cm Measure the correct required height of the hood for this installation. Fix the hanging brackets at the required length.
- Page 23 Mains lead Place the lower chimney and upper chimney as shown.
- Page 24 [10] x 8 Fix the brackets onto the top plate using 8 screws. [11] x 4 [11] Put up the upper chimney and fix it onto the bracket using 4 screws.
- Page 25 Remove the protective film, for Stainless Steel only. For recirculating option refer to Care and maintenance section. Note: For electrical connection see Technical and legal information section.
- Page 26 Appendix... Information for EU66 (A)Information of the cooker Hood Symbo l Valu e Unit ISLA90SS Model identification Annual Energy Consumption 95.9 kWh/a hood Time increase factor Fluid Dynamic Efficiency 15.0 hood Energy Efficiency Index 84.8 hood Measured air flow rate at best 368.8...
- Page 28 Apelson Appliances UK Limited Unit 3 Normandy Landings Pope St Castleford WF6 2AG...
Need help?
Do you have a question about the ISLA90SS and is the answer not in the manual?
Questions and answers