Table of Contents
Advertisement
Quick Links
Advertisement
Table of Contents

Related Manuals for boytone BT-37WT-C


Summary of Contents for boytone BT-37WT-C
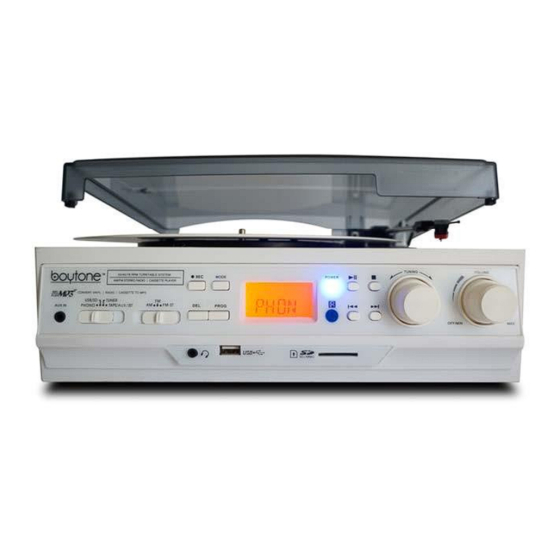
- Page 1 Multi-Speed Turntable with AM/FM Radio, Cassette Player & MP3 Encoding ----------------------------------------------------------- MODEL: BT-37WT-C ----------------------------------------------------------- Operating Instructions Manual ® BOYTONE...
-
Page 2: General Safety Instructions
General Safety Instructions Read this manual thoroughly before first use and keep it in a safe place for future reference, along with the completed warranty card, purchase receipt and carton. The safety precautions enclosed herein reduce the risk of fire, electric shock and injury when correctly adhered to. Follow all instructions and take notice of all warnings to reduce the risk of fire or electric shock. -
Page 3: Usage Conditions And Restrictions
• Unplug the unit from the power outlet after use to avoid possible damage during electrical storms, or when the equipment will be unattended or unused for a long period of time. • Do not let the cord hang over the edge of a table or counter, or touch any hot surface. Do not allow anything to rest on or roll over the power cord, and run any cords so that no one steps on or trips over them. -
Page 4: Parts List
• The equipment is not intended for use by persons (including children) with reduced physical, sensory or mental capabilities, or lack of experience and knowledge, unless they have been given supervision or instruction concerning use of the appliance by a person responsible for their safety. - Page 5 9 Program button 10 USB port 11 LC display 12 Power LED indicator 13 Play/Pause button 14 Stop button 15 Volume knob 16 Tuning knob 17 Skip up button 18 Skip down button 19 SD/MMC card slot...
-
Page 6: Getting Started
20 Right speaker 21 45 rpm adaptor 22 Lift lever 23 Auto stop control 24 Speed selector (33/45/78 rpm) 25 Tone arm 26 Line out sockets 27FM wire antenna 28 AC power cord Getting Started Before first use • Remove all packaging and protective materials from the appliance and dispose of them responsibly. -
Page 7: Installation
• Refer to the Parts List on pages 7 to 8 to familiarise yourself with the product and identify all parts. Installation • Do not connect the unit to the mains before checking the mains voltage and before all other connections have been made. -
Page 8: Listening To Radio
Features • Variable turntable speed (33, 45, 78 rpm) • Automatic/manual stop turntable • Belt-driven system • Direct USB/SD encoding for turntable and auxiliary input • Auxiliary input for connection of other device (e.g. CD player or MP3 player) • USB/SD slot for MP3 playback •... -
Page 9: The Record Player
8. FM reception: the receiver has a built-in FM wire antenna hanging at the rear cabinet. For best reception, completely unravel and extend this wire. 9. When you have finished listening to the radio, turn the volume knob in a counterclockwise direction to switch the unit off. - Page 10 1. Open the dust cover and turn the volume knob clockwise to turn the equipment on. 2. Use the function selector to select PHONO mode. 3. Set the speed selector to the appropriate position: 33, 45 or 78, depending on the record to be played.
-
Page 11: Phono Encoding
Your record will now play to the end, but you will have to stop the turntable rotation manually. (Return the tone arm to its rest manually and if the turntable is still rotating, switch off the unit by the volume control knob. Then set the auto stop control back to ON.) Phono encoding 1. - Page 12 3. If an external audio device is connected to the AUX IN socket, playing of the auxiliary device takes priority over cassette playback (on available models). AUX IN encoding 1. Use the function selector to select AUX mode and then insert a memory device (USB drive, SD or MMC card).
-
Page 13: Important Notes
bending.IMPORTANT: Connecting the USB device upside down or backwards could damage the audio system or storage media (USB drive, SD or MMC card). Check to ensure the direction is correct before connection. 3. Set the function selector to USB/SD mode. (If you have both a USB device and a memory card inserted, press the MODE button to toggle between USB and SD mode.) The system will start reading the storage medium automatically after mode selection and will display the total number of folders and MP3/WMA files. - Page 14 • You can connect an MP3 player to the system via the USB socket, however, some MP3 players may not be able to play via the USB socket. This is due to variances in the MP3 encoding format, it is not a malfunction of the system. •...
- Page 15 1. Insert a USB storage device and SD/MMC card, then select USB/SD mode (as described previously). 2. Press the record REC button during playback of the track you want to copy: “ONE” will be flashing on the display. Press the record REC button again to confirm. 3.
- Page 16 Deleting a single file/track 1. Insert the USB storage device or SD card, then select USB/SD mode (as described previously). 2. Press the delete DEL button during the playback of the track you want to delete: “ONE” will be flashing on the display. Press the delete DEL button again to confirm. 3.
-
Page 17: Problems With Sound
• To remove a memory card, press the memory card inwards and then release it. The card will be released (partially ejected) and you can remove it by hand. FAQs If you are experiencing problems with your USB Turntable, check in the section below whether there are any quick and easy checks you can do that may help you solve the problem.
Need help?
Do you have a question about the BT-37WT-C and is the answer not in the manual?
Questions and answers