
Subscribe to Our Youtube Channel
Related Manuals for Makita DUC256PG2


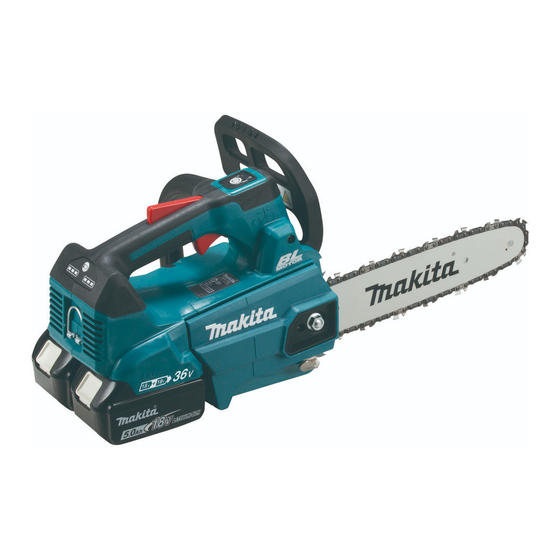
Summary of Contents for Makita DUC256PG2
- Page 1 INSTRUCTION MANUAL Cordless Chain Saw DUC256 DUC306 DUC356 DUC406 DUC256C Read before use.
-
Page 2: Specifications
SPECIFICATIONS Model: DUC256 DUC306 DUC356 DUC406 DUC256C Overall length (without guide bar) 270 mm Rated voltage D.C. 36 V Net weight 4.2 kg 4.6 - 4.8 kg 4.7 - 4.9 kg 4.8 - 5.0 kg 4.8 - 5.1 kg 4.6 - 4.7 kg Standard guide bar length 250 mm 300 mm... -
Page 3: Intended Use
Saw chain type 25AP Number of drive links Guide bar Guide bar length 250 mm Cutting length 253 mm Pitch 1/4″ Gauge 1.3 mm Type Carving bar Sprocket Number of teeth Pitch 1/4″ WARNING: Use appropriate combination of the guide bar and saw chain. Otherwise personal injury may result. Symbols Intended use The followings show the symbols used for the equipment. The tool is intended for cutting branches and pruning Be sure that you understand their meaning before use. -
Page 4: Ec Declaration Of Conformity
Save all warnings and instruc- Vibration tions for future reference. The vibration total value (tri-axial vector sum) deter- The term "power tool" in the warnings refers to your mined according to EN ISO 11681-2: mains-operated (corded) power tool or battery-operated Model DUC256 (cordless) power tool. - Page 5 Remove any adjusting key or wrench before Maintain power tools and accessories. Check for turning the power tool on. A wrench or a key left misalignment or binding of moving parts, break- attached to a rotating part of the power tool may age of parts and any other condition that may result in personal injury.
- Page 6 Kickback is the result of tool misuse and/or incor- Cordless Chain saw safety warnings rect operating procedures or conditions and can be avoided by taking proper precautions as given Keep all parts of the body away from the saw below: chain when the chain saw is operating.
- Page 7 Top handle chainsaw specific safety — Wear adequate noise protection equip- ment (ear muffs, ear plugs, etc.) warnings The protective jacket consists of 22 layers — This chain saw is designed especially for tree of nylon and protects the operator against care and surgery.
- Page 8 Only use genuine Makita batteries. Use of non-genuine Makita batteries, or batteries that have been altered, may result in the battery bursting causing fires, personal injury and damage. It will also void the Makita warranty for the Makita tool and charger. Tips for maintaining maximum battery life Charge the battery cartridge before completely discharged.
-
Page 9: Parts Description
PARTS DESCRIPTION Battery indicator Check button Switch trigger Top handle Lock-off lever Front hand guard Guide bar Saw chain Chain catcher Retaining nut Chain adjusting screw Battery cartridge Main power lamp Mode indicator Main power switch Adjusting screw (for oil pump) Carabiner Front handle Oil tank cap Spike bumper Guide bar cover 9 ENGLISH... -
Page 10: Functional Description
Indicating the remaining battery FUNCTIONAL capacity DESCRIPTION CAUTION: Always be sure that the tool is switched off and the battery cartridge is removed before adjusting or checking function on the tool. Installing or removing battery cartridge CAUTION: Always switch off the tool before installing or removing of the battery cartridge. -
Page 11: Main Power Switch
Main power switch Indicator lamps Remaining capacity WARNING: Always turn off the main power Lighted Blinking switch when not in use. 75% to 100% To turn on the tool, press the main power switch until the main power lamp lights up in green. To turn off, 50% to 75% press the main power switch again. -
Page 12: Checking The Chain Brake
Checking the chain brake NOTE: You can use the tool in the Torque Boost mode up to 60 seconds. Depending on the usage conditions, this mode shifts to the normal mode in CAUTION: Hold the chain saw with both less than 60 seconds. hands when switching it on. -
Page 13: Electronic Function
The tool is equipped with the spike bumper as stan- dard. For replacement of the spike bumper, ask Makita Fit one end of the saw chain on the top of the Authorized Service Centers. -
Page 14: Adjusting Saw Chain Tension
Fit the other end of the saw chain around the Adjusting saw chain tension sprocket, then attach the guide bar to the chain saw body, aligning the hole on the guide bar with the pin on CAUTION: the chain saw body. Do not tighten the saw chain too much. -
Page 15: Operation
The oil delivery may otherwise be impaired. NOTICE: Use the saw chain oil exclusively for Makita chain saws or equivalent oil available in the market. NOTICE: ► 1 . Retaining nut Never use oil including dust and parti- cles or volatile oil. -
Page 16: Maintenance
NOTICE: Never use gasoline, benzine, thinner, alcohol or the like. Discoloration, deformation or cracks may result. To maintain product SAFETY and RELIABILITY, repairs, any other maintenance or adjustment should be performed by Makita Authorized or Factory Service Centers, always using Makita replacement parts. 16 ENGLISH... -
Page 17: Sharpening The Saw Chain
Sharpening the saw chain Sharpen the saw chain when: • Mealy sawdust is produced when damp wood is cut; • The chain penetrates the wood with difficulty, even when heavy pressure is applied; • The cutting edge is obviously damaged; • The saw pulls to the left or right in the wood. (caused by uneven sharpening of the saw chain or damage to one side only) Sharpen the saw chain frequently but a little each time. -
Page 18: Cleaning The Guide Bar
Cleaning the sprocket cover Chips and saw dust will accumulate inside of the sprocket cover. Remove the sprocket cover and saw chain from the tool then clean the chips and saw dust. ► 1 . File holder — After sharpening the chain, check the height of the depth gauge using the chain gauge tool (optional accessory). -
Page 19: Replacing The Sprocket
Replacing the sprocket CAUTION: A worn sprocket will damage a new saw chain. Have the sprocket replaced in this case. Before fitting a new saw chain, check the condition of the sprocket. ► 1 . Sprocket 2. Areas to be worn out Always fit a new locking ring when replacing the sprocket. ► 1 . Locking ring 2. Sprocket NOTICE: Make sure that the sprocket is installed as shown in the figure. -
Page 20: Instructions For Periodic Maintenance
Instructions for periodic maintenance To ensure long life, prevent damage and ensure the full functioning of the safety features, the following maintenance must be performed regularly. Warranty claims can be recognized only if this work is performed regularly and prop- erly. -
Page 21: Troubleshooting
TROUBLESHOOTING Before asking for repairs, conduct your own inspection first. If you find a problem that is not explained in the manual, do not attempt to dismantle the tool. Instead, ask Makita Authorized Service Centers, always using Makita replace- ment parts for repairs. Malfunction status Cause Action The chain saw does not start. Battery cartridge is not installed. Install a charged battery cartridge. -
Page 22: Optional Accessories
OPTIONAL ACCESSORIES CAUTION: These accessories or attachments are recommended for use with your Makita tool specified in this manual. The use of any other accessories or attachments might present a risk of injury to persons. Only use accessory or attachment for its stated purpose. If you need any assistance for more details regard- ing these accessories, ask your local Makita Service Center. - Page 24 Makita Europe N.V. Jan-Baptist Vinkstraat 2, 3070 Kortenberg, Belgium Makita Corporation 3-11-8, Sumiyoshi-cho, Anjo, Aichi 446-8502 Japan 885722A227 www.makita.com 20190708...
Need help?
Do you have a question about the DUC256PG2 and is the answer not in the manual?
Questions and answers