
Related Manuals for Electrolux UR15IM20RS


Summary of Contents for Electrolux UR15IM20RS
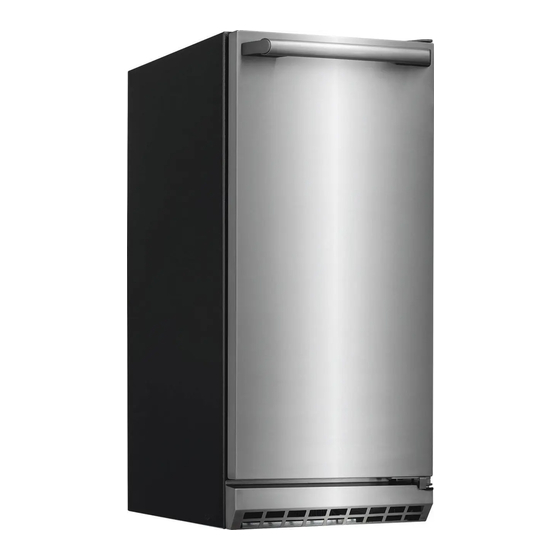
- Page 1 EN ICE MAKER USE AND CARE GUIDE FR ICE MAKER GUIDE D’UTILISATION ET D’ENTRETIEN ES ICE MAKER GUIA DE USO Y CUIDADO A04236401 August 2015 (41014070 August 2015)
-
Page 2: Finding Information
Please Read and Save Keep a record for quick This Guide reference Thank you for choosing Electrolux, the Whenever you call to request information new premium brand in home appliances. or service, you will need to know your This Use & Care Guide is part of our model number and serial number. -
Page 3: Table Of Contents
Finding Information Table of Contents Finding Information ......2 Options Menu ........16 Please Read and Save this Guide ..2 Normal and ECO Mode ....16 Keep a Record for Quick Reference ..2 Clean Mode ........16 Questions? ........... 2 Once You have your Cleaner ..16 Table of Contents ........ -
Page 4: Safety
RISK OF CHILD ENTRAPMENT. Before you throw away your old • Use only genuine Electrolux appliance, take off the doors and replacement parts. Imitation parts leave shelves in place so that can damage the unit and may children may not easily climb inside. -
Page 5: Site Preparation
2 The surrounding air temperature must direction. Electrolux stainless steel be at least 50°F (10°C) but must not models require a minimum 2-3/4 inch exceed 110°F (43°C). -
Page 6: Installation
⁄ " ⁄ " openings kept clean. Electrolux does (3.2 cm) (17mm) not recommend the use of a custom made grille as air flow may be restricted (Figure 1). Drain access in ⁄... -
Page 7: Installation Dimensions
This drain pump is designed to be cut to length. installed in Electrolux ice machines only and has been evaluated for use with water only. Drain line vertical rise is not to exceed 8 feet and total drain line length is not to exceed 20 feet;... -
Page 8: Connecting The Water Supply
Installation Connecting the Water Supply CAUTION Observe and follow all local plumbing codes when installing this appliance. After completing the installation, turn on the water and recheck the drain and water connections for leaks. Water Supply Line Clamp and This ice machine must be connected to a Screw potable cold water supply line delivering water pressure between a minimum of 20... -
Page 9: Electrical Connection
Installation Electrical Connection WARNING A grounded 115 volt, 15 amp dedicated circuit is required. Electrical Shock Hazard This product is factory equipped with • Do not use an extension cord a power supply cord that has a three- with this appliance. They can pronged, grounded plug. -
Page 10: Leveling Legs
Table "A". Table A Check Level Minimum Maximum Models Height Height UR15IM20RS ⁄ " ⁄ " UL15IM20RS (85.4 cm) (88.3 cm) To adjust the leveling legs, place the appliance on a solid surface and protect the floor beneath the legs to avoid scratching the floor. -
Page 11: Door Adjustment
Door Adjustment Adjusting the Door 4 If door edge opposite the hinges needs to move up, move plate Your door is aligned at the factory before toward outside of door. If door edge shipment. Occasional re-adjustment may needs to move down, move plate be necessary, especially if an overlay panel toward inside of door. -
Page 12: 12 Operation Of Ice Machine
12 Operation of Ice Machine Ice Making Process The ice machine will keep producing ice until the ice machine's bin is full and will Your ice machine is unique in how it forms restart automatically when ice needs to ice with fractional freezing to form a slab be replenished in the bin. -
Page 13: New Sounds
Operation of Ice Machine New Sounds The ice machine will make sounds that are different than your household refrigerator. Because these sounds are new to you they may be of concern but are most likely normal. The ice production process will make noises that are not typical in a refrigeration product, ice falling onto hard surfaces, water cascading across the evaporator plate, and valves opening and closing. -
Page 14: 14 Built-In Installation/Start-Up
14 Built-In Installation/Start-Up Installing a Built-In CAUTION Your Electrolux product has been DO NOT install unit behind closed doors. designed for either free-standing or built-in installation. When built-in, your ice maker Initial Start-Up does not require additional air space for top, sides or rear. -
Page 15: Starting Your Clear Ice Machine
Built-In Installation/Start-Up Starting your clear ice machine: Delay start/Vacation mode: Plug the ice machine into a 115 Your ice machine is equipped with a delay volt wall outlet, Your appliance is start function. This feature can be used to shipped from the factory in the "ICE" mode temporarily shut the appliance off for 1, 4, and will automatically begin making ice as 6, or 8 hours or days. -
Page 16: Door Ajar Alarm
16 Built-In Installation/Start-Up Door ajar alarm: Once you have your cleaner: If the door is open, or not closed Turn the ice machine off by pressing DOOR properly for 5 minutes the "DOOR" and holding the "ON/OFF" icon for indicator will illuminate and flash and 3 seconds. - Page 17 Built-In Installation/Start-Up Drain the water from the water reservoir, The plastic splash shield can be removed by removing the black plug from the by lifting off hanger brackets to improve bottom of the fresh water reservoir (Figure access (Figure 6). 4).
-
Page 18: 18 Maintenance
18 Maintenance Special Considerations • If any surface discolors or rusting appears, clean it quickly with Bon-Ami • For best performance, keep the unit or Barkeepers Friend Cleanser and out of direct sunlight. a non-abrasive cloth. Always clean in the direction of the grain. Always •... -
Page 19: Condenser Cleaning - Every 3 Months
Maintenance Condenser Cleaning — 4 Clean the condenser coil using a brush with a "combing" action or a Every 3 Months vacuum cleaner. Do not touch the condenser coil. To maintain operational efficiency, clean the 5 Clean the grille, then position the grille condenser every three months (depending over the screws in the cabinet. -
Page 20: Preparing The Ice Machine For Storage
20 Maintenance PREPARING THE ICE Draining and Removing Water from the Ice-Making System with MACHINE FOR STORAGE a Gravity Drain. If the ice machine is moved, not used 1. Turn off the water supply to the ice for an extended period of time, or will machine. -
Page 21: Draining Water For Factory In- Stalled Drain Pump Application
Maintenance 6. Remove the access cover from the 8. Reconnect the water valve outlet rear of the ice machine (Figure 3). water line (Figure 4). 9. Reinstall the ice machine’s access cover. 10. Clean and dry the ice machine’s storage bin. 11. -
Page 22: To Restart The Ice Maker
22 Maintenance 14. Remove the top clamp from the vent To Restart the Ice Machine tube, for easier access for the air 1. Reconnect or turn on the water hose. supply line. 15. Apply air pressure (approximately 10 2. Reconnect drain tubing if removed. psi) to the end of the vent tube which 3. -
Page 23: Drain Pump Removal Instructions
Maintenance DRAIN PUMP REMOVAL 5. Disconnect the ice machine power cord from the drain pump (Figure 9). INSTRUCTIONS (FOR SERVICE ONLY) 1. Unplug the ice machine from the electrical supply and remove the rear access cover from the ice machine. 2. -
Page 24: 24 Troubleshooting
24 Troubleshooting Before You call For Service If the unit appears to be malfunctioning, read through Normal Operation first. If the problem persists, check the Troubleshooting Guide. Locate the problem in the guide and refer to the cause and its remedy before calling for service. The problem could be something very simple which can be solved without a service call. - Page 25 Troubleshooting Problem Possible Cause Remedy Unit runs but • Dirty condenser coils. • Clean the condenser. See produces very little Maintenance. ice. • High air temperature • Surrounding air temperature around unit. of over 90°F (32°C). Low ice production at high temperatures is normal.
- Page 26 26 Troubleshooting Problem Possible Cause Remedy The ice machine is • Do you hear water • This is a normal sound as water noisy being circulated in the is added once every ice making ice machine? cycle. • Is there a “whooshing” •...
- Page 27 Troubleshooting Problem Possible Cause Remedy Clumps of ice • Are there clumps of ice • If the ice isn’t used on a regular in the bin? basis it will melt and form into clumps. Break up the ice clumps with the ice scoop. Ice cubes are too •...
-
Page 28: Troubleshooting The Drain Pump
Troubleshooting Troubleshooting the Drain Pump If the drain pump reservoir (not the ice machine bin) reaches overfill condition, the power to the ice machine will be shut off. If the ice machine is not working, check the following: • Make sure there is power at the receptacle. •... -
Page 29: Warranty Information
Your appliance is covered by a one year limited warranty. For one year from your original date of purchase, Electrolux will repair or replace any parts of this appliance that prove to be defective in materials or workmanship when such appliance is installed, used, and maintained in accordance with the provided instructions.
Need help?
Do you have a question about the UR15IM20RS and is the answer not in the manual?
Questions and answers