
Related Manuals for Philips NTRX300/77


Summary of Contents for Philips NTRX300/77
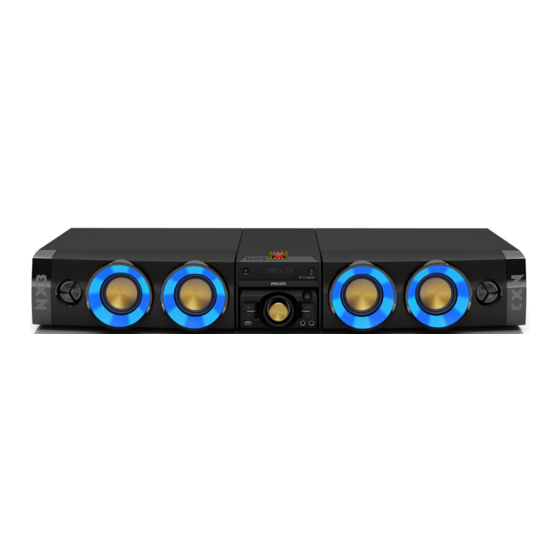
- Page 1 Always there to help you Register your product and get support at www.philips.com/welcome NTRX300 Question? Contact Philips User manual...
-
Page 3: Table Of Contents
Contents 7 Adjust volume level and sound 1 Important effect Safety Select a preset sound effect Enhance bass 2 Your Mini Hi-Fi System Apply Nitro boost Introduction What's in the box 8 Other features Overview of the main unit USB record Overview of the remote control Play from an external device Listen to an MP3 player... -
Page 4: Important
1 Important h Do not install near any heat sources such as radiators, heat registers, stoves, or other apparatus (including amplifiers) that produce heat. Safety i Protect the power cord from being walked on or pinched, particularly at plugs, convenience receptacles, and the point where they exit from the apparatus. -
Page 5: Your Mini Hi-Fi System
Congratulations on your purchase, and welcome to Philips! To fully benefit from the p Do not place any sources of danger on support that Philips offers, register your product the apparatus (e.g. liquid filled objects, at www.Philips.com/welcome. lighted candles). q Where the MAINS plug or an appliance... -
Page 6: What's In The Box
DVD region code Countries Latin America What's in the box Check and identify the contents of your package: • Main unit • Subwoofer x 2 • Tweeter x 2 • 3.5 mm audio in link cable • FM antenna • Composite video cable •... -
Page 7: Overview Of The Main Unit
Overview of the main unit a Nitro Boost button i SOUND • Select a preset sound effect. (power button/indicator and Bluetooth indicator) j SOURCE • Turn the unit on or off. • Select a source: DISC, TUNER, AUX • Switch to standby mode or Eco IN 1/2, AUDIO IN, USB, BLUETOOTH, standby mode. -
Page 8: Overview Of The Remote Control
• SUBTITLE ( ): Set the subtitle Overview of the remote language. control e OK • Confirm a selection. • Return to the previous display menu. g +/- • Adjust volume. • Skip to the previous or next title, chapter, track, or file. • Start, pause, or resume play. -
Page 9: Connect
3 Connect • Press to switch between the speakers' light effects during play: [PEACE] (peace), [POWERFUL] (powerful), Place the unit [SAMBA] (samba), [FIESTA] (fiesta), [CIELO] (cielo), [CUSTOM] (custom) and OFF (off). You can place the unit set in two ways: • Place the speakers in portrait position: • Navigate through the menu. -
Page 10: Connect Fm Antenna
Place the supplied paper card on one Connect speakers corner of the main unit; the side lines of the paper card should align with the side of Note the corner. Stick the one rubber pad to the position of • For optimal sound, use the supplied speakers only. -
Page 11: Connect Video Options
Option 2: Connect to the TV through Connect video options composite video Select the best video connection that the TV Basic quality video can support. If your TV does not have HDMI connectors, use Option 1: Connect to TV through HDMI •... -
Page 12: Connect Power
Before you connect the AC power cord, make sure that you have completed all other connections. sequence. If you contact Philips, you will be asked for the model and serial number of this apparatus. The model number and serial number are on the back of the apparatus. -
Page 13: Turn On
Turn on Auto(eng) Auto Standby • Press . » The unit switches to the last selected source. Switch to standby mode To exit the menu, press (Home). • Press again to switch the unit to standby mode. Find the correct viewing channel Note •... -
Page 14: Set Up Easylink (Hdmi-Cec Control)
Depending on the manufacturer, HDMI-CEC is known your unit. by many names. For information about your device, see the user manual of the device. • Philips does not guarantee 100% interoperability with all HDMI-CEC devices. Note • To change the EasyLink control settings, press Before you start (Home), select [Setup] >... -
Page 15: Play
5 Play Play from disc Caution • Risk of product damage! Never play discs with • To play the audio from the TV accessories such as disc stabilizer rings or disc speakers, select [Off], and skip the treatment sheets. following steps. •... -
Page 16: Play From Usb Or Recored Discs
Use the disc menu Resume video play from last stopped point When you load a DVD/(S)VCD disc, a menu may be displayed on the TV screen. Note Press MENU to access or exit disc menu manually. • This feature is only available for CD/DVD/VCD/DivX play. -
Page 17: Control Play
Navigate to the photo folder/album and SOURCE press to start the slideshow. » Slideshow begins and continues till the L IG HT end of the photo folder or album. » Audio continues till the end of the last file. • To return to the previous menu, press •... -
Page 18: Enjoy Karaoke
[Angle]: switch between camera angles. • Adjust Karaoke settings [Microphone]: turn on or off the • Note microphone sound output. • [Mic Volume]: adjust the microphone • Some DVDs contain alternate scenes, such as scenes recorded from different camera angles. For such DVDs, volume. - Page 19 To clear Bluetooth pairing history: • Pressand hold on the main unit for 8 seconds. » The current Bluetooth connection is disconnected. » After successful clearing, beep sounds. SOURCE NTRX300 0000 Press SOURCE repeatedly to select the Bluetooth source. » [BT] (Bluetooth) is displayed. »...
-
Page 20: Listen To The Radio
6 Listen to the Program radio stations radio manually Tune to a radio station. Tune to a radio station Press PROG, and then press select a number from 1–30. Press PROG to confirm. » [SAVE] (save) is displayed. • Position the antenna as far as possible from TV, VCR, or other radiation source. -
Page 21: Adjust Volume Level And Sound Effect
7 Adjust volume • Stage 2: The sound volume increases to a higher level and stays at this level level and sound for 5 seconds. The display panel shows [FIRING] (firing); effect • Stage 3: The sound volume gradually decreases to its original level in 10 seconds. -
Page 22: Other Features
USB device. Each time you record to a Continue USB device, the recorded files are stored in Cancel a subfolder in the 'PHILIPS' folder. Files and subfolders are named numerically in the order in which they are created. Select [Continue]. Select the tracks that you want to rip to Ripping MP3 tracks from disc the USB device and select [Continue]. -
Page 23: Play From An External Device
Choose the settings of [Speed] and When ripping is complete, select [Finish]. [Bitrate] and select [Continue]. Complete! Change settings or Speed Press continue to start again, or press Finish to end. press Continue to Slow start creating Mp3 Fast file. Bitrate 128kbps (good) 192kbps (better) -
Page 24: Listen To An Mp3 Player
Start play on the external audio device and Set the sleep timer adjust volume. » You can hear music from the Mini Hi-fi • To set the sleep timer, in power-on mode, system. press SLEEP repeatedly to select a set Use the controls on your audio device to period of time (in minutes). -
Page 25: Adjust Settings
9 Adjust settings Choose your favorite light effects During play, press repeatedly to enter the [Custom] mode. Press . Rotate the (light dial) on the main unit Select the [Setup] page. to change the color of the light. » The unit will display selected color Select a setting and press OK. -
Page 26: Audio Setup
[TV Display] (TV display):The TV format Audio setup determines the aspect ratio of display according to the type of TV you have connected. On the [Audio] page, you can set the following options: [HDMI Audio]: Set the HDMI audio output from your TV, or disable HDMI audio output 4:3 Pan Scan (PS) 4:3 Letter Box (LB) - Page 27 [Parental Control]: Restrict access to discs that Note are unsuitable for children. These types of discs must be recorded with ratings. • Ensure that the subtitle file has the exact same file name as the movie file. If for example the file name of 1) Press OK. the movie is ‘Movie.avi’, and then you will need to name the text file ‘Movie.sub’...
-
Page 28: Product Information
10 Product Sensitivity - Mono, 26dB S/N <22 dBf information Ratio - Stereo, 46dB S/N <45 dBf Ratio Search Selectivity <30 dBf Note Total Harmonic <3% • Distortion Product information is subject to change without prior notice. Signal to Noise Ratio >45 dB Specifications USB Direct Version 2.0 full speed... -
Page 29: Supported Disc Formats
Dimensions USB playability information - Main Unit 180 x 164 x 402 mm (W x H x D) Compatible USB devices: - Speaker Box 160 x 440.5 x 385 mm • USB flash memory (USB2.0 or USB1.1) (W x H x D) • USB flash players (USB2.0 or USB1.1) Weight •... -
Page 30: Troubleshooting
If the problem remains • Disable the password for parental control unsolved, go to the Philips Web page (www. or change the rating level. philips.com/support). When you contact Philips, • Moisture has condensed inside the system. - Page 31 Audio or subtitle languages cannot be set • Some mobile phones may connect and • The disc is not recorded with sound or disconnect constantly when you make subtitles in multiple languages. or end calls. This does not indicate any •...
-
Page 32: Notice
® device that are not expressly approved by registered trademarks owned by Bluetooth Philips Consumer Lifestyle may void the user’s SIG, Inc. and any use of such marks by Philips is authority to operate the equipment. under license. Your product is designed and manufactured with high quality materials and components, which can be recycled and reused. - Page 33 This apparatus includes this label: Note • The type plate is located on the back of the device.
- Page 34 Specifications are subject to change without notice © 2013 Koninklijke Philips Electronics N.V. All rights reserved. NTRX300_77_UM_V1.0...
Need help?
Do you have a question about the NTRX300/77 and is the answer not in the manual?
Questions and answers