Advertisement
Instruction Manual
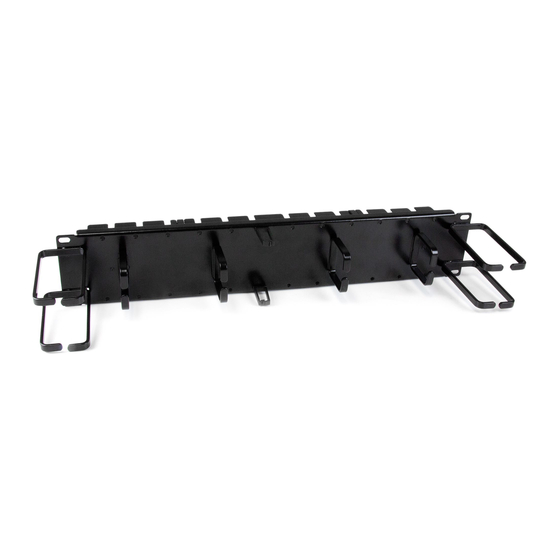
2U Finger Duct and D-Ring Hook Rack Cable Manager
CMPNL2Uxx
DE: Bedienungsanleitung - de.startech.com
FR: Guide de l'utilisateur - fr.startech.com
ES: Guía del usuario - es.startech.com
IT: Guida per l'uso - it.startech.com
NL: Gebruiksaanwijzing - nl.startech.com
PT: Guia do usuário - pt.startech.com
Packaging Contents
• 1x 2U Horizontal Cable Manager (for CMPNL2U) or 1 x 2U Combo
Cable Manager (for CMPNL2Uxx)
• 24 x Cable Clamps
• 4 x 5/8" #10-32 UNF Screws
• 4 x #10-32 UNF Cage Nuts
• 4 x 5/8" #12-24 UNC Screws
• 4 x #12-24 UNC Cage Nuts
System Requirements
• 2U of Rack Space
Installation
1. Determine the location on the rack where you want to install the
cable manager; an open 2U space is required.
2. Depending on the rack type, insert the four provided #10-32
or #12-24 cage nuts on opposite posts at equal height levels/
positions.
3. Align the cable manager mounting points with the cage nuts on
the rack.
4. Using the four provided #10-32 or #12-24 screws and a
screwdriver, secure the cable manager to the rack.
5. Insert the provided Cable Clamps into the front Cable Clamp
mounting points as desired.
6. Insert and organize your cables as desired.
For the most up-to-date information, please visit: www.startech.com
Product Diagram
CMPNL2U
Mounting Point
Horizontal
D-Ring Hook
CMPNL2UC
Mounting Point
Horizontal
Vertical
D-Ring Hook
D-Ring Hook
CMPNL2UCD
Mounting Point
Horizontal
D-Ring Hook
Vertical
D-Ring Hook
Mounting Point
Cable Clamp
Mounting Point (x24)
Mounting Point
Cable Clamp
Mounting Point (x24)
Mounting Point
Cable Clamp
Mounting Point (x24)
Manual Revision: 02/05/2015
Advertisement
Table of Contents

Related Manuals for StarTech.com CMPNL2U Series


Summary of Contents for StarTech.com CMPNL2U Series
- Page 1 5. Insert the provided Cable Clamps into the front Cable Clamp mounting points as desired. 6. Insert and organize your cables as desired. Cable Clamp Horizontal Mounting Point (x24) D-Ring Hook Vertical D-Ring Hook For the most up-to-date information, please visit: www.startech.com Manual Revision: 02/05/2015...
- Page 2 This manual may make reference to trademarks, registered trademarks, and other protected names and/or symbols of third-party companies not related in any way to StarTech.com. Where they occur these references are for illustrative purposes only and do not represent an endorsement of a product or service by StarTech.com, or an endorsement of the product(s) to which this manual applies by the third-party company in question.
Need help?
Do you have a question about the CMPNL2U Series and is the answer not in the manual?
Questions and answers