Advertisement
Available languages
Available languages
Table of Contents
Important Safe Operation Practices • Assembly & Set-Up • Controls & Operation • Product Care
O
Table of Contents
Important Safe Operation Practices ..................... 2
Assembly & Set-Up .................................................. 7
Controls & Operation .............................................10
READ AND FOLLOW ALL SAFETY RULES AND INSTRUCTIONS IN THIS MANUAL
FAILURE TO COMPLY WITH THESE INSTRUCTIONS MAY RESULT IN PERSONAL INJURY.
NOTE: This Operator's Manual covers several models. Features may vary by model. Not all features in this manual are applicable to all
models and the model depicted may differ from yours.
peratOr
Riding Mower
BEFORE ATTEMPTING TO OPERATE THIS MACHINE.
'
M
s
anual
Product Care ...........................................................14
Parts/Warranty .............. See Separate Supplement
WARNING
Form No. 769-11837
(October 7, 2016)
Advertisement
Chapters
Table of Contents

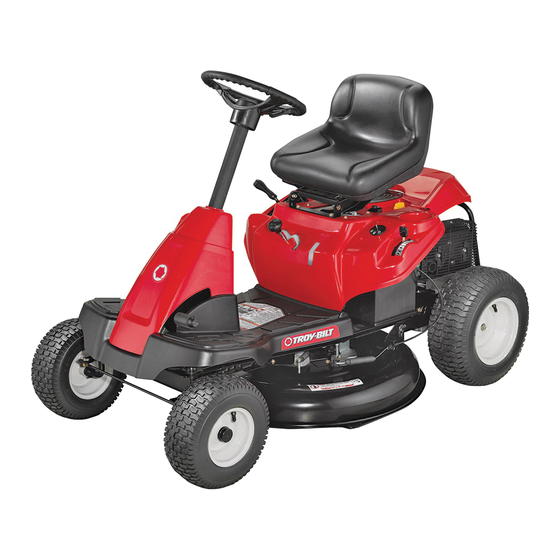
Related Manuals for Troy-Bilt 13A726JD066


Summary of Contents for Troy-Bilt 13A726JD066
-
Page 1: Table Of Contents
Important Safe Operation Practices • Assembly & Set-Up • Controls & Operation • Product Care ’ peratOr anual Riding Mower Table of Contents Important Safe Operation Practices ..... 2 Product Care ............14 Assembly & Set-Up ..........7 Parts/Warranty ....See Separate Supplement Controls &... -
Page 2: Important Safe Operation Practices
Important Safe Operation Practices WARNING This symbol points out important safety instructions which, if not followed, could endanger the personal safety and/or property of yourself and others. Read and follow all instructions in this manual before attempting to operate this machine. Failure to comply with these instructions may result in personal injury. When you see this symbol. HEED ITS WARNING! WARNING California Proposition 65 Engine Exhaust, some of its constituents, and certain vehicle components contain or emit chemicals known to State of California to cause cancer and birth defects or other reproductive harm. - Page 3 Be alert and turn machine off if a Never fill containers inside a child enters the area. vehicle or on a truck or trailer bed Mow up and down slopes, not across. with a plastic liner. Always place Before and while backing, look Exercise extreme caution when containers on the ground away behind and down for small...
- Page 4 Notice Regarding Emissions Check the blade(s) and engine mounting Do not change the engine governor bolts at frequent intervals for proper settings or over-speed the engine. The tightness. Also, visually inspect blade(s) governor controls the maximum safe Engines which are certified to comply with for damage (e.g., excessive wear, bent, operating speed of the engine.
- Page 5 Symbol Description DANGER— BYSTANDERS Keep bystanders, helpers, children and pets at least 75 feet from the machine while it is in operation. WARNING— THROWN OBJECTS This machine may pick up and throw and objects which can cause serious personal injury. WARNING—THROWN OBJECTS This machine may pick up and throw and objects which can cause serious personal injury.
- Page 6 2 — i ection mportant peration racticeS...
-
Page 7: Assembly & Set-Up
Assembly & Set-Up Thank You Thank you for purchasing this product. It was carefully engineered to provide If applicable, the power testing information used to establish the power rating of excellent performance when properly operated and maintained. the engine equipped on this machine can be found at www.opei.org or the engine manufacturer’s web site. - Page 8 Attaching the Seat Lower the steering wheel assembly (a) onto Using a 1/4” drive ratchet with a 3/8” socket, the lower steering shaft (b) and secure secure the seat bracket (a) with the self- If the seat for your riding mower was not attached with the shoulder bolt (c) and lock nut (d) tapping bolts (b) removed in step 2.
- Page 9 Install the Rear Engine Cover (If equipped) Installing the Bumper (If equipped) Install the deck chute (b) into the deck discharge opening on the deck. The rear of Remove the two factory installed hex Remove the two screws (a) as shown in the chute (b) should be under the tab (f) on screws (a) located on the rear engine cover (b).
- Page 10 Tire Pressure Remove the plastic cover (c), if present, from Service and check the engine oil as instructed in the positive battery terminal (d) and attach the Engine Operator’s Manual packed with your the red cable (e) to the positive battery riding mower.
-
Page 11: Controls & Operation
Controls & Operation Hydro Transmission 30” 6-Speed Transmission 24” 6-Speed Transmission (N*) (N*) (N*) (N*) (N*) * -- Refer to Oil Fill Cap for location of your oil fill cap. Figure 3-1 Ignition Module (B) Ignition Module (If equipped) Note: This Operator’s Manual covers several models. - Page 12 Brake Pedal (Hydro riding mowers) (E) Shift Lever (6-speed riding mowers) (I) Operation The brake pedal is located on the left side of the The shift lever is located on the control panel just WARNING riding mower, along the running board. Depress below the seat, in the center of the riding mower.
- Page 13 Steering Wheel Height Adjustment (If equipped) After the engine starts, deactivate the choke Important: First-time operators should use (if equipped) by placing the throttle/choke speed positions 1 or 2 on the shift lever (if To adjust the height of the steering wheel: control (if equipped) into the FAST position.
- Page 14 Reverse Caution Mode (If equipped) Driving on Slopes Mowing Refer to the SLOPE GAUGE in the Important Safe The REVERSE CAUTION MODE position of the WARNING Operation Practices section to help determine slopes ignition module allows the tractor to be operated in where you may operate the riding mower safely.
-
Page 15: Product Care
Product Care Maintenance Schedule Before Every Every Every Every Prior Each use 10 Hours 25 Hours 50 Hours 100 Hours to Storing Check Engine Oil Level Check Air Filter for Dirty, Loose or Damaged Parts Clean & Re-oil Air Filter’s Foam Pre-cleaner (if Equipped) Replace Air Filter Element Change Engine Oil &... - Page 16 Cleaning the Tractor Remove the oil drain plug and drain the oil Drive the riding mower to a level, clear spot into a suitable container with a capacity of on your lawn, near enough for your garden If the engine has been running, allow it to cool for no less than 64 oz.
- Page 17 Parking Brake Off Season Storage Cut the tie strap, if present, then pinch the in-line clamp on the fuel filter with a pair of pliers, slide the clamp up the fuel line. WARNING WARNING Pull the fuel line free from the filter and Never attempt to adjust the brakes while the engine is running.
- Page 18 Remove the remaining bow-tie cotter pins (a) Pull the belt towards the front of the riding Loosen the idler pulley (24" decks only) (a) mower, pulling it through and out of the securing the deck to the riding mower, as by loosening the flange lock nut (b) that belt keeper rod.
- Page 19 Fuse Make the final connection on the engine Remove the hex flange nut that secures the block of the tractor, away from the battery. blade to the spindle assembly. See the Inset One 15A fuse is installed in your tractor’s wiring Attach to a unpainted part to assure a good of Figure 4-14.
- Page 20 Notes...
- Page 21 Importantes Medidas de Seguridad • Montaje y configuración • Controles y funcionamiento • Cuidado de productos anual del peradOr Tractor cortacésped Índice Importantes medidas de seguridad ...... 2 Cuidado del producto ........... 14 Armado y montaje ..........7 Piezas/Garantía ..Consulte el suplemento que Controles y Funcionamiento .......
-
Page 22: Importantes Medidas De Seguridad
Importantes Medidas de Seguridad ADVERTENCIA Este símbolo indica instrucciones de seguridad importantes que, de no cumplirse, pueden poner en peligro su seguridad personal y/o material y la de otras personas. Lea y cumpla todas las instrucciones de este manual antes de intentar hacer funcionar esta máquina. Si no cumple estas instrucciones puede provocar lesiones personales. Cuando vea este símbolo. ¡TENGA EN CUENTA LAS ADVERTENCIAS! ADVERTENCIA Proposición 65 de California El escape del motor de este vehículo, algunos de sus elementos y ciertos componentes del vehículo contienen o liberan sustancias químicas que el Estado de California considera que pueden producir cáncer, defectos de... - Page 23 Haga lo siguiente: Cuando sea posible, saque el equipo Esté alerta y apague la máquina si un niño ingresa al área. a gasolina del camión o remolque Corte las pendientes hacia arriba y hacia abajo, y llénelo sobre el suelo. Si eso no Antes de desplazarse marcha atrás y no en forma transversal.
- Page 24 Aviso sobre las Emisiones Controle las cuchillas y los pernos de montaje “El uso de piezas que no cumplen con las del motor a intervalos frecuentes para verificar especificaciones del equipo original podría que estén bien apretados. Además, inspeccione resultar en rendimiento inadecuado y además Los motores certificados que cumplen con las normas visualmente las cuchillas buscando daño puede comprometer la seguridad.
- Page 25 Símbolo Descripción PELIGRO — OBSERVADORES Mantenga a los observadores, ayudantes, mascotas y niños por lo menos a 75 pies de la máquina mientras está en funcionamiento. ADVERTENCIA—ARROJA OBJETOS Esta máquina puede levantar y arrojar objetos lo cual puede causar lesiones personales graves. ADVERTENCIA—ARROJA OBJETOS Esta máquina puede levantar y arrojar objetos lo cual puede causar lesiones personales graves.
- Page 26 2 — i ección mportanteS edidaS de eguridad...
-
Page 27: Armado Y Montaje
Armado y Montaje Muchas gracias Gracias por comprar este producto. Ha sido cuidadosamente diseñado para brindar excelente Si corresponde, la información sobre las prueba de potencia utilizada para determinar la rendimiento si se lo hace funcionar y se lo mantiene correctamente. potencia nominal del motor equipado en esta máquina se puede consultar en www.opei.org o en el sitio web del fabricante del motor. - Page 28 Instalación del asiento Baje el conjunto del volante (a) sobre el eje inferior Con una llave de trinquete de 1/4” con una llave de de la dirección (b) y sujételo con el tornillo con 3/8”, sujete el soporte del asiento (a) con los pernos reborde (c) y la tuerca de seguridad (d) que extrajo autorroscantes (b) que se extrajeron en el paso 2.
- Page 29 Coloque la tapa trasera del motor (si está Colocación del paragolpes (Si está Coloque el canal de la plataforma (b) en la abertura de descarga sobre la plataforma. Los espárragos equipada) equipado) (c) en la superficie de la plataforma calzarán en los orificios de la parte superior del canal de la Extraiga los dos tornillos hexagonales instalados Extraiga los dos tornillos (a) como se indica en la...
- Page 30 Presión de los neumáticos Retire la cubierta plástica (c), si está presente, del Mantenga y controle el aceite del motor como se indica en el Manual del operador del motor que se envía borne positivo de la batería (d) y una el cable rojo con el tractor cortacésped.
-
Page 31: Controles Y Funcionamiento
Controles y Funcionamiento Transmisiones hidrostáticas Transmisión de 6 velocidades, 30” Transmisión de 6 velocidades, 24” (N*) (N*) (N*) (N*) (N*) * -- Consulte Tapón de llenado de aceite para conocer la ubicación de su tapón de llenado de aceite. Figura 3-1 Módulo de encendido Nota: Tire de la palanca de control del acelerador hacia atrás para... - Page 32 Pedal del freno (tractores cortacésped Palanca de cambios (tractores Funcionamiento Hydro) (E) cortacésped de 6 velocidades) (I) ADVERTENCIA La palanca de cambios está ubicada en el panel de El pedal del freno está ubicado del lado izquierdo del Evite lesiones graves o la muerte control justo debajo del asiento, en el centro del tractor tractor cortacésped, a lo largo del estribo.
- Page 33 Ajuste de la altura del volante (Si está equipado) Después de que arranque el motor, desactive el esté en movimiento. Use siempre el pedal de control del cebador (si está equipado) colocando el embrague-freno (Si está equipado) para hacer Para ajustar la altura del volante: control del acelerador/cebador (si está...
- Page 34 Modo de precaución marcha atrás Conducción en pendientes Corte de césped (si está equipado) Consulte el INDICADOR DE PENDIENTES en la sección ADVERTENCIA Importantes medidas de seguridad del manual para La posición MODO MARCHA ATRÁS CON PRECAUCIÓN contribuir a determinar en qué pendientes puede operar el Para tratar de evitar el contacto con las cuchillas o una lesión por un del módulo de encendido permite operar el tractor tractor de manera segura.
-
Page 35: Cuidado Del Producto
Cuidado del producto Programa de Mantenimiento Antes de Cada Cada Cada Cada Antes de cada uso 10 horas 25 horas 50 horas 100 horas almacenar Controle el nivel de aceite del motor Revise si el filtro de aire está sucio, flojo o tiene piezas dañadas Limpie y vuelva a lubricar el depurador de espuma del filtro de aire (si está... - Page 36 Limpieza del tractor Extraiga el tapón de drenaje y vacíe el aceite en Conduzca el tractor cortacésped a una zona un contenedor apropiado, con una capacidad no nivelada y despejada del césped, que se encuentre Si el motor ha estado funcionando, déjelo enfriar durante menor a 64 oz.
- Page 37 Freno de mano Almacenamiento fuera de temporada Corte el precinto, si lo hay, luego sujete la abrazadera en línea del filtro de combustible con un par de pinzas, deslice la abrazadera hacia arriba ADVERTENCIA ADVERTENCIA por la línea de combustible. Nunca intente ajustar los frenos con el motor en marcha.
- Page 38 Extraiga los pasadores de chaveta con unión curva Extraiga la correa de la plataforma de alrededor Afloje la polea loca (plataformas de 24” solamente) (a) que aún están sujetando la plataforma al tractor (a) para lo cual debe aflojar la tuerca de seguridad de la polea de transmisión de la PTO del tractor cortacésped, como se indica en la Figura 4-7.
- Page 39 Fusible Haga la conexión final al bloque del motor del Extraiga la tuerca de brida hexagonal que asegura tractor, alejado de la batería. Acople a una parte la cuchilla al montaje del husillo. Vea el recuadro de En el arnés de cables de su tractor cortacésped está sin pintura para asegurarse de que haya una buena la Figura 4-14.
- Page 40 Notas...