Troy-Bilt Super Bronco Operator's Manual
Hide thumbs
Also See for Super Bronco:
- Operator's manual (88 pages) ,
- Operation manual (48 pages) ,
- Operator's manual (64 pages)
Table of Contents
Advertisement
Available languages
Available languages
Safe Operation Practices • Set-Up • Operation • Maintenance • Service • Troubleshooting • Warranty
O
'
M
peratOr
s
anual
Lawn Tractor — Super Bronco
WARNING
READ AND FOLLOW ALL SAFETY RULES AND INSTRUCTIONS IN THIS MANUAL
BEFORE ATTEMPTING TO OPERATE THIS MACHINE.
FAILURE TO COMPLY WITH THESE INSTRUCTIONS MAY RESULT IN PERSONAL INJURY.
TROY-BILT LLC, P.O. BOX 361131 CLEVELAND, OHIO 44136-0019
Printed In USA
Form No. 769-03532
(November 12, 2007)
Advertisement
Chapters
Table of Contents

Subscribe to Our Youtube Channel
Related Manuals for Troy-Bilt Super Bronco


Summary of Contents for Troy-Bilt Super Bronco
- Page 1 READ AND FOLLOW ALL SAFETY RULES AND INSTRUCTIONS IN THIS MANUAL BEFORE ATTEMPTING TO OPERATE THIS MACHINE. FAILURE TO COMPLY WITH THESE INSTRUCTIONS MAY RESULT IN PERSONAL INJURY. TROY-BILT LLC, P.O. BOX 361131 CLEVELAND, OHIO 44136-0019 Printed In USA Form No. 769-03532...
-
Page 2: Table Of Contents
Choose from the options below: ◊ Visit us on the web at www.troybilt.com ◊ Call a Customer Support Representative at (800) 828-5500 or (330) 558-7220 ◊ Write us at Troy-Bilt LLC • P.O. Box 361131 • Cleveland, OH • 44136-0019... -
Page 3: Important Safe Operation Practices
Important Safe Operation Practices WARNING: This symbol points out important safety instructions which, if not followed, could endanger the personal safety and/or property of yourself and others. Read and follow all instructions in this manual before attempting to operate this machine. Failure to comply with these instructions may result in personal injury. - Page 4 Slope Operation A missing or damaged discharge cover can cause blade contact or thrown object injuries. Slopes are a major factor related to loss of control and tip-over Stop the blade(s) when crossing gravel drives, walks, or accidents which can result in severe injury or death. All slopes roads and while not cutting grass.
- Page 5 Children Use only an approved gasoline container. Never fill containers inside a vehicle or on a truck Tragic accidents can occur if the operator is not alert to the or trailer bed with a plastic liner. Always place presence of children. Children are often attracted to the containers on the ground away from your vehicle machine and the mowing activity.
-
Page 6: Spark Arrestor
Notice Regarding Emissions Check the blade(s) and engine mounting bolts at frequent intervals for proper tightness. Also, visually inspect blade(s) Engines which are certified to comply with California and federal for damage (e.g., excessive wear, bent, cracked). Replace EPA emission regulations for SORE (Small Off Road Equipment) the blade(s) with the original equipment manufacturer’s are certified to operate on regular unleaded gasoline, and (O.E.M.) blade(s) only, listed in this manual. - Page 7 2 — i ectiOn MpOrtant peratiOn ractices...
-
Page 8: Assembly & Set-Up
Assembly & Set-Up Assembly & Set-Up Tractor Set-Up Shipping Brace Removal WARNING! Attaching the Battery Cables Make sure the riding mower’s engine is off, remove the ignition key, and set the parking NOTE: The battery may have already been installed at the brake before removing the shipping brace. - Page 9 Attaching The Steering Wheel If the steering wheel for your tractor did not come attached, the hardware for attaching it has been packed within the steering wheel, beneath the steering wheel cap. Carefully pry off the steering wheel cap and remove the hardware. With the wheels of the tractor pointing straight forward, place the steering wheel over the steering shaft.
- Page 10 Setting the Deck Gauge Wheels Move the tractor on a firm and level surface, preferably pavement, and proceed as follows Select the height position of the cutting deck by placing the deck lift lever in the normally desired mowing height setting (any of the six different cutting height notches on the right fender).
-
Page 11: Controls & Features
Controls and Features PTO (Blade Engage) Lever Drive Pedal Brake Pedal Ammeter Throttle/Choke Lever Ignition Switch Cruise Control Button Parking Brake Button Shift Lever Deck Lift Lever Cup Holder Figure 4-1 Lawn Tractor controls and features are illustrated in Fig 4-1 and described on the following pages. WARNING! Read and follow all safety rules and instructions in this manual, including the entire Operation section, before attempting to operate this machine. -
Page 12: Throttle Control Lever
Throttle Control Lever Ignition Switch Your new lawn tractor will have one of the following ignition The throttle control lever is located on the right side of the switches. Use Fig. 4-3 to identify which switch your machine tractor’s dash panel. This lever controls the speed of the engine utilizes and follow these instructions for proper operation. -
Page 13: Drive Pedal
Drive Pedal IMPORTANT: Always set the parking brake when leaving the tractor unattended. The drive pedal is located below the brake pedal Cruise Control Button on the right front side of the tractor along the running board. Depress the drive pedal with The cruise control button is located on the your right foot when the tractor shift lever is in tractor dash panel to the left of the ignition... -
Page 14: Operation
If the interlock system should ever malfunction, do not operate the tractor. Contact an authorized WARNING: Do not operate the tractor if the Troy-Bilt service dealer. interlock system is malfunctioning. This system was designed for your safety and protection. •... -
Page 15: Stopping The Engine
Driving On Slopes IMPORTANT: Do NOT hold the key in the START position for longer than ten seconds at a time. Doing so may cause damage Refer to the SLOPE GAUGE in the Important Safe Operation to your engine’s electric starter. Practices section of this manual to help determine slopes where After the engine starts, deactivate the choke control and you may operate the tractor safely. -
Page 16: Engaging The Blades
Engaging the Blades Headlights Engaging the PTO (Blade Engage) transfers power to the cutting • The lamps are ON whenever the ignition key is moved out deck or other (separately available) attachments. To engage the of the STOP position. blades, proceed as follows: •... -
Page 17: Maintenance & Adjustment
Replace the oil filter as instructed in the separate engine or individual. Warranty repairs must be performed by an Owner’s Manual. authorized Troy-Bilt Service Dealer. Refill the engine with new oil. Refer to the engine Owner’s Changing the Engine Oil... - Page 18 Cleaning the Tractor Any fuel or oil spilled on the machine should be wiped off promptly. Do NOT allow debris to accumulate around the cooling fins of the engine, the transmission’s cooling fan or on any other part of the machine, especially the belts and pulleys. IMPORTANT: The use of a pressure washer to clean your tractor is NOT recommended.
- Page 19 Adjustments Leveling the Deck (Side to Side) If the cutting deck appears to be mowing unevenly, a side to side WARNING! Shut the engine off, remove the adjustment can be performed. Adjust if necessary as follows: ignition key and engage the parking brake before With the tractor parked on a firm, level surface, place the making adjustments.
- Page 20 Note adjustment. See your authorized Troy-Bilt service dealer to have the distance. the brake properly adjusted.
-
Page 21: Maintenance Schedule
Lube Pedal Pivot Points Check Spark Plug Condition & Gap Replace Fuel Filter NOTE: Troy-Bilt LLC reserves the right to change product specifications, designs and equipment without notice and without incurring obligation. IMPORTANT: Consult the specific engine operator’s manual included with this machine for detailed engine maintenance procedures and intervals. - Page 22 Maintenance Log Please keep a record of the maintenance performed on your tractor. Date Hour Meter Maintenance Performed By 6 — M & a ectiOn aintenance djustMents...
-
Page 23: Service
Service Cutting Deck Removal Note: Note what hole the other end of the belt-keeper rod is inserted into for reinstallation purposes. To remove the cutting deck, proceed as follows: Remove the belt (C) from around the tractor’s engine Place the PTO/Blade Engage lever in the disengaged (OFF) pulley and idler pulley(s). -
Page 24: Cutting Blades
Remove the hex flange nut that secures the blade to the spindle assembly. See Fig. 7-5. To properly sharpen the cutting blades, remove equal amounts of metal from both ends of the blades along the cutting edges, parallel to the trailing edge, at a 25°- to 30° angle. -
Page 25: Service Dealer
Several components must be removed and special tools used in this manual). order to change the tractor’s transmission drive belt. See your authorized Troy-Bilt service dealer to have the transmission drive Set the tractor’s parking brake before removing the jumper belt replaced. -
Page 26: Customer Support
NOTE: Several components must be removed in order to change the tractor’s lower deck belt. See an authorized Troy-Bilt Service All belts on your tractor are subject to wear and should be Dealer to have your lower drive belt replaced or phone Customer replaced if any signs of wear are present . -
Page 27: Troubleshooting
Troubleshooting Problem Cause Remedy Engine fails to start PTO/Blade Engage knob engaged. Place knob in disengaged (OFF) position. Parking brake not engaged. Engage parking brake. Spark plug wire disconnected. Connect wire to spark plug. Throttle control lever not in correct starting Place throttle lever to FAST position. -
Page 28: Replacement Parts
NOTE: This Operators Manual covers a range of product specifications for various models. Characteristics and features discussed and/or illustrated in this manual may not be applicable to all models. Troy-Bilt LLC reserves the right to change product specifications, designs and equipment without notice and without incurring obligation. - Page 29 NOTE: This Operators Manual covers a range of product specifications for various models. Characteristics and features discussed and/or illustrated in this manual may not be applicable to all models. Troy-Bilt LLC reserves the right to change product specifications, designs and equipment without notice and without incurring obligation.
-
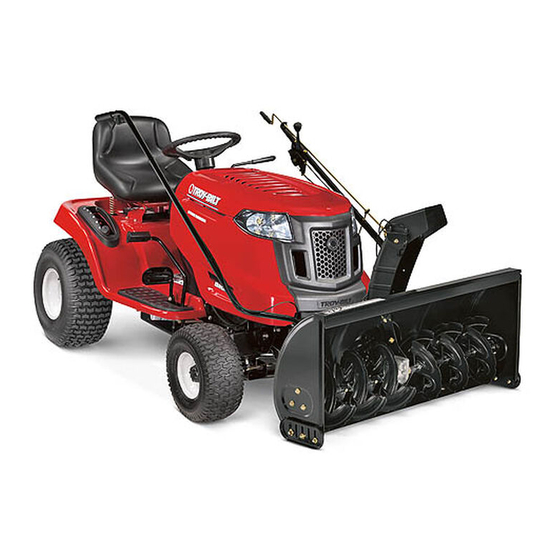
Page 30: Attachments & Accessories
Attachments & Accessories The following attachments and accessories are compatible for the Super Bronco Lawn Tractor. See the retailer from which you purchased your tractor, an authorized Troy-Bilt Service Dealer or phone (800) 828-5500 for information regarding price and availability. -
Page 31: Warranty
CALIFORNIA EMISSION CONTROL WARRANTY STATEMENT YOUR WARRANTY RIGHTS AND OBLIGATIONS The California Air Resources Board and MTD Consumer Group Inc are pleased to explain the evaporative emission control system warranty on your 2007 lawn mower. In California, new lawn mower must be designed, built and equipped to meet the State’s stringent anti-smog standards. MTD Consumer Group Inc must warrant the EECS on your lawn mower for the period of time listed below provided there has been no abuse, neglect or improper maintenance of your lawn mower. - Page 32 MANUFACTURER’S LIMITED WARRANTY FOR The limited warranty set forth below is given by Troy-Bilt LLC with c. Routine maintenance items such as lubricants, filters, blade respect to new merchandise purchased and used in the United States sharpening, tune-ups, brake adjustments, clutch adjustments,...
-
Page 33: Español
ADVERTENCIA LEA Y SIGA TODAS LAS INSTRUCCIONES DE ESTE MANUAL ANTES DE PONER EN FUNCIONAMIENTO ESTA MÁQUINA. SI NO RESPETA ESTAS INSTRUCCIONES PUEDE PROVOCAR LESIONES PERSONALES. TROY-BILT LLC, P.O. BOX 361131 CLEVELAND, OHIO 44136-0019 Impreso en Estados Unidos de América... - Page 34 Elija entre las opciones que se presentan a continuación: ◊ Visite nuestro sitio web en www.troybilt.com ◊ Llame al representante de Atención al Cliente al (800) 828-5500 o (330) 558-7220 ◊ Escríbanos a Troy-Bilt LLC • P.O. Box 361131 • Cleveland, OH • 44136-0019...
-
Page 35: Medidas Importantes De Seguridad
Medidas importantes de seguridad ADVERTENCIA: La presencia de este símbolo indica que se trata de instrucciones importantes de seguridad que se deben respetar para evitar poner en peligro su seguridad personal y/o material y la de otras personas. Lea y siga todas las instrucciones de este manual antes de poner en funcionamiento esta máquina. - Page 36 Funcionamiento en pendientes Una cubierta de descarga faltante o dañada puede provocar el contacto con la cuchilla o lesiones por objetos arrojados. Las pendientes son un factor importante relacionado con Detenga la(s) cuchilla(s) cuando atraviese senderos, sendas o accidentes por derrape y vuelcos que pueden producir lesiones caminos de grava y cuando no esté...
- Page 37 Niños Utilice sólo los recipientes para gasolina autorizados. Nunca llene los recipientes en el interior de Pueden ocurrir accidentes trágicos si el operador no un vehículo o camión o caja de remolque con está atento a la presencia de niños. Por lo general, los recubrimiento plástico.
- Page 38 Aviso referido a emisiones Revise los pernos de montaje de la(s) cuchilla(s) y del motor a intervalos frecuentes para verificar que estén bien apretados. Además, inspeccione visualmente la(s) Los motores que están certificados y cumplen con las cuchilla(s) en busca de daños (por ejemplo, desgaste regulaciones de emisiones federales EPA y de California para excesivo, abolladuras, rajaduras, etc.).
- Page 39 2 — M ectiOn edidas iMpOrtantes de seguridad...
-
Page 40: Montaje Y Configuración
Montaje y Configuración Montaje y Configuración Extracción de la traba de seguridad utilizada en el envío CONFIGURACIóN DEL TRACTOR Instalación de los cables de la batería ¡ADVERTENCIA! Asegúrese de que el motor del tractor corta césped esté apagado, quite la llave NOTA: Algunos modelos se envían con los cables de la batería ya de encendido y coloque el freno de mano antes de conectados. - Page 41 Instalación del volante Si el volante del tractor no se envía instalado, debajo de la tapa del volante, dentro del mismo, se entregan embalados los elementos de ferretería para su instalación. Extraiga con cuidado el casquete del volante mediante palanca y retire los elementos de ferretería.
-
Page 42: Figure
El ajuste de las Ruedas de Medida de Cubierta Mueva el tractor en una firma y nivele la superficie, preferentemente pavimento, y proceda como sigue Seleccione la posición de altura de la cubierta cortante colocando la palanca de levantamiento de cubierta en el ajuste de altura normalmente deseado que siega (cualquiera de la seis altura cortante diferente hace una muesca en la defensa derecha). -
Page 43: Controles Y Características
Controles y Características Palanca de potencia de arranque (PTO) Pedal de la transmisión Pedal de Freno Amperímetro Palanca del regulador interruptor de encendido Palanca de control de crucero Botón de freno de mano Palanca de cambios Palanca de elevación de Portacubeta la plataforma Figura 4-1... -
Page 44: Pedal De Freno
interruptor de encendido PALANCA DE CONTROL DEL REGULADOR La palanca de control del estrangulador está ubicada del lado Su nuevo tractor de césped tendrá uno de los interruptores de derecho del tablero de instrumentos del tractor. Esta palanca ignición siguientes. El Higo 4-3 de Uso para identificarse que controla la velocidad del motor y, en algunos modelos, cuando se la cambian su máquina utiliza y seguir éstos instrucciones para la empuja totalmente hacia adelante, también controla el obturador. -
Page 45: Palanca De Cambios
Pedal de la transmisión Botón de freno de mano El pedal de la transmisión está ubicado en el lado Para colocar el freno de mano, presione hasta delantero derecho del tractor, por debajo del pedal el fondo el pedal de freno y presione el botón de freno, a lo largo del estribo. -
Page 46: Funcionamiento
Funcionamiento Funcionamiento Colocación del freno de mano Para colocar el freno de mano: Presione totalmente el pedal del embrague-freno y manténgalo hacia abajo con el pie. Mueva la palanca de control de velocidad totalmente hacia abajo en la posición de freno de mano. Suelte el pedal del embrague-freno para permitir que el freno de mano engrane. - Page 47 Detención del motor Coloque la palanca de cambios en neutral, Coloque el freno de estacionamiento, ¡ADVERTENCIA! Si golpea contra algún objeto Apague el motor y retire la llave. Eso permitirá reducir al extraño, detenga el motor, desconecte el(los) mínimo la posibilidad de que su césped resulte quemado cable(s) de la bujía y conecte el motor a masa.
- Page 48 Faros delanteros NOTA: Modelos con modo de precaución en marcha atrás: El motor se apagará automáticamente si la potencia de arranque (PTO) está enganchada con la palanca de cambios en posición de • En algunos modelos, los faros se encienden (ON) cada vez marcha atrás con la llave de encendido en la posición de CORTE que el motor del tractor está...
-
Page 49: Mantenimiento Y Ajustes
Mantenimiento y Ajustes Mantenimiento Retire el tapón de llenado de aceite /la varilla de nivel de aceite del tubo de llenado. ¡ADVERTENCIA! Antes de realizar tareas de Inserte la manguera de drenaje de aceite (embalada mantenimiento o reparaciones, desconecte la con este manual) dentro del orificio de drenaje de potencia de arranque (PTO), coloque el freno de aceite. - Page 50 Limpieza del tractor Lubricación Si se derrama combustible o aceite sobre la máquina, debe ¡ADVERTENCIA! Antes de realizar tareas de limpiarse de inmediato. NO permita que se acumulen desechos lubricación, reparaciones o inspecciones, alrededor de las aletas de refrigeración del motor, el ventilador desconecte la potencia de arranque (PTO), coloque de refrigeración de la transmisión ni en ninguna otra parte de la el freno de mano, apague el motor y retire la llave,...
- Page 51 Ajustes Vuelva a apretar cada tuerca de seguridad contra cada tuerca hexagonal cuando alcance el ajuste adecuado. ¡ADVERTENCIA! Apague el motor, retire la llave Nivelación de la plataforma (lado a lado) de encendido y coloque el freno de mano antes de Si la plataforma de corte estuviera realizando el corte de césped realizar ajustes.
- Page 52 Ajuste del asiento La convergencia de las ruedas delanteras puede medirse de este modo: Consulte la sección Configuración y Montaje de este manual para Coloque el volante en posición de operación hacia ver instrucciones para el ajuste del asiento. adelante. ¡Advertencia! Antes de operar el tractor, asegúrese Delante del eje, mida la distancia horizontal desde el de que el asiento esté...
- Page 53 Inspeccione la condición de las bujías de encendido y la separación Reemplace el filtro de combustible NOTE: el Troy-Bilt LLC reserva el derecho de cambiar especificaciones de producto, diseños y equipo sin el aviso y sin incurrir en la obligación. IMPORTANTE: Consulte el manual del operador de motor específico incluido con esta máquina para procedimientos de...
- Page 54 Registro de mantenimiento Lleve un registro del mantenimiento realizado a su tractor. fabricación Medidor horario Mantenimiento Realizado por 6— M ección anteniMientO y justes...
-
Page 55: Servicio
Servicio Extracción de la plataforma de corte Note: Haga una nota mental en que agujero el otro final de la vara de encargado de cinturón es insertado para objetivos de Para extraer la plataforma de corte, proceda de la siguiente manera: nueva instalación. -
Page 56: Figure
Conecte el otro extremo del cable al borne positivo (+) de la batería con el puente conector. Conecte el segundo cable negativo (-) al otro borne de la batería con el puente conector. Realice la conexión final en el bloque del motor del tractor, lejos de la batería. - Page 57 Cuchillas de corte ¡ADVERTENCIA! Antes de extraer la(s) cuchilla(s) para afilarla(s) o reemplazarla(s), asegúrese de apagar el motor, retirar la llave de encendido, desconectar el(los) cable(s) de la bujía y hacer masa contra el motor para impedir el encendido accidental del motor. Proteja sus manos utilizando guantes pesados o un paño para asir la cuchilla de corte.
- Page 58 Cambio de la correa de la plataforma ¡ADVERTENCIA! Evite la posibilidad de lesiones por compresión. Al extraer la correa, cuide de no ¡ADVERTENCIA! Asegúrese de apagar el motor, colocar sus dedos en el resorte intermedio o entre la retirar la llave de encendido y desconectar el (los) correa y una polea.
-
Page 59: Solución De Problemas
Solución de Problemas Problema Causa Solución El motor no arranca La potencia de arranque (PTO)/cuchilla está Coloque la perilla (o palanca) en posición OFF conectada. (desenganchada). Se ha desconectado el cable de la bujía. Conecte el cable a la bujía. El depósito de combustible está... -
Page 60: Piezas De Reemplazo
Piezas de reemplazo Componente Número de pieza y Descripción 759-3336 Bujía (Champion RC12YC) KH-20-883-02-S1 Depurador y elemento de filtro de aire Kohler KH-12-050-01-S Filtro de aceite Kohler KH-25-050-21-S Filtro de combustible Kohler 954-0349 Correa de transmisión (plataforma de corte) (Dejado) 954-04122 Correa de transmisión (plataforma de corte)(Derecho) 942-0611A... - Page 61 Componente Número de pieza y Descripción 918-0430A Husillo de plataforma 918-04134B Doble Polea Husillo de plataforma 734-0973 Rueda de plataforma 925-1707D Batería 951-3111 Tapón del depósito de combustible 746-04364 Control/Cable de Regulador 925-1745 Llave de encendido 931-1032B Conjunto de canal de descarga NOTE: el Troybilt LLC reserva el derecho de cambiar especificaciones de producto, diseños y equipo sin el aviso y sin incurrir en la obligación.
-
Page 62: Aditamentos Y Accesorios
Aditamentos y accesorios Los accesorios siguientes y los accesorios son compatibles para el Tractor de Césped de Poni de Troy-bilt. Ver al detallista del cual usted compró su tractor, un Distribuidor de Servicio de Troy-bilt autorizado o telefonear (800) 828-5500 para la información en cuanto a precio y disponibilidad. -
Page 63: Garantía
DECLARACIÓN DE GARANTÍA DE CONTROL DE EMISIONES DE CALIFORNIA DERECHOS Y OBLIGACIONES DE SU GARANTÍA El Departamento de los Recursos de Aire de California y MTD Consumer Group Inc, se complacen en explicar la garantía del sistema de control de emisiones por evaporación de su cortadora de césped 2007. - Page 64 Las disposiciones de esta garantía cubren el recurso de reparación producto están libres de defectos de material y mano de obra única y exclusiva que surge de la venta. Troy-Bilt no se hará durante un período de un (1) año a partir de la fecha de compra o responsable de ninguna pérdida o daño incidental o resultante,...
Need help?
Do you have a question about the Super Bronco and is the answer not in the manual?
Questions and answers