
Related Manuals for Troy-Bilt 13A-130F063


Summary of Contents for Troy-Bilt 13A-130F063
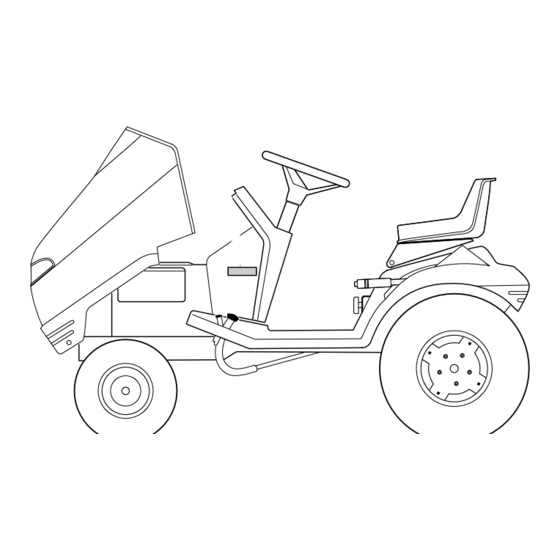
- Page 1 Owner/Operator Manual LTX Lawn Tractors • Safety • Controls • Operation • Maintenance Models 13A-130F063 — 13 HP Gear Drive 13A-145F063 — 14 HP Hydro Drive ©1997 GARDEN WAY INCORPORATED Form 770-1212C (4/98)
-
Page 2: Table Of Contents
Introduction Thank you for purchasing this product. We feel you now own which does not attempt to cover major repairs. one of the finest lawn tractors available. Our equipment is carefully designed, engineered and All information in this manual is based on the latest product manufactured for excellent performance if properly operated information available at the time of printing. -
Page 3: Service Information
Service Information Unit Service and Repair Left and Right Sides Contact your local dealer to service your unit. Provide the Left and right sides of this unit are determined from the unit's model/serial number and the part description when operator's position, facing the direction of forward travel. calling or writing for service. -
Page 4: Section 1: Safety
Section 1 Safety Important! Safe Operating Practices for this Unit This is a safety alert symbol. It is used in this manual and on decals on the unit to alert you to potential hazards. Whenever you see this symbol, read and obey the safety message that follows it. - Page 5 Safety (continued) c. Inspect mower blades for wear or HANDLING GASOLINE damage. Broken pieces thrown from a worn or damaged blade can cause serious injury. d. Check for and maintain correct tire pressure. Check tires for cuts or bubbles. Check wheels for damage or missing hardware.
- Page 6 Safety (continued) 8. Never carry passengers. Passengers 17. Never leave a running machine SLOPE OPERATION interfere with the safe operation of this unattended. Always turn off unit. Passengers could be struck by attachment/PTO drive, set parking brake, foreign objects and/or thrown from unit stop engine and remove key before and severely injured.
- Page 7 Safety (continued) 8. If unit is unable to continue moving 8. Keep unit free of grass, leaves or uphill, disengage attachment/PTO drive, other debris build-up. Clean up oil or check area on ground immediately fuel spillage. Allow machine to cool behind unit, watch area to rear and before storing.
- Page 8 Safety (continued) 17. Towing or pushing unit with another 5. Do not change engine governor 5. If electrolyte is swallowed: setting. Over-revving may damage a. Drink large amounts of water or vehicle will damage transmission. Push unit by hand only. engine and will void warranty.
-
Page 9: Section 2: Attachments And Kits
Section 2 Attachments and Kits A full line of attachments available for your unit are listed below. The information is the most current at the time this manual was printed. Contact your authorized dealer or the factory for current information. MOWER DECKS COUNTER BALANCE 14051... -
Page 10: Section 3: Safety Decals
Section 3 Safety Decals Refer to this section for safety decal description and location. Keep safety decals on unit clean, legible and intact. Refer to Parts Catalog and see your dealer for replacements when necessary. Ref. Letter Description and Location Qty. - Page 11 Safety Decals (continued) BRAKE DANGER WARNING ROTATING BLADES CAN TO AVOID SERIOUS INJURY READ CUT ARMS AND LEGS. ALL SAFETY PRECAUTIONS CAREFULLY. • Look down and behind before and while back- • Read owner/operator manual. ing. • Avoid sudden turns. •...
-
Page 12: Section 4: Features & Controls
Section 4 Features & Controls performance of this system. Low throttle settings can also discharge battery. (D)—Throttle Lever (model 130F) Instrument Panel– – AMPERES Controls engine speed. Always run Model 145F engine at full throttle. Note: Items G and H are available as dealer-installed options (E)—Attachment/PTO Drive Switch... -
Page 13: Travel Pedal
Features & Controls (continued) Gear Drive Fig. 4-4 Gear Shift Console Brake Unlocked Fig. 4-2 Right View Fig. 4-5 Brake Locked (P, Figs. 4-3 & 4-5)—Clutch/Brake Pedal Press pedal to apply brake and disengage drive. Brake pedal does not stop attachment/PTO drive operation. Brake must be applied to start engine. -
Page 14: Attachment Lift Lever
Features & Controls (continued) Fuel Fill Cap Fuel Tank Fig. 4-6 Fuel Tank approximately 1/2" increments. See After adjusting the mower deck to the (V, Fig. 4-6)—Attachment Height page 20 for more detailed lift desired cutting height, note the location Indicator information. -
Page 15: Section 5: Operation
Section 5 Operation PRE-OPERATION CHECKLIST Perform the following checks each time before using the unit: WARNING BEFORE OPERATING THE UNIT, READ AND UNDERSTAND ALL SAFETY, CONTROLS AND OPERATING INSTRUCTIONS IN THIS MANUAL. ALSO, READ ALL MATERIAL PROVIDED WITH ANY ATTACHMENTS TO BE USED WITH THE UNIT. -
Page 16: Tire Pressure
Operation (continued) Engine flywheel screen (C, Fig. 5-3) 4. Check for debris and clean regularly. DO NOT CLEAN FLYWHEEL WHILE ENGINE IS RUNNING! Battery 5. If the unit has not been used for an extended period of time, charge at 6 to 10 amps for 1 hour. -
Page 17: Operation
Operation (continued) Operation • Do not start the unit until all the steps of the pre-operation checklist at the – AMPERES beginning of this section have been completed. After completing these checks, set parking brake (F, Fig. 5-6), place attachment/PTO drive switch (A, Throttle/Choke Lever –... -
Page 18: Stopping Engine
Operation (continued) Interlock System Test Procedure Engine Control– Engine Controls– Model 130F Models 145F After starting, but before working with the unit, perform the following test: Lever Positions Lever Position Lever Position When Starting When Starting When Starting 1. Park unit on a level surface so it does Engine Engine Engine... -
Page 19: Moving Tractor Manually
Operation (continued) Hydrostatic Drive Units Model 145F only Fig. 5-10 Travel Pedal Fig. 5-8 Gear Drive Transmission Gear Drive Units WARNING Depress clutch/brake pedal and move gear shift lever (Q, Fig. 5-9) into desired DO NOT LEAVE THE UNIT UNATTENDED position. -
Page 20: Brake Check
Operation (continued) Attachments Right-Hand Attachments for the unit are supplied Attachment/PTO Instrument Panel Drive Switch with literature containing important safety, operation and maintenance information. Read and understand all literature provided with any attachments to be used with the unit before use. Attachment/PTO Drive ELECTRIC CLUTCH BREAK-IN Attachment Lift in Lowered Position... - Page 21 Operation (continued) Basic Operation of Attachment Lift Lever (Models 130F, 145F) The lift mechanism has seven (7) positions. Unlock lift before raising or lowering. Lock lift down when using ground following cutting method. To lock, push lever completely down until button pops out.
-
Page 22: Section 6: 38-Inch Cutting Deck Attachment
Section 6 38-Inch Cutting Deck Attachment WARNING Hex Nuts READ AND UNDERSTAND THE “SAFE OPERATION PRACTICES” SECTION AT THE FRONT OF THE TRACTOR OPERATORS MANUAL BEFORE Bell Washers OPERATING THE TRACTOR. WARNING DO NOT OPERATE THE MOWER DECK UNLESS THE CHUTE DEFLECTOR HAS BEEN PROPERLY INSTALLED. - Page 23 38-Inch Cutting Deck Attachment (continued) Both distances should be equal. • To level, adjust the length of the front lift rods (A, Fig. 6-3) by turning the rod end (P) on each front lift rod, as required. NOTE: Clearance between the frame and the lift bracket (D) must be no less than 1/4"...
-
Page 24: Deck Removal And Installation
38-Inch Cutting Deck Attachment (continued) adjust as follows: a. Raise the implement lift handle to its highest setting. b. Remove the lock nuts to unfasten the rear gauge wheels, shoulder screws, and flat washer from the deck gauge wheel brackets. c. - Page 25 38-Inch Cutting Deck Attachment (continued) belt from the upper pulley of the deck center double-pulley. Engage the deck idler arm lever back into its stop bracket Deck Idler Arm (See to Fig. 6-8). (Disengaged) 5. Remove the hairpin clips from the clevis pins (F) on the left and right rear lift links (E).
-
Page 26: Maintenance
38-Inch Cutting Deck Attachment (continued) MAINTENANCE – CLEANING AND BLADE CARE WARNING BEFORE PERFORMING ANY MAINTENANCE, PLACE THE PTO SWITCH IN THE “OFF” POSITION, ENGAGE THE BRAKE PEDAL LOCK, TURN THE IGNITION KEY TO THE “OFF” POSITION AND REMOVE THE KEY FROM THE SWITCH TO AVOID ACCIDENTAL STARTING AND INJURY. -
Page 27: Mowing
38-Inch Cutting Deck Attachment (continued) securing the blade. A block of wood may be placed between the deck housing and the cutting edge of the blade to assist in removal of the hex nut securing the blade (Refer to Fig. 6-10). After replacing the blades, apply grease to the exposed threads at the bottom of the spindle bolts to prevent rust buildup. -
Page 28: Section 7: Maintenance
Section 7 Maintenance WARNING BEFORE PERFORMING ANY SERVICE, ADJUSTMENTS OR MAINTENANCE ON THE TRACTOR, ENGINE OR ATTACHMENTS: A. PARK THE TRACTOR ON A FIRM AND LEVEL SURFACE. B. DISENGAGE ATTACHMENT/PTO DRIVE. C. LOWER THE ATTACHMENTS. D. MOVE ALL CONTROL LEVERS TO NEUTRAL. -
Page 29: Hood Removal/Installation
Maintenance (continued) so dirt does not fall into crankcase when dipstick is removed. Remove dipstick. Oil level must be between “ADD” and “FULL” marks on dipstick. Do not overfill. Oil level must not exceed “FULL” mark on dipstick. ADD OIL: Remove oil fill cap (A, Fig. 7- 2) and add oil. -
Page 30: Engine Oil Filter
Maintenance (continued) Engine Oil Filter (Models 130F & 145F) Fig. 7-5 Fig. 7-6 Flywheel Screen WARNING NOTE: Please dispose of all waste Engine Oil Filter Replace oil filter (D, Fig. 7-5) as materials in an ecologically responsible DO NOT USE FOOD OR BEVERAGE indicated in engine owners manual. -
Page 31: Air Cleaner
Maintenance (continued) Air Cleaner Models 130F & 145F Fig. 7-9 Battery cartridge (B) and foam pre-cleaner (A). NOTE: The battery is sealed and is Separate foam pre-cleaner from paper maintenance-free. Acid level cannot be cartridge. checked. • Wash foam pre-cleaner (A) in liquid Keep battery cables and terminals clean. -
Page 32: Spark Plugs
Maintenance (continued) Spark Plug (Fig. 7-10) Every 50 operating hours or every season, remove and check the condition of the spark plug. Do not service a plug in poor condition. Best results are obtained with a new plug. See the engine owner manual to determine the proper replacement spark plug specifications. -
Page 33: Brake Adjustment
Maintenance (continued) Peerless VST 205 Gear Drive Brake Adjustment Fig. 7-13 Brake Adjustment Set parking brake. Adjust brake interlock Hydrostatic Drive Brake Adjustment is required if brake does not switch (K, Fig. 7-15) at screws (J) as Fig. 7-14 Adjustment hold the tractor when parking brake is required to provide a 1/16”... -
Page 34: Gear Drive Shift Linkage Adjustment
Maintenance (continued) Gear Drive Shift Linkage Adjustment With gear shift lever in “N” (neutral) position, it should be possible to push Rotate (Y) Rotate (Y) forward if unit backward if unit forward or backward. With gear shift runs forward unit runs in lever in “R”... -
Page 35: Drive Belt Removal/Installation
Maintenance (continued) Hydro Drive Belt Path Gear Drive Belt Path (TOP VIEW) (TOP VIEW) Idler at rear of slot VST 205 50° VST 205 Fig. 7-21 Fig. 7-20 Drive Belt Removal/Installation • Adjust belt guide (B) so it is pointing straight to the right of the unit as shown Set parking brake. -
Page 36: Maintenance Chart
Maintenance (continued) Maintenance Chart INTERVAL* ITEM SERVICE Each use Mower Blades Check Air Intake Screen Check Loose or Missing Hardware Tighten or Replace Belts Check Brake Check Engine Oil Level Check First 5 hours Engine Oil and Filter Replace 25 hours Engine Oil** Check Air Filter... -
Page 37: Troubleshooting Chart
Maintenance (continued) Symptom Troubleshooting Chart Possible cause Engine malfunction (refer to engine • • • • • • • • manual). • • • Faulty attachment drive switch. • Faulty interlock switches or relays. • • Dirty engine cooling fins or flywheel screen. •... -
Page 38: Lubrication Chart
Maintenance (continued) Lubrication Chart (refer to Fig. 7-22) ITEM INTERVAL LUBRICATION TYPE AMOUNT REQUIRED A--Engine Crankcase First 5 hours Change Oil & Filter (If so Refer to engine manual equipped) supplied with unit 25-50 hours Change Oil & Filter (lubrication intervals vary with operating conditions and type of oil used) B--Front Axle/Spindles... -
Page 39: Section 8: Storage
Section 8 Storage When storing the unit for more than 30 debris from unit. Thoroughly clean necessary. days: engine cooling fins, engine flywheel screen and transmission cooling fins. Charge battery at 6-10 amps for 1 hour Add a gasoline stabilizer to fuel and Change engine oil. -
Page 40: Section 9: Specifications
Section 9 Specifications Specifications listed below are grouped by model number. Several attachments and kits are available which can improve the performance and comfort of the unit. See page 9 for further details. Dimensions: Tire sizes Length 130F Front ..15 x 6.00-6RS All units..........72”...
Need help?
Do you have a question about the 13A-130F063 and is the answer not in the manual?
Questions and answers