
Related Manuals for Dometic CoolMatic CRX 65DS


Summary of Contents for Dometic CoolMatic CRX 65DS
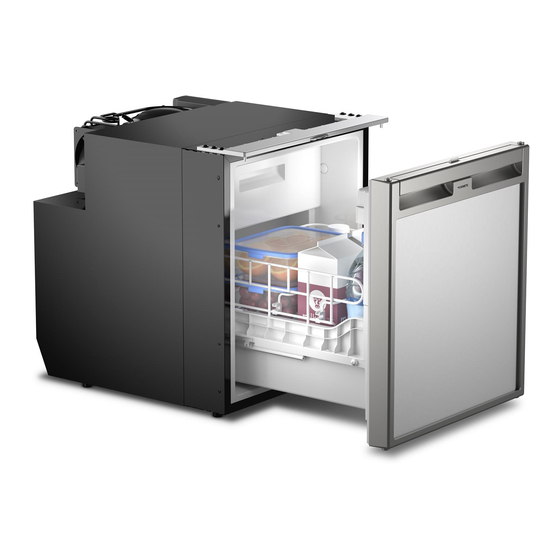
- Page 1 REFRIGERATION CRX65D Compressor refrigerator Installation and Operating Manual...
- Page 2 © 2020 Dometic Group. The visual appearance of the contents of this manual is protected by copyright and design law. The underlying technical design and the products contained herein may be protected by design, patent or be patent pending. The trademarks mentioned in this manual belong to Dometic Sweden AB.
-
Page 3: Table Of Contents
Explanation of symbols Please read this instruction manual carefully before installation and first use, and store it in a safe place. If you pass on the product to another person, hand over this instruction manual along with it. Table of contents Explanation of symbols . -
Page 4: Safety Instructions
Safety instructions CAUTION! Safety instruction: Indicates a hazardous situation that, if not avoided, could result in minor or moderate injury. NOTICE! Indicates a situation that, if not avoided, can result in property damage. NOTE Supplementary information for operating the product. Safety instructions The manufacturer accepts no liability for damage in the following cases: •... - Page 5 Safety instructions Health hazard • This device can be used by children aged from 8 years and above and persons with reduced physical, sensory or mental capabilities or lack of experience and knowledge if they have been given supervision or instruction concerning use of the device in a safe way and understand the hazards involved.
- Page 6 Safety instructions NOTICE! Damage hazard • Check that the voltage specification on the type plate corresponds to that of the energy supply. • Only connect the cooling device as follows: – With the DC connection cable to a DC power supply in the vehicle –...
-
Page 7: Scope Of Delivery
Scope of delivery Scope of delivery Quantity Description Refrigerator with shelves Outlet port Installation and operating manual Accessories Available as accessories (not included in the scope of delivery): Description Explanation Ref. no. Rectifier Transforms an input voltage of 100 – 240 Vw to 24 Vg, 9600000445 so that the refrigerator can be connected to an AC power supply. -
Page 8: Technical Description
Technical description Technical description The CoolMatic cooling appliances can cool products and keep them cool. Products can be deep-frozen in the freezer compartment. If the refrigerator is operated without a freezer compartment, frozen products can be stored in the short term using the fast-cooling function. - Page 9 Technical description Components No. in fig. 1 Explanation Freezer compartment (detachable) Control panel Refrigerator drawer Compartment with lid (hinged) Lock...
- Page 10 Technical description Control elements No. in fig. 2 Explanation IR sensor for switching the interior light LED Service display LED Blue: Compressor is running LED Orange: Compressor is off On/off button Inner lighting Temperature selection button LED: Fast cooling function on LEDs: Temperature levels 1 to 4...
-
Page 11: Installing And Connecting The Refrigerator
Installing and connecting the refrigerator Installing and connecting the refrigerator Safety instructions for installation on boats Please note the following instructions for installation on boats: DANGER! DANGER OF ELECTROCUTION If the appliance is powered by the mains, ensure that the voltage supply has a residual current circuit breaker. - Page 12 Installing and connecting the refrigerator • Install the refrigerator so that the warm air produced can easily flow away (either upwards or to the sides, fig. 3). Key for fig. 3 Explanation Cold intake air Hot waste air Condenser Spacing above the refrigerator if there is not sufficient air to circulate above or at the side.
- Page 13 Installing and connecting the refrigerator • Condensate is produced when the refrigerator is operating normally. You can either wipe up the condensate on the floor of the refrigerator in regular intervals, or drain it through an outlet in the floor of the refrigerator (see chapter “Mounting the water drain outlet (optional)”...
- Page 14 Installing and connecting the refrigerator Installing the refrigerator Proceed as follows to install the refrigerator: ➤ If you wish to drain the condensate through a hose: Mount the outlet port (see chapter “Mounting the water drain outlet (optional)” on page 13) ➤...
- Page 15 Installing and connecting the refrigerator For safety reasons, the refrigerator is equipped with an electronic system to prevent the polarity being reversed. This protects the refrigerator against reversed polarity when connecting to a battery and against short circuiting. To protect the battery, the refrigerator switches off automatically if the voltage is insufficient (see table below).
- Page 16 Installing and connecting the refrigerator ➤ Connect your refrigerator to a plug socket which is fuse-protected with at least 15 A (at 12 Vg) or 7.5 A (at 24 Vg) (fig. 8 1). ➤ Connect the red cable (fig. 8 rd) to the positive terminal of the battery. ➤...
- Page 17 Installing and connecting the refrigerator Connecting the ACDC version to AC voltage Proceed as follows when you connect the refrigerator to the AC supply: ➤ Plug the connector into the AC socket (fig. 9 1). Connecting the DC version to AC voltage You can connect the refrigerator to 100 –...
-
Page 18: Using The Refrigerator
Using the refrigerator Proceed as follows when you connect the refrigerator to the AC supply: – 100 – 240 V~ rd/bk 10 A – 12 V/24 V ➤ Attach the rectifier on the back of the refrigerator. ➤ Connect the rectifier as shown in fig. 0. ➤... - Page 19 Using the refrigerator NOTE • Before starting your new refrigerator for the first time, you should clean it inside and outside with a damp cloth for hygienic reasons (please also refer to the chapter “Cleaning and maintenance” on page 25). •...
- Page 20 Using the refrigerator Setting the temperature ➤ Press the button repeatedly until the desired temperature level is set. The more LEDs light up above the button the lower is the temperature level. To switch from the last level to the first level press the button again.
- Page 21 Using the refrigerator NOTE Food which can easily absorb tastes and odours, as well as liquids and products with a high alcohol content, should be conserved in air-tight containers. You can conserve foodstuffs in the refrigerator. The time for which the food can be conserved in this way is usually stated on the package.
- Page 22 Using the refrigerator Releasing the lock NOTICE! DANGER OF DAMAGE Only adjust the locking mechanism when the door is open. If you use it with the door closed, you will damage the device. The refrigerator has a locking mechanism (fig. a 1), which is also used to protect it during transport.
- Page 23 Using the refrigerator Detaching the refrigerator drawer ➤ Unscrew both screws (fig. b).
- Page 24 Using the refrigerator ➤ Lift the drawer slightly at the front (fig. c). ➤ Pull out the drawer all the way (fig. c).
-
Page 25: Cleaning And Maintenance
Cleaning and maintenance 8.10 Change the fuse (ACDC version only) If the fuse in the AC socket is faulty, it can be replaced. ➤ Lever the fuse compartment (fig. 9 2, page 17) open with a screwdriver. ➤ Replace the fuse (250 V/4 A). ➤... -
Page 26: Troubleshooting
Troubleshooting Troubleshooting The significance of the red LED (fig. 2 2, page 10) For operational faults it illuminates several times. The number of pulses depends on the type of fault. Each flash lasts for one quarter of a second. After the series of impulses a pause follows. - Page 27 Troubleshooting Problem Possible cause Remedy Start attempt with Loose cables Establish a connection ≤ U Poor contact (corrosion) Term Battery capacity too low Replacing the battery Cable cross section too small Replace the cable (fig. 7, page 15) Start attempt with Ambient temperature too high –...
- Page 28 Troubleshooting Poor cooling, increase in interior temperature Problem Possible cause Remedy Compressor runs for a Ambient temperature too high – long time/continuously Insufficient ventilation Move the refrigerator to another location Condenser is dirty Clean the condenser Faulty fan Replace the fan Compressor does not Battery capacity exhausted Charge the battery...
-
Page 29: Warranty
Warranty Warranty LIMITED WARRANTY AVAILABLE AT DOMETIC.COM/WARRANTY. IF YOU HAVE QUESTIONS OR TO OBTAIN A COPY OF THE LIMITED WARRANTY FREE OF CHARGE, CONTACT THE DOMETIC WARRANTY DEPARTMENT: DOMETIC CORPORATION CUSTOMER SUPPORT CENTER 1120 NORTH MAIN STREET ELKHART, INDIANA 46514 1-800-544-4881 OPT. -
Page 30: Technical Data
Technical data Technical data CRX0065D CRX1065D Refrigerator compartment storage volume: 43.5 l (1.54 cu.ft.) Freezer compartment storage volume: 7.0 l (0.25 cu.ft.) Total storage volume: 50.5 l (1.78 cu.ft.) Voltage: 12 Vg or 24 Vg 12 Vg or 24 Vg 100 –... - Page 31 Technical data CRX0065D CRX1065D Dimensions: Weight: 21.5 kg (47.41 lbs) 22 kg (48.5 lbs) Inspection/certification: Contains fluorinated greenhouse gases Hermetically sealed equipment...
- Page 32 YOUR LOCAL YOUR LOCAL YOUR LOCAL DEALER SUPPORT SALES OFFICE dometic.com/dealer dometic.com/contact dometic DOMETIC GROUP AB...
Need help?
Do you have a question about the CoolMatic CRX 65DS and is the answer not in the manual?
Questions and answers