Dometic CRX50 Installation And Operating Manual
Compressor refrigerator
Hide thumbs
Also See for CRX50:
- Installation and operating manual (384 pages) ,
- Operating manual (88 pages) ,
- Service manual (24 pages)

Related Manuals for Dometic CRX50


Summary of Contents for Dometic CRX50
- Page 1 REFRIGERATION CRX50, CRX65, CRX80, CRX110, CRX140 Compressor refrigerator Installation and Operating Manual...
- Page 2 © 2020 Dometic Group. The visual appearance of the contents of this manual is protected by copyright and design law. The underlying technical design and the products contained herein may be protected by design, patent or be patent pending. The trademarks mentioned in this manual belong to Dometic Sweden AB.
-
Page 3: Table Of Contents
Please read this instruction manual carefully before installation and first use, and store it in a safe place. If you pass on the product to another person, hand over this instruction manual along with it. Table of contents Explanation of symbols ......... . .4 Safety instructions . -
Page 4: Explanation Of Symbols
Explanation of symbols Explanation of symbols DANGER! Safety instruction: Indicates a hazardous situation that, if not avoided, will result in death or serious injury. WARNING! Safety instruction: Indicates a hazardous situation that, if not avoided, could result in death or serious injury. CAUTION! Safety instruction: Indicates a hazardous situation that, if not avoided, could result in minor or moderate injury. - Page 5 Safety instructions WARNING! Failure to obey these warnings could result in death or serious injury. Electrocution hazard • Installations in washrooms and areas exposed to water, must be performed by a qualified technician. • Do not operate the device if it is visibly damaged. •...
- Page 6 Safety instructions • If the device is connected to the DC socket: Disconnect the device and other electric consumers from the battery before connecting the quick charging device. • If the device is connected to the DC socket: Disconnect the device or switch it off when you turn off the engine.
- Page 7 Safety instructions • Store raw meat and fish in suitable containers in the device, so that it is not in contact with or can drip onto other food. • If the device is left empty for long periods: – Switch off the device. –...
-
Page 8: Scope Of Delivery
Scope of delivery Scope of delivery Quantity Description Refrigerator with shelves Water drain outlet Installation and operating manual Accessories Available as accessories (not included in the scope of delivery): Description Explanation Ref. no. Rectifier Suitable for CRX50DC, CRX65DC, CRX80DC, 9600000445 CRX110DC. -
Page 9: Intended Use
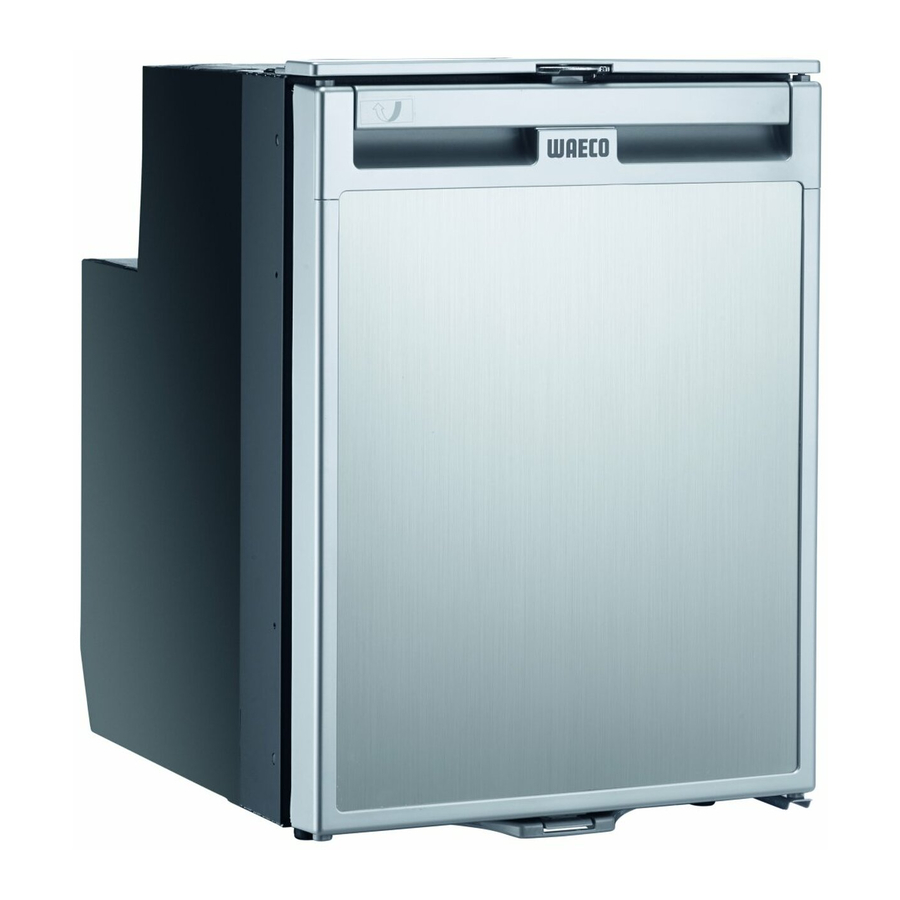
The temperature is set using the control panel on the inside left of the refrigerator. CRX50, CRX65, CRX80 Four temperature ranges from +3 °C (37 °F) to +12 °C (54 °F), and a fast-cooling function, are available for selection. - Page 10 The various types of refrigerators are shown in the following illustrations: CRX 50 • CRX50: fig. 1 Explanation Freezer compartment (detachable: CRX50, CRX65, CRX80 only) Control panel Wire shelf (folding, so that bottles can be put in the refrigerator) Shelf...
- Page 11 Technical description CRX 65 • CRX65: fig. 2 Explanation Freezer compartment (detachable: CRX50, CRX65, CRX80 only) Control panel Wire shelf (folding, so that bottles can be put in the refrigerator) Shelf Fruit compartment Bottle restraint (to hold bottles in the door)
- Page 12 Technical description CRX 80 • CRX80: fig. 3 Explanation Freezer compartment (detachable: CRX50, CRX65, CRX80 only) Control panel Wire shelf (folding, so that bottles can be put in the refrigerator) Shelf Fruit compartment Bottle restraint (to hold bottles in the door)
- Page 13 Technical description CRX 110 • CRX110: fig. 4 Explanation Freezer compartment (detachable: CRX50, CRX65, CRX80 only) Control panel Wire shelf (folding, so that bottles can be put in the refrigerator) Shelf Fruit compartment Bottle restraint (to hold bottles in the door)
- Page 14 Technical description CRX 140 • CRX140: fig. 5 Explanation Freezer compartment (detachable: CRX50, CRX65, CRX80 only) Control panel Wire shelf (folding, so that bottles can be put in the refrigerator) Shelf Fruit compartment Bottle restraint (to hold bottles in the door)
- Page 15 Technical description Control elements CRX50, CRX65, CRX80 CRX110DC CRX110ACDC, CRX140ACDC...
-
Page 16: Installing And Connecting The Refrigerator
LED Blue: Compressor is running LED Orange: Compressor is off On/off button Inner lighting Temperature selection button LED: Fast cooling function on (CRX50, CRX65, CRX80) LED: Winter mode on (CRX110ACDC, CRX140ACDC) LEDs: Temperature levels Installing and connecting the refrigerator Safety instructions for installation on boats... - Page 17 Installing and connecting the refrigerator CRX 50-140 CRX 50-140 ca. 50 mm (2 inch) CRX 140 c a . 2 0 m m ( 0 . 7 9 in c h )
- Page 18 Installing and connecting the refrigerator NOTICE! DANGER OF DAMAGE • The cooling device can withstand a short term inclination of 30°, for example on boats. When setting up the refrigerator, note that it must be fastened to take account of this. If you have any questions regard- ing installation, consult your specialist dealer.
- Page 19 Installing and connecting the refrigerator Observe the following installation dimensions: Model Dimensions W x H x D (mm) Dimensions W x H x D (inch) CRX50 390 x 544 x 550 15.35 x 21.42 x 21.65 CRX65 458 x 535 x 595 18.03 x 21.06 x 23.43...
- Page 20 Installing and connecting the refrigerator Mounting the water drain outlet (optional) NOTE The fitment of the drain outlet is recommended in high humidity climates which will generate more condensate than low humidity applications. ➤ Connect a hose with an inside diameter of 10 mm (0.4 inch) (not included) to the water drain outlet.
- Page 21 Installing and connecting the refrigerator Installing the refrigerator WARNING! INJURY HAZARD The device must be installed in accordance with the instructions to avoid a hazard due to instability of the device. Proceed as follows to install the refrigerator: ➤ If you wish to drain the condensate through a hose: Mount the water drain port (see chapter “Mounting the water drain outlet (optional)”...
- Page 22 Installing and connecting the refrigerator Changing the door hinge You can also change the hinge of the door, so that it opens to the left rather than the right. ➤ Proceed as shown (fig. a to fig. c).
- Page 23 Installing and connecting the refrigerator...
- Page 24 Installing and connecting the refrigerator Connecting the refrigerator to DC voltage NOTICE! DANGER OF DAMAGE • To avoid voltage drops and loss of performance, keep the connection cable as short as possible and not be interrupted. Therefore avoid additional switches, plugs or power strips. •...
- Page 25 Installing and connecting the refrigerator Ø/mm² 24 V • 24 V: fig. e Key to fig. e: Coordinate axis Meaning Unit Cable length ∅ Cable cross section mm² NOTICE! DANGER OF DAMAGE Make sure the polarity is correct. ➤ Before starting up the device for the first time, check whether the operating volt- age and the battery voltage match (see type plate).
- Page 26 Installing and connecting the refrigerator ➤ Connect your refrigerator to a plug socket which is fuse-protected at 15 A (at 12 V) or 7.5 A (at 24 V) (fig. f 1,). ➤ Connect the red cable (fig. f rd) to the positive terminal of the battery. ➤...
- Page 27 Installing and connecting the refrigerator Connecting the refrigerator to AC voltage DANGER! DANGER OF ELECTROCUTION • Never handle plugs and switches with wet hands or if you are stand- ing on a wet surface. • If you are operating your refrigerator on board a boat with an AC mains connection using a shore connection, you must install a residual current circuit breaker between the AC mains supply and the refrigerator.
- Page 28 Installing and connecting the refrigerator CRX50DC, CRX65DC, CRX80DC, CRX110DC You can connect the refrigerator to 100 – 240 Vw AC power if you use the MPS35 rectifier (accessory). The MPS35 rectifier features a priority circuit which conserves the battery con- nected.
-
Page 29: Using The Refrigerator
Using the refrigerator Using the refrigerator The refrigerator conserves fresh foodstuffs. The freezer compartment conserves frozen foodstuffs and freezes fresh foodstuffs. NOTICE! DANGER OF DAMAGE • Do not place any electrical devices inside the cooler. The only exceptions are devices approved for the purpose by the manu- facturer. - Page 30 If the ambient temperature is at 16 °C (61 °F) to 20 °C (68 °F), set the refrigerator to at least level 2. Setting the fast cooling function (CRX50, CRX65, CRX80 only) NOTICE! DANGER OF DAMAGE • Only use the fast-cooling function when the removable freezer com- partment is not being used.
- Page 31 Using the refrigerator Setting the winter mode (CRX110ACDC, CRX140ACDC only) The winter mode ensures optimum operation at ambient temperature of below 16 °C (61 °F): ➤ Press the button longer than 3 seconds. ✓ The refrigerator switches to winter mode and the LED lights up above the button.
- Page 32 Using the refrigerator Defrosting the freezer NOTICE! DANGER OF DAMAGE Never use mechanical tools to remove ice or to loosen objects stuck to the device. The only exceptions are devices approved for the purpose by the manufacturer. This is how to defrost the refrigerator: ➤...
- Page 33 Using the refrigerator Switching off and storing the refrigerator If you do not intend to use the refrigerator for a long time, proceed as follows: ➤ Press the button until the refrigerator switches off. ➤ Disconnect the connection cable from the battery or disconnect the plug on the AC cable plug from the rectifier.
-
Page 34: Cleaning And Maintenance
Limited warranty If the product does not work as it should, please contact your retailer or the manufacturer's branch in your country (see dometic.com/dealer). The warranty applicable to your product is 3 year(s). For repair and warranty processing, please include the following documents when you send in the device: •... -
Page 35: Disposal
Disposal Australia only Our goods come with guarantees that cannot be excluded under the Australian Consumer Law. You are entitled to a replacement or refund for a major failure and for compensation for any other reasonably foreseeable loss or damage. You are also entitled to have the goods repaired or replaced if the goods fail to be of acceptable quality and the failure does not amount to a major failure. - Page 36 Troubleshooting CRX50, CRX65, CRX80 Number of Fault Possible cause flashes Low Voltage The supply voltage is outside of the set range. Excessive fan current The fan load on the electronics unit is more than 1 A. Too many start attempts The compressor or fan has been started too often within a short period of time.
- Page 37 Troubleshooting Number of Fault Possible cause flashes Overheating of the elec- If the cooling system is loaded too heavily or tronics unit the temperature is set too high, the electron- ics can overheat. Constantly Temperature sensor Temperature sensor is defective. errors Compressor does not run (battery connection) Problem...
- Page 38 Troubleshooting Compressor is not running (connected to AC supply) Problem Possible cause Remedy No voltage Connection supply line interrupted Establish a connection Main switch faulty (if installed) Replace the main switch Additional supply line fuse has blown Replace the supply line (if installed) fuse Voltage is present but...
-
Page 39: Technical Data
Technical data Technical data CRX50 CRX65 CRX80 ACDC models: CRX1050 CRX1065 CRX1080 DC models: CRX0050 CRX0065 CRX0080 Refrigerator compartment storage 41.2 l 50 l 70.6 l volume: (1.45 cu.ft.) (1.77 cu.ft.) (2.49 cu.ft.) Freezer compartment storage 4.4 l 7.0 l 7.5 l... - Page 40 Technical data CRX50 CRX65 CRX80 Global warming potential (GWP): 1430 fig. j, page 42 fig. k, page 42 fig. l, page 42 Dimensions: Weight ACDC models: 17.4 kg 19.8 kg 22 kg (38.36 lbs) (43.65 lbs) (48.50 lbs) DC models:...
- Page 41 Technical data CRX110 CRX140 Winter mode setting – 5 W heating, off-cycle (ACDC models only): Climatic class: Relative humidity: Max. 90 % Short-term inclination: maximum 30° Max. pressure: LP 11 bar/HP 25 bar Propellant: Refrigerant: R134a Refrigerant quantity: 47 g 50 g (1.66 oz.) (1.76 oz.)
- Page 42 Technical data 380 mm (14.96 inch) 500 mm (19.69 inch) CRX 50 448 mm (17.64 inch) 545 mm (21.46 inch) CRX 65 475 mm (18.7 inch) 528 mm (20.79 inch) CRX 80...
- Page 43 Technical data 520 mm (20.47 inch) 558 mm (21.97 inch) CRX 110 525 mm (20.67 inch) 620 mm (24.41 inch) CRX 140...
- Page 44 YOUR LOCAL YOUR LOCAL YOUR LOCAL DEALER SUPPORT SALES OFFICE dometic.com/dealer dometic.com/contact dometic DOMETIC GROUP AB...
Need help?
Do you have a question about the CRX50 and is the answer not in the manual?
Questions and answers