Advertisement
Quick Links
I N S T A L L A T I O N I N S T R U C T I O N S
Instrucciones de instalación
Installationsanleitung
Instruções de Instalação
RMT2
RXT2
RMT2/RLT2/RXT2
Istruzioni di installazione
Installatie-instructies
Instructions d´installation
RLT2
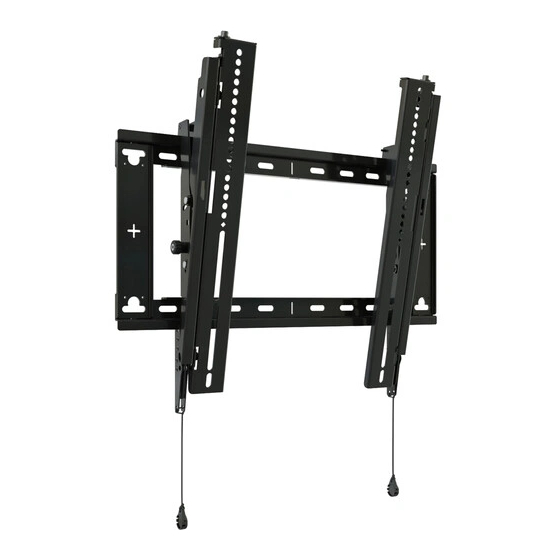
Universal Tilt Mounts
Spanish Product Description
German Product Description
Portuguese Product Description
Italian Product Description
Dutch Product Description
French Product Description
Advertisement

Related Manuals for CHIEF RLT2


Summary of Contents for CHIEF RLT2
- Page 1 I N S T A L L A T I O N I N S T R U C T I O N S Instrucciones de instalación Istruzioni di installazione Installationsanleitung Installatie-instructies Instruções de Instalação Instructions d´installation RMT2 RLT2 RXT2 Universal Tilt Mounts Spanish Product Description German Product Description Portuguese Product Description Italian Product Description Dutch Product Description...
-
Page 2: Important Safety Instructions
125 lbs (56.7 kg) for the RMT2 and RLT2 or 175 lbs (79.4 kg) for the RXT2. Use with products heavier than the maximum weight indicated may result in collapse of the mount and its accessories causing possible injury. - Page 3 Installation Instructions RMT2/RLT2/RXT2 DIMENSIONS-RMT2 16.00 19.94 1.00 7.87 TOP MOUNTING HOLE TO CENTERLINE 12° NOTCH ON WALL PLATE 1.96 MAX TILT 5.19 7.00 WALL 8.38 16.50 OPENING 11.49 15.75 2.50 CENTERLINE TO BOTTOM OF WALL PLATE OPENING 11.00 -CABLE ACCESS...
- Page 4 RMT2/RLT2/RXT2 Installation Instructions DIMENSIONS-RXT2 32.00 24.00 16.00 1.00 9.84 7.00 12° 35.94 TOP MOUNTING WALL HOLE TO CENTERLINE 1.96 OPENING NOTCH ON WALL PLATE 5.19 8.38 11.49 19.68 2.50 CENTERLINE 19.00 TO BOTTOM OF 38.00 WALL PLATE OPENING -CABLE ACCESS WHEN KICKSTAND - TILTS BACK 5°...
- Page 5 Installation Instructions RMT2/RLT2/RXT2 LEGEND Tighten Fastener Pencil Mark Apretar elemento de fijación Marcar con lápiz Befestigungsteil festziehen Stiftmarkierung Apertar fixador Marcar com lápis Serrare il fissaggio Segno a matita Bevestiging vastdraaien Potloodmerkteken Serrez les fixations Marquage au crayon Loosen Fastener Drill Hole Aflojar elemento de fijación...
-
Page 6: Tools Required For Installation
5/16" (7.9mm) PARTS B(1) C(1) A(1) [right upright] [left upright] [wall plate] (RXT2 shown) For below kit, quantities are 4 for RMT2 and RLT2, 6 for RXT2. G(1) Hardware Bag GA(8) GE(6) GI(6) GL(6) M4 x 16mm M5 x16mm M6 x16mm... - Page 7 LINE NOTE: The RMT2 must be installed on two 16" studs. The RLT2 can be installed on 16" studs (inner holes) or 24" studs (outer holes). For the RXT2, it can be mounted Figure 3 over two or three 16" studs or two 24" studs. If mounting to three 16"...
- Page 8 (E), wall plate (A) and into concrete anchors (F). concrete block wall. (See Figure 7) NOTE: For the RLT2, either the inner or outer four holes may be used. (F) x 4 or 6 NOTE: For the RXT2, use the outer four holes and the two middle holes on wall plate for installation.
- Page 9 WARNING: The minimum hole pattern size is 100mm x Tighten all screws. Ensure all applicable display mounting 100mm for the RMT2 and RLT2 and 200mm x 200mm for the holes (4, 6, or 8) are used. RXT2. Lay display face down on protective surface.
- Page 10 125 lbs (56.7 kg) for the RMT2 and RLT2 or 175 lbs (79.4 kg) for the RXT2. Use with products heavier than the maximum weight indicated may result in collapse of the mount and its accessories causing possible injury.
- Page 11 Installation Instructions RMT2/RLT2/RXT2 Switching Interface Brackets (Optional) Tilt Adjustment For wide hole patterns, interface brackets must be reversed. Adjust tilt tension adjustment knobs to desired tension. (See Figure 12) See Table below to determine if this is necessary. Adjust tilt of display by pulling the top of display away from Table 1: Hole Pattern Width the wall until desired tilt position is reached.
- Page 12 Europe A Franklinstraat 14, 6003 DK Weert, Netherlands P +31 (0) 495 580 852 F +31 (0) 495 580 845 Chief, a products division of Asia Pacific A Office No. 918 on 9/F, Shatin Galleria Milestone AV Technologies 18-24 Shan Mei Street...
Need help?
Do you have a question about the RLT2 and is the answer not in the manual?
Questions and answers