Table of Contents
Advertisement
Available languages
Available languages
Quick Links
ELECTRIC WALL OVEN INSTALLATION INSTRUCTIONS
INSTALLATION AND SERVICE MUST BE PERFORMED BY A QUALIFIED INSTALLER.
IMPORTANT: SAVE FOR LOCAL ELECTRICAL INSPECTOR'S USE.
READ AND SAVE THESE INSTRUCTIONS FOR FUTURE REFERENCE.
FOR YOUR SAFETY: Do not store or use gasoline or other
flammable vapors and liquids in the vicinity of this or any other appliance.
Your new wall oven has been designed to fit a variety of cutout sizes to make the job of installing easier. The first
step of your installation should be to measure your current cutout dimensions and compare them to the cutout
dimensions chart below for your model. You may find little or no cabinet work being necessary.
Do not remove spacers (if equipped) on the side walls of the built-in oven. These spacers
center the oven in the space provided. The oven must be centered to prevent excess heat buildup that may
result in heat damage or fire.
NOTES:
1. Allow at least 21"
(53.3 cm) clearance in
front of oven for door
depth when it is open.
2. Dimension G (cutout depth)
is critical to the proper
installation of the built-in
oven. If the oven trim does
not butt against the cabinet,
or if noise is heard on
convection models, verify
dimension G to assure it is
the required depth.
3. For a cutout height
greater than the maximum
(H), add one 2"(5 cm)
wide wood shim of
appropriate height to each
side of the opening under
the appliance side rails
(not included).
A
30 (76.2 cm)
F
Min.
28
/
(72.4 cm)
1
2
All dimensions are in inches (cm).
Printed in U.S.A.
(with cooktop combination installations)
SINGLE WALL OVEN - SINGLE INSTALLATION
B
B
Door Open
(see note 2)
A
A
30" Single Wall Ovens
PRODUCT DIMENSIONS
B
29
/
(73.9 cm)
1
8
CUTOUT DIMENSIONS AND CABINET WIDTH
G
Max.
Min.
29 (73.7 cm)
24 (61.0 cm)
1½" (3.8 cm)
C
C
27 1/4"
(68.8 cm)
(78.7 cm )
Spacer
D
D
2" (5 cm) Wide Wood
Spacer if Needed
* Suggested distance from floor is 31" (78.7cm).
Minimum required distance is 4 ½" (11.4cm).
Figure 1
C
28
/
(71.8 cm)
1
4
H. Standard Height
(**Others, see note 3)
Min.
Max.
27¼ (68.8 cm)
28
/
(71.4 cm)
1
8
1
United States
and Canada
I
I
Min.
G
G
H
H
F
F
31"*
)
2"
(5.1 cm)
Min.
Junction Box
D
25
/
(63.9 cm)
3
16
I
30
/
(76.5 cm) Min
1
8
PN 807153707 Rev. A (2020/10)
English – pages 1-10
Español – páginas 11-20
Français – pages 21-30
Hole for
Cord
3"
(7.6 cm)
Electrical
Advertisement
Table of Contents

Related Manuals for Electrolux ECWS3011AS


Summary of Contents for Electrolux ECWS3011AS
- Page 1 ELECTRIC WALL OVEN INSTALLATION INSTRUCTIONS (with cooktop combination installations) United States INSTALLATION AND SERVICE MUST BE PERFORMED BY A QUALIFIED INSTALLER. and Canada IMPORTANT: SAVE FOR LOCAL ELECTRICAL INSPECTOR'S USE. READ AND SAVE THESE INSTRUCTIONS FOR FUTURE REFERENCE. FOR YOUR SAFETY: Do not store or use gasoline or other flammable vapors and liquids in the vicinity of this or any other appliance.
-
Page 2: Product Dimensions
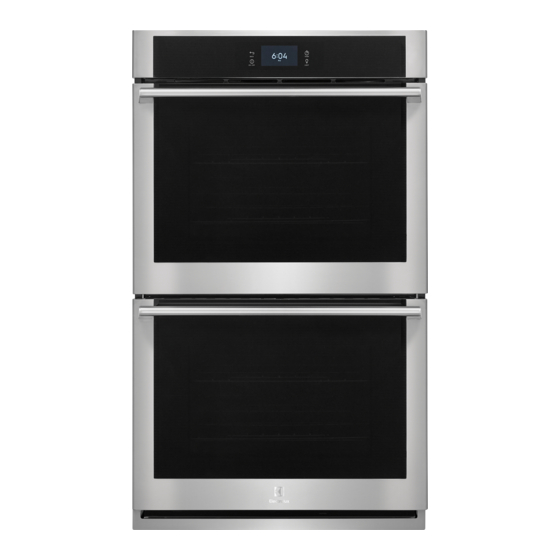
ELECTRIC WALL OVEN INSTALLATION INSTRUCTIONS (with cooktop combination installations) DOUBLE WALL OVEN INSTALLATION Do not remove spacers (if equipped) on the side walls of the built-in oven. These spacers center the oven in the space provided. The oven must be centered to prevent excess heat buildup that may result in heat damage or fire. - Page 3 ELECTRIC WALL OVEN INSTALLATION INSTRUCTIONS (with cooktop combination installations) CARPENTRY and SUPPORT Refer to Figure 1 or Figure 2 for the dimensions of your appliance and the cabinet cutouts and space needed to fit the oven. The oven support or base surface must be solid plywood, solid wood, or a material verified to meet the temperature and strength requirements needed for your installation.
-
Page 4: Important Safety Instructions
ELECTRIC WALL OVEN INSTALLATION INSTRUCTIONS (with cooktop combination installations) 1. Electrical Requirements Important Notes to the Installer 1. Read all instructions contained in these installation Each appliance must be supplied with the proper instructions before installing the wall oven. voltage and frequency, and connected to an individual, 2. -
Page 5: Electrical Shock Hazard
ELECTRIC WALL OVEN INSTALLATION INSTRUCTIONS (with cooktop combination installations) (If your appliance is equipped with a white neutral conductor.) This appliance is manufactured with a white neutral Electrical Shock Hazard power supply and a frame connected copper wire. The • Electrical ground is required on this appliance. frame is grounded by connection of grounding lead to •... -
Page 6: Model And Serial Number Location
ELECTRIC WALL OVEN INSTALLATION INSTRUCTIONS (with cooktop combination installations) Model and Serial Number Location If oven is used in a new branch circuit installation (1996 NEC), mobile home, recreational vehicle, or The serial plate is located along the interior side trim of where local codes DO NOT permit grounding through the oven and visible when the door is opened. -
Page 7: Cabinet Installation
ELECTRIC WALL OVEN INSTALLATION INSTRUCTIONS (with cooktop combination installations) 3. Cabinet Installation Install the Anti-tip Mounting Screws The wall oven can tip when the door is open. The anti-tip mounting screws supplied with the IMPORTANT! wall oven must be installed to prevent tipping of the Do not lift or manipulate the oven by the door handle wall oven and injury to persons. - Page 8 ELECTRIC WALL OVEN INSTALLATION INSTRUCTIONS (with cooktop combination installations) Install the Bottom Trims Bottom trims must be installed for the oven to function properly. DO NOT operate the oven without bottom oven trims installed. Do not use wood or any other trim that is not manufactured for use with this model.
- Page 9 ELECTRIC WALL OVEN INSTALLATION INSTRUCTIONS (with cooktop combination installations) TYPICAL UNDER-COUNTER INSTALLATION Do not remove spacers (if equipped) on the side walls of the built-in oven. These spacers center the oven in the space provided. The oven must be centered to prevent excess heat buildup that may result in heat damage or fire.
-
Page 10: Important Note
ELECTRIC WALL OVEN INSTALLATION INSTRUCTIONS (with cooktop combination installations) 18”(45.7 cm) Max. 4”(10 cm) 6 1/2” Min. 5” Max. (12.7 cm) (16.5 cm) Flare Union Right Side of Cabinet 120V/60Hz Flexible Appliance Conduit Grounded Flare (To be Outlet Union accessible Pressure for shut-off Regulator... - Page 11 INSTRUCCIONES DE INSTALACIÓN PARA EL HORNO ELÉCTRICO DE PARED (con instrucciones para la instalación de la estufa) LA INSTALACIÓN Y EL SERVICIO DEBEN SER EFECTUADOS POR UN INSTALADOR CALIFICADO. IMPORTANTE: GUARDE ESTAS INSTRUCCIONES PARA USO DEL INSPECTOR LOCAL DE ELECTRICIDAD. LEA Y GUARDE ESTAS INSTRUCCIONES PARA REFERENCIA FUTURA. Estados Unidos PARA SU SEGURIDAD: No almanece ni utilice gasolina u otros vapores y líquidos y Canadá...
- Page 12 INSTRUCCIONES DE INSTALACIÓN PARA EL HORNO ELÉCTRICO DE PARED (con instrucciones para la instalación de la estufa) No quite los separadores de los muros laterales del horno empotrado. Estos espaciadores centran el horno en el espacio provisto. El horno debe estar centrado para prevenir una concentración excesiva de calor que podría resultar en daños por el calor o un incendio.
- Page 13 INSTRUCCIONES DE INSTALACIÓN PARA EL HORNO ELÉCTRICO DE PARED (con instrucciones para la instalación de la estufa) ESPACIO y ESTRUCTURAS DE APOYO Consulte la figura 1 o la figura 2 para determinar las dimensiones del aparato, el espacio del gabinete y el espacio necesario para colocar el horno.
-
Page 14: Instrucciones Importantes De Seguridad
INSTRUCCIONES DE INSTALACIÓN PARA EL HORNO ELÉCTRICO DE PARED (con instrucciones para la instalación de la estufa) Notas importantes para el instalador 1. Requerimientos Eléctricos 1. Lea todas las instrucciones contenidas en este Se debe proveer el voltaje y la frecuencia apropiados a manual antes de instalar el horno. -
Page 15: Conexión Eléctrica
INSTRUCCIONES DE INSTALACIÓN PARA EL HORNO ELÉCTRICO DE PARED (con instrucciones para la instalación de la estufa) (Si su electrodoméstico está equipado con un conductor neutro blanco.) Riesgo de choque eléctrico Este electrodoméstico está fabricado con un suministro • Una puesta a tierra se requiere en este aparato. eléctrico neutro blanco y un alambre de cobre •... - Page 16 INSTRUCCIONES DE INSTALACIÓN PARA EL HORNO ELÉCTRICO DE PARED (con instrucciones para la instalación de la estufa) Ubicación del número de modelo y de serie Si el horno se usa en una instalación de circuito de ramal nuevo (1996 NEC), en una casa rodante, en un La placa con el número de serie está...
-
Page 17: Instalación Del Gabinete
INSTRUCCIONES DE INSTALACIÓN PARA EL HORNO ELÉCTRICO DE PARED (con instrucciones para la instalación de la estufa) 3. Instalación del Gabinete Instalación de los tornillos de montado El horno de pared puede inclinarse IMPORTANTE cuando la puerta esta abierta. Los soportes de No levante o manipular el aparato por el asa de la montaje que vienen con el horno de pared deben puerta o el panel de control. - Page 18 INSTRUCCIONES DE INSTALACIÓN PARA EL HORNO ELÉCTRICO DE PARED (con instrucciones para la instalación de la estufa) Instalación de la Guarnición Inferior: La guarda de seguridad inferior debe ser propiamente instalada para que el aparato electrodoméstico funcióne correctamente. No operar el horno sin la guarda de seguridad instalada.
- Page 19 INSTRUCCIONES DE INSTALACIÓN PARA EL HORNO ELÉCTRICO DE PARED (con instrucciones para la instalación de la estufa) INSTALACIÓN TÍPICA DE BAJO CONTADOR No quite los separadores de los muros laterales del horno empotrado. Estos espaciadores centran el horno en el espacio provisto. El horno debe estar centrado para prevenir una concentración excesiva de calor que podría resultar en daños por el calor o un incendio.
-
Page 20: Verificación Del Funcionamiento
INSTRUCCIONES DE INSTALACIÓN PARA EL HORNO ELÉCTRICO DE PARED (con instrucciones para la instalación de la estufa) 18”(45.7 cm) Max. ESTUFA DE GAS 4”(10 cm) 5” Max. 6 1/2” Min. (12.7 cm) (16.5 cm) Adaptor de gas Lado derecho del Tomacorriente Conector flexible para artefactos gabinete... -
Page 21: Dimensions De L'appareil
INSTRUCTIONS D'INSTALLATION POUR FOUR ENCASTRÉ ÉLECTRIQUE (avec les instructions pour l’installation la combinaison de table de cuisson) L’INSTALLATION ET L’ENTRETIEN DOIVENT ÊTRE EFFECTUÉS PAR UN INSTALLATEUR QUALIFIÉ. IMPORTANT: CONSERVEZ POUR L’INSPECTEUR D’ÉLECTRICITÉ LOCAL. LISEZ ET CONSERVEZ CES INSTRUCTIONS POUR RÉFÉRENCES ULTÉRIEURES. POUR VOTRE SÉCURITÉ: N’entreposez pas ou n’utilisez pas États-Unis et Canada d’essence ou d’autres produits inflammables à... - Page 22 INSTRUCTIONS D'INSTALLATION POUR FOUR ENCASTRÉ ÉLECTRIQUE (avec les instructions pour l’installation la combinaison de table de cuisson) FOUR DOUBLE ENCASTRÉ - INSTALLATION N’enlevez pas les entretoises sur les parois latérales du four. Ces entretoises centrent le four dans l’espace fourni. Le four doit être centré pour prévenir une accumulation excessive de chaleur pouvant causer un feu ou des dommages.
- Page 23 INSTRUCTIONS D'INSTALLATION POUR FOUR ENCASTRÉ ÉLECTRIQUE (avec les instructions pour l’installation la combinaison de table de cuisson) MENUISERIE et SUPPORT Consultez la Figure 1 ou la Figure 2 pour les dimensions de votre appareil, les découpes de l'armoire et l'espace nécessaire pour installer le four. La surface de support du four ou de la base doit être en contreplaqué...
-
Page 24: Directives Importantes De Sécurité
INSTRUCTIONS D'INSTALLATION POUR FOUR ENCASTRÉ ÉLECTRIQUE (avec les instructions pour l’installation la combinaison de table de cuisson) 1. Exigences électriques Installateur 1. Lisez toutes les instructions contenues dans ce Chaque appareils doivent être branchés à une feuillet avant l’installation du four encastré. alimentation possédant la tension et la fréquence 2. -
Page 25: Risque De Choc Électrique
INSTRUCTIONS D'INSTALLATION POUR FOUR ENCASTRÉ ÉLECTRIQUE (avec les instructions pour l’installation la combinaison de table de cuisson) (Si votre appareil possède un câble muni d'un conducteur blanc neutre.) Cet appareil est fabriqué avec un câble d’alimentation Risque de choc électrique muni d’un fil blanc neutre et d’un fil de mise à... - Page 26 INSTRUCTIONS D'INSTALLATION POUR FOUR ENCASTRÉ ÉLECTRIQUE (avec les instructions pour l’installation la combinaison de table de cuisson) Emplacement des numéros de modèle et de série Câble d'alimentation La plaque signalétique est située sur le côté intérieur Fil dénudé de la moulure latérale. Fil blanc Pour toute commande de pièces ou demande de Fils...
-
Page 27: Installation Dans L'armoire
INSTRUCTIONS D'INSTALLATION POUR FOUR ENCASTRÉ ÉLECTRIQUE (avec les instructions pour l’installation la combinaison de table de cuisson) 3. Installation dans l'armoire Installez les vis de fixation Le four encastré peut basculer IMPORTANT quand la porte est ouverte. Il faut fixer l'appareil à l'armoire, à... - Page 28 INSTRUCTIONS D'INSTALLATION POUR FOUR ENCASTRÉ ÉLECTRIQUE (avec les instructions pour l’installation la combinaison de table de cuisson) Installation de la moulure inférieure: La moulure inférieure doit être installée pour que le four fonctionne correctement. N'utilisez PAS le four sans la moulure inférieure correctement installée.
- Page 29 INSTRUCTIONS D'INSTALLATION POUR FOUR ENCASTRÉ ÉLECTRIQUE (avec les instructions pour l’installation la combinaison de table de cuisson) INSTALLATION TYPIQUE SOUS LE COMPTOIR N’enlevez pas les entretoises sur les parois latérales du four. Ces entretoises centrent le four dans l’espace fourni. Le four doit être centré pour prévenir une accumulation excessive de chaleur pouvant causer un feu ou des dommages.
-
Page 30: Note Importante
INSTRUCTIONS D'INSTALLATION POUR FOUR ENCASTRÉ ÉLECTRIQUE (avec les instructions pour l’installation la combinaison de table de cuisson) 18”(45.7 cm) Max. TABLE DE CUISSON À GAZ 4”(10 cm) 5” Max. 6 1/2” Min. (12.7 cm) (16.5 cm) Raccord évasé Côté droit de Prise l'armoire Conduit à...
Need help?
Do you have a question about the ECWS3011AS and is the answer not in the manual?
Questions and answers