Table of Contents
Advertisement
User Manual
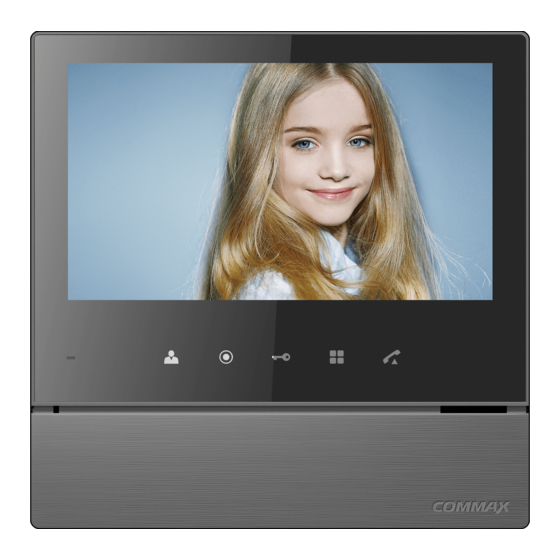
Fineview Video Phone CDV-70HM2
• Thank you for purchasing COMMAX products.
• Thank you for purchasing COMMAX products.
• Please carefully read this User's Guide (in particular, precautions for safety) before using a product and follow
• Please carefully read this User's Guide (in particular, precautions for safety) before using a product and follow
instructions to use a product exactly.
instructions to use a product exactly.
• The company is not responsible for any safety accidents caused by abnormal operation of the product.
• The company is not responsible for any safety accidents caused by abnormal operation of the product.
Advertisement
Table of Contents

Subscribe to Our Youtube Channel
Related Manuals for Commax Fineview CDV-70HM2


Summary of Contents for Commax Fineview CDV-70HM2
- Page 1 User Manual Fineview Video Phone CDV-70HM2 • Thank you for purchasing COMMAX products. • Thank you for purchasing COMMAX products. • Please carefully read this User’s Guide (in particular, precautions for safety) before using a product and follow • Please carefully read this User’s Guide (in particular, precautions for safety) before using a product and follow instructions to use a product exactly.
-
Page 2: Table Of Contents
Table of Contents 1. Warnings and caution ···············································2 2. Parts Names ··························································3 3. Package Contents ···················································4 4. Wiring and Connection Instructions ······························4 5. Operation ······························································5 6. Start Menu ·····························································7 7. Installation ··························································· 17 8. Specifications and Features ······································ 18 9. Safe Operation guide ·············································· 18 1. -
Page 3: Parts Names
Warning & Caution Please plug out the power Please don’t use several Please don’ t bend the power Please don’ t handle the power cable from the socket when products at the same time on cable excessively or it may cable with a wet hand. -
Page 4: Package Contents
3. Package Contents Monitor fixing Wall bracket User Manual Wall bracket mounting Connector (2EA) (1EA) screw for monitor screw (1EA) (1EA) (4EA) 4. Wiring and Connection Instructions ▷ Polarity of interphone connector ▷ Polarity of the camera connector 1. Red: Talk (Audio) 1. -
Page 5: Operation
5. Operation 1. Calling of visitor The visitor The visitor’ s presses the image appears call button on A chime on the monitor the camera sounds Dialog begins Dialog begins Dialog duration The display will be shown up for 60 seconds and turned off 60 seconds at automatically a time... - Page 6 3 . . Monitoring : function to see the image of visitor in the entrance. (stand-by mode) Operation - By pressing the Monitoring button repeatedly, the monitor will work as following in order. Camera 1 ( Camera 2 ) OFF Camera 1 .... (On talking mode)Operation - By pressing Monitoring button repeatedly, the monitor will work as following in order.
-
Page 7: Start Menu
6. Start Menu : User can start Main Menu by touching Menu button from Standby mode in LCD monitor. : Main Menu consists of two features, first 'VISITOR' and second ‘CONFIG’ User can finish Main Menu by touching Talk button and LCD monotor will go back to Standby mode. - Page 8 : Select (Interphone button) – Execute : Previous (Talk button) – Go back to Main Menu (2) ‘VIDEO’: User can check ‘VIDEO’. (3) ‘STILL IMAGE’: User can check ‘STILL IMAGE’. 6-1-1 Recorded image checking User can choose ‘CHECKING VISITOR’ Menu. User can choose then ‘VIDEO’ or ‘STILL IMAGE’...
- Page 9 6-2. CONFIG User can see below image in LCD monitor by selecting the icon in Main Menu. (1) Icon descripton : Move to left - User can select TIME, SETTING, LANGUAGE, DISPLAY based on ned. : Move to right - User can select TIME, DISPLAY, LANGUAGE, SETTING based on need. : Select - User can select any feature.
- Page 10 (1) Icon decription : Move to left – Move from YEAR, MINUTE, HOUR, DAY and lastly MONTH. (Move from right after YEAR) : Move to right – Move from YEAR, MONTH, DAY, HOUR and lastly MINUTE. (Move from left after YEAR) : Select –...
- Page 11 : Select - Select to feature to change. When selecting, the feature will be blinking. Decrease the configuration value Increase the configuration value (After adjustment, complete it with button.) : Previous – User can go back to ‘CONFIG’ 6-2-3. LANGUAGE SETTING User can see below image in LCD monitor by moving and selecting the right icon ‘LANGUAGE’...
- Page 12 6-2-4. SETTING User can see below image in LCD monitor by moving and selecting the right icon ‘SETTING’ in CONFIG. (1) Icon description : Move to left - Move from right feature to left. : Move to right - Move from left feature to right. : Select - Select to feature to change.
- Page 13 (1) Icon description : Move – Move from STILL IMAGE and to VIDEO. : Select - Select to feature to change. ( When seleted, Icon will be displayed.) :Previous – User can go back to ‘SETTING’ (2) VIDEO: Saved as VIDEO ●...
- Page 14 (2) AUTOMATIC SAVE ➔ User can save ‘VIDEO’ or ‘STILL IMAGE’ automatically using this mode. In this mode, ‘VIDEO’ will be saved once. User can stop saving ‘VIDEO’ by touching Menu button. And User can start saving ‘VIDEO’ again by touching Menu button. In this mode, ‘STILL IMAGE’will be also saved once.
- Page 15 6-2-4-4. INITIALIZATION User can see below image in LCD monitor by moving and selecting the right icon ‘INITIALIZATION’ in SETTING mode. (1) Icon description : Move - Move from RESET to FORMAT. : Select - Execute : Previous – User can go back to ‘SETTING’ (2) RESET : This is the feature User can reset the product.
- Page 16 *** Folder and File management *** ➯ Firstly insert SD CARD and execute ‘ FORMAT’ menu and create the folder. ➯ Creation of basic folder PICTURE : Still cut image folder / VIDEO : Video saving folder ( BKUP_PIC : STILL IMAGE back up from embedded memory ) ...
-
Page 17: Installation
7. Installation ▷ Monitor installation Note • Avoid installing the product in the area of direct sunlight. • The position of the unit's body should fit the standard height range (Recommended height range is 1450 ~ 1500mm.) • Avoid installing the product exposed to gas exposure, magnetic force, in humid temperatures, as it may damage the condition and performance of the product. -
Page 18: Specifications And Features
8. Specifications and Features CDV-70HM2 Rated Voltage 100-240V~, 50/60Hz Power Consumption Standby : 3W, Operating : 16W Wiring 4 wires with door camera (Polarity), 4 wires with an Interphone (Polarity) Screen Size Color 7 " TFT LCD Transmission way HANDS FREE (Voice switch circuit) From a door camera : Electric chime Call Sound From an interphone : Beep sound... - Page 20 513-11, Sangdaewon-dong, Jungwon-gu, Seongnam-si, Gyeonggi-do, Korea 513-11, Sangdaewon-dong, Jungwon-gu, Seongnam-si, Gyeonggi-do, Korea Int’l Business Dept. Tel. : +82-31-7393-540~550 Fax. : +82-31-745-2133 Int’l Business Dept. Tel. : +82-31-7393-540~550 Fax. : +82-31-745-2133 Web site : www.commax.com Web site : www.commax.com Printed In Korea / 2016.07.104...
Need help?
Do you have a question about the Fineview CDV-70HM2 and is the answer not in the manual?
Questions and answers