Table of Contents
Advertisement
Quick Links
Advertisement
Table of Contents

Subscribe to Our Youtube Channel
Related Manuals for Medion Akoya S4403


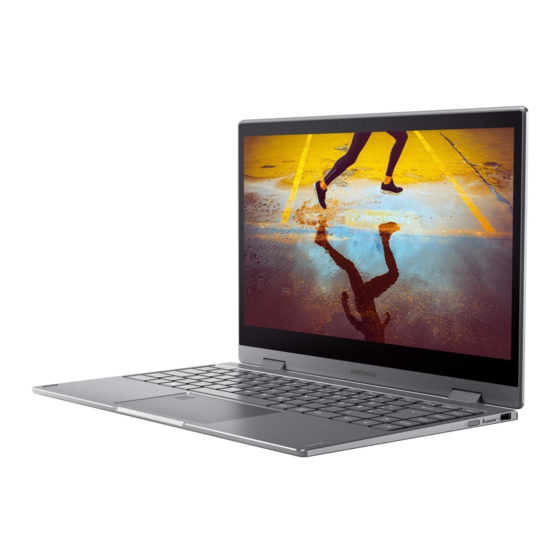
Summary of Contents for Medion Akoya S4403
- Page 1 Instruction Manual 35.5 cm / 14‘‘ Notebook...
-
Page 2: Table Of Contents
Table of Content Information about these operating instructions ........4 1.1. Explanation of Symbols ..................4 1.2. Proper Use........................ 6 EU Declaration of Conformity ..............6 2.1. Information on WLAN ..................7 Information on trademarks ................ 8 Safety Instructions ..................8 4.1. - Page 3 Power Management (Power Options) ............29 14.1. Energy Saving Tips ....................29 Display ......................30 15.1. Opening and Closing the Display ..............30 15.2. Touch Screen ......................30 15.3. Connecting an External Monitor ..............31 Data Input ....................31 16.1. Keyboard ........................31 16.2. Touchpad .......................32 Sound System ....................
- Page 4 Upgrading/Modifying and Repair ............46 27.1. Notes for Service Technicians .................46 Disposal ...................... 47 Information on Display Errors ..............47 29.1. European EN ISO 9241-307 Class II Standard ..........47 Service information ................... 49 Legal Notice....................50 Index ......................51...
-
Page 5: Information About These Operating Instructions
1. Information about these operating instructions Thank you for choosing our product. We hope you enjoy using it. Read the safety instructions and all other instructions carefully before using the device for the first time. Note the warnings on the device and in the operating instructions. - Page 6 Additional information on using the device. Please follow the guidelines in the operating instructions. • Bullet point/information on operating steps and results Tasks to be performed Declaration of conformity (see section ‘Declaration of conformity’): Products that feature this symbol meet the requirements of the EC directives.
-
Page 7: Proper Use
• Do not use the device in extreme environmental conditions. 2. EU Declaration of Conformity MEDION AG hereby declares that this product conforms with the essential requirements and the remaining relevant regulations: •... -
Page 8: Information On Wlan
AT = Austria, BE = Belgium, CZ = Czech Republic, DK = Denmark, EE = Estonia, FR = France, DE = Germany, IS = Iceland, IE = Ireland, IT = Italy, EL = Greece, ES = Spain, CY = Cyprus, LV = Latvia, LT = Lithuania, LU = Luxembourg, HU = Hungary, MT = Malta, NL = Netherlands, NO = Norway, PL = Poland, PT = Portugal, RO = Romania, SI = Slovenia, SK = Slovakia, TR = Turkey, FI = Finland, SE = Sweden, CH = Switzerland, UK = United Kingdom, HR = Croatia... -
Page 9: Information On Trademarks
Intel Core, device, and Core Inside are trademarks of Intel Corporation in the U.S. and/or other countries. The Bluetooth® word mark and logos are registered trademarks of Bluetooth SIG, Inc. and are used by Lenovo/MEDION under licence. Dolby is a registered trademark of Dolby Laboratories. -
Page 10: Operational Safety
WARNING! Impairment to hearing! Listening through earphones or headphones at excessive volume levels, as well as changes to the basic settings of the equaliser, drivers, software or operating system generates excessive acoustic pressure and can lead to damage or loss of hearing. ` Before pressing play, set the volume to the lowest setting. - Page 11 The slots and openings on the device are for ventilation purposes. ` Do not cover these openings, as this could cause the device to overheat or even catch fire. ` Do not insert anything into the device through the slots and openings.
-
Page 12: Never Carry Out Repairs Yourself
4.3. Never carry out repairs yourself CAUTION! Risk of electric shock! There is a risk of electric shock if repairs are not carried out by qualified personnel! ` Never open the housing of the notebook or the mains adapter! ` In the event of a fault, please contact the Service Centre or an approved repair specialist. -
Page 13: Environmental Requirements
• Do not operate the notebook or power adaptor for long periods on your lap or any other body part as the heat dissipation on the underside can result in uncomfortable overheating. • This device is not suitable for use with VDU workstations. 4.5. -
Page 14: Power Supply
4.6. Power Supply CAUTION! Risk of electrical shock! There are live components inside this AC adapter. In the event of an unintentional short circuit of this AC adapter, there is a risk of electrical shock or fire! ` Do not open the housing of the AC adapter. ` Do not cover the mains adapter. -
Page 15: Notes On The Battery
NOTICE! Risk of damage! Unsuitable mains adapters may cause damage to the product. ` Only use the mains adapter supplied in order to charge the device. 4.7. Notes on the Battery To extend your battery’s performance and lifespan and ensure safe operation, you should also observe the guidelines below: •... -
Page 16: Information About The Touchpad
• Please note that only shielded cables that are shorter than 3 metres may be connected to the external interfaces of this notebook. • Do not exchange the supplied cable for another one. Use only the supplied cable as this cable has been extensively tested in our laboratory. -
Page 17: Protecting The Display
4.10. Protecting the Display The display is the most sensitive component part of the device as it consists of thin glass. The display can break if subjected to too much stress. • Do not allow any objects to drop onto the display. •... -
Page 18: Data Backup
4.11. Data backup Back up your data to external storage media before each update. We do not accept any liability for claims for compensation arising from loss of data or any consequential loss or damage. 4.12. Ergonomics Avoid dazzle, reflections and a light-dark contrast that is too strong in order to protect your eyes. - Page 19 50 - 60 cm 40 - 45° 90° In general – change your position frequently (around every 20-30 minutes) and • take regular breaks to avoid tiredness. Back – when sitting at your workstation, your back must be supported by your •...
-
Page 20: Included With Your Notebook
5. Included with your Notebook Risk of suffocation! Packaging material is not a toy! There is a risk of suffocation if plastic packaging is swallowed or used inappropriately! ` Keep packaging material, e.g. plastic film or bags, away from children. ` Check your purchase to ensure all items are included and contact us within 14 days of purchase if anything is missing. -
Page 21: Views And Description Of The Controls
7. Views and description of the controls 7.1. Open Notebook Webcam Microphones Touch screen Operating and Status LEDs Keyboard Fingerprint Sensor (optional) Touchpad... -
Page 22: Left Side
7.2. Left Side Power Supply (DC In) USB Port 3.1 (type C) LED for the mains adapter connection The LED lights up red with a charge level of 0–94%. The LED lights up green with a charge level of over 95%. E series: USB 3.1 port (Type-C) with DisplayPort function (only with a suitable adapter, not included in the scope of delivery) -
Page 23: Bottom View
7.4. Bottom View M.2 2280 Slot Stereo Speaker 7.5. Stand Mode ` To use the notebook in stand mode, open it and turn it over so that it is standing on the keyboard. Set up the display. In this mode keyboard and touchpad are disabled. 7.6. -
Page 24: Presentation Mode
7.7. Presentation Mode You can also use your notebook in presentation mode. This mode is suitable for applications that require little or no operation of the device e.g screen presentations, playing videos and displaying photos. In this mode keyboard and touchpad are disabled. 7.7.1. -
Page 25: Operating And Status Leds
8. Operating and Status LEDs The system displays power supply status and operating modes via LEDs. The operating lights also light up during notebook activity: Operating Indicator This indicator lights up when the system is powered on. Capital Lock This LED lights when CAPS-Lock has been activated. This sets the keyboard to capital letters. -
Page 26: Starting The Notebook
` Switch the notebook on by pressing the on/off switch. The notebook will now start and run through various installation steps. The operating system cannot be used unless you agree to the terms and conditions of use during the installation process. Have the information ready for access to Wi-Fi or your email inbox in case you wish to set this up now. -
Page 27: Ac Power
The following animated windows simply contain information about using the ® new Windows operating system. No entries of any kind may be made during the animation. The Windows ® interface appears after the login process. In the first few days following the initial installation, Windows® may update and configure data (e.g. -
Page 28: General Handling Of Rechargeable Batteries
Select the language again, click Options and install your language pack by clicking the Download button. If further Download buttons are now available, click them in succession – insofar as the respective function is desired – and wait until the installation has finished. -
Page 29: Battery Mode
13.1. Battery Mode Batteries store electrical energy in their cells and then release it again as required. Please charge and discharge the new battery completely two or three times consecutively to ensure that it reaches its optimum performance! 13.1.1. Shipping Mode The notebook is in secure transport mode after being unpacked;... -
Page 30: Power Management (Power Options)
14. Power Management (Power Options) Your notebook offers automatic and user selectable power-saving and energy functions that can be used to optimize battery life and reduce the overall operating costs. If you need help with the power management of your notebook, press the F1 key for Windows Help. -
Page 31: Display
15. Display 15.1. Opening and Closing the Display The special design of the display hinges keeps the display closed without the need for an additional catch. ` To open the notebook, fold the display up to the desired position using your thumb and forefinger. -
Page 32: Data Input
15.3. Connecting an External Monitor The notebook features a USB 3.1 port (Type-C) with DisplayPort function for an external monitor. ` Shut down your Notebook correctly. ` Plug the external monitor’s signal cable (not included) into the USB 3.1 port (type C) with DisplayPort function. -
Page 33: Touchpad
Description Fn + F9 Insert Fn + F10 Print Numeric key block Fn + F11 This key combination activates / deactivates the numeric key block. Scroll This key combination activates / deactivates the scroll function. Fn + F12 Many applications use this function to scroll the screen without moving the cursor 16.2. -
Page 34: Sound System
17. Sound System Your notebook comes with a high-definition audio system with 2 speakers (Dolby ). Personal settings can be configured via the Dolby menu. This ensures optimum support for all current programs and games. 17.1. External Audio Connections Your Notebook has an integrated stereo speaker so you can always reproduce sound without additional devices. -
Page 35: Bluetooth
18.1.1. Requirements A so called Wi-Fi access point may be used as a remote station. A Wi-Fi access point is a radio transmitting device that communicates with your Notebook and controls access to the connected network. Wi-Fi access points are frequently found in large offices, airports, train stations, universities or Internet cafés. -
Page 36: Microsd Card Reader
19. microSD Card Reader The shape and capacity of a memory card can vary depending on the manufacturer. 19.1. Inserting a Memory Card NOTICE! Risk of damage! Incorrectly inserting the memory card may damage the device. ` Slide the memory card into the card slot and make sure that the contacts face upwards. -
Page 37: Slot For M.2 2280 Flash Memory
21. Slot for M.2 2280 flash memory On the base of the notebook, the E series features one slot and the S series features two optional slots for M.2 2280 flash memory. (illustration similar) 21.1. Safety information • Switch off your notebook before removing the cover. •... -
Page 38: Securing Your Notebook
If the new memory does not include an operating system, you must install an appropriate operating system. 21.3. Inserting a flash memory Proceed as follows: ` Switch off the notebook by shutting it down normally. ` Turn the notebook over and place it on a stable and level surface to prevent the notebook from falling. -
Page 39: Resetting The Notebook To Its Factory Settings
22.2. Fingerprint Sensor (optional) 22.2.1. Setting up the fingerprint sensor ` Open the Start menu and click/tap on Settings -> Accounts -> Sign-in options. ` Click/tap on the Set up button under the heading Fingerprint in the section Windows Hello. If you have not yet created a PIN for the sign-in process, this needs to be created first. -
Page 40: System Recovery With Powerrecover (Optional)
23.1. System recovery with PowerRecover (optional) In the event of problems with the installation or other software problems which make it necessary to reinstall the software, Windows® offers three options for reinstalling Windows® on your notebook. First ensure that you have backed up all important data and programs. 23.1.1. -
Page 41: System Restore With Windows Recovery Options
23.2. System Restore with Windows Recovery Options If you experience problems with your device, you can refresh or reset it. Windows is reinstalled when you refresh your device. Your personal files and settings are retained. Windows is also reinstalled when you reset your device. However, your files, settings and apps –... -
Page 42: Uefi Configuration
24. UEFI Configuration The UEFI configuration (basic hardware configuration of your system) provides you with a number of options for the configuration and operation of your notebook. For example, you can modify the operating mode for interfaces, security features or power supply management. The notebook has already been configured by the manufacturer to ensure optimum operation. - Page 43 Why do I need to reinstall my USB device even though I have already done it? • If the device is not operated on the same USB port as the one it was installed in, it automatically receives a new identifier. The operating system then treats it like a new device and tries to reinstall it.
-
Page 44: Customer Service
You’ve checked through the suggestions in the previous section and you’re still having problems with your device? Then call our hotline or contact us at www.medion.com. We’ll be glad to help you. Before contacting your technology centre, however, prepare the following... -
Page 45: Driver Support
So-called optional driver updates can be loaded and installed via the Windows Update function. The current drivers are available on our homepage at http://www.medion.com. Please use the service address for the country where the device was purchased. 26.5. Transport Please note the following information if you wish to transport the Notebook: ` Switch the notebook off. -
Page 46: Cleaning And Maintenance
26.6. Cleaning and Maintenance WARNING! Danger of electric shock! There is a risk of death as a result of electric shock if the housing is open and if parts inside the device are touched! ` Do not open the housing of the notebook. It does not contain any parts requiring maintenance. -
Page 47: Upgrading/Modifying And Repair
26.7.1. Automatic Battery Protection NOTICE! Loss of data! Unintentional or random changes to UEFI settings may affect the stable and safe operation of the system. ` Changes must only be carried out by specialists or very experienced users. If you cannot use your laptop for a longer period of time (e.g. you go on holiday) activate the automatic battery protection manually in your device’s UEFI. -
Page 48: Disposal
However, these approaches were mostly very complicated and varied from one manufacturer to the next. When handling warranty issues for all of its display products, MEDION therefore adheres to the strict and transparent requirements of the standard EN ISO 9241-307, Class II; which has been briefly summarised below. - Page 49 Pixel defect types: • Type 1: permanently illuminated pixel (bright, white dot) even when not activated. A white pixel occurs due to the illumination of all three sub-pixels. • Type 2: non-illuminated pixel (dark, black dot) even when activated. • Type 3: abnormal or faulty red, green or blue sub-pixel (e.g.
-
Page 50: Service Information
In our Service Community, you can meet other users, as well as our staff, and you can exchange your experiences and pass on your knowledge there. You will find our Service Community at http://community.medion.com. • Alternatively, use our contact form at www.medion.com/contact. -
Page 51: Legal Notice
These operating instructions are protected by copyright. Mechanical, electronic and any other forms of reproduction are prohibited without the written permission of the manufacturer. Copyright is owned by the distributing company: MEDION AG Am Zehnthof 77 45307 Essen Germany Please note that you cannot use the address above for returns. Please always con-... -
Page 52: Index
32. Index Keyboard ............31 Shortcuts ..........31 Battery Mode ..........28 Charging the Battery ......28 Licence Agreement ........25 Discharging the Battery ...... 28 Bluetooth®............. 34 Network Operation ........33 Requirements ......... 34 Card Reader Wi-Fi (Wireless Network) ....33 Inserting a Memory Card ....
Need help?
Do you have a question about the Akoya S4403 and is the answer not in the manual?
Questions and answers