Table of Contents
Advertisement
Available languages
Available languages
Quick Links
Advertisement
Table of Contents

Related Manuals for Eskimo ES RTF240SFW


Summary of Contents for Eskimo ES RTF240SFW
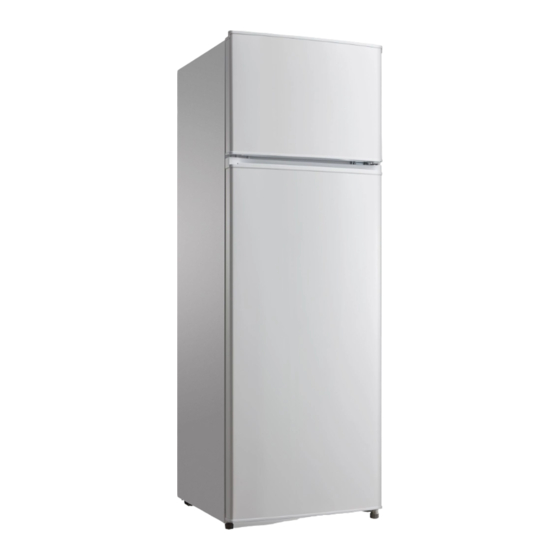
- Page 1 Instruction Manual REFRIGERATOR Model: ES RTF240SFW ES RTF210SFW ES RTF210SFIN...
-
Page 2: Table Of Contents
Contents SAFETY WARNINGS ......................1 INSTALLTION ........................3 Location ........................3 Reversing the Door Swing(optionnal) ..............3 Door Handle Install Illumination (optional) ............... 7 Door Space Requirements ..................7 Levelling the Unit ....................... 8 Cleaning Before Use ....................8 Before Using Your Unit ....................8 Interior Accessories .................... -
Page 3: Safety Warnings
1. SAFETY WARNINGS Warning : risk of fire / flammable materials THIS appliance is intended to be used in household and similar applications such as staff kitchen areas in shops, offices and other working environments; farm houses and by clients in hotels, motels and other residential type environments;... - Page 4 -Leave the shelves in place so that children may not easily climb inside. refrigerator must be disconnected from the source of electrical supply before attempting the installation of accessory. REFRIGERANT and cyclopentane foaming material used for the appliance are flammable. Therefore, when the appliance is scrapped, it shall be kept away from any fire source and be recovered by a special recovering company with corresponding qualification other than be disposed by combustion, so as to prevent damage to the environment or any other harm.
-
Page 5: Installtion
2. INSTALLTION 2.1 Location When selecting a position for your unit you should make sure the floor is flat and firm, and the room is well ventilated. Avoid locating your unit near a heat source, e.g. cooker, boiler or radiator. Also avoid direct sunlight as it may increase the electrical consumption. - Page 6 2) Remove the screws fixed the top-hinge with cross-slot screwdriver. 3) Replace the top-hinge and the top-door limit block and the door bearing bush to the other side. Remove the nut with sleeve.Take off the washer then remove the axes to the other side and fixed.
- Page 7 5) Replace the bottom door bearing bush and the limit block. 6) Replace the bottom hinge to the other side then fix it with screws 7) Replace the mid-hinge. 8) Set the bottom door right position,fix the mid-hinge.
- Page 8 9) Replace the top-hinge. 10) Set the top door right position,fix the top-hinge and the cover. 11) Install the four screw caps and two catches to corresponding position. ·Ensure the Appliance is unplugged and empty. ·Adjust the two leveling feet to their highest position. ·We recommend you have someone to assist you.
-
Page 9: Door Handle Install Illumination (Optional)
2.3 Door Handle Install Illumination (optional) Note: Figures in the user manual are only for reference. The actual product may differ slightly. The refrigerator must be disconnected from the source of electrical supply before attempting the installation of accessory. Step 1: take out two plug pins from the door (Side of door open) Step 2: Install the door handle to the door and fasten it with screws Step 3: Cover screw caps of the handle into screw holes *The picture above is only for reference. -
Page 10: Levelling The Unit
Levelling the Unit To do this adjust the two levelling feet at the front of the unit. If the unit is not level, the door and magnetic seal alignments will not be covered properly. Make sure that the foot touches the ground before use. Look down from the top, clockwise and counterclockwise loosening, tightening. -
Page 11: Interior Accessories
2.8 Interior Accessories Various glass or plastic storage shelves are included with your appliance - different models have different combinations. You should always slide one of the full size glass storage shelves into the lowest set of guides, above the fruit and vegetable containers, and keep it in this position. To do this, pull the storage shelf forward until it can be swivelled upwards or downwards and removed. -
Page 12: Operation
4. OPERATION 4.1 Switching On Your Unit Setting“Off” :UnitOff Setting“Min” :Less Cool Temperature Setting“Med” or “MID” :Normal Operation(adequate for most situations) Setting“Max” :Coolest Temperature ◆During high ambient temperatures e.g. on hot summer days. It may be necessary to set the thermostat to the Coolest setting(position“Max”).This may cause the compressor running continuously in order to maintain a low temperature in the cabinet. -
Page 13: Cleaning
5. CLEANING Defrosting NOTE THIS UNIT DOES NOT HAVE AN AUTO DEFROST SYSTEM. Please use a plastic ice shovel when clearing the frosting of the evaporator. Do not use metal sharp objects. 5.2 Cleaning the Interior and the Exterior of the Unit ... -
Page 14: Maintenance
6. MAINTENANCE 6.1 Changing the Internal Light Lamp replacement by professionals. 6.2 Care When Handling / Moving Your Unit Hold the unit around its sides or base when moving it. Under no circumstances should it be lifted by holding the edges of the top surface. 6.3 Servicing The unit should be serviced by an authorized engineer and only genuine spare parts should be used. -
Page 15: For Energy Saving
seals of the freezer when the ambient humidity is large, this is a normal phenomenon, and the condensa�on can be wiped away with a dry towel. ◆Buzz: Buzz will be generated by running compressor specially when star�ng up or shu�ng down. - Page 16 Part description Purchased by Minimum availability period...
- Page 17 Εγχειρίδιο οδηγιών Ψυγείο ΜΟΝΤΕΛΟ: ES RTF240SFW ES RTF210SFW ES RTF210SFIN...
- Page 18 Αλλαγή φοράς ανοίγματος πόρτας ................3 Εγκατάσταση λαβής ....................3 Απόψυξη........................
- Page 19 ΟΔΗΓΙΕΣ ΑΣΦΑΛΕΙΑΣ Προειδοποίηση: κίνδυνος πυρκαγιάς / εύφλεκτων υλικών Αυτή η συσκευή προορίζεται για χρήση σε οικιακές και παρόμοιες εφαρμογές, όπως -κουζίνα προσωπικού σε καταστήματα, γραφεία και άλλα περιβάλλοντα- αγροικίες και πελάτες σε ξενοδοχεία, μοτέλ και άλλα περιβάλλοντα τύπου κατοικίας - περιβάλλοντα τύπου...
- Page 20 Κατά το πρότυπο EN: Αυτή η συσκευή μπορεί να χρησιμοποιηθεί από παιδιά ηλικίας από 8 ετών και άνω και άτομα με μειωμένες φυσικές αισθητικές ή διανοητικές ικανότητες ή έλλειψη εμπειρίας και γνώσης, εάν έχουν επίβλεψη ή οδηγίες σχετικά με τη χρήση της συσκευής...
- Page 21 2 ΕΓΚΑΤΑΣΤΑΣΗ 2.1 Τοποθεσία Επιλέξτε ένα χώρο καλά αεριζόμενο με σταθερό και σκληρό πάτωμα, καθώς και καλό εξαερισμό. Μην τοποθετείτε τη συσκευή δίπλα σε πηγές θερμότητας όπως φούρνους, καυστήρες και καλοριφέρ. Μην εκθέτετε τη συσκευή απευθείας σε ηλιακό φως. Πολύ χαμηλή εξωτερική θερμοκρασία μπορεί να προκαλέσει...
- Page 22 Αφαιρέστε τις βίδες με το κατσαβίδι τύπου Phillips. 3) Επανατοποθετήστε τον πάνω μεντεσέ, το στοπ και τον πλαστικό δακτύλιο της πάνω πόρτας στην άλλη πλευρά. A. Αφαιρέστε το παξιμάδι. Βγάλτε την ροδέλα, μετακινήστε τον άξονα στην απέναντι πλευρά και σφίξτε καλά.
- Page 23 Σημείωση:η γωνία κλίσης πρέπει να είναι μικρότερη από 45°. 5) Επανατοποθετήστε την κάτω πόρτα, τον δακτύλιο και το στοπ. 6) Επανατοποθετήστε τον κάτω μεντεσέ στην άλλη πλευρά και σταθεροποιήστε με τις βίδες 7) Επανατοποθετήστε το μεσαίο μεντεσέ.
- Page 24 8) Τοποθετήστε την κάτω πόρτα στη δεξιά θέση και σταθεροποιήστε το μεσαίο μεντεσέ 9) Επανατοποθετήστε τον πάνω μεντεσέ. 10) Τοποθετήστε την πάνω πόρτα στη δεξιά θέση και σταθεροποιήστε τον πάνω μεντεσέ και το κάλυμμα. 11) Τοποθετήστε τα πλαστικά καπάκια και τα καλύμματα στις θέσεις τους. ·Βεβαιωθείτε...
- Page 25 2.3 Εγκατάσταση χειρολαβής πόρτας (δεν είναι διαθέσιμο σε όλα τα μοντέλα) Σημείωση: Οι εικόνες στο παρόν εγχειρίδιο είναι μόνο για αναφορά. Το πραγματικό προϊόν ενδέχεται να διαφέρει. Το ψυγείο πρέπει να είναι αποσυνδεμένο από την παροχή ρεύματος πριν από την αεγκατάσταση της χειρολαβής. Βήμα...
- Page 26 2.4 Ευθυγράμμιση της συσκευής Ευθυγραμμίστε σωστά τη συσκευή με τα 2 ρυθμιζόμενα πόδια στο μπροστά μέρος της. Αν η συσκευή δεν είναι σωστά ευθυγραμμισμένη η πόρτα δεν θα κλείνει σωστά. Βεβαιωθείτε ότι τα πόδια ακουμπούν σωστά στο πάτωμα. Γυρνώντας τα προς την φορά των δεικτών του ρολογιού τα χαλαρώνετε, γυρνώντας...
- Page 27 2.7 Εσωτερικά εξαρτήματα Το ψυγείο σας πριλαμβάνει ράφια και θήκες από γυαλί ή πλαστικό. Ανάλογα με το μοντέλο μπορεί να υπάρχουν διάφοροι συνδυασμοί αυτών. Θα πρέπει να τοποθετήσετε ένα από τα γυάλινα ράφια μεγάλουμεγέθους στο κάτω οδηγό, ακριβώς πάνω από το καλάθι φρούτων και λαχανικών και να το διατηρήσετε εκεί. Για...
- Page 29 5.1 Απόψυξη ΣΗΜΕΙΩΣΤΕ ΟΤΙ Η ΣΥΣΚΕΥΗ ΔΕΝ ΕΧΕΙ ΑΥΤΟΜΑΤΗ ΑΠΟΨΥΞΗ. 5.2 Καθαρισμός του εξωτερικού και του εσωτερικού της συσκευής Οι σκόνες πίσω από το ψυγείο και στο έδαφος πρέπει να καθαρίζονται έγκαιρα για να βελτιωθεί το ψυκτικό αποτέλεσμα και η εξοικονόμηση ενέργειας. Ελέγχετε...
- Page 31 Χρήσιμες συμβουλές ◆Η συσκευή μπορεί να εκπέμπει θερμότητα κατά την λειτουργία ειδικά την περίοδο του καλοκαιριού. Αυτό προέρχεται από τις εκπομπές του συμπιεστήρα και είναι φυσιολογικό. ◆Υδρατμοί/πάχνη. Μπορεί να δημιουργηθεί πάχνη στο εξωτερικό του ψυγείου και στο λάστιχο της πόρτας, όταν η σχετική υγρασία του χώρου είναι υψηλή. Αυτό είναι φυσιολογικό, απλά σκουπίστεμε ένα...
- Page 32 Πίνακας 1 – Κλιματικές κλάσεις Κλάση Σύμβολο Εύρος τιμών θερμοκρασίας περιβάλλοντος Εκτεταμένη εύκρατη κλάση Από 10 C έως 32 Εύκρατη κλάση Από 16 C έως 32 Υποτροπική κλάση Από 16 C έως 38 Τροπική κλάση Από 16 C έως 43 Εκτεταμένη...
Need help?
Do you have a question about the ES RTF240SFW and is the answer not in the manual?
Questions and answers