
Subscribe to Our Youtube Channel
Related Manuals for Dacor Epicure ESG366SBK


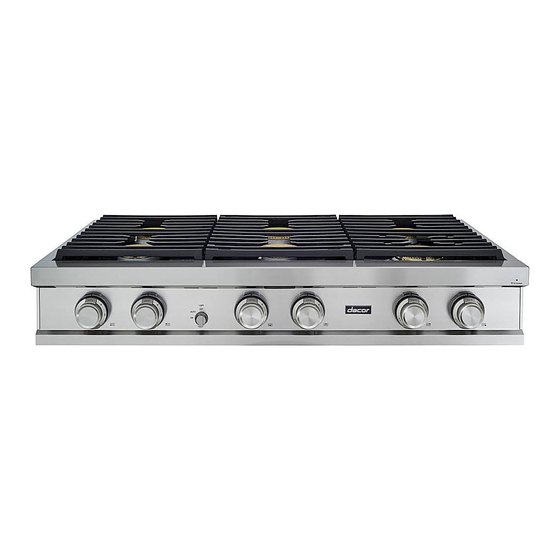
Summary of Contents for Dacor Epicure ESG366SBK
-
Page 1: Installation Instructions
Installation Instructions Epicure Cooktop ® Models: ESG366, ESG486 Part No. 65162 Rev. K... -
Page 2: Table Of Contents
(877) 337-3226 (U.S.A. and Canada) Monday — Friday 6:00 . to 4:00 All specifications are subject to change without notice. Dacor assumes no liability for changes to specifications. Table of Contents Installation Instructions ... 8 Unpack the Cooktop ... 8 Cooktop Installation ... -
Page 3: Important Safety Instructions
Use common sense and caution when installing, maintaining or oper- ating this or any other appliance. • Always contact the Dacor Customer Service Team about problems and conditions that you don’t under- stand. See Customer Service Information. Safety Symbols and Labels... -
Page 4: General Safety Precautions
Installations with less than 2 1/2” (64 mm) from the rear of the cooktop to a combustible material must use Dacor backguard model AEB3609, AEB3612, (for model ESG366) AEB4809, AEB4812 (for model ESG486) or a non-combustible material. See the lat- est version of ANSI Z223.1. -
Page 5: Installation Requirements
Installation Requirements WARNING • Observe all governing codes and ordinances during planning and installation. Contact your local building department for further information. • To prevent an electric shock hazard, the power supply must meet the specifications stated below. The electrical and gas supply data on this page is for refer- ence only. -
Page 6: Cabinet And Countertop Layout
• For installations with a raised vent, install this appliance only with the approved Dacor raised vent models listed on page 6. Gas and Electric Service Location • The gas supply piping, gas shut-off valve and the elec- trical outlet must be located so they do not interfere with the cooktop when it is installed. -
Page 7: Cabinet/Cutout Dimensions
Installation Requirements Cabinet/Cutout Dimensions 10” (254 mm) to combustible side wall Min. both sides Cooktop platform Cabinet/Countertop Dimensions - Front View Hood 30” (762 mm) Min. 18” (457 mm) utility access 1, 3 Min. Top of finished counter Cabinet tolerances +1/16” -0 (+1.6 mm, 0) unless otherwise noted. 1 1/2”... - Page 8 Installation Requirements Cabinet/Countertop Dimensions (cont.) Cutout tolerances +1/16” -0 (+1.6 mm, 0) unless otherwise noted. Increase countertop and overhang additional 2 1/2” (64 mm) Min. for combustible rear wall above countertop countertop overhang 1/2” (13 mm) countertop overhang 24 5/8” (625 mm) 11 7/16”...
- Page 9 Stiffener 3/8” Min. (10 mm) space behind raised vent chassis to clear stiffener Dacor approved raised vent Cabinet/Countertop with Raised Vent - Side View Non combustible rear wall recommended Open to below to allow for raised vent, gas and electrical connections 1”...
-
Page 10: Installation Instructions
• Grates (3) • Burner caps (6) • Burner rings (6) • Hold down bolts/washers (2 sets) • Regulator • Dacor Stainless Steel Cleaner • Igniter cleaning brush • Literature kit • WOK ring • Griddle • Simmer plate •... -
Page 11: Gas Line Connection
Installation Instructions Gas Line Connection WARNING • Verify that the gas supply meets specifications before connection. See page 3. • The maximum gas supply pressure to the regulator must never exceed ½ pounds per square inch (psi) or 3.5 kPa. •... -
Page 12: Verifying Proper Operation
Be sure to have the model and serial numbers available when you call. See the inside cover for location. Dacor is not responsible for the cost of correcting problems caused by a faulty installation. OFF position... -
Page 13: Installation Checklist
• Proper installation is the responsibility of the hom- eowner. The importance of proper installation of your Dacor cooktop cannot be overemphasized. □ Is the electrical outlet for the cooktop grounded and located according to these instructions and in accor- dance with all applicable electrical codes? See pages 3 and 4. -
Page 14: Wiring Diagram
Wiring Diagram... - Page 16 Dacor ● Phone: (800) 793-0093 ● FAX: (626) 403-3130 ● www.Dacor.com...
Need help?
Do you have a question about the Epicure ESG366SBK and is the answer not in the manual?
Questions and answers