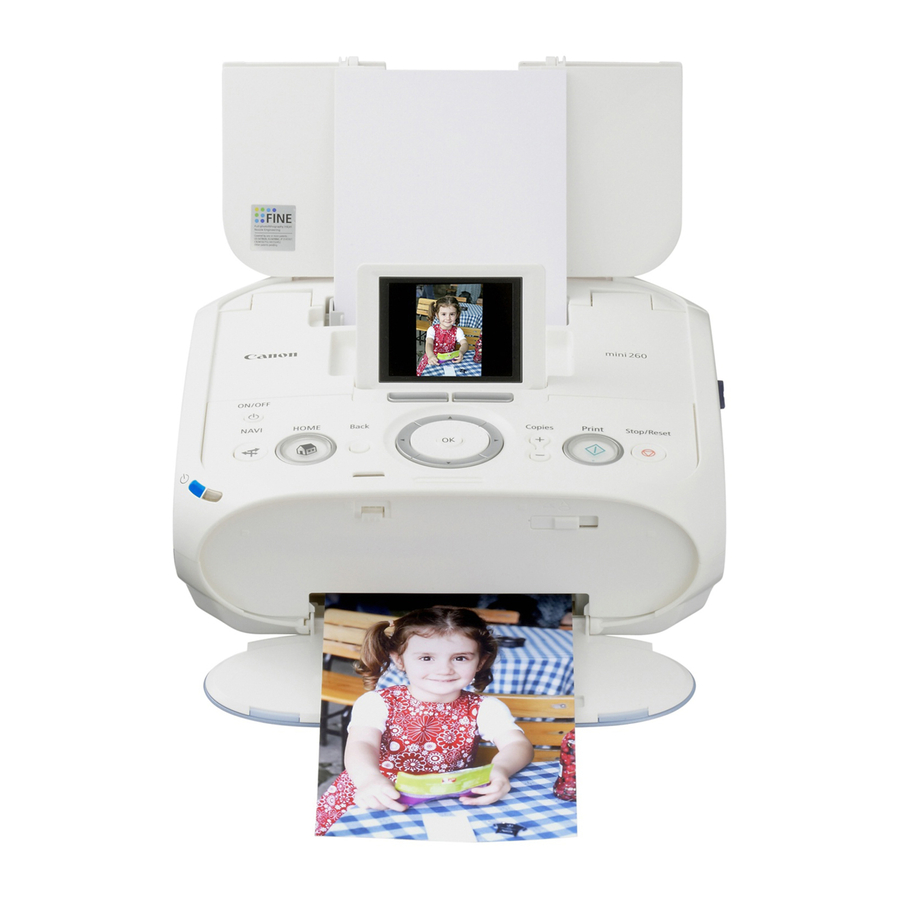
Canon PIXMA mini260 Photo Printing Manual
Canon pixma mini260: printing guide
Hide thumbs
Also See for PIXMA mini260:
- Photo printing manual (105 pages) ,
- Service manual (57 pages) ,
- Easy setup instructions (2 pages)

Related Manuals for Canon PIXMA mini260


Summary of Contents for Canon PIXMA mini260
-
Page 1: Table Of Contents
Photo Printer Photo Printing Guide Table of Contents Introduction Before Printing Printing from the Memory Card Printing Photographs Directly from a Digital Camera Printing Photographs from a Wireless Communication Device Printing Maintenance Changing the Printer Settings Troubleshooting Appendix QT5-0760-V01... -
Page 2: Getting Help From Canon
CarePAK offers toll-free Canon technical support and includes Canon’s superb InstantExchange product replacement program. For further information about extend- ing your Canon service and support, call (1-800-385-2155), or visit our Web site at www.canonesp.com. CarePAK must be purchased during your product’s warranty period. -
Page 3: Exif Print
® Program ® Partner, Canon Inc. has determined that this product meets the The International ENERGY STAR global program that promotes energy saving through the use of computer and other office equipment. The program backs the development and dissemination of products with functions that effectively reduce energy consumption. -
Page 4: Introduction
“IrDA Feature Trademark” is owned by the Infrared Data Association and used under license therefrom. “Bluetooth” is a trademark of Bluetooth SIG, Inc., U.S.A and are licensed to Canon Inc. Copyright ©2006 CANON INC. All rights reserved. No part of this publication may be transmitted or copied in any form whatsoever without the express written permission. -
Page 5: Before Printing
Slide to the right to open the Printer Cover. *The Bluetooth unit is not available to some regions due to the law or the regulations of the countries. For details, contact a Canon service representative. Auto Sheet Feeder Load paper here. -
Page 6: Rear View
Do not pull up this lever after installing the Print Head. Before Printing Carrying Handle Pulls out this handle to carry the printer. Paper Thickness Lever Move to the right when printing. Move to the left if ink smudges or the printed sur- face is stained. - Page 7 See “Replacing an Ink Tank” on page 48. If the printing is not blurred, you can continue printing for a while, but the printer may not be able to print properly along the way. We recommend you to have a replacement ink tank available.
- Page 8 Allows you to make a selection. For example, selecting a photo to be printed, selecting a menu item or other settings. Also, press to resume printing once an error has been resolved. The printer will then initialize ready for printing.
-
Page 9: Basic Operation For The Operation Panel
Basic Operation for the Operation Panel (A) HOME button (B) Easy-Scroll Wheel (C) OK button Easy-Scroll Wheel Turn the Easy-Scroll Wheel left or right to select the setting item. The selected item is highlighted or rounded by the frame. You can also use the setting item. - Page 10 Printing Becomes Faint or Colors are Incorrect” on page 42 or “Changing the Printer Settings” on page 52. Sticker print: Print your favorite photo with a frame on the Canon genuine Photo Stickers. See “Printing Stickers from a Photo—Sticker print” on page 21. Slide show: You can display photos stored in a memory card on the LCD sequentially.
- Page 11 Other Buttons (A) NAVI button (B) Function buttons NAVI button Find out easily the menu you want from the navigation menu. Select the menu you want, then press the OK button. Function Buttons Two Function buttons enable you to select the menu displayed at the lower corner of the LCD. The different screen will be displayed depending on the screen on the LCD when you press the Function button.
-
Page 12: Turning On The Printer
The printer is not operating. Important Data in the memory card may be damaged if you remove the memory card or turn off the printer when the Access lamp is flashing. Turn off the printer by pressing the ON/OFF button. -
Page 13: Loading Printing Paper
Paper Handling Do not use the following types of paper. Using such paper will not only produce unsatisfactory results, but can also cause the printer to jam or malfunction. Also, do not use a cut paper or memo pad. Folded, curled or wrinkled paper... -
Page 14: Loading Paper
Loading Paper Turn on the printer. (1) Open the Paper Feed Tray and fold it in half. (2) Press the ON/OFF button. See “Turning On the Printer” on page 10. Flatten the four corners of the paper before loading it. - Page 15 Load the paper. (3) Slide the Paper Guide against the left side of the stack of paper. Photo stickers Note Do not touch the printed surface until the ink dries. For specific drying times, refer to the instructions packaged with your media. (1) Insert the paper into the Auto Sheet Feeder with print side facing up.
- Page 16 When printing on sticker paper, select Sticker print. When printing photos in a mobile phone or a PDA on sticker paper, see “Printing Photographs from a Wireless Communication Device” on page 36. Note You may not be able to purchase some Canon genuine papers depending on your country. Before Printing Page Size [4"×6" (101.6×152.4)] [Photo Paper Pro] [Wide 4×7.1 (101×180)] [Photo Paper Pro]...
-
Page 17: Using A Memory Card
If you shot or saved photos on a type of memory card that is not guaranteed operation to be used on your digital camera, the image may be unreadable on this printer. Attempting to read such data on this printer may damage the data. For information on memory cards that your digital camera guarantees operation, refer to the manuals supplied with your digital camera. -
Page 18: Inserting A Memory Card
Inserting a Memory Card This printer is equipped with two Card Slots to meet various types of memory cards. Refer to the illustration below to find the Card Slot corresponds to your memory card. Check the card face and insert it gently until it reaches the bottom and the Access lamp turns on. -
Page 19: Removing A Memory Card
Removing a Memory Card Note If you use the printer connected to your computer, follow the instructions for removal of the memory card from the computer. For the procedure, refer to “Using Data in the Memory Card on the Computer” of the User’s Guide on-screen manual. -
Page 20: Printing From The Memory Card
Note If you leave the printer more than five minutes without using any button on the operation panel, the LCD goes into sleep mode automatically. Press the OK button to resume the LCD. When using the optional battery, the printer will be turned off automatically after five minutes from when the LCD goes into sleep mode. - Page 21 Select the photo to print and specify the number of copies for each photo. (1) Use the Easy-Scroll Wheel or the (2) Use the + or - button to specify the copies to print. (3) Repeat steps (1) and (2) to specify the number of copies for each photo. (4) Press the OK button.
- Page 22 Printing Multiple Photos on One Sheet of Media—Layout print You can print the specified photo in the specified layout (Borderless or Bordered ×2/×4/×8/Half, borderless/Half, bordered/Half, borderless (w/lines)/Half, bordered (w/lines)/Album×4 (photos on right)/Album×4 (photos on left)). ×2 Borderless Bordered Prepare to print. See “Printing Photographs”...
- Page 23 Press the Stop/Reset button to cancel printing. Printing Stickers from a Photo—Sticker print You can print your favorite photo with a frame on the Canon genuine Photo Stickers. Prepare to print. See “Selecting Photographs to Print—Select and print” on page 18.
- Page 24 Use the Easy-Scroll Wheel or the press the OK button. Select the photo to print. (1) Use the Easy-Scroll Wheel or the (2) Press the OK button. The screen to select a frame will be displayed. Note You can do... See “Changing the Display—Change display”...
-
Page 25: Print Settings
Print Setting Screens This section describes about the print setting screen and the print confirmation screen displayed during the operation to print photos on a memory card. (1) Specify the paper size. Credit card/4"x6" (101.6x152.4)/Wide 4x7.1 (101x180) (2) Specify the media type. Glossy Photo Paper/Matte Photo Paper/Photo Plus Glossy/Photo Paper Pro (3) Specify the print quality. - Page 26 Home button > Special photo print > DPOF print Note This printer allows you to make the following DPOF settings: – Image format: CIFF, Exif (Tiff), and JFIF – Print type - Standard: The Photos for which you specified Standard using the DPOF function are printed.
- Page 27 Printing with Adjusted Color Balance—Color balance print This function allows you to print a sample of a photo in 9 different hues on a single sheet of paper. You can then select the hue you like from the sample and print a final copy. Procedure: Home button >...
-
Page 28: Other Useful Functions
Other Useful Functions You can print your favorite photo as a postcard or sticker using the following features. “Changing the Display—Change display” on page 26 “Display photos sequentially—Slide show” on page 26 “Searching for Photos with the Shooting Date—Select date range” on page 27 “Printing a Specified Area—Trimming”... - Page 29 Searching for Photos with the Shooting Date—Select date range When there are many photos stored on the memory card, you can select photos to display or print by specifying the shooting date with the search function. Note You can use the search function to specify a date or date range from the Select and print, Color balance print in Special photo print, or Sticker print menus to display or print only photos that match the dates you set.
-
Page 30: Printing A Specified Area—Trimming
Specify a date range. If you select One date only If you select Select date range Note The date that you specified is displayed in the format that you set at Date display in Other settings. See “Date display” on page 53. Press the Function button (f2/Cancel selected date range) to cancel the searching date range, and then press the OK button. - Page 31 Trim the sections you want to print. buttons: you can move the trimming area. Easy-Scroll Wheel: you can enlarge or reduce the trimming frame. Turn clockwise to enlarge or counterclockwise to reduce the cropping frame size. Function button (f2/Rotate frame): you can rotate the trimming frame. To switch the cropping frame between portrait and landscape orientations, press this button.
- Page 32 Photo opt. pro ON/Photo opt. pro OFF If you select Photo opt. pro ON, Photo optimizer pro function automatically corrects the image brightness and color. Noise reduction ON/Noise reduction OFF If you select Noise reduction ON, digital camera noise (which may be seen in dark areas or areas such as sky) is reduced.
-
Page 33: Printing Photographs Directly From A Digital Camera
Caution Do not connect any equipment other than PictBridge compliant devices or the Bluetooth unit (option) to the Direct Print Port of the printer. If you do so, electric shock, fire, or damage to the device could result. Note When producing photos with the digital device connected to the printer, it is advisable to use the AC adapter supplied with the device. -
Page 34: Printing Photographs Directly From A Pictbridge Compliant Device
Default setting explained below is applied for the setting item. * In the following description, names of settings items are given according to those used in Canon-brand PictBridge compliant devices. Setting item names may be different depending on the brand or model of your device. - Page 35 10×15 cm / 4"×6" (Default) 5.4×8.6 cm / Credit Card 10.1×18.0 cm / 4"×7.1" * Sticker media manufactured by Canon. Set Paper size to 10×15 cm/4"×6" when printing stickers. About “Layout” and “Trimming” For Layout, when you have selected Default (selections based on the printer setting), the printer operates based on the Settings screen.
- Page 36 When you have selected Default (selections based on the printer setting), the printer operates based on the PictBridge settings screen. If you use a Canon PictBridge-compliant device, you can select VIVID, NR, Face or Red eye. (Note that these options cannot be selected for some models.) Note When VIVID is selected, green and blue portions of photos are printed vividly.
- Page 37 (4) Repeat steps (1) and (2) to specify each item. (5) After specifying the necessary items, select OK, and then press the OK button. With the specified settings, you can print from the PictBridge compliant device. PictBridge Setting Items: (1) Specify the paper size to print from the PictBridge compliant device. (2) Specify the media type to print from the PictBridge compliant device.
-
Page 38: Printing Photographs From A Wireless Communication Device
If you have a mobile phone or a PDA with an infrared port for wireless data transmission, you can print photos through a cordless connection with the printer. If the optional Bluetooth unit BU-20 is connected to the printer, you can also print photos through Bluetooth communication. -
Page 39: Printing Photographs From A Wireless Communication Device
Printing on paper other than sticker: Bordered, x 2, x 4, x 8 Borderless, x 2, x 4, x 8 Note When printing on Canon Genuine Photo Stickers, make the settings as below. Page size Stickers Printing Photographs from a Wireless Communication Device... -
Page 40: Performing Infrared Communication
7.9 inch (20 cm). Note The effective angle of the IrDA Port of the printer is about 10° from the central axis in both vertical and horizontal directions. The allowable distance of communication with the printer depends on the mobile phone or the PDA you use. -
Page 41: Performing Bluetooth Communication
It does not support printing video files. Depending on your device, it may not print data stored in a memory card. Depending on the size of a photo, it may take a while for this printer to start to print after starting the infrared transfer. - Page 42 PDA” on page 36. Start printing from a mobile phone or a PDA. When you select the device name, select the initial value “Canon mini260-1”. If you are required to enter the passkey, enter the initial value “0000”. You can change the device name of the printer or passkey in the Bluetooth settings screen on the printer.
- Page 43 Changing the Bluetooth Settings—Bluetooth settings You can change settings such as device name of a printer and passkey in Bluetooth settings. Turn on the printer. See “Turning On the Printer” on page 10. Connect the Bluetooth unit BU-20 to the Direct Print Port.
-
Page 44: Printing Maintenance
See “Replacing an Ink Tank” on page 47. If the printing is not blurred, you can continue printing for a while, but the printer may not be able to print properly along the way. We recommend you to have a replacement ink tank available. -
Page 45: Printing The Nozzle Check Pattern
Prepare to print. (1) Turn on the printer. See “Turning On the Printer” on page 10. (2) Load the supplied paper or Canon 4"×6"/101.6×152.4mm paper into the Paper Support. See “Loading Printing Paper” on page 11. Print the Nozzle Check Pattern. -
Page 46: Print Head Cleaning
Clean the Print Head if a missing or white stripes appear in the nozzle check pattern. Cleaning the Print Head consumes ink, so perform Cleaning only when necessary. Turn on the printer. See “Turning On the Printer” on page 10. Start Print Head Cleaning. (1) Display the Settings screen. -
Page 47: Print Head Deep Cleaning
Nozzle Check Pattern, and verify the Print Head Nozzles. See “Printing the Nozzle Check Pattern” on page 43. Note If Print Head Deep Cleaning does not resolve the problem, the Print Head may be worn out. Contact a Canon service representative. Printing Maintenance... -
Page 48: Aligning The Print Head
If print quality is poor, adjust the Print Head position. It may solve the problem. Prepare to print. (1) Turn on the printer. See “Turning On the Printer” on page 10. (2) Load two sheets of supplied paper or Canon genuine 4"×6"/101.6×152.4mm paper in the Auto Sheet Feeder. Note The following papers are recommended. -
Page 49: Replacing An Ink Tank
The printer will not print properly if the wrong ink tank is used. Ink Tank: CLI-36 Color Getting the Ink Level Information You can confirm the ink level in ink tank by the ink lamp. Open the Printer Cover to confirm how the ink lamp light or flash. Ink is low: ...Repeats The ink lamp flashes slowly (at around 3-second intervals). - Page 50 * With this operation, releasing the function for detecting the remaining ink level is memorized. Please be advised that Canon shall not be liable for any malfunction or trouble which may be caused by continuation of printing under the ink out condition.
- Page 51 The Print Head Holder moves to the center. Important If the Printer Cover is left open for more than 10 minutes, the Print Head Holder moves to the right. Close and reopen the Printer Cover to return the holder to the center.
- Page 52 Dispose of the protective cap. Important Do not touch the electrical contacts (A) on the ink tank. Doing so can cause the printer to malfunction or become unable to print. Do not reattach the protective cap once you have removed it.
- Page 53 Print Head. (2) Push down on the clicks into place. Ensure that the ink lamp is lit red. (1) Lift the Printer Cover and pull the Lock Bar close. (2) Close the Printer Cover firmly until it clicks into place.
-
Page 54: Changing The Printer Settings
Changing the Printer Settings This section describes the procedure to change the settings in the Device settings screen, taking the steps to specify Date display as an example. Turn on the printer. Display the Device settings on page 7. (1) Select Device settings, then press the OK button. -
Page 55: Wireless Print Settings
Bluetooth settings For details, see “Changing the Bluetooth Settings—Bluetooth settings” on page 41. PictBridge settings For details, see “Confirming and Changing PictBridge Print Settings from the Printer” on page 34. Other settings Date display Changes the display format of shooting dates when printed. -
Page 56: Language Selection
Selects whether to allow data to be written onto memory cards from a computer. Important When you write the data on the memory card, connect the printer with the AC adapter. The printer cannot be set to the Read/write mode be set to the not remove the AC adapter when you write the data on the memory card. -
Page 57: Troubleshooting
Troubleshooting Let's take a look at countermeasures against problems which may occur during use of the printer. Note Here, we will discuss errors indicated on the LCD, problems that might occur during direct printing from the digital camera. If you cannot find the symptom corresponding to a certain problem, refer to the User’s Guide on-screen manual. - Page 58 * With this operation, releasing the function for detecting the remaining ink level is memorized. Please be advised that Canon shall not be liable for any malfunction or trouble which may be caused by continuation of printing under the ink out condition.
- Page 59 If you are attaching the optional battery, remove it once. After a while, plug the power cord of the printer back in, and then turn on the printer. If the same error occurs, contact a Canon service representative. The Card Slot is set to Read/write mode.
- Page 60 Auto Sheet Feeder. Press the OK button on the printer to dismiss the error message, then load two sheets of supplied paper or Canon genuine 4" x 6"/ 101.6 x 152.4 mm paper* in the Auto Sheet Feeder. Paper is not loaded in the Auto Sheet Feeder.
- Page 61 If the Automatic Print Head Alignment does not work or if you wish to adjust the print heads manually, follow the procedure below. 1. Press the ON/OFF button to turn on the printer, and then load two sheets of supplied paper or Canon genuine 4" x 6"/101.6 x 152.4 mm paper* in the Auto Sheet Feeder.
-
Page 62: Lcd Cannot Be Seen At All
Troubleshooting Action If the POWER lamp on the Operation Panel is off The printer is not powered on. Connect the power cord and press the ON/OFF button. The printer will power on and the LCD will display a message. If the POWER lamp is lit On the Operation Panel, press the OK button. -
Page 63: Cannot Install The Printer Driver
If the CD-ROM icon is not displayed, restart your computer. If the icon is still not displayed, try different disks and see if they are displayed. If other disks are displayed, there is a problem with the Setup CD- ROM. Contact a Canon service representative. Troubleshooting... -
Page 64: Cannot Connect To Computer Properly
Follow the procedure described in the Easy Setup Instructions (Setup Sheet) for proper installation. If the drivers were not installed correctly, uninstall the printer driver, restart your computer, and then reinstall the drivers. Refer to the Printer Driver Guide on-screen manual. -
Page 65: Print Results Not Satisfactory
Media Type setting in the Operation Panel does not match the actual type of paper. Print Head nozzles are clogged. Open the Printer Cover and check if the ink lamp is lit red. See The media is loaded with the wrong side facing upwards. -
Page 66: Printed Paper Curls Or Has Ink Blots
If the nozzle check pattern does not print out properly, check if any of the missing colors are due to empty tank. If there is plenty of ink and the printer does not print, clean the Print Head and then print the nozzle check pattern to check that ink is ejecting properly. - Page 67 If you do not return the lever, the distance between the Print Head and printing paper stays broadened and the inside of the printer will easily get dirty. The image quality also may be decreased. , and cover it with a non-...
-
Page 68: Colors Are Uneven Or Streaked
Colors Are Uneven or Streaked Cause Print quality is not set appropriately. Printer Does Not Start or Stops During Print Jobs Printing Does Not Start Cause Ink tank is empty. Ink tank is not installed securely. -
Page 69: Paper Does Not Feed Properly
For details on cleaning, see “Cleaning the Roller (Roller Cleaning)” of the User’s Guide on-screen manual. Make sure of the following when you load paper in the printer. When loading two or more sheets of paper, align the edges of the sheets before loading. -
Page 70: Paper Jams
Be careful not to touch the components inside the printer. If you cannot pull the paper out, turn the printer off and turn it back on. The paper will be ejected automatically. (2) Reload the paper in the printer, and press the OK button on the printer. -
Page 71: The Power Lamp (Blue) And Alarm Lamp (Orange) Flash Alternately
Disconnect the printer cable from the printer, turn the printer off, and then unplug the printer from the power supply. Plug the printer back in and turn the printer back on after leaving it for a while. If the problem is not resolved, contact your Canon Service representative. - Page 72 Stop/Reset button for at least 5 seconds, and then release it. * With this operation, releasing the function for detecting the remaining ink level is memorized. Please be advised that Canon shall not be liable for any printer malfunction or damage caused by refilled ink tank.
-
Page 73: Cannot Print Properly Through Wireless Communication
Camera Error Message Hardware Error Printer error To resume printing, you can press the OK button on the printer instead of selecting Continue. Cannot Print Properly through Wireless Communication Cause Printer placement is inadequate. During infrared communication, infrared rays were blocked. - Page 74 Action You can establish a connection between a mobile phone or a PDA and the printer up to a distance of approximately 33 feet/ 10m for Bluetooth communication, however the following conditions may affect both your ability to establish a connection...
-
Page 75: Appendix
You can view the on-screen manuals in the following way: To view the on-screen manual, double-click the mini260 On-screen Manual shortcut icon on the desktop, or click Start > All Programs (or Programs) > Canon mini260 Manual > mini260 On- screen Manual. -
Page 76: For The Optional Bluetooth Unit Users
Do not attempt to use the product in any way not described in this manual. Warning You may cause an electric shock/fire or damage the printer if you ignore any of these safety precautions. Caution You may cause injury or damage the printer if you ignore any of these safety precautions. - Page 77 Specifications When using with PIXMA mini260, the specification of Bluetooth unit BU-20 is as follows. Communication method Output Communication distance Profile Frequency band Transmission speed Power supply Power consumption Operating temperature Operating humidity Dimensions Weight About Option Portable Kit LK-61 The Portable Kit LK-61 is the kit to operate the printer with the battery, and composed of a battery attachment and battery.
-
Page 78: Specifications
Photo Paper/Photo Stickers*), 5.4×8.6 cm/Credit Card (Glossy Photo Paper Card Size)/Wide (Photo Paper Pro) * Canon genuine sticker. Printing on this paper is available only when the Layout function on your camera has a 16-up option. See “Using Genuine Media” on page 14. - Page 79 Default (Off: No trimming), On (follow camera’s setting), Off Default (selections based on the printer setting), “VIVID”*, “NR” (Noise Reduction)*, “Face”*, “Red eye”* * If using a Canon PictBridge-compatible Camera, you can select it. Default (Off: No printing), Date, File No., Both, Off Minimum System Requirements...
- Page 80 Additional System Requirements for On-screen Manual Browser: Windows HTML Help Viewer ® Note: Microsoft Internet Explorer 5.0 or later must be installed. The On-screen Manual may not be displayed properly depending on your operating system or Internet Explorer version. We recommend that you keep your system up to date with Windows Update.
-
Page 81: Safety Precautions
Please read the safety warnings and cautions provided in this manual to ensure that you use your printer safely. Do not attempt to use printer in any way not described in this manual. Warning You may cause an electric shock/fire or damage the printer if you ignore any of these safety precautions. Choosing a... - Page 82 Do not install the printer in locations that are very humid or dusty, in direct sunlight, outdoors, or close to a heating source. To avoid the risk of fire or electric shocks, install the printer in a location with an ambient temperature range of 5°C to 35°C (41°F to 95°F) and humidity of 10% to 90% (condensation free).
- Page 83 (EEA: Norway, Iceland and Liechtenstein) For Customers in Europe, Middle-East, Africa and Russia only For Canon Customer Support contacts, please see the back cover of the European Warranty Systems (EWS) Booklet or visit www.canon-europe.com. Canon Europa N.V., Bovenkerkerweg 59-61, 1185 XB Amstelveen, The Netherlands...
-
Page 84: Regulatory Information
Do not make any changes or modifications to the equipment unless otherwise specified in the manual. If such changes or modifications should be made, you could be required to stop operation of the equipment. Canon U.S.A., Inc. One Canon Plaza Lake Success, NY 11042... - Page 85 Separate Warranty. Non-Canon brand equipment and software that may be distributed with the Product are sold “as is” and without warranty of any kind by Canon USA, including any implied warranty regarding merchantability or fitness for a particular purpose, and all such warranties are disclaimed.
- Page 86 BY THE USE, MISUSE, OR INABILITY TO USE THE PRODUCT REGARDLESS OF THE LEGAL THEORY ON WHICH THE CLAIM IS BASED, AND EVEN IF CANON USA OR ITS ASF HAS BEEN ADVISED OF THE POSSIBILITY OF SUCH DAMAGES. NOR SHALL RECOVERY OF ANY KIND AGAINST CANON USA OR ITS ASF BE GREATER IN AMOUNT THAN THE PURCHASE PRICE OF THE PRODUCT CAUSING THE ALLEGED DAMAGE.
- Page 87 ** InstantExchange warranty service is subject to the availability of refurbished or new replacement units. Canon U.S.A., Inc. One Canon Plaza Lake Success, NY 11042 ©2006 Canon U.S.A., Inc. Canon is a registered trademark of Canon Inc. in the United States and may also be a registered trademark in other countries. Appendix...
- Page 88 This product uses the following copyrighted software: exit.c Copyright © 1990 The Regents of the University of California. All rights reserved. Redistribution and use in source and binary forms are permitted provided that the above copyright notice and this paragraph are duplicated in all such forms and that any documentation, advertising materials, and other materials related to such distribution and use acknowledge that the software was developed by the University of California, Berkeley.
-
Page 91: Ordering Information
© 2006 Canon U.S.A., Inc. Canon is a registered trademark of Canon Inc. in the United States and may be a registered trademark or trademarks in other countries. All other product and brand names are trademarks of their respective owners. - Page 92 The following ink tank is compatible with this printer. For details on ink tank replacement, refer to “Replacing an Ink Tank” in this guide. QT5-0760-V01 XXXXXXXX ©CANON INC.2006 PRINTED IN VIETNAM...