Table of Contents
Advertisement
Quick Links
1
Limited Liability
These warranties replace all other warranties, expressed or implied including,
but not limited to, the implied warranties of merchantability and fitness for a
particular purpose.
Thermaltake disclaims all other warranties, expressed or implied including,
without limitation, implied warranties of merchantability and fitness for a particular
purpose.
Some jurisdictions do not allow the exclusion of implied warranties so this
limitation may not apply to you. All expressed and implied warranties are limited in
duration to the limited warranty period. No warranties apply after that period, some
jurisdiction do not allow limitation on how long an implied warranty lasts, so this
limitation may not apply to you.
Limitations of liability, Thermaltake's responsibility under this, or any other
warranty, implied or expressed, are limited to repair or replacement, as set forth
above. These remedies are the sole and exclusive remedies for any breach of
warranty. Thermaltake is not responsible for direct, special, incidental, or
consequential damages resulting from any breach of warranty or under any other
legal theory including, but not limited to, lost profits, downtime, goodwill, damage
to or replacement of equipment and property, and any cost of recovering,
reprogramming, or reproducing any program or data stored in or used with a
system containing Thermaltake product. Some jurisdictions do not allow the
exclusion or limitation of incidental or exclusions may not apply to you.
Extent of limited warranty, Thermaltake does not warrant that your product will
be free from design defects or errors known as "ERRATA". Current characterized
errata are available upon request. This limited warranty does not cover any costs
relating to removal or replacement of any part that is soldered or otherwise affixed
to your system's motherboard. This limited warranty does not cover damages due
to external causes, including accidental, problems with electrical power, usage not
in accordance with product instructions, misuse, neglect, alteration, repair,
improper installation, or improper testing. Nor is Thermaltake held liable for any
bodily damage that may result during the installation, maintenance, repair, or is
otherwise associated with this product, Thermaltake is free from any legal actions
that may result in death, pain and anguish, or any other form of personal damage
that may occur by purchasing this product.
You, the buyer, agree to this warranty and its term set within its expressed and
implied limited warranty. This limited warranty gives you specific legal rights, and
you may also have other right that varies from jurisdiction to jurisdiction.
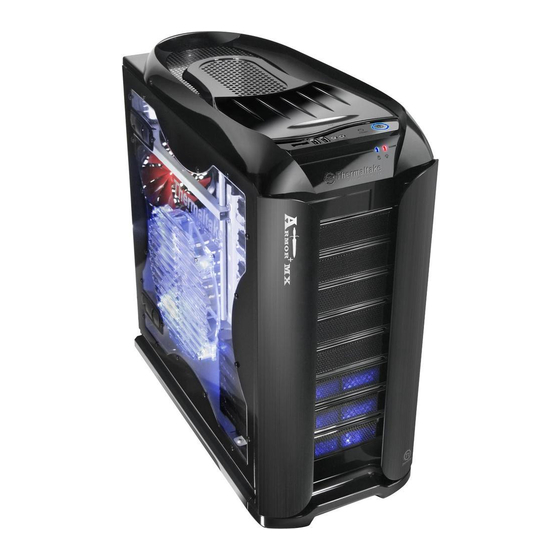
VH8000 Series
Contents
1.1
2.1
2.2
2.3
3.5" Device Installation
2.4
2.5
2.6
2.7
2.8
3.1
3.2
3.3
3.4
3.5
4.1
4.2
4.3
4.4
Installation Waterblock
4.5
4.6
4.7
4.8
4.9
Beyond the past, Exceed the present, Surpass the competition
2
03
04
04
04
05
05
05
06
06
07
08
08
09
10
10
11
11
12
14
15
16
17
27
29
30
32
33
Advertisement
Table of Contents

Related Manuals for Thermaltake Armor+ MX LCS VH8000 Series


Summary of Contents for Thermaltake Armor+ MX LCS VH8000 Series
-
Page 1: Table Of Contents
Chapter 3. Motherboard & Leads Installation Motherboard Installation Extent of limited warranty, Thermaltake does not warrant that your product will be free from design defects or errors known as "ERRATA". Current characterized Case LED connection errata are available upon request. -
Page 2: Chapter 1. Product Introduction Specification
Chapter 1. Product Introduction Chapter 2 Case Mechanical Operation Specification 2.1 How to Open the Side Panel Open the left-hand side panel To remove the left-hand side panel, please remove thumb screws on the back of the case. VH800LBWS 00LSWA Model Case Typ e Middle Tower... -
Page 3: Device Installation
2.3 3.5" Device Installation 2.2 5.25" Device Installation Unlock the tool-free clip. Remove the 3.5" plastic cover. Remove the 5.25" drive bay cover as shown. Remove the 5.25" drive bay metal cover. Insert the 3.5" drive into the front of chassis. Notice: It is possible to secure the 5.25"... -
Page 4: How To Remove The Hdd Cage
2.6 PCI Slot Tool-Free Usage Slide the HDD tray back to the drive bay. Release the plastic clip as shown. Take off the PCI bracket. Press the handle to lock the HDD tray. Locate Graphic Card to the motherboard through fixing it on the space of PCI bracket and insert it to the PCI slot. -
Page 5: Accessory Storage
Chapter3 Motherboard & Leads Installation 3.1 Motherboard Installation Each motherboard has different standoff layout. It is highly suggested that you refer to your motherboard's manual when installing motherboard into the Case. Armor+ MX is applicable with ATX & Micro ATX motherboards. Your motherboard may require a special I/O Panel, Fasten the supporting bridge using which should be included with your motherboard. -
Page 6: Usb 2.0 Connection
3.3 USB 2.0 Connection USB connection PORT1 L BLACK AUD GND Please consult your motherboard manual to find out the section of "USB connection". PORT1 R BROWN BLACK PRESENCE# PORT2 R YELLOW ORANGE SENSE1_RETURN USB Function SENSE_SEND PURPLE VCC / USB Power (+5C) for Port 4 SENSE2_RETURN PORT2 L BLUE... -
Page 7: Chapter4 Liquid Cooling Installation
All copper designed Material Dimension 78mm(L) X 55.5mm(W) X 27.7mm(H) Thermaltake will not responsible for any damages due to incorrect Tubing & Hoes Clip For 9.5mm ID (3/8") tubing installation and incorrect usage of this product. Weight... -
Page 8: Components
4.2 Components 4.3 Installation steps Main unit : All copper water block We strongly suggest the following installation procedures. 2U Bay Drives For Intel LGA 775 / P4 478 Failure to comply may result in leaks and damaged components. Computer Liquid and AMD AM2/ AM2+/K8 Cooling System (pre-built) - Page 9 4.4 Install Waterblock 4.4.1 Intel LGA 775 - Secure Waterblock onto CPU Install the Clip on Motherboard Components for LGA 775: A-Metal H-type clip Install Waterblock on Motherboard B-Cushion C-Insulator Intel LGA 775 D-50mm screws Motherboard E-Thumb nuts G-Thermal Exploded View Completed View compound I -Stand offs...
- Page 10 4.4.2 Intel P4 Socket 478 - Secure Waterblock onto CPU Install the Clip on Motherboard Install Waterblock on Motherboard Components for P4 478 : A-Metal H-type clip B-Cushion Exploded View Completed View C-Insulator Intel P4 478 D-50mm screws Motherboard E-Thumb nuts G-Thermal compound I -Stand offs...
- Page 11 4.4.3 AMD K8 Socket 754 / 939 / 940 - Secure B. Install waterblock by clips included in package Waterblock onto CPU Install the Clip on Motherboard A. Standard installation - Install waterblock by motherboard back plate Components for AMD K8 Motherboard AMD K8: Check The Back Plate A-Metal H-type clip...
- Page 12 4.4.4 AMD Socket AM2/AM2+ - Secure Waterblock Combine the insulator(C) and the onto CPU cushion (B) using the adhesive. Stick the metal H-type clip(A) with the insulators (BC). Tear off the protective A. Standard installation - Install waterblock by motherboard layer to adhere it onto the motherboard.
- Page 13 B. Install waterblock by clips included in package Combine the insulator(C) and the cushion (B) using the adhesive. Stick the metal H-type clip(A) with the Install the Clip on Motherboard insulators (BC). Tear off the protective layer to adhere it onto the motherboard. AMD AM2 Motherboard Components for AMD AM2/AM2+ : A-Metal H-type clip...
-
Page 14: Install Water Tube
Step Connect Waterblock to Radiator 4.5 Install Water tube CPU Waterblock Pump and Liquid Tank Radiator Insert the hose clip(N) through a tube. Connect the tube with the waterblock. Use pliers to tighten the hose clip(N). Step Connect Main Unit to Waterblock Insert the hose clip(N) through the tube. -
Page 15: 12Cm Radiator & Main Unit
4.7 Fill Coolant Connector the Quickconn connector Open the top sliding hood of the chassis, and remove the accessory storage. Connect the Quickconn connector. 4.6 12cm Radiator & Main Unit 12cm Radiator Fill the tank up with coolant. Pre-built 12cm radiator Turn on the PC power switch. -
Page 16: Schedule Maintenance
4.8 Schedule Maintenance Performing scheduled check up for the liquid cooling system will ensure optimal cooling performance! Adjust the fan speed. Pump Ensure pump is working proper. Turn off the PC power switch. Water Tank Check for water level within the water tank. -
Page 17: Q&A
Yes, there are numerous upgrades available for all different components in PC. Please visit www.thermaltake.com for more information. Q: How do I know if the pump is working? Place your hand on the pump. If the pump is operating, the pump should vibrate gently.
Need help?
Do you have a question about the Armor+ MX LCS VH8000 Series and is the answer not in the manual?
Questions and answers